Hunter 90053 Owner's Manual - Page 5
New Construction - attaching to joist
 |
View all Hunter 90053 manuals
Add to My Manuals
Save this manual to your list of manuals |
Page 5 highlights
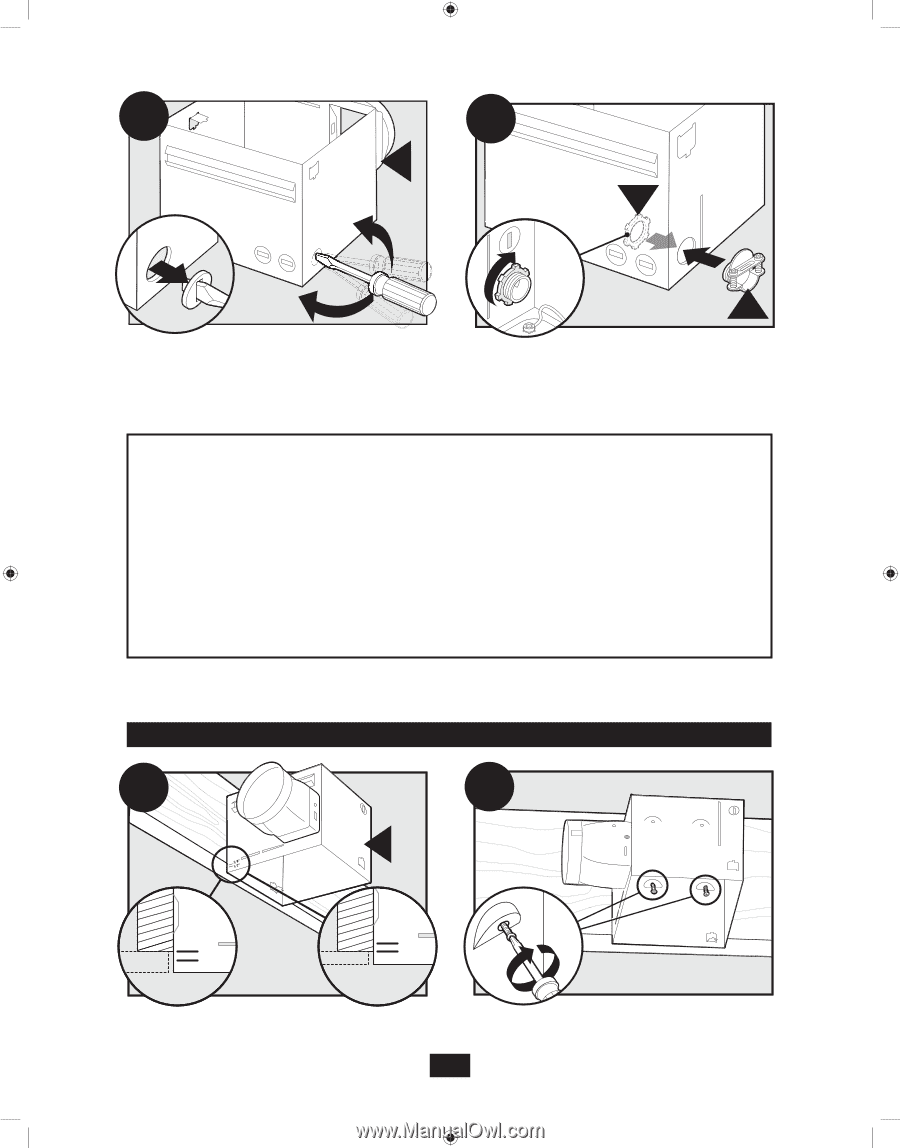
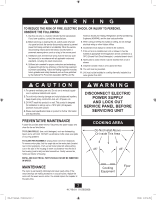
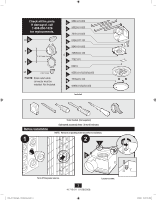
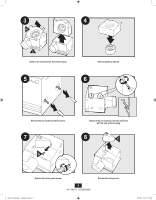
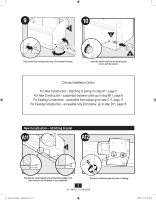
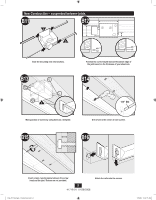
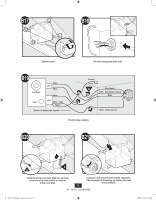
9 10 E C Pop out the first wiring access slug. Use second if needed. B Insert the strain relief into the housing and secure with the washer. Choose Installation Option For New Construction - attaching to joist go to step A11, page 5 For New Construction - suspended between joists go to step B11, page 8 For Existing Construction - accessible from above go to step C11, page 11 For Existing Construction - accessible only from below go to step D11, page15 New Construction - attaching to joist A11 A12 E 5/8 5/8 1/2 1/2 Position the correct depth mark at the bottom edge of the joist based on the thickness of your sheetrock. Screw pre-loaded screws into joist or framing. 5 41718-01 01/28/2008 028_41718_EngS_1.28.08_Arial.indd 5 1/28/08 10:47:13 AM
-
 1
1 -
 2
2 -
 3
3 -
 4
4 -
 5
5 -
 6
6 -
 7
7 -
 8
8 -
 9
9 -
 10
10 -
 11
11 -
12
-
13
-
14
-
15
-
16
-
17
-
18
-
19
-
20
-
21
-
22
-
23
-
24
-
25
-
26
-
27
-
28
-
29
-
30
-
31
-
32
-
33
-
34
-
35
-
36
-
37
-
38
-
39
-
40
 |
 |