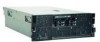
IBM 72332MU Installation Guide
IBM 72332MU - System x3950 M2 Manual
 |
UPC - 883436084673
View all IBM 72332MU manuals
Add to My Manuals
Save this manual to your list of manuals |
IBM 72332MU manual content summary:
- IBM 72332MU | Installation Guide - Page 1
- IBM 72332MU | Installation Guide - Page 2
- IBM 72332MU | Installation Guide - Page 3
IBM System x3850 M2 and System x3950 M2 Types 7141 and 7233 Installation Guide - IBM 72332MU | Installation Guide - Page 4
Note: Before using this information and the product it supports, read the general information in "Notices" on page 79. Fifth Edition (August 2009) © Copyright International Business Machines Corporation 2009. US Government Users Restricted Rights - Use, - IBM 72332MU | Installation Guide - Page 5
29 Updating the server configuration 29 SMP Expansion cabling 30 Chapter 3. Server controls, connectors, LEDs, and power 37 Front view 37 Rear view 39 Server power features 41 Turning on the server 41 Turning off the server 42 Chapter 4. Configuring the server 45 Using the ServerGuide - IBM 72332MU | Installation Guide - Page 6
People's Republic of China Class A warning statement 84 Japanese Voluntary Control Council for Interference (VCCI) statement . . . 84 Korean Class A warning statement 84 Index 85 iv IBM System x3850 M2 and System x3950 M2 Types 7141 and 7233: Installation - IBM 72332MU | Installation Guide - Page 7
, leggere le Informazioni sulla Sicurezza. Les sikkerhetsinformasjonen (Safety Information) før du installerer dette produktet. Antes de instalar este produto, leia as Informações sobre Segurança. © Copyright IBM Corp. 2009 v - IBM 72332MU | Installation Guide - Page 8
sure to read all caution and danger statements in this document before you perform the procedures. Read any additional safety information that comes with the server or optional device before you install the device. vi IBM System x3850 M2 and System x3950 M2 Types 7141 and 7233: Installation - IBM 72332MU | Installation Guide - Page 9
is evidence of fire, water, or structural damage. v Disconnect the attached power cords, telecommunications systems, networks, and modems before you open the device covers, unless instructed otherwise in the installation and configuration procedures. v Connect and disconnect cables as described in - IBM 72332MU | Installation Guide - Page 10
could result in exposure to hazardous laser radiation. There are no serviceable parts inside the device. v Use of controls or adjustments or , do not view directly with optical instruments, and avoid direct exposure to the beam. viii IBM System x3850 M2 and System x3950 M2 Types 7141 and 7233: - IBM 72332MU | Installation Guide - Page 11
Statement 4: ≥ 18 kg (39.7 lb) ≥ 32 kg (70.5 lb) CAUTION: Use safe practices when lifting. Statement 5: ≥ 55 kg (121.2 lb) CAUTION: The power control button on the device and the power switch on the power supply do not turn off the electrical current supplied to the device. The device also - IBM 72332MU | Installation Guide - Page 12
. If you suspect a problem with one of these parts, contact a service technician. Statement 26: CAUTION: Do not place any object on top of rack-mounted devices. Statement 27: CAUTION: Hazardous moving parts are nearby. x IBM System x3850 M2 and System x3950 M2 Types 7141 and 7233: Installation - IBM 72332MU | Installation Guide - Page 13
This Installation Guide contains instructions for setting up your IBM® System x3850 M2 and System x3950 M2 Types 7141 and 7233 servers and basic instructions for installing some optional devices. More detailed instructions for installing optional devices are in the User's Guide on the IBM System - IBM 72332MU | Installation Guide - Page 14
following procedures to start the Documentation Browser: v If Autostart is enabled, insert the CD into the CD or DVD drive. The Documentation Browser starts automatically. 2 IBM System x3850 M2 and System x3950 M2 Types 7141 and 7233: Installation - IBM 72332MU | Installation Guide - Page 15
server from the Product menu. The Available Topics list displays all the documents for the server Click View Book to view the IBM System problem situations. v Attention: These notices indicate potential damage to programs, devices, or data. An attention notice is placed just before the instruction - IBM 72332MU | Installation Guide - Page 16
of the features and specifications of the server. Depending on the server model, some features might not be available, or some specifications might not apply. Notes below which a large number of computers will operate. 4 IBM System x3850 M2 and System x3950 M2 Types 7141 and 7233: Installation - IBM 72332MU | Installation Guide - Page 17
server - One internal v Broadcom 5709 dual 10/100/1000 Gigabit Ethernet controller v ATI RN50 video - 16 MB video memory - SVGA compatible v Serial-attached SCSI (SAS) controller with RAID capabilities v Support for ServeRAID-MR10k SAS controller v Serial connector v SMP Expansion Ports Acoustical - IBM 72332MU | Installation Guide - Page 18
the instructions for removing or installing a specific hot-swap component for any additional procedures that you might have to perform before you remove or install the component. The following illustration shows the major components in the server. 6 IBM System x3850 M2 and System x3950 M2 Types 7141 - IBM 72332MU | Installation Guide - Page 19
Note: The illustrations in this document might differ slightly from your hardware. Chapter 1. Introduction 7 - IBM 72332MU | Installation Guide - Page 20
battery holder ServeRAID-MR10k controller and battery Hot-swap power supply Top cover Adapter-retention bracket PCI divider PCI switch-card assembly I/O board shuttle assembly 8 IBM System x3850 M2 and System x3950 M2 Types 7141 and 7233: Installation - IBM 72332MU | Installation Guide - Page 21
document. 1. Go to http://www.ibm.com/systems/support/. 2. Under Product support, click System x. 3. Under Popular links, click Software and device drivers. 4. Click System x3850 M2 or System x3950 M2 to display the matrix of downloadable files for the server. For additional information about tools - IBM 72332MU | Installation Guide - Page 22
which means that if the server and operating system support hot-swap capability, you can remove or install the component while the server is running. (Orange can also indicate touch points on hot-swap components.) See the instructions for removing or installing a specific hot-swap component for any - IBM 72332MU | Installation Guide - Page 23
potential problem, always use an electrostatic-discharge wrist strap or other grounding system when you work inside the server with the power on. The server supports server; do not wear cuff links while you are working inside the server. v Do not allow your necktie or scarf to hang inside the server - IBM 72332MU | Installation Guide - Page 24
Release latch AC power LED (green) DC power LED (green) Error LED (amber) Hot-swap power supply Release release latch on the filler-panel handle and pull the handle to the open position, then remove the filler panel from power-supply bay 2. 12 IBM System x3850 M2 and System x3950 M2 Types 7141 - IBM 72332MU | Installation Guide - Page 25
3. Press the orange release latch on the power-supply handle and pull the handle to the 6. Make sure that the ac power LED on the power supply is lit, indicating that the power supply is operating correctly. If the server is turned on, make sure that the dc power LED on the top of the power supply - IBM 72332MU | Installation Guide - Page 26
and must be replaced. If the green hard disk drive activity LED is flashing, the drive is being accessed. If you have other devices to install or remove, do so now. Otherwise, go to "Completing the installation" on page 28. 14 IBM System x3850 M2 and System x3950 M2 Types 7141 and 7233: Installation - IBM 72332MU | Installation Guide - Page 27
filler panel To install a DVD drive, compete the following steps: 1. Remove the DVD drive filler from the drive bay. 2. Slide the DVD drive into the server until it engages the interposer card or the SATA cable. If you have other devices to install or remove, do so now. Otherwise, go to - IBM 72332MU | Installation Guide - Page 28
read any specific instructions that ship with the DIMMs before installing them in the server. v You can configure the server to use memory mirroring and memory scrubbing. For detailed information about configuring the server and using these features, see the User's Guide on the IBM Documentation CD - IBM 72332MU | Installation Guide - Page 29
want to use. You must install at least one pair of DIMMs on each memory card. Table 2. Low-cost memory-card installation sequence DIMM pair installation order Memory card First 1 Second 2 Third 1 Fourth 2 Fifth 1 Sixth 2 Seventh 1 Eighth 2 Ninth 3 Tenth 4 Eleventh 3 Twelfth - IBM 72332MU | Installation Guide - Page 30
is a problem and guiding you to the defective DIMM. When this occurs, first identify the defective DIMM; then, remove and replace the DIMM. The following illustration shows the LEDs that are visible from the top of the memory card. 18 IBM System x3850 M2 and System x3950 M2 Types 7141 and 7233 - IBM 72332MU | Installation Guide - Page 31
is off, it indicates that power is removed from the card and that you can remove the memory card and replace a failed DIMM. This LED will also turn off when the release levers are opened. Installing a DIMM To install additional DIMMs, complete the following steps: 1. Read the safety information that - IBM 72332MU | Installation Guide - Page 32
. 8. Touch the static-protective package that contains the DIMM to any unpainted metal surface on the server. Then, remove the DIMM from the package. 9. Turn the DIMM so that the DIMM keys align correctly with the slot. 20 IBM System x3850 M2 and System x3950 M2 Types 7141 and 7233: Installation - IBM 72332MU | Installation Guide - Page 33
-adding the memory card, turn off the server and peripheral memory card into the memory-card connector on the microprocessor board. 5. Press the memory card into the connector and close the small retention lever. 6. Wait 2 seconds and close the large retention lever. 7. Slide the orange release - IBM 72332MU | Installation Guide - Page 34
and 4 are mounted on the microprocessor board with the microprocessor-release levers on opposite sides. These sockets are oriented 180° from 6 Fan 3 V R M 4 Memory V Cards R 1 2M 1 CPU 1 CPU 2 V Memory R Cards M3 4 2 22 IBM System x3850 M2 and System x3950 M2 Types 7141 and 7233: Installation - IBM 72332MU | Installation Guide - Page 35
all external cables as necessary to replace the device. 3. Remove the server cover and bezel. Attention: When you handle static-sensitive devices, take closed Lever fully open 8. Lift the microprocessor-release lever to the fully-open position (approximately 135° angle). Chapter 2. Installing - IBM 72332MU | Installation Guide - Page 36
new microprocessor to any unpainted metal surface on the server; then, remove the microprocessor from the package. release lever, and move the lever to the locked position. 15. Install a VRM in the connector next to the microprocessor socket. 24 IBM System x3850 M2 and System x3950 M2 Types 7141 - IBM 72332MU | Installation Guide - Page 37
Battery cable Cable guide Battery cable connector RAID controller 1. Read the safety information that begins on page v and "Installation guidelines" on page 9. 2. Turn off the server and peripheral devices, and disconnect the power cords and all external cables as necessary to replace the device - IBM 72332MU | Installation Guide - Page 38
the server and peripheral devices, and disconnect the power cords and all external cables as necessary to remove or install the adapter. 3. Remove the server cover and determine which PCI Express expansion slot you will use for the adapter. 26 IBM System x3850 M2 and System x3950 M2 Types 7141 and - IBM 72332MU | Installation Guide - Page 39
the adapter in slot 6 or slot 7, push the orange adapter retention latch toward the rear of the server and open the tab. The power LED for the slot turns off. 7. Remove the expansion-slot cover. Attention: When you install an adapter, avoid touching the components and gold-edge connectors on the - IBM 72332MU | Installation Guide - Page 40
server. Damage to the server might result. Only use the lift handles on each side of the chassis to lift the server. 4. Connect the cables and power cords. See "Connecting the cables" on page 29 for more information. 28 IBM System x3850 M2 and System x3950 M2 Types 7141 and 7233: Installation Guide - IBM 72332MU | Installation Guide - Page 41
the Rack Installation Instructions that come with the server. Rear view SAS USB System serial Remote Supervisor Adapter II Power-supply 1 Front view SMP expansion port 1 SMP expansion port 2 SMP expansion port 3 Power-control button/power-on LED Ethernet icon LED 1 2 Power-supply 2 Gigabit - IBM 72332MU | Installation Guide - Page 42
or four servers, for up to a 16-socket operation. A node is a server that is interconnected with other servers or nodes through the SMP Expansion Ports to share system resources. to where it will be connected to each server. 30 IBM System x3850 M2 and System x3950 M2 Types 7141 and 7233: Installation - IBM 72332MU | Installation Guide - Page 43
not squeeze the blue cable tabs when connecting the cables. Use the blue tabs only when disconnecting the cables from the servers. a. Connect one end of a ScaleXpander cable to port 1 on node 1; then, connect the other end to port 1 on node 2. b. Connect one end of the second ScaleXpander cable to - IBM 72332MU | Installation Guide - Page 44
of the second ScaleXpander cable to port 2 on node 1; then, connect the other end to port 1 on node 3. c. Connect one end of the third ScaleXpander cable to port 2 on node 2; then connect the other end to port 2 on node 3. 32 IBM System x3850 M2 and System x3950 M2 Types 7141 and 7233: Installation - IBM 72332MU | Installation Guide - Page 45
cables and the 3.3 m (10.8-foot) ScaleXpander cable. If you have System x3950 M2 servers, the Scalabilty Cable Option kit contains all the parts that you need to configure a 4-node system. If you have System x3850 M2 servers, you must purchase four ScaleXpander Option Kits (to obtain the additional - IBM 72332MU | Installation Guide - Page 46
) ScaleXpander cable to port 3 on node 1; then, connect the other end to port 3 on node 2. d. Connect one end of a 3.0 m (9.8-foot) ScaleXpander cable to port 1 on node 2; then, connect the other end to port 1 on node 3. 34 IBM System x3850 M2 and System x3950 M2 Types 7141 and 7233: Installation - IBM 72332MU | Installation Guide - Page 47
3 on node 3; then, connect the other end to port 3 of node 4. Wire-clip forms 3. Route the ScaleXpander cables through the cable-management arm. Be sure to route each cable through the wire-form clip that is associated with the server to which it is connected. Note: When disconnecting the cables - IBM 72332MU | Installation Guide - Page 48
36 IBM System x3850 M2 and System x3950 M2 Types 7141 and 7233: Installation Guide - IBM 72332MU | Installation Guide - Page 49
LEDs) and how to turn the server on and off. Front view The following illustration shows the controls, LEDs, and connectors on the front of the server. Hard disk drive activity LED Hard disk drive status LED to release a CD or DVD from the DVD drive. DVD drive activity LED: When this LED is lit - IBM 72332MU | Installation Guide - Page 50
to this connector. Scalability LED: When this LED is lit, it indicates that an optional scalability key is installed in the server, which enables support for connecting the server to other servers to form multi-node configurations. 38 IBM System x3850 M2 and System x3950 M2 Types 7141 and 7233 - IBM 72332MU | Installation Guide - Page 51
error Power supply 2 System serial SMP Expansion Port 1 link LED SMP Expansion Port 1 SMP Expansion Port 2 link LED SMP Expansion Port 2 SMP Expansion Port 3 SMP Expansion Port 3 link LED Power-on LED: When this LED is lit and not flashing, it indicates that the server is turned on. When - IBM 72332MU | Installation Guide - Page 52
connector: Use this connector to connect an external power-supply to the Remote Supervisor Adapter II. v ASM connector: This connector is not supported. Power supply 1 connector: Connect the power cord to this connector. 40 IBM System x3850 M2 and System x3950 M2 Types 7141 and 7233: Installation - IBM 72332MU | Installation Guide - Page 53
Guide on the IBM System x Documentation CD. Power supply 2 connector: Connect the power cord to this connector. SMP Expansion Port 3 connector: Use this connector to connect the server to other servers to form multi-node configurations (requires scalability enablement). SMP Expansion Port 3 link LED - IBM 72332MU | Installation Guide - Page 54
turn off the server. v If the server is installed in a static partition, pressing the power-control button on the primary node in the partition will start an orderly shutdown of the operating system and turn off the server. 42 IBM System x3850 M2 and System x3950 M2 Types 7141 and 7233: Installation - IBM 72332MU | Installation Guide - Page 55
turned off from the Remote Supervisor Adapter II user interface. v If the Wake on LAN feature turned on the server, the Wake on LAN feature can turn off the server. v You can turn off the server through a request from the service processor. Chapter 3. Server controls, connectors, LEDs, and power 43 - IBM 72332MU | Installation Guide - Page 56
44 IBM System x3850 M2 and System x3950 M2 Types 7141 and 7233: Installation Guide - IBM 72332MU | Installation Guide - Page 57
the server. If the CD does not start, see "ServerGuide problems" on page 67. 2. Follow the instructions on the screen to: a. Select your language. b. Select your keyboard layout and country. c. View the overview to learn about ServerGuide features. d. View the readme file to review installation - IBM 72332MU | Installation Guide - Page 58
Adapter II service processor. A multi-node configuration interconnects multiple servers. Each multi-node configuration can have one or more scalable partitions. Each scalable partition supports an independent operating system installation. 46 IBM System x3850 M2 and System x3950 M2 Types 7141 and - IBM 72332MU | Installation Guide - Page 59
software and hardware: - The current level of BIOS code, SAS BIOS code, service processor firmware, BMC firmware, and FPGA firmware. Note: To check for the latest firmware levels and to download firmware updates, go to http://www.ibm.com/systems/support/. - Microprocessors that are the same cache - IBM 72332MU | Installation Guide - Page 60
multi-node configuration. v Click Create under Partition Configure to manually assign nodes to the partition. Note: Click Redraw to reorder view information about the partition. A page similar to the one in the following illustration is displayed. 48 IBM System x3850 M2 and System x3950 M2 Types 7141 - IBM 72332MU | Installation Guide - Page 61
. - Unknown: The partition contains unidentified port or chassis IDs. a. In the Partition . Allow at least 8 seconds for each GB of memory in the scalable partition. b. In the On merge the default value. c. In the Memory Mirroring? field, select whether memory mirroring is enabled in all nodes - IBM 72332MU | Installation Guide - Page 62
50 IBM System x3850 M2 and System x3950 M2 Types 7141 and 7233: Installation Guide - IBM 72332MU | Installation Guide - Page 63
the instructions on the Web page to download the latest version. 2. Install the IBM Director program. 3. Download and install any applicable updates or interim fixes for the server: a. Go to http://www.ibm.com/systems/support/. b. Under Product support, click System x. c. Under Popular links, click - IBM 72332MU | Installation Guide - Page 64
52 IBM System x3850 M2 and System x3950 M2 Types 7141 and 7233: Installation Guide - IBM 72332MU | Installation Guide - Page 65
while you are setting up the server. If you cannot locate and correct a problem by using the information in this chapter, see "Getting help and technical assistance," on page 77, the Problem Determination and Service Guide on the IBM System x Documentation CD, and the "Server Support" flowchart in - IBM 72332MU | Installation Guide - Page 66
www.ibm.com/systems/support/. 2. Under Product support, click System x. 3. Under Popular links, click Publications lookup. 4. From the Product family menu, select System x3850 M2 or System x3950 M2 and click Continue. 54 IBM System x3850 M2 and System x3950 M2 Types 7141 and 7233: Installation Guide - IBM 72332MU | Installation Guide - Page 67
memory resource settings are not correct, change them. 3. If all memory resources are being used, remove an adapter to make memory available to the PCI adapter. Disabling the BIOS on the adapter might correct the error. See the documentation that comes with the adapter. Chapter 6. Solving problems - IBM 72332MU | Installation Guide - Page 68
in the Action column until the problem is solved. v See the parts listing in the Problem Determination and Service Guide to determine which components are at a time, in the order shown, restarting the server each time. 56 IBM System x3850 M2 and System x3950 M2 Types 7141 and 7233: Installation - IBM 72332MU | Installation Guide - Page 69
programs" in the Problem Determination and Service Guide). If you have just added new software or a new optional device and the server is not working, complete the following steps before you use the troubleshooting tables: 1. Check the light path diagnostics LEDs on the operator information - IBM 72332MU | Installation Guide - Page 70
A hard disk drive passes the diagnostic Fixed Disk Test but the problem remains. Run the diagnostic SAS Fixed Disk Test. Note: This test is not available to servers using RAID or servers with IDE or SATA hard disk drives. 58 IBM System x3850 M2 and System x3950 M2 Types 7141 and 7233: Installation - IBM 72332MU | Installation Guide - Page 71
Action column until the problem is solved. v See the parts listing in the Problem Determination and Service Guide to determine which components device USB cable is securely connected to the server, and the device drivers are installed correctly. v The server and the monitor are turned on. v - IBM 72332MU | Installation Guide - Page 72
, making sure that the DIMMs on each card match. 7. Reseat the following components: a. DIMM b. Memory card 8. Replace the components listed in step 7 one at a time, in the order shown, restarting the server each time. 60 IBM System x3850 M2 and System x3950 M2 Types 7141 and 7233: Installation - IBM 72332MU | Installation Guide - Page 73
. Monitor problems Some IBM monitors have their own self-tests. If you suspect a problem with your monitor, see the information that comes with the monitor for instructions for testing and adjusting the monitor. If you cannot diagnose the problem, call for service. Chapter 6. Solving problems 61 - IBM 72332MU | Installation Guide - Page 74
device drivers for the application. 2. Run video diagnostics. v If the server passes the video diagnostics, the video is good. v If the server fails the video diagnostics, reseat the Remote Supervisor Adapter II. v Replace the Remote Supervisor Adapter II. 62 IBM System x3850 M2 and System x3950 M2 - IBM 72332MU | Installation Guide - Page 75
problem is solved. v See the parts listing in the Problem Determination and Service Guide (3 in.). b. Non-IBM monitor cables might cause unpredictable problems. 2. Reseat the following server each time. Wrong characters appear on the 1. If the wrong language is displayed, update the BIOS code - IBM 72332MU | Installation Guide - Page 76
Action column until the problem is solved. v See the parts listing in the Problem Determination and Service Guide to determine which components on the server. 4. Reseat the failing device. 5. Replace the failing device. 64 IBM System x3850 M2 and System x3950 M2 Types 7141 and 7233: Installation - IBM 72332MU | Installation Guide - Page 77
until the problem is solved. v See the parts listing in the Problem Determination and Service Guide to determine server and to a working electrical outlet. v The type of memory that is installed is correct. v The memory card is fully seated. v The LEDs on the power supply do not indicate a problem - IBM 72332MU | Installation Guide - Page 78
server unexpectedly shuts down, and the LEDs on the operator information panel are not lit. See the Problem Determination and Service Guide on the IBM System x Documentation CD for more information. Serial-device problems For more information about the serial port, see the User's Guide on the IBM - IBM 72332MU | Installation Guide - Page 79
in the order shown, restarting the server each time. ServerGuide problems v Follow the suggested actions in the order in which they are listed in the Action column until the problem is solved. v See the parts listing in the Problem Determination and Service Guide to determine which components are - IBM 72332MU | Installation Guide - Page 80
server. Video problems See "Monitor problems" on page 61. Light path diagnostics Use light path diagnostics to diagnose system errors. By viewing the LEDs in order, you can often identify the source of the error. 68 IBM System x3850 M2 and System x3950 M2 Types 7141 and 7233: Installation Guide - IBM 72332MU | Installation Guide - Page 81
the operating system to shut down. Any memory-card LED can be lit while the memory card is removed from the server so that you can isolate a problem. After ac power has been removed from the server, power remains available to these LEDs for up to 24 hours. To view the memory-card LEDs, press and - IBM 72332MU | Installation Guide - Page 82
4 VRM 4 error LED Microprocessor 1 error LED VRM 1 error LED 1 2 Microprocessor 2 error LED VRM 2 error LED Machine check LED Power good LED Scalability enabled LED The following illustration shows the LEDs on the memory card. 70 IBM System x3850 M2 and System x3950 M2 Types 7141 and 7233 - IBM 72332MU | Installation Guide - Page 83
one of the following conditions occurs: v All known errors or suboptimal conditions are corrected. v The server is powered back on. v A new error or suboptimal condition occurs, causing the system-error LED to be lit again. In multi-node configurations, you can also press this button during startup - IBM 72332MU | Installation Guide - Page 84
failed port is off. 1. Check the SMP Expansion Port link LEDs to find the failing port or cable. 2. Reseat the SMP Expansion cables. 3. Replace the SMP Expansion cables. 4. (Trained service technician only) Replace the microprocessor board. 72 IBM System x3850 M2 and System x3950 M2 Types 7141 and - IBM 72332MU | Installation Guide - Page 85
Action column until the problem is solved. v See the parts listing in the Problem Determination and Service Guide to determine which power cord and restart the server. PCI A PCI adapter has failed. 1. See the BMC log or the system-error log. Note: The error LED next to the failing adapter - IBM 72332MU | Installation Guide - Page 86
. 1. Find the failing or missing component by checking the other light path diagnostics LEDs. 2. Make sure that the fans, power supplies, microprocessors, VRMs, and memory cards are installed in the correct sequence. 74 IBM System x3850 M2 and System x3950 M2 Types 7141 and 7233: Installation - IBM 72332MU | Installation Guide - Page 87
, restarting the server each time: a. (Trained service technician only) Failing microprocessor b. (Trained service technician only) Microprocessor board VRM A dc-dc regulator has failed or is missing. 1. Check the BMC log or the system-error log to determine the reason for the lit LED (for a VRM - IBM 72332MU | Installation Guide - Page 88
restarting the server each time. BOARD The microprocessor board or I/O board has failed. 1. Find the failing board by checking the LEDs on the microprocessor board and I/O board. 2. Reseat the failing board. 3. Replace the failing board. 76 IBM System x3850 M2 and System x3950 M2 Types 7141 and - IBM 72332MU | Installation Guide - Page 89
v Use the troubleshooting information in your system documentation, and use the diagnostic tools that come with your system. Information about diagnostic tools is in the Problem Determination and Service Guide on the IBM Documentation CD that comes with your system. v Go to the IBM support Web site - IBM 72332MU | Installation Guide - Page 90
find service information for IBM systems and optional devices at http://www.ibm.com/systems/support/. Software service and support Through IBM Support Line, you can get telephone assistance, for a fee, with usage, configuration, and software problems with System x and xSeries servers, BladeCenter - IBM 72332MU | Installation Guide - Page 91
right may be used instead. However, it is the user's responsibility to evaluate and verify the operation of any non-IBM product, program, or service. IBM may have patents or pending patent applications covering subject matter described in this document. The furnishing of this document does not - IBM 72332MU | Installation Guide - Page 92
products are offered and warranted solely by third parties. IBM makes no representations or warranties with respect to non-IBM products. Support (if any) for the non-IBM products is provided by the third party, not IBM. 80 IBM System x3850 M2 and System x3950 M2 Types 7141 and 7233: Installation - IBM 72332MU | Installation Guide - Page 93
manuals server to malfunction or cease functioning altogether. This specification sets forth limits for particulates and gases that are intended to avoid such damage. The limits must not be viewed server, IBM may condition provision of repair or replacement of servers control systems: - IBM 72332MU | Installation Guide - Page 94
energy and, if not installed and used in accordance with the instruction manual, may cause harmful interference to radio communications. Operation of this equipment to public telecommunication systems in the United Kingdom. 82 IBM System x3850 M2 and System x3950 M2 Types 7141 and 7233: Installation - IBM 72332MU | Installation Guide - Page 95
responsibility for any failure to satisfy the protection requirements resulting from a nonrecommended modification of the product, including the fitting of non-IBM option cards. This product has been tested and found to comply with the limits for Class A Information Technology Equipment according to - IBM 72332MU | Installation Guide - Page 96
zu führen. Verantwortlich für die Konformitätserklärung des EMVG ist die IBM Deutschland GmbH, 70548 Stuttgart. Generelle Informationen: Das Gerät erfüllt die VCCI) statement Korean Class A warning statement 84 IBM System x3850 M2 and System x3950 M2 Types 7141 and 7233: Installation - IBM 72332MU | Installation Guide - Page 97
59 power 65 serial port 66 software 68 USB port 68 Ethernet activity LED 38, 40 Gigabit activity LED 38, 40 Gigabit connector 39 Gigabit link LED 39 expansion bays 5 expansion slots 5 external cabling 29 F FCC Class A notice 82 features 4 filler panel, hard disk drive bay 14 firmware updates 1 four - IBM 72332MU | Installation Guide - Page 98
39 link LED 39 guidelines installation 9 system reliability 10 H hard disk drive activity LED 37 problems 58 status LED 37 hardware service and support 78 heat output 5 heat sink, installing 24 help, getting 77 hot-swap drive, installing 14 humidity 5 I IBM Director, updating 51 IBM Support Line - IBM 72332MU | Installation Guide - Page 99
5 SMP expansion cabling 30 port connectors 41 port link LEDs 41 software problems 68 software service and support 78 solving problems 53 specifications 4 standby mode 41 statements and notices 3 static-sensitive devices, handling 11 support, web site 77 system-error LED 38, 39 T table memory cost - IBM 72332MU | Installation Guide - Page 100
88 IBM System x3850 M2 and System x3950 M2 Types 7141 and 7233: Installation Guide - IBM 72332MU | Installation Guide - Page 101
- IBM 72332MU | Installation Guide - Page 102
Part Number: 46M1504 Printed in USA (1P) P/N: 46M1504
-
 1
1 -
 2
2 -
 3
3 -
 4
4 -
 5
5 -
 6
6 -
 7
7 -
8
-
9
-
10
-
11
-
12
-
13
-
14
-
15
-
16
-
17
-
18
-
19
-
20
-
21
-
22
-
23
-
24
-
25
-
26
-
27
-
28
-
29
-
30
-
31
-
32
-
33
-
34
-
35
-
36
-
37
-
38
-
39
-
40
-
41
-
42
-
43
-
44
-
45
-
46
-
47
-
48
-
49
-
50
-
51
-
52
-
53
-
54
-
55
-
56
-
57
-
58
-
59
-
60
-
61
-
62
-
63
-
64
-
65
-
66
-
67
-
68
-
69
-
70
-
71
-
72
-
73
-
74
-
75
-
76
-
77
-
78
-
79
-
80
-
81
-
82
-
83
-
84
-
85
-
86
-
87
-
88
-
89
-
90
-
91
-
92
-
93
-
94
-
95
-
96
-
97
-
98
-
99
-
100
-
101
-
102
 |
 |
