IBM 84885BU User Manual - Page 30
Updating, Remote, Supervisor, Adapter, firmware
 |
View all IBM 84885BU manuals
Add to My Manuals
Save this manual to your list of manuals |
Page 30 highlights
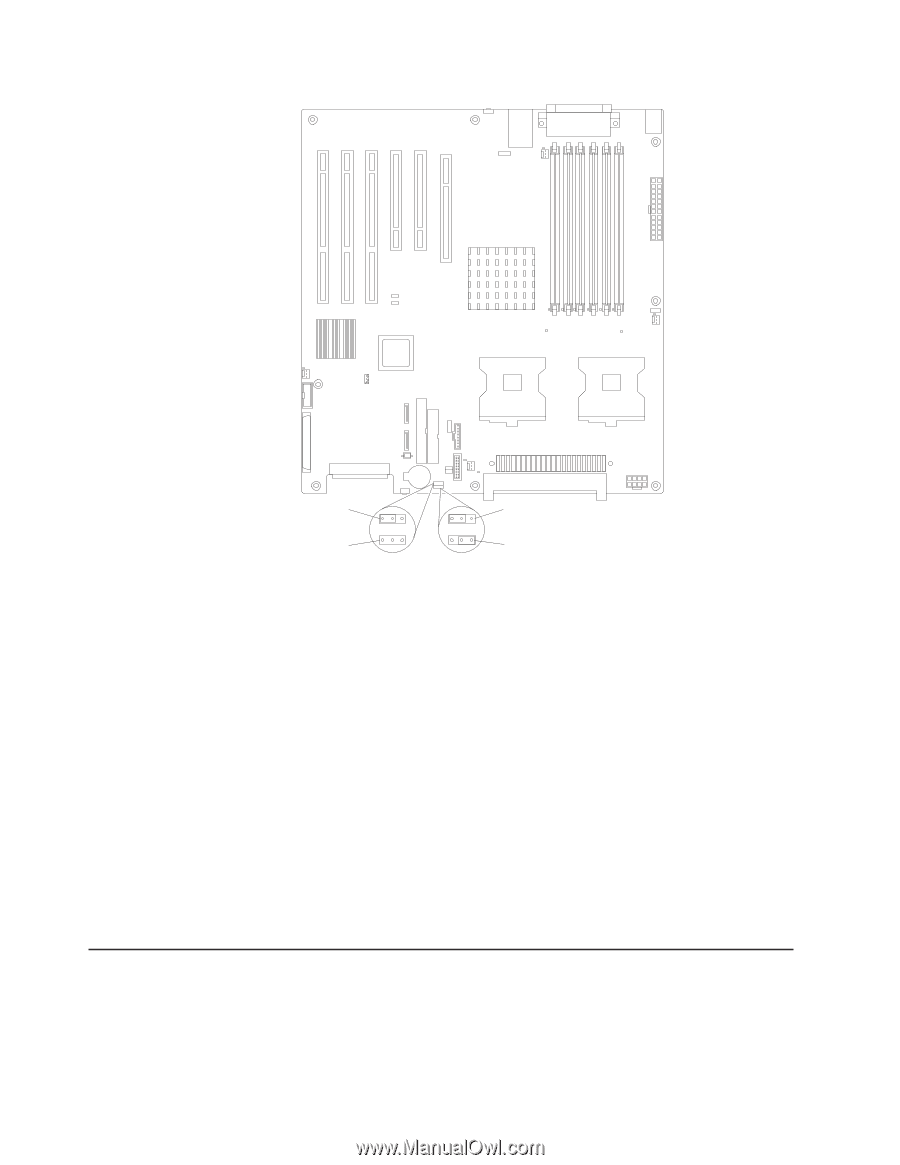
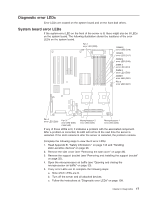
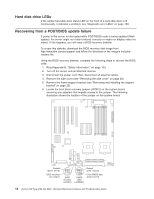
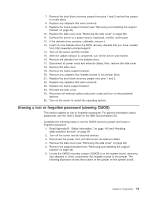
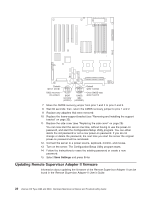
Default (pins 1 and 2) BIOS recovery (no jumper) 1 2 3 BIOS recovery (JCON1) 1 2 3 CMOS data (JCMOS1) Default (pins 1 and 2) Clear CMOS data (pins 2 and 3) 7. Move the CMOS recovery jumper from pins 1 and 2 to pins 2 and 3. 8. Wait 60 seconds; then, return the CMOS recovery jumper to pins 1 and 2. 9. Replace any adapters that were removed. 10. Replace the frame-support bracket (see "Removing and installing the support bracket" on page 32). 11. Replace the side cover (see "Replacing the side cover" on page 29). You can now start the server one time, without having to use the power-on password, and start the Configuration/Setup Utility program. You can either delete the old password or set a new power-on password. If you do not change or delete the password, the next time you start the server the original power-on password will be reinstated. 12. Connect the server to a power source, keyboard, monitor, and mouse. 13. Turn on the server. The Configuration/Setup Utility program starts. 14. Follow the instructions to erase the existing password or create a new password. 15. Select Save Settings and press Enter. Updating Remote Supervisor Adapter II firmware Information about updating the firmware of the Remote Supervisor Adapter II can be found in the Remote Supervisor Adapter II User's Guide. 20 xSeries 226 Type 8488 and 8648: Hardware Maintenance Manual and Troubleshooting Guide
-
 1
1 -
2
-
3
-
4
-
5
-
6
-
7
-
8
-
9
-
10
-
11
-
12
-
13
-
14
-
15
-
16
-
17
-
18
-
19
-
20
-
21
-
22
-
23
-
24
-
 25
25 -
 26
26 -
 27
27 -
 28
28 -
 29
29 -
 30
30 -
 31
31 -
 32
32 -
 33
33 -
 34
34 -
 35
35 -
36
-
37
-
38
-
39
-
40
-
41
-
42
-
43
-
44
-
45
-
46
-
47
-
48
-
49
-
50
-
51
-
52
-
53
-
54
-
55
-
56
-
57
-
58
-
59
-
60
-
61
-
62
-
63
-
64
-
65
-
66
-
67
-
68
-
69
-
70
-
71
-
72
-
73
-
74
-
75
-
76
-
77
-
78
-
79
-
80
-
81
-
82
-
83
-
84
-
85
-
86
-
87
-
88
-
89
-
90
-
91
-
92
-
93
-
94
-
95
-
96
-
97
-
98
-
99
-
100
-
101
-
102
-
103
-
104
-
105
-
106
-
107
-
108
-
109
-
110
-
111
-
112
-
113
-
114
-
115
-
116
-
117
-
118
-
119
-
120
-
121
-
122
-
123
-
124
-
125
-
126
-
127
-
128
-
129
-
130
-
131
-
132
-
133
-
134
-
135
-
136
-
137
-
138
-
139
-
140
-
141
-
142
-
143
-
144
-
145
-
146
-
147
-
148
-
149
-
150
-
151
-
152
-
153
-
154
-
155
-
156
-
157
-
158
-
159
-
160
-
161
-
162
-
163
-
164
-
165
-
166
-
167
-
168
-
169
-
170
-
171
-
172
-
173
-
174
-
175
-
176
-
177
-
178
-
179
-
180
-
181
-
182
-
183
-
184
-
185
-
186
-
187
-
188
-
189
-
190
-
191
-
192
-
193
-
194
-
195
-
196
-
197
-
198
-
199
-
200
 |
 |