IBM 84885BU User Manual - Page 41
Replacing, bezel
 |
View all IBM 84885BU manuals
Add to My Manuals
Save this manual to your list of manuals |
Page 41 highlights
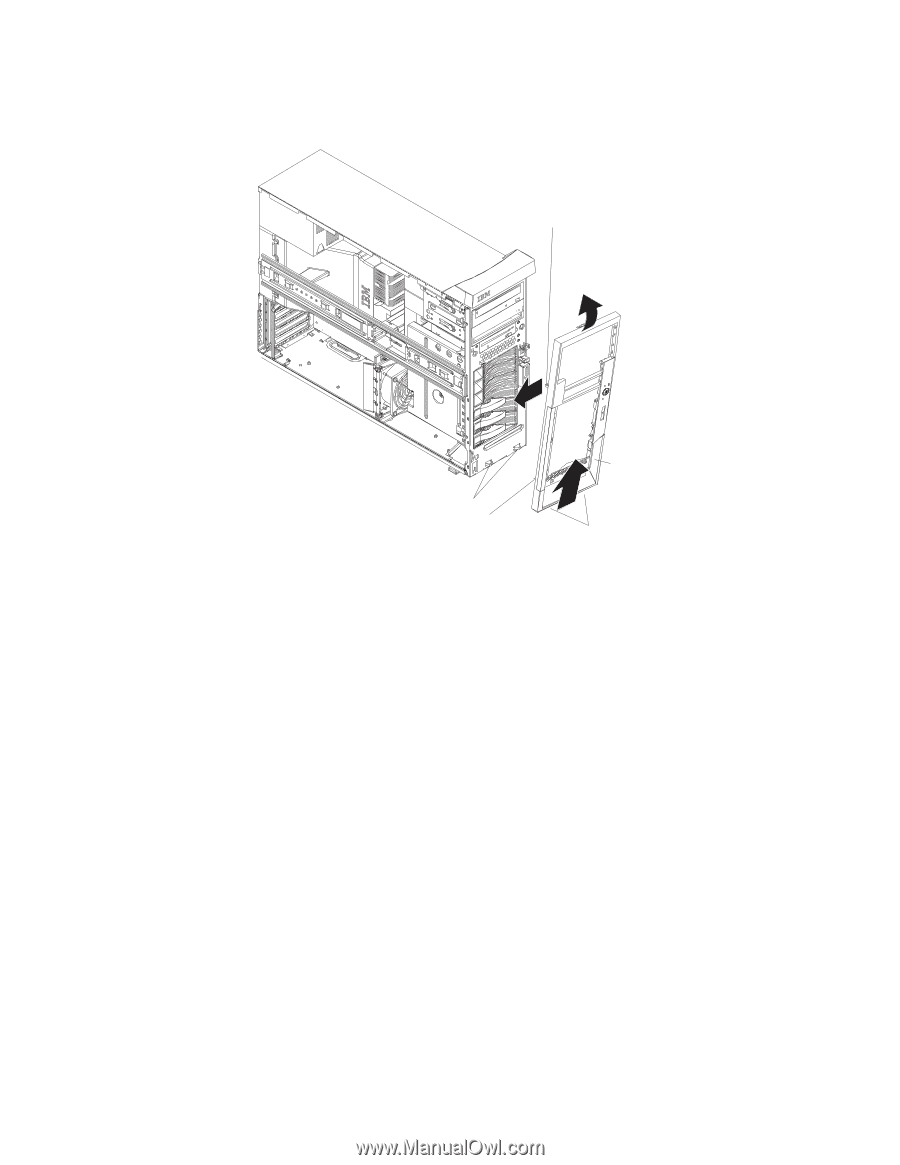
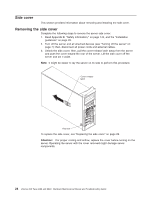
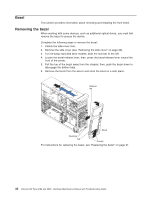
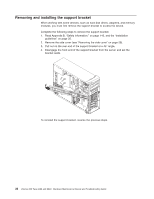
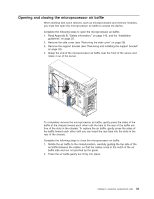
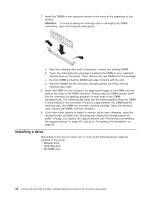
Replacing the bezel Complete the following steps to replace the bezel. Release tab Openings Tab Bezel Hooks Note: For hot-swap hard disk drive models, make sure the side cover is unlocked; then, slide the lock bar on the bezel to the left (unlocked) before you begin. 1. Insert the tab on the left side of the bezel into the matching hole on the chassis left front. 2. Slide the bezel toward the bottom of the server until you can insert the two openings on the bottom rear of the bezel onto the matching hooks on the server chassis. 3. Push the top of the bezel toward the server until the two tabs at the top of the bezel snap into place. 4. For hot-swap hard disk drive models, slide the lock bar to the right. The hot-swap lock bar locks when you lock the side cover key lock. 5. Lock the side cover. Chapter 4. Customer replacement units 31
-
 1
1 -
2
-
3
-
4
-
5
-
6
-
7
-
8
-
9
-
10
-
11
-
12
-
13
-
14
-
15
-
16
-
17
-
18
-
19
-
20
-
21
-
22
-
23
-
24
-
25
-
26
-
27
-
28
-
29
-
30
-
31
-
32
-
33
-
34
-
35
-
 36
36 -
 37
37 -
 38
38 -
 39
39 -
 40
40 -
 41
41 -
 42
42 -
 43
43 -
 44
44 -
 45
45 -
 46
46 -
47
-
48
-
49
-
50
-
51
-
52
-
53
-
54
-
55
-
56
-
57
-
58
-
59
-
60
-
61
-
62
-
63
-
64
-
65
-
66
-
67
-
68
-
69
-
70
-
71
-
72
-
73
-
74
-
75
-
76
-
77
-
78
-
79
-
80
-
81
-
82
-
83
-
84
-
85
-
86
-
87
-
88
-
89
-
90
-
91
-
92
-
93
-
94
-
95
-
96
-
97
-
98
-
99
-
100
-
101
-
102
-
103
-
104
-
105
-
106
-
107
-
108
-
109
-
110
-
111
-
112
-
113
-
114
-
115
-
116
-
117
-
118
-
119
-
120
-
121
-
122
-
123
-
124
-
125
-
126
-
127
-
128
-
129
-
130
-
131
-
132
-
133
-
134
-
135
-
136
-
137
-
138
-
139
-
140
-
141
-
142
-
143
-
144
-
145
-
146
-
147
-
148
-
149
-
150
-
151
-
152
-
153
-
154
-
155
-
156
-
157
-
158
-
159
-
160
-
161
-
162
-
163
-
164
-
165
-
166
-
167
-
168
-
169
-
170
-
171
-
172
-
173
-
174
-
175
-
176
-
177
-
178
-
179
-
180
-
181
-
182
-
183
-
184
-
185
-
186
-
187
-
188
-
189
-
190
-
191
-
192
-
193
-
194
-
195
-
196
-
197
-
198
-
199
-
200
 |
 |