IBM 84885BU User Manual - Page 43
Opening, closing, microprocessor, baffle
 |
View all IBM 84885BU manuals
Add to My Manuals
Save this manual to your list of manuals |
Page 43 highlights
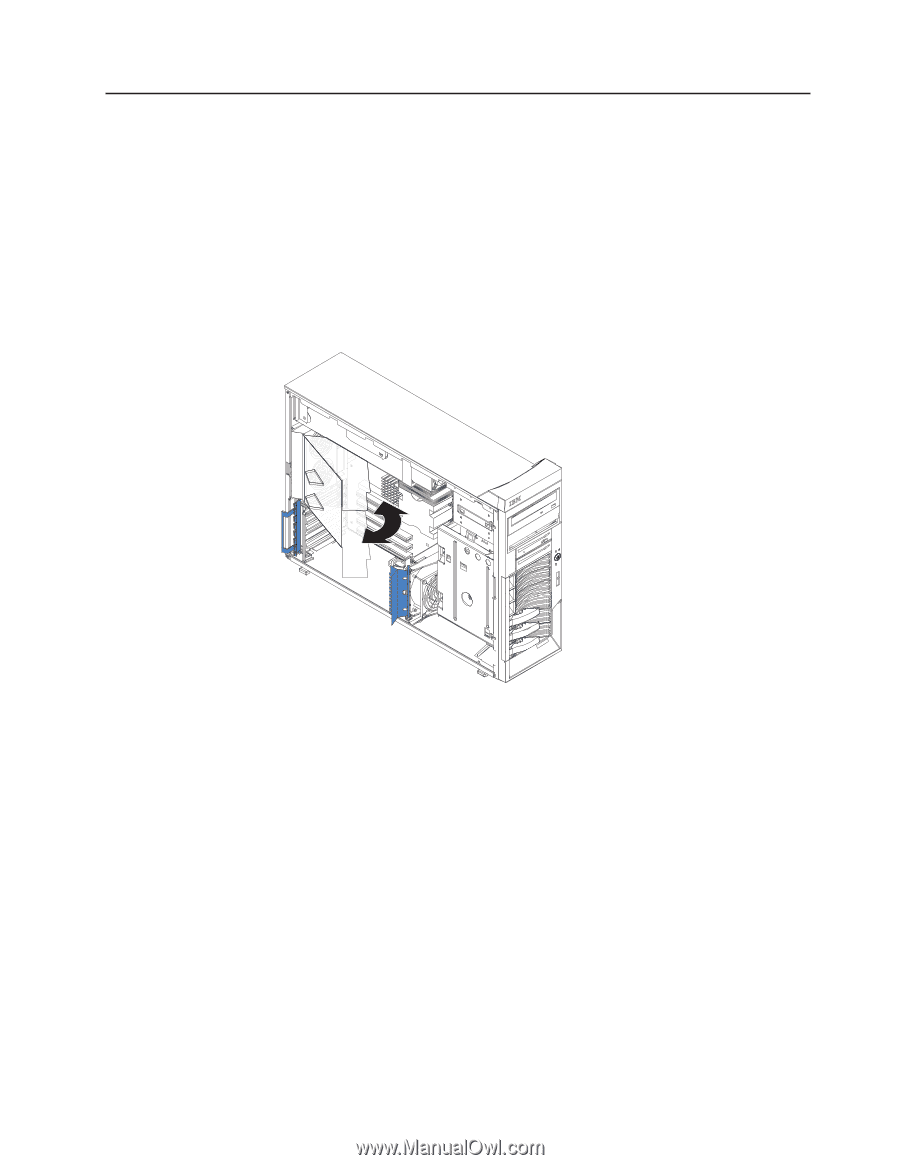
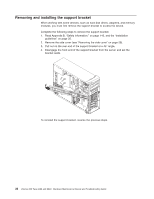
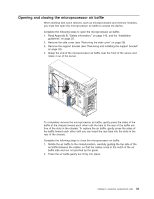
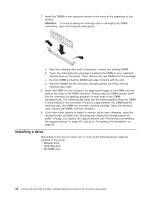
Opening and closing the microprocessor air baffle When working with some devices, such as microprocessors and memory modules, you must first open the microprocessor air baffle to access the device. Complete the following steps to open the microprocessor air baffle: 1. Read Appendix B, "Safety information," on page 143, and the "Installation guidelines" on page 25. 2. Remove the side cover (see "Removing the side cover" on page 28). 3. Remove the support bracket (see "Removing and installing the support bracket" on page 32). 4. Grasp the end of the microprocessor air baffle near the front of the server and rotate it out of the server. To completely remove the microprocessor air baffle, gently press the sides of the baffle at the chassis toward each other until the tabs at the rear of the baffle are free of the slots in the chassis. To replace the air baffle, gently press the sides of the baffle toward each other until you can insert the rear tabs into the slots in the rear of the chassis. Complete the following steps to close the microprocessor air baffle: 1. Rotate the air baffle to the closed position, carefully guiding the top side of the air baffle between the cables, so that the cables cross in the notch of the air baffle side and are not pinched by the guide. 2. Press the air baffle gently but firmly into place. Chapter 4. Customer replacement units 33
-
 1
1 -
2
-
3
-
4
-
5
-
6
-
7
-
8
-
9
-
10
-
11
-
12
-
13
-
14
-
15
-
16
-
17
-
18
-
19
-
20
-
21
-
22
-
23
-
24
-
25
-
26
-
27
-
28
-
29
-
30
-
31
-
32
-
33
-
34
-
35
-
36
-
37
-
 38
38 -
 39
39 -
 40
40 -
 41
41 -
 42
42 -
 43
43 -
 44
44 -
 45
45 -
 46
46 -
 47
47 -
 48
48 -
49
-
50
-
51
-
52
-
53
-
54
-
55
-
56
-
57
-
58
-
59
-
60
-
61
-
62
-
63
-
64
-
65
-
66
-
67
-
68
-
69
-
70
-
71
-
72
-
73
-
74
-
75
-
76
-
77
-
78
-
79
-
80
-
81
-
82
-
83
-
84
-
85
-
86
-
87
-
88
-
89
-
90
-
91
-
92
-
93
-
94
-
95
-
96
-
97
-
98
-
99
-
100
-
101
-
102
-
103
-
104
-
105
-
106
-
107
-
108
-
109
-
110
-
111
-
112
-
113
-
114
-
115
-
116
-
117
-
118
-
119
-
120
-
121
-
122
-
123
-
124
-
125
-
126
-
127
-
128
-
129
-
130
-
131
-
132
-
133
-
134
-
135
-
136
-
137
-
138
-
139
-
140
-
141
-
142
-
143
-
144
-
145
-
146
-
147
-
148
-
149
-
150
-
151
-
152
-
153
-
154
-
155
-
156
-
157
-
158
-
159
-
160
-
161
-
162
-
163
-
164
-
165
-
166
-
167
-
168
-
169
-
170
-
171
-
172
-
173
-
174
-
175
-
176
-
177
-
178
-
179
-
180
-
181
-
182
-
183
-
184
-
185
-
186
-
187
-
188
-
189
-
190
-
191
-
192
-
193
-
194
-
195
-
196
-
197
-
198
-
199
-
200
 |
 |