Image Fitness 2-in-1 Elliptical English Manual
Image Fitness 2-in-1 Elliptical Manual
 |
View all Image Fitness 2-in-1 Elliptical manuals
Add to My Manuals
Save this manual to your list of manuals |
Image Fitness 2-in-1 Elliptical manual content summary:
- Image Fitness 2-in-1 Elliptical | English Manual - Page 1
.com/ registration. CUSTOMER CARE For service at any time, go to www.imagefitness.com. Or call 1-800-753-4645 Mon.–-Fri. 6 a.m.–-6 p.m. MT Sat. 8 a.m.–-12 p.m. MT Please do not contact the store. CAUTION Read all precautions and instructions in this manual before using this equipment. Keep this - Image Fitness 2-in-1 Elliptical | English Manual - Page 2
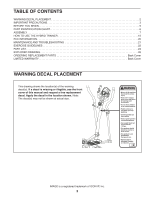
HOW TO USE THE HYBRID TRAINER 15 FCC INFORMATION 20 MAINTENANCE AND TROUBLESHOOTING 21 EXERCISE GUIDELINES 22 PART LIST 24 cover of this manual and request a free replacement decal. Apply the decal in the location shown. Note: The decal(s) may not be shown at actual size. IMAGE is a registered - Image Fitness 2-in-1 Elliptical | English Manual - Page 3
of all precautions. 2. Before beginning any exercise program, consult your physician. This is especially important for persons over age 35 or persons with pre-existing health problems. 3. Use the hybrid trainer only as described in this manual. 4. The hybrid trainer is intended for home use only. Do - Image Fitness 2-in-1 Elliptical | English Manual - Page 4
STANDARD SERVICE PLANS all 4 - Image Fitness 2-in-1 Elliptical | English Manual - Page 5
BEFORE YOU BEGIN Thank you for selecting the revolutionary IMAGE® 2 IN 1 hybrid trainer. The 2 IN 1 hybrid trainer provides an impressive selection of features designed to make your workouts at home more effective and enjoyable. manual. To help us assist you, note the product model number and - Image Fitness 2-in-1 Elliptical | English Manual - Page 6
for assembly. The number in parentheses below each drawing is the key number of the part, from the PART LIST near the end of this manual. The number following the key number is the quantity needed for assembly. Note: If a part is not in the hardware kit, check to see if - Image Fitness 2-in-1 Elliptical | English Manual - Page 7
ASSEMBLY •• To hire an authorized service technician to assemble the hybrid trainer, call 1-800-445-2480. •• If you do not have Internet access, call Customer Care (see the front cover of this manual) and register your product. 2. Identify the Rear Stabilizer (28), which has a Leveling Cap - Image Fitness 2-in-1 Elliptical | English Manual - Page 8
(81), two M8 Split Washers (63), and two M8 Acorn Nuts (58). 58 63 81 1 10 51 58 63 81 4. While a second person holds the Upright (2) near the Frame (1), connect the Wire Harness 4 (31) to the Reed Switch Wire (47). Next, connect the Resistance Cable (25) to the Lower Cable (42 - Image Fitness 2-in-1 Elliptical | English Manual - Page 9
(2) with three M8 x 20mm Screws (54), three M8 Split Washers (63), and three M8 Washers (55). Do not tighten the Screws yet. Then, attach the Upright (2) with two M8 x 60mm Bolts (90), four M8 Washers (55), and two M8 Locknuts (53). Do not tighten the Locknuts yet. 5 Avoid pinching the wires - Image Fitness 2-in-1 Elliptical | English Manual - Page 10
7. Identify the Right Upper Body Arm (6) and orient it as shown. 7 Next, orient an Upper Body Leg (64) so that the hexagonal holes are on the side shown. Insert the Right Upper Body Arm (6) into the Upper Body Leg (64). Attach the Right Upper Body Arm with two M8 x 40mm Bolts (56), two M8 Washers - Image Fitness 2-in-1 Elliptical | English Manual - Page 11
amount of the included grease 8 to the right axle on the Upright (2) and to a Wave Washer (73). Next, orient an Upright Spacer (26) as shown. Slide the Upright Spacer and the Wave Washer (73) onto the right axle on the Upright (2). 5 Then, slide the Right Upper Body Arm (6) onto the right axle - Image Fitness 2-in-1 Elliptical | English Manual - Page 12
) onto the Right Crank Axle (16). Then, press a 19mm Dome Cap (84) onto the Split Washer. Repeat this step on the left side of the elliptical. Note: Turn the Left Crank Axle (not shown) counterclockwise to tighten it, and use the Left Crank Locknut (not shown). 10 84 36 74 18 - Image Fitness 2-in-1 Elliptical | English Manual - Page 13
. Attach the Console (23) to the Upright (2) with four M4 x 12mm Screws (66). See step 5. Tighten the M8 x 20mm Screws (54) and the M8 Locknuts (53). 23 Battery Compartment 23 A 102 Avoid pinching the wires 31 2 66 14. Attach the Seat (69) to the Seat Carriage (61) with three M8 Locknuts (53 - Image Fitness 2-in-1 Elliptical | English Manual - Page 14
one of the adjustment holes in the Seat Post. Tighten the Seat Post Knob (87). Make sure that the Seat Post Knob is inserted into one of the adjustment holes in the Seat Post (24). Adjustment Holes 24 Hole 87 1 17. Make sure that all parts of the hybrid trainer are properly tightened. Note: Extra - Image Fitness 2-in-1 Elliptical | English Manual - Page 15
HOW TO USE THE HYBRID TRAINER HOW TO MOVE THE HYBRID TRAINER HOW TO USE THE ELLIPTICAL MODE Due to the size and weight of the hybrid trainer, moving it requires two persons. Stand in front of the hybrid trainer, hold the upright, and place one foot against one of the front stabilizer caps. Pull - Image Fitness 2-in-1 Elliptical | English Manual - Page 16
HOW TO USE THE UPRIGHT BIKE MODE To use the hybrid trainer as an upright bike, adjust the position of the seat post and the position of the seat. For effective exercise, the seat should be at the proper height. As you pedal, there should be a slight bend in your knees when the pedals are in the - Image Fitness 2-in-1 Elliptical | English Manual - Page 17
your pedaling speed while guiding you through an effective workout. Before using the console, make sure that batteries are installed (see assembly step 12 on page 13). If there is a sheet of plastic on the display, remove the plastic. To use the manual mode, see the instructions at the right. To - Image Fitness 2-in-1 Elliptical | English Manual - Page 18
pedaling. If the time is displayed, it will flash. To continue your workout, simply resume pedaling. If your heart rate is not shown, make sure abrasives, or chemicals to clean the contacts. 5. When you are finished exercising, the console will turn off automatically. If the pedals do not move for - Image Fitness 2-in-1 Elliptical | English Manual - Page 19
A few seconds after you select a preset workout, the display will show the duration of the workout. 3. Begin pedaling to start the workout. The preset workouts consist of several one-minute segments. One target speed (rpm) is programmed for each segment. As you exercise, the pacer will prompt you to - Image Fitness 2-in-1 Elliptical | English Manual - Page 20
. This equipment generates, uses, and can radiate radio frequency energy and, if not installed and used in accordance with the instructions, may cause harmful interference to radio communications. However, there is no guarantee that interference will not occur in a particular installation - Image Fitness 2-in-1 Elliptical | English Manual - Page 21
reach the Idler Adjustment Bolt (34). CONSOLE TROUBLESHOOTING If the console display becomes dim, replace all the batteries at the same time; most console problems are the result of low batteries. See assembly step 12 on page 13 for replacement instructions. If the console does not display your - Image Fitness 2-in-1 Elliptical | English Manual - Page 22
and helps to prevent post-exercise problems. EXERCISE FREQUENCY To maintain or improve your condition, complete three workouts each week, with at least one day of rest between workouts. After a few months of regular exercise, you may complete up to five workouts each week, if desired. Remember - Image Fitness 2-in-1 Elliptical | English Manual - Page 23
SUGGESTED STRETCHES The correct form for several basic stretches is shown at the right. Move slowly as you stretch; never bounce. 1. Toe Touch Stretch Stand with your knees bent slightly and slowly bend forward from 1 your hips. Allow your back and shoulders to relax as you reach down toward - Image Fitness 2-in-1 Elliptical | English Manual - Page 24
Axle Flywheel Crank Drive Belt Crank Bearing Assembly Front Stabilizer Cap Frame Sleeve Console Seat Post Resistance Control/Cable Upright Spacer M8 Plastic Washer Rear Stabilizer Large Flywheel Bearing Seat Post Sleeve Wire Harness Pulley Leveling Cap Idler Adjustment Bolt C-magnet Assembly Right - Image Fitness 2-in-1 Elliptical | English Manual - Page 25
94 1 Knob Washer 95 1 Short Flywheel Spacer 96 2 Crank Cover 97 2 Seat Carriage Cap 98 1 M8 x 40mm Socket Bolt 99 1 100 2 101 4 * –- Grommet Small Curved Washer M10.5 Washer Ground Wire User·s Manual Assembly Tool DVD Note: Specifications are subject to change without notice. - Image Fitness 2-in-1 Elliptical | English Manual - Page 26
EXPLODED DRAWING A 14 91 13 60 92 92 93 14 61 14 69 93 92 91 97 12 26 15 59 73 41 44 68 3 68 62 30 11 101 93 94 93 27 77 35 48 55 9 53 41 82 39 42 96 4 22 39 78 98 82 43 49 1 20 47 68 79 33 58 63 81 68 68 68 68 51 28 30 97 55 11 59 24 53 44 43 46 53 55 50 - Image Fitness 2-in-1 Elliptical | English Manual - Page 27
EXPLODED DRAWING B 83 57 63 72 27 40 56 67 85 80 85 71 100 68 73 71 52 66 26 8 100 68 102 80 63 86 55 88 5 25 23 99 66 75 76 73 40 58 63 55 64 31 54 63 90 63 54 55 90 2 26 40 53 55 63 56 54 53 62 65 67 8 6 40 27 72 63 58 57 63 83 55 64 27 Model No. - Image Fitness 2-in-1 Elliptical | English Manual - Page 28
of this manual) LIMITED WARRANTY IMPORTANT: To protect your fitness equipment with an extended service plan, see page 4. ICON Health & Fitness, Inc. the product is purchased or transported outside the USA, if all instructions in this manual are not followed, if the product is abused or improperly or
-
 1
1 -
 2
2 -
 3
3 -
 4
4 -
 5
5 -
 6
6 -
 7
7 -
8
-
9
-
10
-
11
-
12
-
13
-
14
-
15
-
16
-
17
-
18
-
19
-
20
-
21
-
22
-
23
-
24
-
25
-
26
-
27
-
28
 |
 |
CAUTION
Read all precautions and instruc-
tions in this manual before using
this equipment. Keep this manual
for future reference.
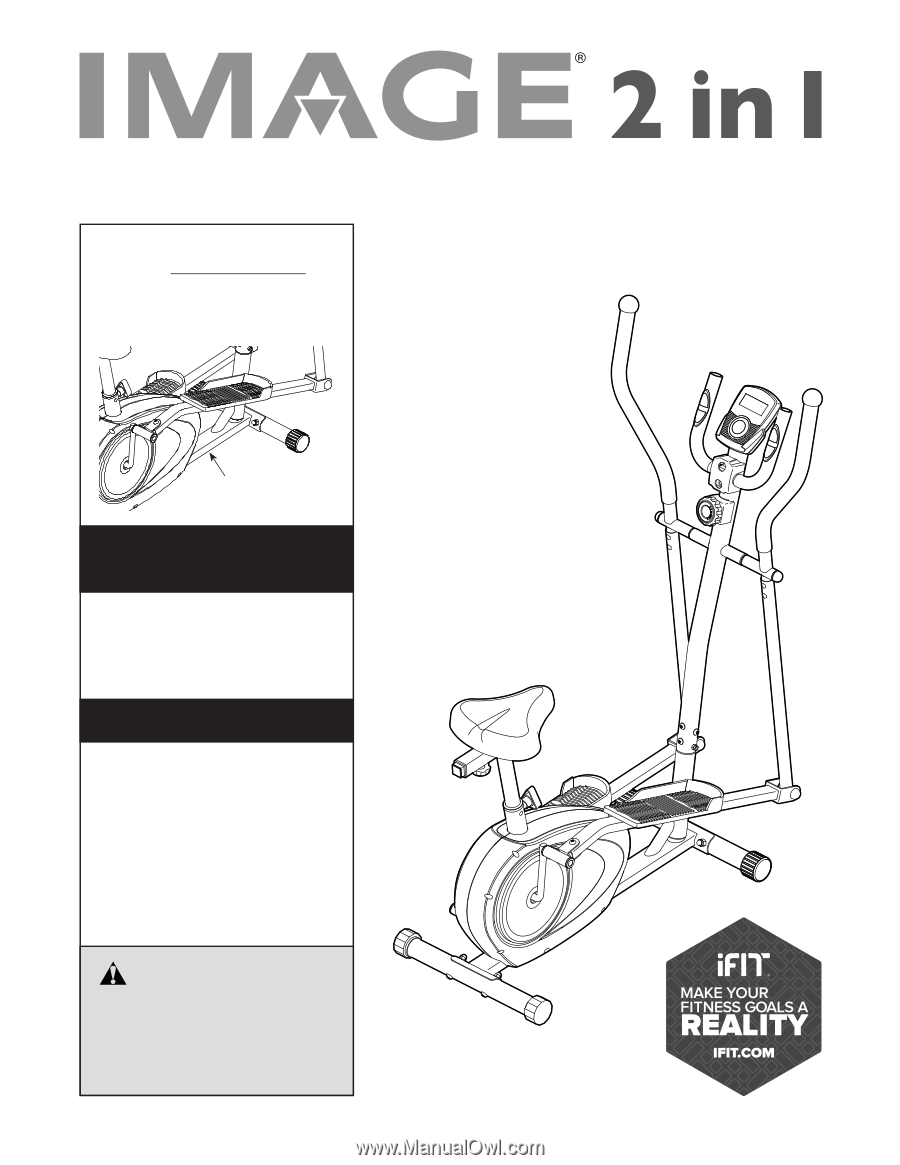
Model No. IMEL02013.0
Serial No.
Write the serial number in the space
above for reference.
USER°S MANUAL
www.imagefitness.com
Serial Number
Decal (under frame)
To register your product and
activate your warranty today, go
to www.workoutwarehouse.com/
registration.
For service at any time, go to
www.imagefitness.com.
Or call 1-800-753-4645
Mon.°Fri. 6 a.m.°6 p.m. MT
Sat. 8 a.m.°12 p.m. MT
Please do not contact the store.
ACTIVATE YOUR
WARRANTY
CUSTOMER CARE