Image Fitness Freestride 16.0 Treadmill English Manual
Image Fitness Freestride 16.0 Treadmill Manual
 |
View all Image Fitness Freestride 16.0 Treadmill manuals
Add to My Manuals
Save this manual to your list of manuals |
Image Fitness Freestride 16.0 Treadmill manual content summary:
- Image Fitness Freestride 16.0 Treadmill | English Manual - Page 1
questions, or if parts are damaged or missing, PLEASE CONTACT OUR CUSTOMER SERVICE DEPARTMENT DIRECTLY. CALL TOLL-FREE: 1-800-753-4645 Mon.-Fri., 6 a.m.-6 p.m. MST ON THE WEB: www.iconservice.com USER'S MANUAL CAUTION Read all precautions and instructions in this manual before using this equipment - Image Fitness Freestride 16.0 Treadmill | English Manual - Page 2
ADJUSTMENT 8 HOW TO FOLD AND MOVE THE TREADMILL 12 TROUBLESHOOTING 13 CONDITIONING GUIDELINES 15 LIMITED WARRANTY Back Cover ORDERING REPLACEMENT PARTS Back Cover Note: An EXPLODED DRAWING and a PART LIST are attached in the center of this manual. IMPORTANT PRECAUTIONS WARNING: To reduce the - Image Fitness Freestride 16.0 Treadmill | English Manual - Page 3
de- scribed in this manual. Never remove the motor hood unless instructed to do so by an authorized service representative. Servicing other than the procedures in this manual should be performed by an authorized service representative only. 23. This treadmill is intended for in-home - Image Fitness Freestride 16.0 Treadmill | English Manual - Page 4
front cover of this manual for the location). To avoid a registration fee for any service needed under warranty, you must register the treadmill at www.iconservice.com/registration. Before reading further, please review the drawing below and familiarize yourself with the labeled parts. Water Bottle - Image Fitness Freestride 16.0 Treadmill | English Manual - Page 5
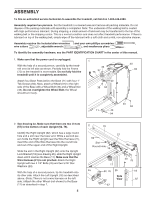
PART IDENTIFICATION CHART in the center of this manual. 1. Make sure that the power cord is unplugged. With the help of a second person, carefully tip the treadmill 1/4" Bolts (78) and two 5/16" Star Washers (20). With the help of a second person, tip the treadmill onto its other side. Attach the - Image Fitness Freestride 16.0 Treadmill | English Manual - Page 6
3. With the help of a second person, position the treadmill with the Uprights (62, 76) in a vertical position as ) and two Crossbar Star Washers (88). Do not tighten the Crossbar Screws yet. Hold the Console (10) and the Console Base (46) near the Handrails (1, 47). See the inset drawing. Route the - Image Fitness Freestride 16.0 Treadmill | English Manual - Page 7
. Then, cut off the ends of the plastic ties. 7 Attach the Console (10) to the Console Base (46) with four 1/2" Screws (97) and two to overtighten the Screws. 8 9. Make sure that all parts are properly tightened before you use the treadmill. Note: Extra hardware may be included. Keep the included - Image Fitness Freestride 16.0 Treadmill | English Manual - Page 8
treadmill (see drawing 1 at the right). To purchase a surge suppressor, see your local IMAGE dealer or call the toll-free telephone number on the front cover of this manual and order part . The surge suppressor must be electrically rated for 120 volts AC and 15 amps. There must be a monitoring light - Image Fitness Freestride 16.0 Treadmill | English Manual - Page 9
of features designed to make your workouts more effective. During each workout, you can change the speed and incline of the treadmill with the touch of a button. As you exercise, the console will display continuous exercise feedback; you can even measure your heart rate using the built-in pulse - Image Fitness Freestride 16.0 Treadmill | English Manual - Page 10
page 11. For simplicity, all instructions in this section refer to miles. The right display- The right display will show the speed of the walking belt and the approximate number of calories you have burned during your workout. The right display will also show your heart rate when you use the pulse - Image Fitness Freestride 16.0 Treadmill | English Manual - Page 11
"d" disappears. The left display will show the total number of miles that the walking belt has moved and the total number of hours that the treadmill has been used. To exit the information mode, remove the key from the console. The right display will show An "E" (for English miles) or an - Image Fitness Freestride 16.0 Treadmill | English Manual - Page 12
latch to the left. Pivot the frame down until the frame and the foot rail are past the storage latch. 2. See drawing 1 above. Hold the treadmill firmly with both hands, and lower the frame to the floor. Do not drop the frame to the floor. To decrease the possibility of injury - Image Fitness Freestride 16.0 Treadmill | English Manual - Page 13
TROUBLESHOOTING Most treadmill problems can be solved by following the steps below. Find the symptom that applies, and follow the steps listed. If further assistance is needed, please see the front cover of this manual. PROBLEM: The power does not turn on SOLUTION: a. Make sure that the power - Image Fitness Freestride 16.0 Treadmill | English Manual - Page 14
in the power cord, insert the key, and run the treadmill for a few minutes. Repeat until the walking belt is properly tightened. b 2"-3" Rear Roller Bolts c. If the walking belt still slows when walked on, see the front cover of this manual. PROBLEM: The walking belt is off-center or slips when - Image Fitness Freestride 16.0 Treadmill | English Manual - Page 15
exercise, adjust the speed and incline of the treadmill until your heart rate is near the highest number in your training zone. WORKOUT GUIDELINES Each workout should include the following three parts: A Warm-up-Start each workout with 5 to 10 minutes of stretching and light exercise. A proper warm - Image Fitness Freestride 16.0 Treadmill | English Manual - Page 16
. Save this chart and the EXPLODED DRAWING/PART LIST for future reference. 1/2" Screw (97)-4 Silver Ground Screw (91)-1 3/4" Screw (13)-8 Crossbar Screw (53)-2 1" Bolt (8)-4 1" Tek Screw (94)-4 2 1/4" Bolt (78)-4 1/4" Star Washer (9)-4 5/16" Star Washer (20)-4 Wheel Bolt (36)-2 Wheel - Image Fitness Freestride 16.0 Treadmill | English Manual - Page 17
PART LIST-Model No. IMTL41205.0 R0905A Key No. Qty. 1 1 2 1 3 2 4 1 5 1 6 1 7 1 8 4 9 4 10 1 11 1 12 1 13 13 14 1 15 2 16 7 17 1 18 Releasable Tie Choke Belt Guide Belly Pan Fastener Walking Manual # These parts are not illustrated. Specifications are subject - Image Fitness Freestride 16.0 Treadmill | English Manual - Page 18
84 98 39 83 38 7 77 3 52 74 85 39 83 98 66 79 10 96 13 95 13 25 53 13 2 1 88 8 9 41 9 34 35 79 76 27 25 19 15 38 48 45 44 33 43 50 93 67 48 51 98 39 38 15 31 30 102 18 29 18 72 38 33 103 33 20 78 40 94 37 36 16 52 77 63 33 39 40 33 94 99 55 54 56 - Image Fitness Freestride 16.0 Treadmill | English Manual - Page 19
IMAGE FREESTRIDE 16.0 treadmill) • the SERIAL NUMBER of the product (see the front cover of this manual) • the KEY NUMBER and DESCRIPTION of the desired part(s) (see the PART or repairs not provided by an ICON authorized service warranties of merchantability or fitness for a particular purpose
-
 1
1 -
 2
2 -
 3
3 -
 4
4 -
 5
5 -
 6
6 -
 7
7 -
8
-
9
-
10
-
11
-
12
-
13
-
14
-
15
-
16
-
17
-
18
-
19
 |
 |
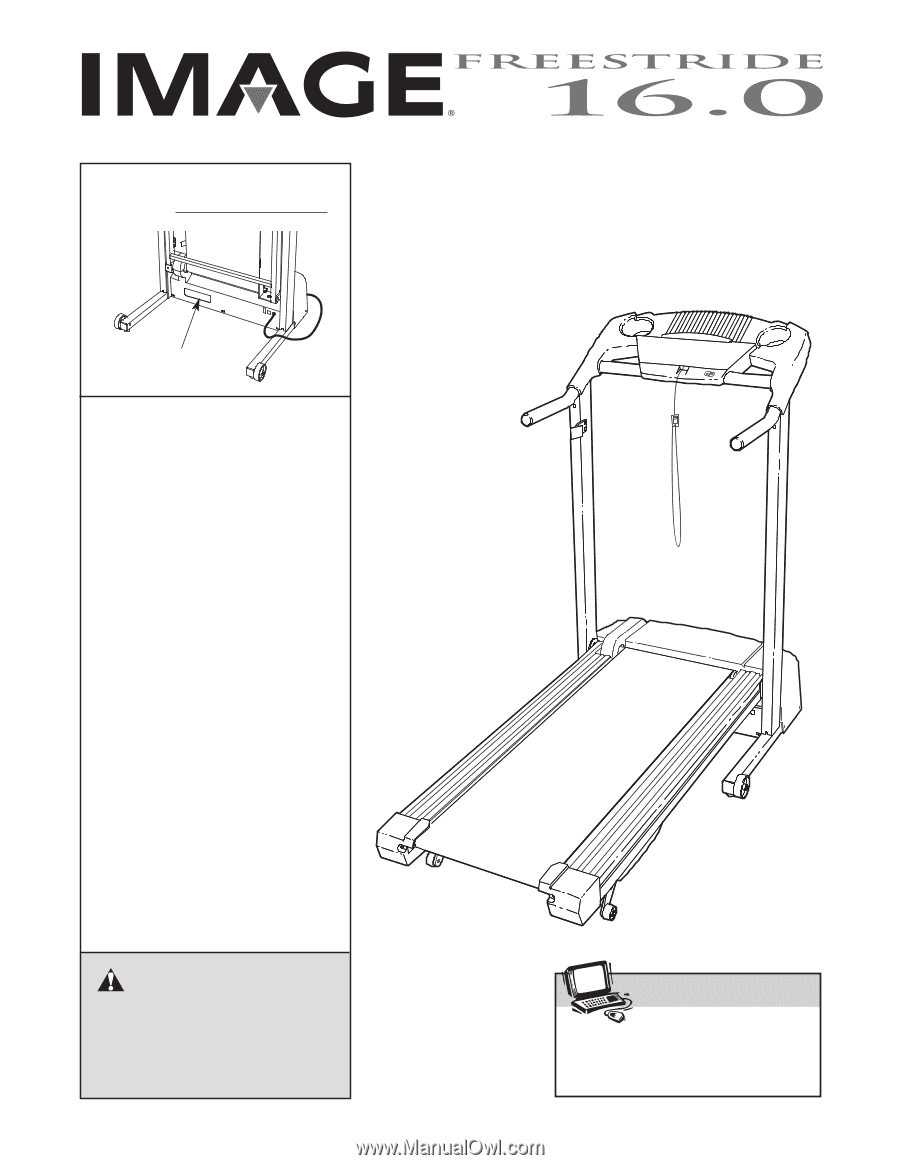
Serial Number
Decal
USER'S MANUAL
Model No. IMTL41205.0
Serial No.
CAUTION
Read all precautions and instruc-
tions in this manual before using
this equipment. Save this manual
for future reference.
Visit our website at
www.imagefitness.com
new products, prizes,
fitness tips, and much more!
QUESTIONS?
As a manufacturer, we are com-
mitted to providing complete
customer satisfaction. If you
have questions, or if parts are
damaged or missing, PLEASE
CONTACT OUR CUSTOMER
SERVICE DEPARTMENT DI-
RECTLY.
CALL TOLL-FREE:
1-800-753-4645
Mon.–Fri., 6 a.m.–6 p.m. MST
ON THE WEB:
www.iconservice.com