Insignia NS-AC8WU3 User Guide
Insignia NS-AC8WU3 Manual
 |
View all Insignia NS-AC8WU3 manuals
Add to My Manuals
Save this manual to your list of manuals |
Insignia NS-AC8WU3 manual content summary:
- Insignia NS-AC8WU3 | User Guide - Page 1
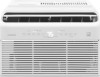
USER GUIDE 8,000 BTU Window Air Conditioner NS-AC8WU3 Before using your new product, please read these instructions to prevent any damage. - Insignia NS-AC8WU3 | User Guide - Page 2
Step 1: Preparing the support bracket 17 Step 2: Installing the support bracket 18 Step 3: Installing your air conditioner on the support bracket 21 Step Removing your air conditioner from the window 30 Troubleshooting 31 Specifications 32 Legal notices 32 ONE-YEAR LIMITED WARRANTY 33 - Insignia NS-AC8WU3 | User Guide - Page 3
trouble-free performance. IMPORTANT SAFEGUARDS Read this manual carefully before installing or operating your new air conditioning unit. Make sure that you save this manual for future reference. To prevent injury to the user or other people and property damage, the following instructions service - Insignia NS-AC8WU3 | User Guide - Page 4
a wet room such as a bathroom or laundry room. • Contact an authorized service technician for repair or maintenance of this unit. • Contact an authorized installer for installation of this unit. IMPORTANT SAFETY INSTRUCTIONS • NOTE: The power supply cord with this air conditioner contains a current - Insignia NS-AC8WU3 | User Guide - Page 5
is a risk of fire. This symbol indicates that the operation manual should be read carefully. CAUTION CAUTION This symbol indicates that service personnel should be handling this equipment with reference to the installation manual. This symbol indicates that information is available, such as the - Insignia NS-AC8WU3 | User Guide - Page 6
, follow basic precautions, including the following: • Be sure the electrical service is adequate for the model you have chosen. This information can be found and correctly installed according to the installation instructions in this manual. Save this manual for possible future use in removing or - Insignia NS-AC8WU3 | User Guide - Page 7
area All maintenance staff and others working in the local area shall be instructed on the nature of work being carried out. Work in confined spaces is absolutely necessary to have an electrical supply to equipment during servicing, then a permanently operating form of leak detection shall be located - Insignia NS-AC8WU3 | User Guide - Page 8
• This shall include damage to cables, excessive number of connections, terminals not made to original specification, damage to seals, incorrect fitting of glands, etc. • Ensure that apparatus is mounted securely. • Ensure that seals or sealing materials have not degraded such that they no longer - Insignia NS-AC8WU3 | User Guide - Page 9
takes place. G Start the recovery machine and operate in accordance with manufacturer's instructions. H Do not overfill cylinders. (No more than 80% volume liquid charge When removing refrigerant from a system, either for servicing or decommissioning, it is recommended good practice that all - Insignia NS-AC8WU3 | User Guide - Page 10
adjust your settings • Oscillating fan lets you manually adjust side-to-side motion • Included remote batteries (2) • User Guide Tools required Phillips screwdriver window) Right Extension Arm (for 22" 1 to 26" window) Main Support Pin 2* Cotter Pin 2* Open Window Bracket - RH 1 Open Window - Insignia NS-AC8WU3 | User Guide - Page 11
hardware provided in a separate bag. Note: Save the carton and these instructions for future reference. The carton is the best way to store your air use. Air conditioner Mounting slot Air conditioner support bracket Rear cross brace Main support Air outlet Control panel Air input Left extension - Insignia NS-AC8WU3 | User Guide - Page 12
not, disconnect the power, then connect it again and turn your air conditioner on. If the error code repeats and the problem persists, disconnect the power and contact your nearest customer service center. Error codes: EH(xx), EL(xx), EC(xx), PH(xx), PL(xx), PC(xx). 2 LED button Press to turn - Insignia NS-AC8WU3 | User Guide - Page 13
8,000 BTU Window Air Conditioner # Item 7 FAN button and indicator LEDs 8 SLEEP button and indicator LED 9 SWING button and indicator LED 10 (power) button Description Press to change the fan speed. The LEDs indicate the speed selected. Fan speed is adjusted in four steps - Auto > Low > Med > High - Insignia NS-AC8WU3 | User Guide - Page 14
# ITEM 9 SLEEP button 10 FAN speed indicator 11 FAN SPEED button 12 TIMER ON button 13 TIMER OFF button 14 °C/°F button DESCRIPTION Press to turn on sleep mode. Indicates the current fan mode. Press to cycle through the available fan speeds, including HIGH>MED>LOW. Press to turn the timer on. If - Insignia NS-AC8WU3 | User Guide - Page 15
8,000 BTU Window Air Conditioner # ITEM DESCRIPTION 19 SET TEMP indicator Lights when the display shows the set temperature. 20 (temperature/time) Displays the room temperature or set temperature. indicator In Timer mode, displays the time. 21 Remote control on indicator Lights when the - Insignia NS-AC8WU3 | User Guide - Page 16
supplied parts and use proper installation procedures as described in these instructions when installing this air conditioner. • If any piece of hardware is missing, DO NOT INSTALL THE AIR CONDITIONER. Call customer service. Understanding the window requirements Your air conditioner is designed to - Insignia NS-AC8WU3 | User Guide - Page 17
extension arm Spring push pin Spring push pin Right extension arm 5 Measure the width of the inner windowsill. Making sure that the center of the support bracket lines up with the center of the window, then adjust the extension arms to the width you just measured. The - Insignia NS-AC8WU3 | User Guide - Page 18
: Maintain control of the bracket until the installation is complete. 1 Open the window where your air conditioner is being installed. 2 Place the main support bracket into the window opening, making sure that the horizontal bracket and extension arms are located on the indoor side of the window - Insignia NS-AC8WU3 | User Guide - Page 19
3 Lower the bracket until it rests on the windowsill. Wooden window Inside Outside Vinyl window Inside Outside 8,000 BTU Window Air Conditioner 4 For wooden windows with a flat sill, secure the bracket to the windowsill by drilling 1/8 in. pilot holes and securing the bracket to the window - Insignia NS-AC8WU3 | User Guide - Page 20
the outside. 1/4 bubble on the level Angled support arm 6 Insert the main support pin through the holes in the main support and angled support arm. Main support pin 7 Using the numbers on the main support, repeat the adjustment for the other angled support arm matching the hole number from the first - Insignia NS-AC8WU3 | User Guide - Page 21
the front of the bracket with bracket sealing foam. Bracket sealing foam Bracket sealing foam Step 3: Installing your air conditioner on the support bracket CAUTION: Do not leave your air conditioner unattended during installation. 1 Measure the width of your window track (the vertical track your - Insignia NS-AC8WU3 | User Guide - Page 22
on the bottom of your air conditioner align with the main supports. Using a level, check for proper tilt towards the outside. correctly. Keep the window partially inserted into the slot to help support your air conditioner during installation. Window 4 Fold down both side arm hinges. - Insignia NS-AC8WU3 | User Guide - Page 23
8,000 BTU Window Air Conditioner 5 Using 1/4 in. and 1/2 in. type B screws, install the open window brackets with an "L" shaped screwdriver, if needed. WARNING: Failure to install the open window brackets could cause injury or property damage. 1/2 in. type B screw 1/4 in. type B screw Step 4: - Insignia NS-AC8WU3 | User Guide - Page 24
2 Apply window sealing foam to the side arm foam block as shown. Note that the window sealing foam attaches to the side next to your air conditioner. Wooden window with flat sill Air conditioner Side arm foam block Window sealing foam Additional side arm foam Vinyl window with lipped sill Air - Insignia NS-AC8WU3 | User Guide - Page 25
8,000 BTU Window Air Conditioner 6 Extend the anti-tip brackets (one on each side of your air conditioner) into the window tracks (the vertical track in which your window slides up and down) until they stop. Extended anti-tip bracket in the window track The side arm foam block has been remove for - Insignia NS-AC8WU3 | User Guide - Page 26
12 Cut strips of window sash foam and insert them in the space between the upper and lower sashes. 13 As a final check, review the installation and check for any gaps or openings. Seal any gaps with additional sealing foam (provided), to make sure that there are no leaks. Check for leaks here Check - Insignia NS-AC8WU3 | User Guide - Page 27
panel on your air conditioner. Using your air conditioner for the first time 1 Plug in your air conditioner (be sure to follow the power cord instructions on page 4). 2 Turn the power on to your air conditioner using the ON/OFF button. 3 Select the Cool mode setting. 4 Adjust the louvers for - Insignia NS-AC8WU3 | User Guide - Page 28
• Using the control panel, the setting is automatically saved after five seconds. OR • Point the remote control at your air conditioner unit and the setting is saved after one second. Note: To cancel the timer program, set the timer to 0:0 hours on the control panel. Your air conditioner turns off. - Insignia NS-AC8WU3 | User Guide - Page 29
desired left/right direction is obtained. Note: The up/down louvers cannot be adjusted manually. Press the SWING button to control up/down motion. Manually adjust the louvers for left/right air flow Manually adjust the louvers for left/right air flow Understanding sounds These sounds are part of - Insignia NS-AC8WU3 | User Guide - Page 30
Cleaning and maintaining your air conditioner CAUTION: Unplug your air conditioner before cleaning to prevent shock or fire hazards. Cleaning the cabinet • Dust the cabinet and front with an oil-free cloth, or wash with a cloth dampened in a solution of warm water and mild liquid dish-washing - Insignia NS-AC8WU3 | User Guide - Page 31
Air Conditioner Troubleshooting PROBLEM POSSIBLE CAUSE set the fan to a slower setting. Check the installation instructions or with the installer to make sure that your air conditioner . See Step 3: Installing your air conditioner on the support bracket on page 21. Water is dripping outside Your - Insignia NS-AC8WU3 | User Guide - Page 32
If the error code repeats and the problem persists, disconnect the power and contact your nearest customer service center. Specifications Dimensions (H × W × and, if not installed and used in accordance with the instructions, may cause harmful interference to radio communications. However, there - Insignia NS-AC8WU3 | User Guide - Page 33
become the property of Insignia and are not returned to you. If service of Products or parts are required after the Warranty Period expires, cover: • Food, beverage, and or medicine loss/spoilage. • Customer instruction/education • Installation • Set up adjustments • Cosmetic damage • Damage due to - Insignia NS-AC8WU3 | User Guide - Page 34
For product inquiries, please contact us with the information below: 1-877-467-4289 www.insigniaproducts.com INSIGNIA is a trademark of Best Buy and its affiliated companies. Distributed by Best Buy Purchasing, LLC 7601 Penn Ave South, Richfield, MN 55423 U.S.A. ©2022 Best Buy. All rights reserved.
-
 1
1 -
 2
2 -
 3
3 -
 4
4 -
 5
5 -
 6
6 -
 7
7 -
8
-
9
-
10
-
11
-
12
-
13
-
14
-
15
-
16
-
17
-
18
-
19
-
20
-
21
-
22
-
23
-
24
-
25
-
26
-
27
-
28
-
29
-
30
-
31
-
32
-
33
-
34
 |
 |

Before using your new product, please read these instructions to prevent any damage.
USER GUIDE
8,000 BTU Window Air
Conditioner
NS-AC8WU3