Insignia NS-FDRE44W1 User guide
Insignia NS-FDRE44W1 Manual
 |
View all Insignia NS-FDRE44W1 manuals
Add to My Manuals
Save this manual to your list of manuals |
Insignia NS-FDRE44W1 manual content summary:
- Insignia NS-FDRE44W1 | User guide - Page 1
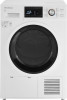
USER GUIDE 16-Cycle 4.4 Cu. Ft. Front Load Electric Dryer NS-FDRE44W1/NS-FDRE44W1-C Before using your new product, please read these instructions to prevent any damage. - Insignia NS-FDRE44W1 | User guide - Page 2
you will need 20 Before you start 20 Step-by-step instructions 21 Stacking your washer and dryer (optional 26 Using your dryer panel 43 Cleaning the moisture sensors 44 Troubleshooting 45 Understanding the error codes 47 Specifications trouble-free performance. 2 www.insigniaproducts.com - Insignia NS-FDRE44W1 | User guide - Page 3
prevent injury and property damage. Warnings and Important Safety Instructions in this manual DO NOT cover all possible conditions and situations that may other appliance. • Installation and service must be performed by a qualified installer, service agency, or the gas supplier. www.insigniaproducts.com - Insignia NS-FDRE44W1 | User guide - Page 4
User Guide. 3 Before use, the dryer must be properly installed as described in this manual. 4 ALWAYS follow the fabric care instructions supplied the appliance is used near children. 9 Before the appliance is removed from service or discarded, remove the door of the drying compartment. 10 Do not - Insignia NS-FDRE44W1 | User guide - Page 5
dryer and exhaust duct should be cleaned periodically by qualified service personnel. 22 This appliance must be grounded. See Electric quickly removed and spread out so that the heat is dissipated. SAVE THESE INSTRUCTIONS WARNING To reduce the risk of fire or explosion • Do not dry items - Insignia NS-FDRE44W1 | User guide - Page 6
details, see the Installation Instructions packed with your product before things. 4 Install and use in accordance with the manufacturer's instructions. 5 Do not place items in your dryer that have been dryer according to the manufacturer's instructions and local codes. • To reduce the risk - Insignia NS-FDRE44W1 | User guide - Page 7
INSTALLATION INSTRUCTIONS Front components Water reservoir Side plate Maintenance cover Adjustable legs (2) Back components Wiring box NS-FDRE44W1/NS-FDRE44W1-C Control panel Door Filter Fan cover Drain hose www.insigniaproducts.com 7 - Insignia NS-FDRE44W1 | User guide - Page 8
Control panel INSTALLATION INSTRUCTIONS # ITEM Power 1 Wrinkle Prevent 2 Delay 3 Time Adjust 4 Dryness , Less, or Damp. Different dry levels have different drying time. For clothes to be ironed manually, select a lower dry level. Press and hold for three seconds to save your favorite drying cycle - Insignia NS-FDRE44W1 | User guide - Page 9
INSTALLATION INSTRUCTIONS NS-FDRE44W1/NS-FDRE44W1-C # ITEM DESCRIPTION Damp Alert Press to time is determined by the moisture in your clothes. Wool, Air Fluff, Time Dry, and Refresh are Manual cycles. Start/Pause Press to start or pause the program. You can't change any 10 setting except - Insignia NS-FDRE44W1 | User guide - Page 10
INSTALLATION INSTRUCTIONS # ITEM DESCRIPTION Cycle time 5 Displays how much time is remaining in your drying cycle. If you're using a Manual cycle (Wool, Air Fluff, Time Dry, or Refresh), press Time Adjust to change the remaining time. Notes: • You cannot adjust the time when using a Sensor - Insignia NS-FDRE44W1 | User guide - Page 11
lifting or carrying your dryer. Choosing a location INSTALLATION REQUIREMENTS IMPORTANT TO THE INSTALLER Read the following instructions carefully before installing the dryer. These instructions should be kept for future reference. •The dryer is not suitable for installation in a mobile home - Insignia NS-FDRE44W1 | User guide - Page 12
INSTALLATION INSTRUCTIONS Do not install or store your dryer in an area where it will be exposed to water or weather. Keep the dryer area clear of - Insignia NS-FDRE44W1 | User guide - Page 13
INSTALLATION INSTRUCTIONS NS-FDRE44W1/NS-FDRE44W1-C Installing side-by-side, or in an alcove, closet, or other recessed area WARNING: No other fuel-burning appliance should be - Insignia NS-FDRE44W1 | User guide - Page 14
INSTALLATION INSTRUCTIONS • Front: 2 in. (5.1 cm) 48 in.² (310 cm²) 3 in. (7.6 cm) 24 in.² (155 cm²) 3 in. (7.6 cm) 14 www.insigniaproducts.com - Insignia NS-FDRE44W1 | User guide - Page 15
INSTALLATION INSTRUCTIONS NS-FDRE44W1/NS-FDRE44W1-C 1 in. (2.5 cm) 2 in. (5.1 cm) 1 in. (2.5 cm) 23.4 in. (59.5 cm) 23.4 in. (59.5 cm) 1 in. (2.5 cm) 25.7 in. (65.3 cm) 2 in. (5.1 cm) 2 in. (5.1 cm) www.insigniaproducts.com 15 - Insignia NS-FDRE44W1 | User guide - Page 16
INSTALLATION INSTRUCTIONS Installing under a counter WARNING: No other fuel-burning appliance should be installed in the same closet as the dryer. ≥35.5 in. (≥90.1 cm) 1 in. 2.5 cm - Insignia NS-FDRE44W1 | User guide - Page 17
of the NS-FWM27W1 washing machine, using the included stacking kit. See "Stacking your washer and dryer (optional)" on page 26 for stacking instructions. Leave at least two inches between your appliances' sides and any surrounding walls. Position the back of your appliances at least 2 in. (5.1 cm - Insignia NS-FDRE44W1 | User guide - Page 18
INSTALLATION INSTRUCTIONS Electric requirements WARNING: The wiring diagram is located on the . Electric models - U.S. only The dryers require a 120/240 volt, 60Hz AC approved electrical service. The electric service requirements can be found on the data label located on the back of your dryer. A 30 - Insignia NS-FDRE44W1 | User guide - Page 19
-gauge solid copper wires. • Match a three-wire outlet of NEMA Type 10-30R. • Be rated 120/240 V, minimum 10 A. See Step-by-step instructions on page 21 for instructions on how to connect a power cord to your dryer. Using a four-wire outlet If your outlet is a four-wire (four-prong) outlet, choose - Insignia NS-FDRE44W1 | User guide - Page 20
INSTALLATION INSTRUCTIONS • If a power cord is not used and the electric dryer is to be internal parts are intentionally not grounded and may present a risk of electric shock only during servicing. Service Personnel - Do not contact the following parts while the appliance is energized: main motor and - Insignia NS-FDRE44W1 | User guide - Page 21
-FDRE44W1/NS-FDRE44W1-C Step-by-step instructions Step 1: Move your dryer to the location you selected • Move your dryer to the location you selected, but do not push your dryer all the - Insignia NS-FDRE44W1 | User guide - Page 22
INSTALLATION INSTRUCTIONS 3 Tighten the strain relief screws. 4 Insert the tab on the terminal block cover into your dryer's rear panel slot, then secure the cover with a screw. - Insignia NS-FDRE44W1 | User guide - Page 23
INSTALLATION INSTRUCTIONS NS-FDRE44W1/NS-FDRE44W1-C 4 Connect the other wires to the outer terminal block screws. Make sure that you cross the screws through the terminal rings, - Insignia NS-FDRE44W1 | User guide - Page 24
INSTALLATION INSTRUCTIONS Step 3: Level your dryer • To minimize vibration, noise, and unwanted movement, the floor must be a level, solid surface. • If your dryer is not level, carefully - Insignia NS-FDRE44W1 | User guide - Page 25
INSTALLATION INSTRUCTIONS NS-FDRE44W1/NS-FDRE44W1-C 2 Disconnect the hose from the water reservoir inflow. Note: To prevent leakage, there is tension between the hose and inflow. You - Insignia NS-FDRE44W1 | User guide - Page 26
INSTALLATION INSTRUCTIONS Step 5: Plug in your dryer Important: Before you connect the power cord, review the electric requirements in Electric requirements on page 18. Before testing or - Insignia NS-FDRE44W1 | User guide - Page 27
INSTALLATION INSTRUCTIONS Stacking parts PART QUANTITY PART NS-FDRE44W1/NS-FDRE44W1-C QUANTITY 2 2 Right-angle rubber pad Connecting bracket Connecting bracket rubber 2 4 pad Support piece 4 10 Support piece rubber pad Screw 1 With two people, tip the dryer to one side. www. - Insignia NS-FDRE44W1 | User guide - Page 28
INSTALLATION INSTRUCTIONS 2 Attach two support pieces with two of the provided screws. Support pieces 3 Peel and stick one support piece rubber pad to each of the support pieces on the surface that will touch the washer top. Support piece Support piece rubber pad 28 www.insigniaproducts.com - Insignia NS-FDRE44W1 | User guide - Page 29
INSTALLATION INSTRUCTIONS NS-FDRE44W1/NS-FDRE44W1-C 4 Tip the dryer to the other side to attach two support pieces and rubber pads. 5 Turn the dryer feet counter-clockwise to retract them. 6 Remove the two screws from the back of your dryer. www.insigniaproducts.com 29 - Insignia NS-FDRE44W1 | User guide - Page 30
INSTALLATION INSTRUCTIONS 7 Attach the connecting bracket rubber pads to the inside face of the two connecting brackets. 8 Using the two connecting brackets as guides, use a 3 mm drill bit to drill holes into the washer to connect the brackets (two holes per bracket). Use the left bracket on the - Insignia NS-FDRE44W1 | User guide - Page 31
INSTALLATION INSTRUCTIONS NS-FDRE44W1/NS-FDRE44W1-C 9 Mount the connecting brackets to the back of the washer. Note: Hand tighten the screws. Don't use an electric screwdriver, and - Insignia NS-FDRE44W1 | User guide - Page 32
OPERATING INSTRUCTIONS 11 With two people, one on each side, lift the dryer up and place on top in step 9. 13 Turn the dryer feet clockwise to tighten them until the four metal support brackets come in contact with the top of the washer and your dryer is stable in position. 32 www.insigniaproducts - Insignia NS-FDRE44W1 | User guide - Page 33
NS-FDRE44W1/NS-FDRE44W1-C Using your dryer WARNING: To reduce the risk of fire, electric shock, or injury to persons, read the IMPORTANT SAFETY INSTRUCTIONS before operating this appliance. Drying a load of clothes Step 1: Turn on your dryer • Press the /POWER button to turn on your dryer. Step - Insignia NS-FDRE44W1 | User guide - Page 34
OPERATING INSTRUCTIONS 2 If you need to pause the cycle (for example to add or remove items or adjust the load), press Start/Pause, then open the door. - Insignia NS-FDRE44W1 | User guide - Page 35
OPERATING INSTRUCTIONS NS-FDRE44W1/NS-FDRE44W1-C Cleaning the lint filters WARNING: • Do not operate your dryer without the lint filter in place. • Do not use a damaged or - Insignia NS-FDRE44W1 | User guide - Page 36
USER MAINTENANCE INSTRUCTIONS Cleaning the base filter 1 Push down on both tabs simultaneously, then tilt the base filter cover forward and remove it. 2 Unlock three locking levers that - Insignia NS-FDRE44W1 | User guide - Page 37
USER MAINTENANCE INSTRUCTIONS NS-FDRE44W1/NS-FDRE44W1-C 5 Replace the base filter and lock the three locking levers. 6 Close the cover until you hear a clicking sound. Note: • Clean the - Insignia NS-FDRE44W1 | User guide - Page 38
USER MAINTENANCE INSTRUCTIONS Emptying the water reservoir Notes: • Empty the water reservoir after each use. Otherwise, the drying cycle pauses and the empty water reservoir indicator lights up. - Insignia NS-FDRE44W1 | User guide - Page 39
USER MAINTENANCE INSTRUCTIONS NS-FDRE44W1/NS-FDRE44W1-C • Small load: Fill the dryer drum with three to four items, not more than 1/4 full. • Medium load: Fill the dryer drum - Insignia NS-FDRE44W1 | User guide - Page 40
CYCLE RECOMMENDED LOAD DRYNESS WRINKLE PREVENT TIME ADJUST MAX. AMOUNT DAMP ALERT Towel • Towels • Heavy cottons Damp Less Normal • Yes More Bulky • Blankets • Sheets • Comforters Damp Less Normal • Yes More Heavy Duty • Jeans • Corduroys • Work clothes Damp Less Normal • Yes - Insignia NS-FDRE44W1 | User guide - Page 41
NS-FDRE44W1/NS-FDRE44W1-C CYCLE Active Wear Towel Bulky Heavy Duty Mixed Load MAX. LOAD WEIGHT RECOMMENDED LOAD 5 lbs. (2.3 kg) 8 lbs. (3.6 kg) 4 lbs. (1.8 kg) 8 lbs. (3.6 kg) 8 lbs. (3.6 kg) Sports clothes, chemical fiber Towels Bedsheets, comforters Jeans, skirts, thick clothes Chemical fiber - Insignia NS-FDRE44W1 | User guide - Page 42
Special laundry tips ITEMS DRYING GUIDE Bedspreads and comforters Blankets Curtains and draperies Cloth diapers to make sure that it is completely dried. • Use the cycle recommend on the care instructions or the Casual cycle and Less dryness level to help minimize wrinkling. • Dry these in small - Insignia NS-FDRE44W1 | User guide - Page 43
apply any pressure or the heat exchanger may be damaged. The dryer will not dry if the cooling fins are damaged or bent. • Follow the instructions on the label on the heat exchanger cover. The heat exchanger is behind the base filter. See Cleaning the base filter on page 36. Cleaning - Insignia NS-FDRE44W1 | User guide - Page 44
INSTALLATION INSTRUCTIONS • The control panel finish may be damaged by some laundry pre-treatment parts are intentionally not grounded and may present a risk of electric shock only during servicing. Service Personal: Do not contact the following parts while the appliance is energized: main motor - Insignia NS-FDRE44W1 | User guide - Page 45
INSTALLATION INSTRUCTIONS NS-FDRE44W1/NS-FDRE44W1-C Troubleshooting CAUTION: Do not try to repair your dryer yourself. Doing so invalidates the warranty. PROBLEM SOLUTION Dryer does not start. Dryer does not heat or does not dry. Dryer is noisy. Clothes are unevenly dried. The remaining time - Insignia NS-FDRE44W1 | User guide - Page 46
INSTALLATION INSTRUCTIONS PROBLEM SOLUTION Dryer shuts off before the clothes are dried. is not full, you can restart the dryer. • If the water full indicator is still on, contact Customer Service. • Clean the lint filters. • Empty the water reservoir. • Make sure that the drain hose (if connected - Insignia NS-FDRE44W1 | User guide - Page 47
INSTRUCTIONS NS-FDRE44W1/NS-FDRE44W1-C Understanding the error codes Your dryer is equipped with an automatic error-monitoring system to detect and diagnose problems communication error SOLUTIONS Please contact your local service center if the problem occurs. Specifications Dimensions (H × W × - Insignia NS-FDRE44W1 | User guide - Page 48
become the property of Insignia and are not returned to you. If service of Products or parts are required after the Warranty Period expires, does the warranty not cover? This warranty does not cover: • Customer instruction/education • Installation • Set up adjustments • Cosmetic damage • Damage due - Insignia NS-FDRE44W1 | User guide - Page 49
INSTALLATION INSTRUCTIONS NS-FDRE44W1/NS-FDRE44W1-C • Connection to an incorrect voltage or power supply • Attempted repair by any person not authorized by Insignia to service the Product • Products sold "as is" or "with all faults" • Consumables, including but not limited to batteries (i.e. AA, - Insignia NS-FDRE44W1 | User guide - Page 50
www.insigniaproducts.com 1-877-467-4289 (U.S. and Canada) or 01-800-926-3000 (Mexico) INSIGNIA is a trademark of Best Buy and its affiliated companies. Distributed by Best Buy Purchasing, LLC 7601 Penn Ave South, Richfield, MN 55423 U.S.A. ©2020 Best Buy. All rights reserved. V1 ENGLISH 19-0726
-
 1
1 -
 2
2 -
 3
3 -
 4
4 -
 5
5 -
 6
6 -
 7
7 -
8
-
9
-
10
-
11
-
12
-
13
-
14
-
15
-
16
-
17
-
18
-
19
-
20
-
21
-
22
-
23
-
24
-
25
-
26
-
27
-
28
-
29
-
30
-
31
-
32
-
33
-
34
-
35
-
36
-
37
-
38
-
39
-
40
-
41
-
42
-
43
-
44
-
45
-
46
-
47
-
48
-
49
-
50
 |
 |

USER GUIDE
16-Cycle 4.4 Cu. Ft.
Front Load Electric Dryer
NS-FDRE44W1/NS-FDRE44W1-C
Before using your new product, please read these instructions to prevent any damage.