Insignia NS-GSC101 Quick Setup Guide (English)
Insignia NS-GSC101 Manual
 |
View all Insignia NS-GSC101 manuals
Add to My Manuals
Save this manual to your list of manuals |
Insignia NS-GSC101 manual content summary:
- Insignia NS-GSC101 | Quick Setup Guide (English) - Page 1
of the Slim Fit Case and then snap the case onto the 3DS® XL system. REMOVING THE SLIM FIT CASE: CAUTION: Failure to follow these instructions could damage your 3DS XL system. 1 Firmly hold the 3DS XL system and pull the tab locks off. Tab locks 2 Slide the case off the - Insignia NS-GSC101 | Quick Setup Guide (English) - Page 2
CUIDADO FAVOR LEA ESTO PRIMERO AJUSTE DEL ESTUCHE DELGADO: 1 Primero, deslice el sistema 3D XL® en la parte INFERIOR del estuche delgado y encaje el estuche en el sistema 3DS® XL. DESMONTAJE DEL ESTUCHE DELGADO: CUIDADO: De no seguir estas instrucciones podría dañar su sistema 3DS XL. 1 Mantenga
-
 1
1 -
 2
2
 |
 |
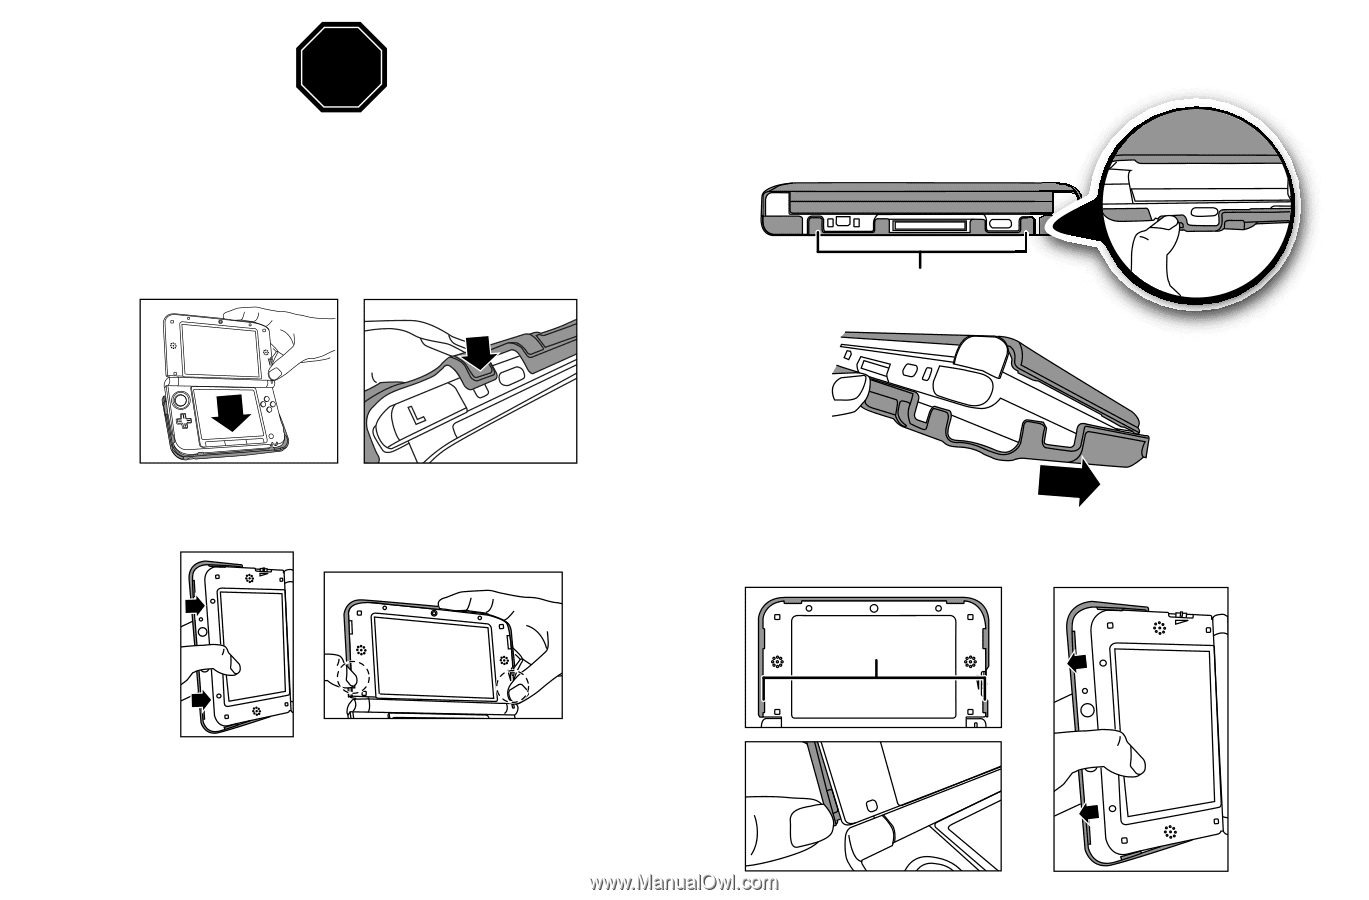
READ THIS FIRST
ATTACHING THE SLIM FIT CASE:
STOP
3D
OFF
1
Slide the 3DS XL® system bottom first into the BOTTOM piece of the Slim Fit Case
and then snap the case onto the 3DS® XL system.
2
Slide the front of the TOP piece of the Slim Fit Case onto the top of the 3DS XL®
system and then snap the case onto the 3DS XL® system.
The charging cradle cannot be used to charge the Nintendo 3DS XL with the product
attached. Please charge by plugging the DC plug of the AC adapter to the AC
adapter connector of the Nintendo 3DS XL. Also, when charging the Nintendo 3DS
XL with the DC plug of the AC adapter plugged into the AC adapter connector,
please do not open the Nintendo 3DS XL to a full 180° as it may damage the system.
CAUTION: Failure to follow these instructions could damage your 3DS XL system.
1
Firmly hold the 3DS XL system and pull the tab locks off.
2
Slide the case off the system as shown.
3
Continue to firmly hold the 3DS XL® system and locate the tab locks on the TOP
piece of the Slim Fit Case. Release the Tab Locks and remove the TOP piece of the
Slim Fit Case as shown.
REMOVING THE SLIM FIT CASE:
Tab locks
Tab locks
ld damage your 3D
ocks off
FIT
mage y
ff.
V1 ENGLISH/SPANISH 14-0074