Insignia NS-HWD1761 User Manual English
Insignia NS-HWD1761 Manual
 |
View all Insignia NS-HWD1761 manuals
Add to My Manuals
Save this manual to your list of manuals |
Insignia NS-HWD1761 manual content summary:
- Insignia NS-HWD1761 | User Manual English - Page 1
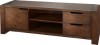
USER GUIDE GUÍA DEL USUARIO Espresso Wood Finish TV Stand for TVs up to 65" Base para televisores de hasta 65 pulg. con acabado de madera NS-HWD1761 ENGLISH 3 ESPAÑOL 24 Before using your new product, please read these instructions to prevent any damage. Antes de usar su producto nuevo, lea este - Insignia NS-HWD1761 | User Manual English - Page 2
CONTENTS/ÍNDICE DE CONTENIDO ENGLISH 3 SAFETY INFORMATION AND SPECIFICATIONS 3 PACKAGE CONTENTS: PARTS 4 PACKAGE CONTENTS: HARDWARE 5 ASSEMBLY INSTRUCTIONS 6 CARE AND MAINTENANCE 22 ONE-YEAR LIMITED WARRANTY 23 ESPAÑOL 24 INFORMACIÓN DE SEGURIDAD Y ESPECIFICACIONES 24 CONTENIDO DEL PAQUETE: - Insignia NS-HWD1761 | User Manual English - Page 3
: This product contains small items that could be a choking hazard if swallowed. Keep these items away from young children! Model #: NS-HWD1761 Maximum Supported Weights: - Top shelf: 125 lbs. (56.7 kg) - Middle shelf: 35 lbs. (15.9 kg) - Bottom shelf: 35 lbs. (15.9 kg) Maximum screen size: 65 - Insignia NS-HWD1761 | User Manual English - Page 4
NS-HWD1761 PACKAGE CONTENTS: PARTS Make sure that you have all the parts necessary to assemble your new TV stand. While not all parts are labeled, some of the parts will have a label or an inked letter on the edge to help distinguish similar parts from each other. Use this part identification to - Insignia NS-HWD1761 | User Manual English - Page 5
12 F Cam screw G B 12 1/2-in Flat head screw Cam screw C Wooden dowel 16 H D 12 1-1/2-in Phillips head screw I E Hidden cam 8 J Hinge Back panel screws Shelf support pin K Cam cover Qty. 8 4 2 26 8 10 1 2 3 4in 10 20 30 40 50 60 70 80 90 100mm www.insigniaproducts.com 5 - Insignia NS-HWD1761 | User Manual English - Page 6
NS-HWD1761 ASSEMBLY INSTRUCTIONS Step 1: Preparing the top and bottom Caution: Assemble your stand on a carpeted floor or on the empty box to avoid scratching your stand. 1 Place the - Insignia NS-HWD1761 | User Manual English - Page 7
Espresso Wood Finish TV Stand for TVs up to 65" Step 2: Preparing the left and center partitions • Insert wooden dowels (C) into the eight inside holes in the top and bottom edges of the left (5) and right (6) partitions, as shown below. You'll need: C (8) www.insigniaproducts.com 7 - Insignia NS-HWD1761 | User Manual English - Page 8
NS-HWD1761 Step 3: Attaching the partitions to the top 1 Align the tops of the left partition (5) and the right partition (6) at 90° angles to the bottom side of the top (1) (as shown), then push the partitions together with the top. 2 Push two hidden cams (A) into the large holes in the top of the - Insignia NS-HWD1761 | User Manual English - Page 9
Espresso Wood Finish TV Stand for TVs up to 65" Step 4: Attaching the bottom 1 Align the holes in the top of the bottom (4) with the wooden dowels (C) in the left and right partitions (5 and 6), then push the bottom and partitions together. 2 Use a Phillips screwdriver to secure the bottom to the - Insignia NS-HWD1761 | User Manual English - Page 10
NS-HWD1761 Step 5: Installing the legs • Attach the two legs (10) to the center holes in the bottom (4) using the pre-attached screws. Turn until snug. 10 www.insigniaproducts.com - Insignia NS-HWD1761 | User Manual English - Page 11
Espresso Wood Finish TV Stand for TVs up to 65" Step 6: Preparing the side panels • Screw four cam screws (B) into the four outside holes in the inside surfaces of the left (2) and right (3) side panels (as shown). Note: Make sure to use cam screws (B) rather than cam screws (F). Only screw the cam - Insignia NS-HWD1761 | User Manual English - Page 12
NS-HWD1761 Step 7: Attaching the left side panel 1 Align the left side panel (2) with the top and bottom (as shown), making sure the the open side of the left panel points the same direction as the legs (10), then push the side panel together with the top and bottom. 2 Push hidden cams (A) into the - Insignia NS-HWD1761 | User Manual English - Page 13
Espresso Wood Finish TV Stand for TVs up to 65" Step 8: Attaching the right side panel 1 Align the right side panel (3) with the top and bottom (as shown), making sure the the open side of the right panel points the same direction as the legs (10), then push the side panel together with the top and - Insignia NS-HWD1761 | User Manual English - Page 14
NS-HWD1761 Step 9: Attaching the back 1 Place the back (16) onto the stand assembly so that the finished surface is toward the front of the stand and the cable openings are toward the right (as shown). 2 Secure the back to the stand assembly with 22 screws (???)(I) in the pre-drilled holes, using a - Insignia NS-HWD1761 | User Manual English - Page 15
Espresso Wood Finish TV Stand for TVs up to 65" Step 10: Adding the shelves 1 Put eight shelf support pins (J) into holes in both partitions and the left side panel (as shown). Make sure that the pins are level. 2 Slide the left (7) and center (8) - Insignia NS-HWD1761 | User Manual English - Page 16
NS-HWD1761 Step 11: Attaching the hinges to the door 1 Lay the door (9) down flat on a padded surface with the hinge mounting holes facing up, then fit one hinge (H) into each mounting hole. 2 Using a Phillips screwdriver, secure the hinges (H) to the door using two 1/2-inch flat head screws (G) for - Insignia NS-HWD1761 | User Manual English - Page 17
Espresso Wood Finish TV Stand for TVs up to 65" Step 12: Attaching the door to the TV stand 1 Using a Phillips screwdriver, loosen the two pre-mounted hinge brackets (the center screw) on the left side of the TV stand, then slide the door/hinge assembly into the brackets (as shown in the detail - Insignia NS-HWD1761 | User Manual English - Page 18
NS-HWD1761 Step 13: Preparing the drawer faces 1 Lay the two drawer fronts (15) face down on a flat, padded surface. 2 Screw four cam screws (F) into the pre-drilled holes in the back of each drawer face (as shown). Note: Only screw the cam screws in to the depth of the thread. You'll need: F (8) - Insignia NS-HWD1761 | User Manual English - Page 19
Espresso Wood Finish TV Stand for TVs up to 65" Step 14: Adding the drawer sides 1 Align a left and right drawer side (11 and 12) with the drawer front (15) (as shown), then push the drawer sides together with the drawer front. 2 Push hidden cams (E) into the two large holes on the outsides of the - Insignia NS-HWD1761 | User Manual English - Page 20
NS-HWD1761 Step 15: Adding the drawer bottoms and backs 1 Slide the drawer bottom (14), finished side up, into the slots in the drawer sides (11 and 12) until it goes into the slots in the drawer fronts (15). 2 Align the drawer back (13) with the drawer sides (11 and 12) (as shown), making sure that - Insignia NS-HWD1761 | User Manual English - Page 21
Espresso Wood Finish TV Stand for TVs up to 65" Step 16: Installing the drawers in the TV stand • Slide the drawers into the drawer slides in the TV stand. www.insigniaproducts.com 21 - Insignia NS-HWD1761 | User Manual English - Page 22
Look out for: What can happen: How to avoid the problem: • Children climbing on the stand. • Children playing near instructions. • Work from the bottom to the top when loading shelves. • The middle shelf can only support 35 lbs. and the bottom shelf can only support 35 lbs. The top can support - Insignia NS-HWD1761 | User Manual English - Page 23
become the property of Insignia and are not returned to you. If service of Products or parts are required after the Warranty Period expires, does the warranty not cover? This warranty does not cover: • Customer instruction/education • Installation • Set up adjustments • Cosmetic damage • Damage due - Insignia NS-HWD1761 | User Manual English - Page 24
NS-HWD1761 ESPAÑOL INFORMACIÓN DE SEGURIDAD Y ESPECIFICACIONES CUIDADO: la parte superior de esta base está diseñada para utilizarse con productos de un peso máximo de 125 lb (56.7 kg) y teniendo un ancho que le permita asentarse de manera uniforme con un saliente no mayor de una pulgada a cada - Insignia NS-HWD1761 | User Manual English - Page 25
Metal, vidrio, y acabado de madera Base para TV CONTENIDO DEL PAQUETE: PIEZAS Asegúrese de que tenga todos los elementos necesarios para ensamblar su mueble nuevo para televisor. Aunque no todas las partes están marcadas, algunas de las partes tendrán una etiqueta o una letra marcada con tinta en - Insignia NS-HWD1761 | User Manual English - Page 26
NS-HWD1761 CONTENIDO DEL PAQUETE: FERRETERÍA Nota: la tabla a continuación le muestra la ferretería requerida. Puede ser que reciba ferretería extra. Asegúrese de que tenga todos los herrajes necesarios para el ensamblaje del mueble para su televisor. Etiqueta Ferretería Cantidad Etiqueta - Insignia NS-HWD1761 | User Manual English - Page 27
Metal, vidrio, y acabado de madera Base para TV INSTRUCCIONES DE MONTAJE Paso 1: Preparación del panel superior y las patas Cuidado: ensamble la base sobre una alfombra o la caja vacía para evitar ralladuras en la base. 1 Coloque las partes superior (1) e inferior (4) en el piso. 2 Inserte las - Insignia NS-HWD1761 | User Manual English - Page 28
NS-HWD1761 Paso 2: Montaje de los separadores izquierdo y del centro • Inserte las espigas de madera (C) en los ocho agujeros internos de los bordes de las partes superior e inferior de los separadores izquierdo (5) y derecho (6) tal como se muestra a continuación. Necesitará: C (8) 28 www. - Insignia NS-HWD1761 | User Manual English - Page 29
Metal, vidrio, y acabado de madera Base para TV Paso 3: Sujetado de los separadores a la parte superior 1 Alinee las partes superiores del separador izquierdo (5) y derecho (6) con un ángulo de 90° al lado inferior de la parte superior (1) (tal como se muestra) y empuje los separadores juntos con la - Insignia NS-HWD1761 | User Manual English - Page 30
NS-HWD1761 Paso 4: Sujetado del panel inferior 1 Alinee los agujeros en la parte superior de la parte inferior (4) con las espigas de madera (C) en los separadores izquierdo y derecho (5 y 6) y junte los separadores y la parte inferior. 2 Use un destornillador Phillips para fijar la parte inferior - Insignia NS-HWD1761 | User Manual English - Page 31
Metal, vidrio, y acabado de madera Base para TV Paso 5: Instalación de las patas • Instalar las dos patas (10) en los agujeros del centro de la parte inferior (4) usando los tornillos pre-insertados. Apriete suficientemente. www.insigniaproducts.com 31 - Insignia NS-HWD1761 | User Manual English - Page 32
NS-HWD1761 Paso 6: Preparación de los paneles laterales • Atornille cuatro tornillos de leva B) en los cuatro agujeros externos en las superficies internas de los paneles laterales izquierdo (2) y derecho (3) [tal como se muestra]. Nota: asegúrese de usarlos tornillos de leva (B) y no los tornillos - Insignia NS-HWD1761 | User Manual English - Page 33
Metal, vidrio, y acabado de madera Base para TV Paso 7: Sujetado del panel lateral izquierdo 1 Alinee el panel lateral izquierdo (2) con las partes superior e inferior (tal como se muestra), asegurándose de que el lado abierto del panel izquierdo esté orientado en la misma dirección que las patas ( - Insignia NS-HWD1761 | User Manual English - Page 34
NS-HWD1761 Paso 8: Sujetado del panel lateral derecho 1 Alinee el panel lateral derecho (3) con las partes superior e inferior (tal como se muestra), asegurándose de que el lado abierto del panel derecho esté orientado en la misma dirección que las patas (10) y junte los paneles laterales con las - Insignia NS-HWD1761 | User Manual English - Page 35
Metal, vidrio, y acabado de madera Base para TV Paso 9: Montaje del panel posterior 1 Coloque la parte posterior (16) en el armazón de la base de tal manera que la superficie acabada sea orientada hacia la parte frontal de la base y que las aperturas para los cables sean orientadas hacia la derecho - Insignia NS-HWD1761 | User Manual English - Page 36
NS-HWD1761 Paso 10: Instalación de las repisas 1 Instale ocho espigas de soporte de las repisas (J) en los agujeros en ambos separadores y el panel lateral izquierdo (tal como se muestra). Asegúrese de que las espigas estén a nivel. 2 Deslice las repisas izquierda (7) y central (8) en el armazón de - Insignia NS-HWD1761 | User Manual English - Page 37
Metal, vidrio, y acabado de madera Base para TV Paso 11: Montaje de las bisagras a la puerta 1 Coloque la puerta (9) en una superficie nivelada y acolchonada con los agujeros de montaje de las bisagras orientados hacia arriba y adapte una bisagra (H) en cada agujero de montaje. 2 Usando un - Insignia NS-HWD1761 | User Manual English - Page 38
NS-HWD1761 Paso 12: Montaje de la puerta a la base para televisor 1 Usando un destornillador Phillips, afloje los dos soportes de bisagras montados (el tornillo central) en el lado izquierdo de la base y deslice el conjunto de la puerta con las bisagras en los soportes (tal como se muestra a - Insignia NS-HWD1761 | User Manual English - Page 39
Metal, vidrio, y acabado de madera Base para TV Paso 13: Preparación de la parte frontal de las gavetas 1 Coloque las dos partes frontal de las gavetas (15) hacia abajo sobre una superficie nivelada y acolchonada. 2 Atornille cuatro tornillos de leva (F) en los agujeros pretaladrados de la parte - Insignia NS-HWD1761 | User Manual English - Page 40
NS-HWD1761 Paso 14: Montaje de las partes laterales de las gavetas 1 Alinee un lado izquierdo y derecho de gaveta (11 y 12) con la parte frontal de la gaveta (15) (tal como se muestra) y junte los lados de la gaveta con su parte frontal. 2 Inserte levas ocultas (E) en los dos agujeros grandes en los - Insignia NS-HWD1761 | User Manual English - Page 41
Metal, vidrio, y acabado de madera Base para TV Paso 15: Montaje de las partes inferiores y posteriores de las gavetas 1 Deslice la parte inferior de la gaveta (14), con el acabado hacia arriba, en las ranuras de los lados de las gavetas (11 y 12) hasta que entre en las ranuras de las partes frontal - Insignia NS-HWD1761 | User Manual English - Page 42
Paso 16: Instalación de las gavetas en la base para televisor • Deslice las gavetas en las guías para gaveta de la base para televisor. NS-HWD1761 42 www.insigniaproducts.com - Insignia NS-HWD1761 | User Manual English - Page 43
Metal, vidrio, y acabado de madera Base para TV CUIDADO Y MANTENIMIENTO Madera y laminado • Utilice su tipo de cera para muebles favorita. • No vaporice directamente la cera en el mueble. Vaporice en un paño suave cuando limpie el mueble. • Siempre pruebe la cera en un lugar discreto primero, tal - Insignia NS-HWD1761 | User Manual English - Page 44
NS-HWD1761 GARANTÍA LIMITADA DE UN AÑO Descripción: El distribuidor* de los productos de la marca Insignia le garantiza a usted, el comprador original de este producto nuevo de la marca Insignia ("Producto"), que éste se encontrará libre de defectos de material o de mano de obra en su fabricación - Insignia NS-HWD1761 | User Manual English - Page 45
certificate applies to the Insignia Product identified by this instruction booklet. 2. This certificate applies to the compliance of 1. Este certificado se aplica al producto de Insignia identificado en este manual de instrucciones. 2. Este certificado se aplica al cumplimiento de este producto
-
 1
1 -
 2
2 -
 3
3 -
 4
4 -
 5
5 -
 6
6 -
 7
7 -
8
-
9
-
10
-
11
-
12
-
13
-
14
-
15
-
16
-
17
-
18
-
19
-
20
-
21
-
22
-
23
-
24
-
25
-
26
-
27
-
28
-
29
-
30
-
31
-
32
-
33
-
34
-
35
-
36
-
37
-
38
-
39
-
40
-
41
-
42
-
43
-
44
-
45
 |
 |

ENGLISH
...........................................................................
3
ESPAÑOL
.......................................................................
24
Before using your new product, please read these instructions to prevent any damage.
Antes de usar su producto nuevo, lea este instructivo para prevenir cualquier daño.
USER GUIDE
GUÍA DEL USUARIO
Espresso Wood Finish TV Stand for TVs
up to 65”
Base para televisores de hasta 65 pulg.
con acabado de madera
NS-HWD1761