Insignia NS-PMMD22 User Guide
Insignia NS-PMMD22 Manual
 |
View all Insignia NS-PMMD22 manuals
Add to My Manuals
Save this manual to your list of manuals |
Insignia NS-PMMD22 manual content summary:
- Insignia NS-PMMD22 | User Guide - Page 1
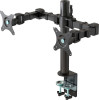
ASSEMBLY GUIDE Dual Screen Desktop Mount NS-PMMD22 Before using your new product, please read these instructions to prevent any damage. - Insignia NS-PMMD22 | User Guide - Page 2
3 Features 3 Dimensions...3 Package contents 4 VESA mount patterns 4 Installation instructions 5 STEP 1: Preparing your monitors 5 STEP 2: Attaching your monitor mount to a desktop edge 5 STEP 3: Attaching the monitor support arm 7 STEP 4: Attaching the monitors 8 STEP 5: Adjusting the - Insignia NS-PMMD22 | User Guide - Page 3
is designed for reliable and trouble-free performance. IMPORTANT SAFETY INSTRUCTIONS 1 Make sure these instructions are read and completely to be installed on a desk. Before installing, make sure the mount will support the combined load of the equipment and hardware. Never exceed the maximum load - Insignia NS-PMMD22 | User Guide - Page 4
that you have all the parts necessary to assemble your new monitor mount: Cable support brackets (pre-installed) # PART 1 Tube cover 2 Monitor support arm 3 Monitor support tube QTY. 2 1 1 # PART 4 Support base 5 Base clamp 6 Anti-slip rubber pads Hardware Make sure that you have all - Insignia NS-PMMD22 | User Guide - Page 5
100 × 100 mm (3.9 × 3.9") NS-PMMD22 Installation instructions STEP 1: Preparing your monitors 1 Make sure that your monitors You need a Phillips screwdriver for this step. 1 Align the support tube (3) bottom with the three holes in the support base (4), then secure the tube using three M6 × 20 mm - Insignia NS-PMMD22 | User Guide - Page 6
clamp (5), then tighten the screws using the 4 × 4 Allen wrench (F). Place the anti-slip rubber pads (6) on the tops of the clamp screws. 3 Slide the support base/base clamp assembly over the edge of the desk where you want your monitor mount installed, then tighten both base clamp screws by turning - Insignia NS-PMMD22 | User Guide - Page 7
your eyes. 1 Slide the monitor support arm (2) over the top of the support tube (3). Make sure that the cable support brackets are installed and evenly spaced along the monitor support arm. Cable support bracket 2 Tighten the monitor support lock when the monitor support arm is at the desired height - Insignia NS-PMMD22 | User Guide - Page 8
plates into position with the 5 x 5 Allen wrench (G), then center the back of the first monitor on the monitor plate at the end of the monitor support bar. 3 Align the mounting holes on the monitor with the holes on the monitor plate, then attach the monitor to the monitor plate using four - Insignia NS-PMMD22 | User Guide - Page 9
monitors. Use 4 x 4 Allen wrench (F) -85°~15° ±180° ±180° -85°~15° Use 5 x 5 Allen wrench (G) Monitor cables 3 Run monitor video and power cables up through the support tube and out the top through the tube cover (1). 4 Align the cables on the back side of the monitor arm, then secure them in - Insignia NS-PMMD22 | User Guide - Page 10
become the property of Insignia and are not returned to you. If service of Products or parts are required after the Warranty Period expires, cover: • Food, beverage, and or medicine loss/spoilage. • Customer instruction/education • Installation • Set up adjustments • Cosmetic damage • Damage due to - Insignia NS-PMMD22 | User Guide - Page 11
For product inquiries, please contact us with the information below: 1-877-467-4289 www.insigniaproducts.com INSIGNIA is a trademark of Best Buy and its affiliated companies. Distributed by Best Buy Purchasing, LLC 7601 Penn Ave South, Richfield, MN 55423 U.S.A. ©2022 Best Buy. All rights reserved.
-
 1
1 -
 2
2 -
 3
3 -
 4
4 -
 5
5 -
 6
6 -
 7
7 -
8
-
9
-
10
-
11
 |
 |

Before using your new product, please read these instructions to prevent any damage.
ASSEMBLY GUIDE
Dual Screen
Desktop Mount
NS-PMMD22