JVC DVM700US Instruction Manual
JVC DVM700US - DVDr / HDDr Manual
 |
UPC - 046838025716
View all JVC DVM700US manuals
Add to My Manuals
Save this manual to your list of manuals |
JVC DVM700US manual content summary:
- JVC DVM700US | Instruction Manual - Page 1
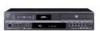
Mini DV & HDD & DVD VIDEO RECORDER SR-DVM700U TV DVD OUTPUT TV/ STANDBY/ON TV SELECT VIDEO DV HDD DVD TV PR/CH CANCEL MEMO/MARK INPUT SELECT F1 F2 EDIT PROG TOP MENU NAVIGATION ENTER MENU RETURN PREVIOUS SLOW PLAY NEXT SLOW REC STOP/CLEAR PAUSE DISPLAY ON SCREEN REC MODE/ - JVC DVM700US | Instruction Manual - Page 2
JVC Mini DV & HDD & DVD video recorder (servicing) instructions in REPAIR YOURSELF. REFER SERVICING SR-DVM700U Trade Name: JVC Responsible Party: JVC Americas Corp. Address: 1700 Valley Road Wayne, N.J. 07470 Telephone Number: 973-317-5000 This device complies with Part by one or more - JVC DVM700US | Instruction Manual - Page 3
following basic rules for its installation, use and servicing. ATTENTION: Follow and obey all warnings and instructions marked on your product and its operating instructions. For your safety, please read all the safety and operating instructions before you operate this product and keep this booklet - JVC DVM700US | Instruction Manual - Page 4
or other hazards. 4. Safety Check Upon completion of any service or repairs to this product, ask the service technician to perform safety checks to determine that the product is in safe operating condition. HOW TO USE THIS INSTRUCTION MANUAL ● All major sections and subsections are listed in the - JVC DVM700US | Instruction Manual - Page 5
environmental problems must be the unit, remote control or disc JVC shall not be liable for any loss relating to the unit's failure to properly record, store or playback any content (video, audio or otherwise) for any reason whatsoever. Any applicable warranties shall only cover replacement or repair - JVC DVM700US | Instruction Manual - Page 6
DV Dubbing (HDD & DVD Deck Only 50 Edit From A Camcorder 52 Edit To Or From Another Recorder 53 Dubbing DV Format Contents To A DV Device (HDD Deck Only 54 Digital Audio Dubbing 55 Audio Dubbing (DV Deck Only 56 Insert Editing (DV Deck Only 57 REMOTE CONTROL 58 Remote Control Functions 58 - JVC DVM700US | Instruction Manual - Page 7
, it is possible to play back the recorded programs (video and/or audio) on a standard DVD video player as a DVD VIDEO disc. ● Edited titles are displayed as the ADVD menuB in video mode. ● It is impossible to record, edit or delete the data either in video mode or in VR mode. HOME MOVIES - JVC DVM700US | Instruction Manual - Page 8
such as shown below. Examples of DVD VIDEO labels which can be played back using this unit. Marks of discs in this instruction manual Allows operation with a DVD-RAM disc. Allows operation with a Video CD/Super Video CD (SVCD) disc. Allows operation with a DVD-R disc. Allows operation with an - JVC DVM700US | Instruction Manual - Page 9
many times as possible on a disc. ● Editing can be performed after recording, such as deleting unwanted parts. ● Recording of copy once programs are possible using a CPRM compatible disc. DVD-RW (Video mode) ● Can be played back on other DVD players. ● New recording can be performed by erasing all - JVC DVM700US | Instruction Manual - Page 10
a mark even for a function it supports. Marks related to video Number of subtitles Number of angles Recorded under the standard 4:3 aspect ratio Screen Opening the disc tray Press M to open the disc tray. DVD REC EJECT DV/HDD/DVD REC MODE INSTANT REPLAY AUDIO DUB. INSERT STOP REW PLAY FF - JVC DVM700US | Instruction Manual - Page 11
a disc may hinder proper playback and recording. Also be careful that a DVD-RAM disc may get scratched or dirty when removed from cartridge then put back in after use. Storage Make sure that discs are kept in their cases. If discs are piled on top of one another without their protective cases, they - JVC DVM700US | Instruction Manual - Page 12
Recording Lamp (REC) E HDD Lamp (HDD) A pg. 20 HDD Recording Lamp (REC) F DVD Lamp (DVD) A pg. 20, 22 DVD Recording Lamp (REC) G Eject Button (M) (DVD) A pg. 10 H DV/HDD/DVD Select Button (DV/HDD/DVD TV screen respectively when EDIT or NAVIGATION is pressed while in the HDD/DVD deck mode. Press - JVC DVM700US | Instruction Manual - Page 13
A B C D EF G HDD/DVD OUTPUT INPUT L-1 S-VIDEO S-VIDEO COMPONENT VIDEO OUT SERIAL COM. VIDEO Y HDD/DVD DV/HDD/DVD DIGITAL AUDIO OUT OUTPUT L PB PCM/STREAM COAXIAL OPTICAL VIDEO AUDIO R PR VIDEO L AUDIO R OUTPUT DV/HDD/DVD S-VIDEO VIDEO L AUDIO R REMOTE IN H I J A AC Power - JVC DVM700US | Instruction Manual - Page 14
for recording with HDD, DVD-RAM, DVD-R and DVD-RW part (A-B) is played back repeatedly. No display: Repeat Playback mode is off. K Video Editing respectively. N Track/Chapter Number Display O Remaining Time/Elapsed Time Indicator A pg. 25 Lights when remaining time of HDD, DVD-RAM, DVD-R and DVD - JVC DVM700US | Instruction Manual - Page 15
Remote Control TV DVD U A OUTPUT TV/ STANDBY/ON TV SELECT VIDEO V B C W D DV HDD DVD TV X Y E PR/CH Z CANCEL MEMO/MARK F INPUT SELECT a G H F1 F2 EDIT PROG b c I TOP MENU NAVIGATION d J ENTER e K MENU RETURN f PREVIOUS L NEXT g SLOW PLAY SLOW h M i N - JVC DVM700US | Instruction Manual - Page 16
INDEX On-Screen Display (HDD & DVD deck) When ASUPERIMPOSEB is set to AONB or AAUTOB and ON SCREEN on the remote control is pressed, various operational indicators appear on the TV screen. To clear the operational indicators, press ON SCREEN twice. When playing back a recorded title HDD 0:00 1:00 - JVC DVM700US | Instruction Manual - Page 17
DV equipment FR360 12bit 0:00 HDD 00:00:00. 00 DV JVC 1:00 GR-DV3500 2:00 GR-DV3500 00:00:00. 00 DV L-R SOUND1 A Recording speed B HDD capacity graph C HDD time counter D Recording time scale E HDD mode F Remote control mode G Connected DV equipment mode H Connected DV equipment model - JVC DVM700US | Instruction Manual - Page 18
DVD Deck Only)B (A pg. 68). Connecting to a DV Device A Connect the unit's [S-VIDEO INPUT] or [VIDEO INPUT] connector on the front panel to the camcorder's s-video or video Another Recorder A Connect the unit's [S-VIDEO INPUT] or [VIDEO INPUT] connector to another recorder's s-video or video output - JVC DVM700US | Instruction Manual - Page 19
Menu screen. 2 Press selection keys to select AINITIAL SET UPB, then press G. 3 Press selection keys to select ACLOCK SETB, then press G. DVD VIDEO SET UP HDD/DVD SET UP FUNCTION SET UP MENU BACKGROUND CLOCK SET INITIAL SET UP 4 Press selection keys to select TIME --:-- ATIMEB, then press - JVC DVM700US | Instruction Manual - Page 20
then press G. 4 Press selection keys to select ALANGUAGE SETB, then press G. 5 Press selection keys to select AMENU LANGUAGEB, then press ENTER. DVD VIDEO SET UP HDD/DVD SET UP FUNCTION SET UP INITIAL SET UP LANGUAGE SET AUDIO OUTPUT DISC PLAY SET UP MENU LANGUAGE AUDIO LANGUAGE SUBTITLE ENGLISH - JVC DVM700US | Instruction Manual - Page 21
You can select the monitor type depending on the TV used when you play back DVD VIDEO discs recorded for wide-screen TVs. ● Turn on the unit. ● Turn on the TV and select the AV mode. ● Slide the TV/DVD switch to DVD. TV DVD DVD ENTER Selection Keys FGDE SET UP INITIAL SETTINGS EN 21 1 Press - JVC DVM700US | Instruction Manual - Page 22
repeatedly or DVD on the remote control so that the DVD lamp lights up on the unit. 3 Press I to start playback. ● If you load a DVD disc whose region code does not match the unit, AREGION CODE ERRORB appears on the TV screen. For details, refer to ARegion NumberB (A pg. 8). ● With Video CD/SVCD - JVC DVM700US | Instruction Manual - Page 23
DVD switch to DVD. ● Press DVD so that the DVD lamp lights up on the unit. TV DVD DVD 0-9 TOP MENU ENTER MENU S I O/SLOW o Selection Keys FGDE T N/SLOW + W Locating A Desired Scene Using The DVD Menu DVD VIDEO (A pg. 25) or beginning of recording Variable Speed Search During playback, press - JVC DVM700US | Instruction Manual - Page 24
playback position slightly. Press w on the remote control or INSTANT REPLAY on the unit. can locate a scene ahead or behind the current one by jumping scenes according to selected time intervals (A RESUMEB setting works on DVD VIDEO, VCD, SVCD and already finalized DVD-R/DVD-RW (video mode) discs. - JVC DVM700US | Instruction Manual - Page 25
the PBC function. (A pg. 26) ● For pre-recorded DVD VIDEO, only the title, chapter and elapsed time are displayed when ON SCREEN is pressed. Angle Selection You can enjoy a variety of scene angles if a DVD VIDEO disc contains Amulti-angleB parts, where the same scene was shot from different - JVC DVM700US | Instruction Manual - Page 26
Language/Sound Selection Some DVD VIDEO discs contain more than one subtitle language, from among which you can choose the desired subtitle language. AhB appears on the TV screen at the beginning of the part where more than one subtitle language are recorded. 1 Press SUBTITLE during playback - JVC DVM700US | Instruction Manual - Page 27
The On-screen Bar 1 Press ON SCREEN twice whenever a disc is loaded. Contents of the on-screen bar during playback DVD VIDEO TITLE 99 DVD- VIDEO CHAPTER 99 EACH 0:00 3D-ON CINEMA AUTO Video CD/SVCD TRACK 99 VCD EACH 0:00 CINEMA JPEG disc JPEG GROUP 99 TRACK 99 5 sec BASIC OPERATIONS ON - JVC DVM700US | Instruction Manual - Page 28
desired part you want to repeat (point A). The elapsed playing time of the point A appears. TITLE 99 DVD- VIDEO CHAPTER type of disc being used. ● The subtitles recorded around the A-B point may not appear. a wrong selection Press RETURN on the remote control and repeat the above procedures from - JVC DVM700US | Instruction Manual - Page 29
RETURN on the remote control and repeat the above procedures from step 2. To clear the on-screen bar Press ON SCREEN. NOTES: ● When A7B is displayed on the TV screen in step 3, you have selected a point that exceeds the recording time of the disc. However, for HDD; DVD-R/RW (Video mode) discs that - JVC DVM700US | Instruction Manual - Page 30
the on-screen bar. 3 Press selection keys to select A B, then press ENTER. The pop-up window appears under the selected item. TITLE 99 DVD- VIDEO CHAPTER 99 EACH 0:00 3D-ON CINEMA AUTO 4 Press selection keys to select the desired option, then press ENTER. AUTO: This mode automatically detects - JVC DVM700US | Instruction Manual - Page 31
is not a malfunction. ● Forward/reverse high-speed search and other operations cannot be performed while playback is stopped. 1 Press DV/HDD/DVD on the unit repeatedly or HDD on the remote so that the HDD lamp lights up on the unit. 2 Press I to start playback. ● The Library Database Navigation also - JVC DVM700US | Instruction Manual - Page 32
position slightly. Press w on the remote control or INSTANT REPLAY on the unit 1.5x speed playback cannot be performed during recording on HDD or DVD. 1 Press O to locate the point to You can locate a scene ahead or behind the current one by jumping scenes according to selected time intervals (A - JVC DVM700US | Instruction Manual - Page 33
on automatically. 2 Press DV/HDD/DVD on the unit repeatedly or DV on the remote control so that the DV lamp video recorder from other manufacturers may not be able to play back the tape properly. ● It is possible to play back on the DV deck and the HDD/DVD deck simultaneously. However, either DVD - JVC DVM700US | Instruction Manual - Page 34
AAUDIO MODEB under ADV SET UPB (A pg. 62). Time Code During recording, a time code is recorded on the tape. This time code is used to confirm the position on the tape when playing back or editing a tape. 1 Press DISPLAY on the remote control or the unit until the time code on the tape appears - JVC DVM700US | Instruction Manual - Page 35
TV and select the AV mode. ● Slide the TV/DVD switch to DVD. ● Press DV/HDD/DVD on the unit repeatedly to select the HDD or DVD deck. This unit records pictures onto the hard disk and DVD-RAM disc, instead of video tapes, then plays back the pictures recorded on the disc. This makes it possible to - JVC DVM700US | Instruction Manual - Page 36
this button during title editing, etc., follow the instruction to return to the previous screen. K EE CHECK You can check, for example, if the program you are recording has already finished. ● Pressing once displays the picture currently being recorded and the one being played back simultaneously - JVC DVM700US | Instruction Manual - Page 37
again. Instant Replay You can move back the playback position slightly during recording or Live Memory Playback. Press w on the remote control or INSTANT REPLAY on the unit. 8 DVD-RAM ● Pressing once during recording skips back for approximately 30 seconds and starts Live Memory Playback. While - JVC DVM700US | Instruction Manual - Page 38
can only be recorded once (copy-once title). Using Library Database Navigation system, you can easily modify registered information, edit the title or cannot record new titles any more. In this case, you need to delete old titles to register new ones. (A pg. 40) NOTES: ● Once a DVD-R/RW (Video - JVC DVM700US | Instruction Manual - Page 39
the right window. ● When you press ENTER with PROG. 1 0 : 01 : 03 SELECT IMAGE TO REPLACE WITH REPLACE ON REMOTE RETURN the arrow on ARETURNB you can return to the previous screen. 8 Press EDIT to return to the normal screen. Modify Title Name 1 Perform steps 1 - 4 of AModify IndexB above - JVC DVM700US | Instruction Manual - Page 40
several seconds between the scene you intend to edit, and the scene which is actually edited. ● Available recording capacity may not match the deleted part after deletion. ● For DVD-R discs, although it is possible to delete unwanted part of a title, available recording capacity does not increase. - JVC DVM700US | Instruction Manual - Page 41
recorded continuously. 1 Press EDIT. The Editing edit, and the scene which is actually edited. ● It is not possible to divide titles that are used in the play list. NAVIGATION ON HDD/DVD DECK EN 41 Modify Chapter (HDD, DVD-RAM & DVD 5 Press S or T to select one chapter you want to delete, press - JVC DVM700US | Instruction Manual - Page 42
for checking the contents of recorded data, category information, and more. Playback according to a play list you have created allows you to enjoy various combinations of video images from a single title. Create Play List 1 Press EDIT. The Editing screen appears. 2 (DVD deck only) Press selection - JVC DVM700US | Instruction Manual - Page 43
to select one play list you want to delete, then press ENTER. 5 Press selection keys to select ADELETEB, then press ENTER. ● When you cancel the deletion, select ACANCELB, then press ENTER. 6 Press EDIT to return to the normal screen. NOTE: Even if a play list is deleted, the titles recorded and the - JVC DVM700US | Instruction Manual - Page 44
to the normal screen. NOTES: ● It is not possible to register discs formatted on devices other than JVC's DVD recorders. ● It is not possible to register discs recorded on devices other than JVC's DVD recorders. ● It is not possible to register discs when ASAVE AS LIBRARYB is set to AOFFB. (A pg. 61 - JVC DVM700US | Instruction Manual - Page 45
/WMA/JPEG Navigation enables you to search and select the desired files recorded on CD-R/RW or CD-ROM discs very easily. ● Turn on the TV and select the AV mode. ● Slide the TV/DVD switch to DVD. ● Press DVD to select the DVD deck. NAVIGATION > ORIGINAL (INSERTED DISC) TRACK: 001/010 01-Whose Side - JVC DVM700US | Instruction Manual - Page 46
not possible to dub the following programs to DVD-R/RW disc (Video mode): ● which contains more than one audio language. ● which is on the play list. ● which is edited (also RetroActive Recording). ● which is recorded in LP mode or FR155-FR240 mode. ● Recording may not be performed in the highest - JVC DVM700US | Instruction Manual - Page 47
is not possible to dub pre-recorded DVD VIDEO discs. ● It is not possible to dub Video CDs/SVCDs or Audio CDs. ● It is not possible to dub from +R/+RW discs. ● It is not possible to discontinue dubbing once it has been started. EDITING EN 47 Dubbing From DVD To DV It is possible to perform - JVC DVM700US | Instruction Manual - Page 48
ON SCREEN and AUDIO buttons are functional. Dubbing From DV To HDD (Dubbing A Part of A Cassette) It is possible to select the images on the DV cassette recorded programs of a cassette from the DV deck to the DVD deck using the AENTIREB dubbing. You cannot select the images to be dubbed; all recorded - JVC DVM700US | Instruction Manual - Page 49
functional. Dubbing From DV To DVD (Dubbing A Part Of A Cassette) It is possible screen. Dubbing will resume once recorded portion is detected. If the EDITING EN 49 About Disc Remaining Display When dubbing from HDD to DVD the bar meter. When performing the Manual Dubbing MAX FR240 ● The unit displays - JVC DVM700US | Instruction Manual - Page 50
on the unit's front panel. 2 Press DV/HDD/DVD on the unit repeatedly; or press HDD or DVD on the remote control to select the recording deck. ● When dubbing to a DVD disc, load a recordable disc on this unit. 3 Press INPUT SELECT +/- on the remote control or INPUT SELECT on the unit to set the - JVC DVM700US | Instruction Manual - Page 51
unwanted pictures may be recorded at the beginning of the recorded program. D Perform steps 9 - 12. To skip unwanted part of the source picture , then press ENTER to restart dubbing. Recording Mode MPEG2 format is used as recording format. As a guide for picture quality, the AbpsB unit is - JVC DVM700US | Instruction Manual - Page 52
connector. ● When using your unit as the source player, refer to the camcorder's instruction manual for the recording procedure. 2 Press DV/HDD/DVD on the unit repeatedly to select the recording deck. 3 Press INPUT SELECT +/- on the remote control or INPUT SELECT on the unit to select AF-1B or ADVB - JVC DVM700US | Instruction Manual - Page 53
its instruction manual. ● It is not possible to dub copy-protected contents. An error message will appear on the TV screen. A When using your unit as the source player TV Player Your unit Another recorder Recorder B When using your unit as the recording deck TV Recorder Your unit EDITING EN - JVC DVM700US | Instruction Manual - Page 54
54 EN EDITING Dubbing DV Format Contents To A DV Device (HDD Deck Only) You can dub programs recorded in DV mode on the HDD 2 Press DV/HDD/DVD on the unit repeatedly or HDD on the remote so that the HDD lamp lights up on the unit. 3 Press INPUT SELECT +/- on the remote control or INPUT SELECT on - JVC DVM700US | Instruction Manual - Page 55
to DVD. Example: Dubbing to an MD Recorder Digital audio device (MD deck, etc.) Coaxial cable (not supplied) Optical cable (not supplied) Player To [DIGITAL AUDIO OUTPUT (COAXIAL)] To [DIGITAL AUDIO OUTPUT (OPTICAL)] EDITING EN 55 1 Connect the unit and a digital audio device using either - JVC DVM700US | Instruction Manual - Page 56
DV cassette with the erase protection switch set to ARECB. 3 Press DV/HDD/DVD on the unit repeatedly or DV on the remote so that the DV lamp lights up on the unit. 4 Press INPUT SELECT +/- on the remote control or INPUT SELECT on the unit to select AF-1B. 5 Start playback slightly - JVC DVM700US | Instruction Manual - Page 57
Editing (DV Deck Only) Insert Editing replaces the pictures with new ones, while the audio soundtrack remains unchanged. For Insert Editing, use your unit as the recording deck. ATTENTION: Insert Editing is not possible with a Mini DV cassette recorded in LP mode. A If the player has no S-VIDEO - JVC DVM700US | Instruction Manual - Page 58
have to repeat this step until you replace your remote control's batteries. ● Some brands of TVs have more than one code. If the TV does not function with one code, try entering another. 3 Press the corresponding buttons to operate the TV: A, TV/ VIDEO, PR/CH +/-, TV8 +/-, TV d, number keys. ● For - JVC DVM700US | Instruction Manual - Page 59
Decoder Or An Amplifier With Built-in DTS These instructions enable you to connect your unit to a Dolby the audio channel of a bilingual program recorded on a DVD-RAM or DVD-R/ RW (VR mode) disc. In this case, perform the following steps using the remote control to switch ADIGITAL AUDIO OUTB from - JVC DVM700US | Instruction Manual - Page 60
/ TV MODE The dynamic range (the difference between the loudest sound and the quietest one) can be compressed during playback of a program encoded in Dolby Digital format. This function takes effect when a DVD VIDEO disc recorded in Dolby Digital format is played back at low or middle volume. NORMAL - JVC DVM700US | Instruction Manual - Page 61
DVD discs in video mode. If the titles you want to dub are recorded in both 16:9 and 4:3, you must select one aspect ratio. PRIORITIZE 4:3: If you select APRIORITIZE 4:3B, even a title recorded you use this unit as the source player for editing, be sure to set ASUPERIMPOSEB to AOFFB before starting - JVC DVM700US | Instruction Manual - Page 62
:9FIX You can select the monitor type depending on the TV used when you play back DVD VIDEO discs recorded for wide-screen TVs. For details, refer to AMonitor SetB (A pg. 21). 8 FRONT AUX F-1 ^ VIDEO / S-VIDEO Select the appropriate mode depending on the connector (F-1) being used on the front panel - JVC DVM700US | Instruction Manual - Page 63
erase all the data on the disc once played back to record new data, or play back the disc on other DVD players. 3 Press selection keys to select AEXECUTEB, then press ENTER. NOTES: ● It is impossible to format Version 1.0 DVD-RW discs in Video mode. ● All the titles on a disc will be deleted once - JVC DVM700US | Instruction Manual - Page 64
-R disc. ● It is impossible to record or edit DVD-R/RW discs recorded on other devices even if they have not been finalized. After finalizing (For DVD-R/RW (Video mode) discs) ● Video and audio that have been recorded by then are recorded in conformity to the DVD Video standard, enabling you to play - JVC DVM700US | Instruction Manual - Page 65
the condition that the Main Menu, Editing, Library Database Navigation or Dubbing screen is not displayed. ● The direct access (F2) function will not work in the following cases, and an operation prohibition mark A B appears on the TV screen. ● During DVD recording or playback. ● Disc is not loaded - JVC DVM700US | Instruction Manual - Page 66
with your own created backgrounds. Up to 18 backgrounds can be replaced. Besides the background, you can also change the text color message will appear if the disc is not loaded; playback or recording in progress on the DVD deck; disc other than UDF2.0 DVD-RAM or CD-R/RW is loaded, or when a blank CD - JVC DVM700US | Instruction Manual - Page 67
color you have selected before proceeding with finalization. This preview function is only possible when finalizing a DVD-R/RW (Video mode) disc. After selecting a background in step 8 of AFinalize A DVD-R/RW DiscB (A pg. 64): A Press selection keys to select APREVIEWB, then press ENTER. ● A preview - JVC DVM700US | Instruction Manual - Page 68
lines of a picture at one time, as a single frame. This system can convert the interlaced video from DVD into progressive format for . AUNLOCKB appears on the front display panel. Mode Lock During playback or recording, press and hold F1 for more than 5 seconds. ALOCKB appears on the front display - JVC DVM700US | Instruction Manual - Page 69
Before requesting service for a problem, use this chart and see if you can solve the trouble yourself. Small problems are often easily solved, and this can save you the trouble of sending your unit off for repair. Initializing (DVD Deck Only) Malfunction occurs on the unit. ] Press A to turn off the - JVC DVM700US | Instruction Manual - Page 70
EN TROUBLESHOOTING ● A finalized DVD-R disc is loaded. ] Recording cannot be made on finalized discs. Load a recordable disc on the unit. ● The disc is full or does not have enough space for the title to be recorded. ] Clear unnecessary titles on the disc or load a blank disc. (A pg. 40) ● The DVD - JVC DVM700US | Instruction Manual - Page 71
DVD Deck Only) DISC NOT REGISTERED IN THE LIBRARY REGISTER DISC? ● A disc that is not registered in the library has been inserted. Register the disc as necessary. (A pg. 44) TITLE MEMORY IS FULL, UNABLE TO RECORD DELETE UNWANTED TITLE ● Recording and/or editing (A pg. 8) TROUBLESHOOTING EN 71 COULD - JVC DVM700US | Instruction Manual - Page 72
SA Sanskrit SD Sindhi SG Sangho SH Serbo-Croatian SI Singhalese SK Slovak SL Slovenian SM Samoan SN Shona SO Somali SQ Albanian SR Serbian SS Siswati ST Sesotho SU Sundanese SW Swahili TA Tamil TE Telugu TG Tajik TH Thai TI Tigrinya TK Turkmen TL Tagalog - JVC DVM700US | Instruction Manual - Page 73
Select Preset Tc Data Sense 9 A BC D E F ACK NAK Play Stop Still Date Preset Clock Preset UP DOWN RIGHT LEFT Next Title Prev Title Remote Data FF REW Fwd Field Rev Field Step Step Select Sense Date Data Sense ClockData Sense Rec Rec Pause CTL Data Sense JVCStatus Sense - JVC DVM700US | Instruction Manual - Page 74
to the next chapter. Functions like the T button on the remote control. (HDD/DVD Deck) 96 Returns to the previous chapter. Functions like the S button on the remote control. (HDD/DVD Deck) 97 Displays/Closes the Main Menu, Editing, Library Database Navigation or Dubbing screen. 97 N 30: Closes - JVC DVM700US | Instruction Manual - Page 75
selecting HDD deck. F0 N 38: For selecting DVD deck. FA Rec Request: For issuing approval for recording. This can be cleared using STOP. 42 or B2: CueUp with Data Cue Position 1st Byte Hr (Tens) 2nd Byte Hr (Ones) 3rd Byte Min (Tens) 4th Byte Min (Ones) 5th Byte Sec (Tens) 6th Byte Sec - JVC DVM700US | Instruction Manual - Page 76
Byte 2nd Byte 3rd Byte 4th Byte Title Search (ORIGINAL) 30 Hundreds Tens Ones ASCII codes (30 - 39) 30 3* 3* 3* E.g. (345) 30 (A pg. 43) 8E: Date Preset 1st Byte 2nd Byte Date Preset Mth (Tens) Mth (Ones) ASCII code (30 - 39) 3* 3* E.g. (01.17.2006) 30 31 E.g.: When - JVC DVM700US | Instruction Manual - Page 77
remote control codes for controlling the VTR (similar to wired remote control) via RS-232C is as shown in the following table. The codes apply to all three DV, HDD and DVD PAUSE D4 RETURN D6 DV/HDD/DVD D8 JOG-1 D9 JOG-1/6 DA JOG +1/6 DB JOG +1 DC INSTANT REPLAY DD EDIT E0 NAVIGATION E1 L1 Y/C INPUT - JVC DVM700US | Instruction Manual - Page 78
232C INTERFACE B8: Input/Output Selection External input selection Output selection L-1 VIDEO L-1 S-VIDEO F-1 VIDEO F-1 S-VIDEO DV Common output Mandatory DV output 1st Byte 30 30 30 30 30 32 32 2nd Byte 31 39 35 3D 34 30 38 B8: Recording Mode Selection 1st Byte XP 34 SP 34 LP 34 EP 34 - JVC DVM700US | Instruction Manual - Page 79
43 RW 44 SA 45 SD 46 SG 47 SH 48 SI 49 SK 4A SL 4B SM 4C SN 4D SO 4E SQ 4F SR 50 SS 51 ST 52 SU 53 SW 54 TA 55 TE 56 TG 57 TH 58 TI 59 TK 5A TL 5B TN 5C - JVC DVM700US | Instruction Manual - Page 80
43 RW 44 SA 45 SD 46 SG 47 SH 48 SI 49 SK 4A SL 4B SM 4C SN 4D SO 4E SQ 4F SR 50 SS 51 ST 52 SU 53 SW 54 TA 55 TE 56 TG 57 TH 58 TI 59 TK 5A TL 5B TN 5C - JVC DVM700US | Instruction Manual - Page 81
number.* (HDD/DVD Deck) 61 Title/Track Sense: DVD Deck) B9 Select Sense: For acquiring the status of the inputs, outputs, recording the total remaining time in the current recording mode when there is a media in is a media in the selected deck.* DD JVC Status Sense: Returns data from the unit.* * - JVC DVM700US | Instruction Manual - Page 82
is as follows: External input selection N L-1 S-VIDEO Output selection N Common output Recording mode selection N SP Audio language selection N 1st Byte 2nd Byte 3rd Byte 4th Byte Date Sense Mth (Tens) Mth (Ones) Day (Tens) Day (Ones) BE 3* 3* 3* 3* E.g. (01.17.2006) 30 31 31 37 - JVC DVM700US | Instruction Manual - Page 83
/DVD DV HDD/DVD 0 (Fixed) 1 (Fixed) 1 (Fixed) Video EE Video EE 0 (Fixed) 0 (Fixed) 0 (Fixed) 0 (Fixed) 1 (Fixed) Audio EE Audio EE 0 (Fixed) 0 (Fixed) 0 (Fixed) 0 (Fixed) 0 (Fixed) 0 (Fixed) 0 (Fixed) 0 (Fixed) 0 (Fixed) Record Forbidden Record Forbidden Record Forbidden - JVC DVM700US | Instruction Manual - Page 84
8th Byte Frame (Ones) 3* 30 JVC Status Sense DD JVC SENSE bit7 bit6 bit5 bit4 bit3 bit2 bit1 bit0 1byte 2byte 3byte 4byte DV HDD/DVD DV 1 (Fixed) 1 (Fixed) 0 (Fixed) 0 (Fixed) 0 (Fixed) 0 (Fixed) 0 (Fixed) 0 (Fixed) 1 (Fixed) During Playback of LP 0 (Fixed) Recorded Tape 0 (Fixed - JVC DVM700US | Instruction Manual - Page 85
video input: Y: 0.8 - 1.2 Vp-p, 75 K C: 0.2 - 0.4 Vp-p, 75 K S-video output: Y: 1.0 Vp-p, 75 K C: 0.3 Vp-p, 75 K DV: 4-pin for DV IN/OUT Remote Input: R3.5 mm Jack Serial Command: D-SUB 9-PIN Component video digital audio output setting menu VIDEO/AUDIO (DVD Deck) Recording time Maximum 8 hours (with - JVC DVM700US | Instruction Manual - Page 86
61 Discs For Playback Only 8 DV Native Format Recording to HDD 48 DVCAM 33 DVD menu 23 F File Structure Of Discs 9 Free Editing 42 Playback Control (PBC 26 Program Playback 30 Progressive scan 68 R Random Playback 30 Recordable/Playable Discs 7 Recording Medium And Format 9 Recording - JVC DVM700US | Instruction Manual - Page 87
MEMO EN 87 - JVC DVM700US | Instruction Manual - Page 88
EN SR-DVM700U © 2006 Victor Company of Japan, Limited US Printed in China 0706MNH-SW-BJ
-
 1
1 -
 2
2 -
 3
3 -
 4
4 -
 5
5 -
 6
6 -
 7
7 -
8
-
9
-
10
-
11
-
12
-
13
-
14
-
15
-
16
-
17
-
18
-
19
-
20
-
21
-
22
-
23
-
24
-
25
-
26
-
27
-
28
-
29
-
30
-
31
-
32
-
33
-
34
-
35
-
36
-
37
-
38
-
39
-
40
-
41
-
42
-
43
-
44
-
45
-
46
-
47
-
48
-
49
-
50
-
51
-
52
-
53
-
54
-
55
-
56
-
57
-
58
-
59
-
60
-
61
-
62
-
63
-
64
-
65
-
66
-
67
-
68
-
69
-
70
-
71
-
72
-
73
-
74
-
75
-
76
-
77
-
78
-
79
-
80
-
81
-
82
-
83
-
84
-
85
-
86
-
87
-
88
 |
 |

DV
HDD
DVD
DVD
TV
PR/CH
INPUT SELECT
PAUSE
REC
REC MODE/
REMAIN
DISPLAY
ON SCREEN
AUDIO
SUBTITLE
ANGLE/
EE CHECK
PROGRESSIVE
SCAN
SLOW
SLOW
PLAY
STOP/CLEAR
NAVIGATION
TOP MENU
RETURN
ENTER
MENU
STANDBY/ON
TV
TV
/
VIDEO
OUTPUT
SELECT
TV
CANCEL
MEMO/MARK
PROG
EDIT
F2
F1
SET UP
DUBBING
EE
NEXT
PREVIOUS
NTSC
EJECT
EJECT
DISPLAY
STANDBY/ON
DV/HDD/DVD
REC MODE
INSTANT REPLAY
AUDIO DUB.
INSERT
S-VIDEO
IN F-1
VIDEO (MONO)L - AUDIO - R
REC
DVD
REC
HDD
REC
DV
DV IN/ OUT
REC
PAUSE
PLAY
INPUT
SELECT
OUTPUT
SELECT
FF
REW
STOP
LPT1135-001A
EN
Mini DV & HDD & DVD VIDEO RECORDER
INSTRUCTIONS
SR-DVM700U
For Customer Use:
Enter below the Model No. and Serial
No. which are located on the rear of
cabinet. Retain this information for
future reference.
Model No.
Serial No.