JVC EX A10 Instructions
JVC EX A10 - DVD Executive Microsystem Manual
 |
UPC - 046838022005
View all JVC EX A10 manuals
Add to My Manuals
Save this manual to your list of manuals |
JVC EX A10 manual content summary:
- JVC EX A10 | Instructions - Page 1
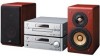
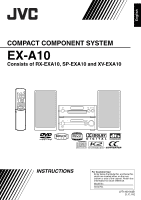
English COMPACT COMPONENT SYSTEM EX-A10 Consists of RX-EXA10, SP-EXA10 and XV-EXA10 INSTRUCTIONS For Customer Use: Enter below the Model No. and Serial No. which are located either on the rear, bottom or side of the cabinet. Retain this information for - JVC EX A10 | Instructions - Page 2
maintenance (servicing) instructions in the literature accompanying the appliance. (For U.S.A.) (For U.S.A.) INFORMATION This equipment has been tested and found help. (For U.S.A.) Note to CATV system installer: This reminder is provided to call the CATV system installer's attention to Section 820-40 - JVC EX A10 | Instructions - Page 3
disconnect the mains line. • When the system is on standby, the STANDBY lamp lights red. • When the system is turned on, the STANDBY lamp goes lighted candles, on the apparatus. • When discarding batteries, environmental problems must be considered and local rules or laws governing the disposal of - JVC EX A10 | Instructions - Page 4
(continued) (For U.S.A. or Canada models) IMPORTANT FOR LASER PRODUCTS / IMPORTANT POUR PRODUITS LASER 1. CLASS 1 LASER PRODUCT 2. CAUTION: Do not open the top cover. There are no user serviceable parts inside the unit; leave all servicing to qualified service personnel. 3. CAUTION: VISIBLE AND - JVC EX A10 | Instructions - Page 5
BORNE CORRESPONDANTE DE LA PRISE ET POUSSER JUSQUAU FOND. For Canada/pour le Canada THIS DIGITAL APPARATUS DOES NOT EXCEED THE CLASS B LIMITS FOR entrée d'air adéquate pour la ventilation en plaçant l'appareil sur un support avec une hauteur d'au moins 10 cm (3 15 16 ″). De plus, - JVC EX A10 | Instructions - Page 6
system 14 Setting the clock 15 Dimmer 16 Adjusting the volume 16 Turning off the sound temporarily (MUTING) ... 16 Adjusting the sound quality 16 Adjusting the bass in the display window ......23 Selecting a chapter/track using the number buttons 23 Stopping playback 23 Pausing playback 24 - JVC EX A10 | Instructions - Page 7
NOTE * The AC plug adaptor is not supplied for U.S.A. and Canada models. CAUTION • Do not fold the optical digital cord as this may damage the inner wire. How to read this manual • This manual explains the operations assuming that you will use the remote control. Some buttons on the receiver or the - JVC EX A10 | Instructions - Page 8
, 28 Rear panel 10 13 45 10 20 20, 28 20, 24 10 47 12 12 12 Display window The receiver and the DVD player use the same design for their display windows. 21, 22 34, 35 13 21, 22 21, 27 28 30 30 31 31 21, 22, 29 21 - JVC EX A10 | Instructions - Page 9
Display window" shown below. 5 18 13, 14 14, 18 16 * 17 18, 20, 41 * This terminal is for connecting a pair of headphones equipped with a stereo plug (not supplied). When the headphones are connected, the speakers do not produce any sound. Rear panel 12 10 10 9, 11 10 7 11 12 8 13 - JVC EX A10 | Instructions - Page 10
remote control sensor on the receiver or the DVD player decreases, replace the batteries. Use two R6P (SUM-3)/AA(15F) type dry-cell batteries. CAUTION • Do not use a used battery and a new battery together. • Do not use different types of batteries at the same time. • Take out the batteries if the - JVC EX A10 | Instructions - Page 11
your TV using the remote control of this system. TV CHANNEL TV and the remote control properly. Manufacturer Code JVC 01 Hitachi 10 Magnavox 02 Mitsubishi 03 Panasonic 04 the TV. Turns on/off the TV. Changes the channels. Adjusts the volume. ~/ / Selects the channels. Switches the *1 - JVC EX A10 | Instructions - Page 12
Connections Standard setup Preparation Do not turn on the power until you complete the connection. DVD player Speaker Receiver Speaker Connecting the antennas Connecting the AM loop antenna (supplied) 1 Set up the AM loop antenna. 2 Connect the antenna cord. Receiver (rear panel) White Black - JVC EX A10 | Instructions - Page 13
, an FM feeder antenna (not supplied: compatible with 300 C) can be used. In this case, a converter (not supplied) is required. When using an antenna other than those supplied with this system, refer to the operation manuals for the antenna and converter for details of connection. When positioning - JVC EX A10 | Instructions - Page 14
supplied receiver as parts of the EX-A10 system. Do not connect the supplied speakers cord connection spoils the stereo effect and sound quality. set up the speakers following the instructions below. 1. Turn off the main The speakers employ natural wood for the diaphragm and the cabinet in - JVC EX A10 | Instructions - Page 15
Preparation Connecting the receiver and the DVD player Make sure to connect the three supplied cords. DVD player (rear panel) Synchronization cord (supplied) Optical digital cord (supplied) Audio cord (supplied) CAUTION • Do not fold the optical digital cord as this may damage the inner wire. - JVC EX A10 | Instructions - Page 16
-built-in subwoofer, you can use the audio cord.) Amplifier-built-in subwoofer (not supplied) Receiver (rear panel) NOTE • The impedance of speakers connected to this system must be within the range 6 C to 16 C. • When connecting the supplied speakers to the receiver, hold down BASS ADJUST on the - JVC EX A10 | Instructions - Page 17
video cord (supplied) Connecting a TV with the S-VIDEO terminal TV DVD player (rear panel) To S-video terminal S-video cord (not supplied) Connecting a TV with the COMPONENT VIDEO OUT terminals TV DVD player (rear panel) To - JVC EX A10 | Instructions - Page 18
player. • Select "PROGRESSIVE" when a TV equipped with a component terminal and compatible with progressive video signals is connected to the contact your local JVC customer service center. • All JVC-manufactured progressive TVs and highdefinition TVs are fully compatible with this system. • Even if - JVC EX A10 | Instructions - Page 19
mode selector F AUDIO F DVD AUX MUTING AUDIO VOLUME +/ - 8 5///2/3 (cursor)/ ENTER CLOCK/ TIMER SET BASS +/ - Number buttons CANCEL BASS ADJUST TREBLE +/ - Basic operations Turning on/off the system Receiver 1 Slide the remote control mode selector to RECEIVER. 2 Press F AUDIO (or F on the - JVC EX A10 | Instructions - Page 20
RECEIVER. 2 Press CLOCK/TIMER. Example: Display on the receiver (for U.S.A. or Canada models) 3 Press 2 or 3 (cursor) to select the hour. • Hold 16) Adjusting the clock Press CLOCK/TIMER twice to display the clock, and then adjust the clock starting from step 3. Displaying the clock when using the - JVC EX A10 | Instructions - Page 21
on the receiver. DISPLAY ON DISPLAY OFF Adjusting the volume 1 Slide the remote control mode VOLUME +/-. • The volume can also be adjusted by turning the VOLUME control on the receiver. will come out from the speakers, headphones and the subwoofer. • Press MUTING again to restore the sound. When - JVC EX A10 | Instructions - Page 22
Basic operations (continued) For the locations of the remote control buttons, refer to page 14. Adjusting the bass sound 1 Slide the remote control mode selector to RECEIVER. 2 Press BASS ADJUST. Display on the receiver 3 While the selectable values are flashing, press 2 or 3 (cursor) to select - JVC EX A10 | Instructions - Page 23
according to the country where you will use the system. This function is not designed for U.S.A. and Canada models. On the receiver ONLY: SEARCH the receiver also enables you to select the radio station. • If an FM stereo broadcast is difficult to hear because of noise, you may be able to hear - JVC EX A10 | Instructions - Page 24
the preset number is flashing, press PRESET or PRESET to select the preset number you want to use. • You can also select the preset number by using the number buttons. (Refer to "Using the number buttons". (A page 15)) 4 Press MEMORY or ENTER while the selected number is flashing. • "STORED" will - JVC EX A10 | Instructions - Page 25
hold down DVD, the playback changes among "DVD-DIGITAL", "DVD-ANALOG" and "DVD-AUTO". Return to the initial setting ("DVD-AUTO") when using the XV-EXA10. • Depending on the disc, the actual operation may be different from the description. • When you select a source other than a DVD during playback - JVC EX A10 | Instructions - Page 26
the track list. • Press 2 (cursor) to go back to the group list. 5 Press 5// (cursor) to select a track. 6 Press 3 (play) or ENTER. NOTE • You can also use GROUP/TITLE or in step 3 and PREVIOUS 4 or NEXT ¢ in step 5. In this case, you can skip step 4. • The number buttons can also be - JVC EX A10 | Instructions - Page 27
VCD. To play back a disc without the PBC function, follow the instructions below. • Specify the track number using the number buttons when the disc is stopped. Refer to "Using the number buttons" (A page 15). • Specify the track number using PREVIOUS 4 or NEXT ¢ when the disc is stopped, and then - JVC EX A10 | Instructions - Page 28
/group number/track number ■ASF/DivX/MPEG1/MPEG2 disc Normal display (as shown on page 22) File type/group number/track number Selecting a chapter/track using the number buttons (PBC off) 7 When a disc is played back 1 Slide the remote control mode selector to DVD - JVC EX A10 | Instructions - Page 29
Hold down PREVIOUS 4 or NEXT¢. • Fast reverse/fast forward search can be used only while the button is pressed. NOTE • For some discs, sound is intermittent the Region Code of the DVD does not match the code the DVD player supports. (A page 47) Appears when no disc is loaded. Appears when the disc - JVC EX A10 | Instructions - Page 30
) to skip to the beginning of a track while you are viewing the TV screen. • You cannot use this function for some discs. Guide icons displayed on the TV screen (on-screen guide) Play Pause Fast reverse/fast forward search Slow motion playback (reverse/ forward directions) Containing multi-view - JVC EX A10 | Instructions - Page 31
remote control buttons, refer to page 20. Resuming playback Playing back DVDs/CDs You can skip within a file at about 5 minute intervals. This is useful especially when you want to skip within a long file. 7 When a disc is played back 1 Slide the remote control mode selector to DVD. 2 Press 2 or - JVC EX A10 | Instructions - Page 32
menu screen has a couple of pages, press PREVIOUS 4 or NEXT ¢ to change the page (only for a VCD and SVCD). 4 Press ENTER. NOTE • You cannot use this function for a disc without a menu screen. • Playback may start for some discs without pressing ENTER. 7 When a disc is stopped or played back 1 Slide - JVC EX A10 | Instructions - Page 33
holding down 7 on the DVD player, press 0 on the DVD player. • "LOCKED" appears in the display window on the DVD player. Releasing Follow the same instructions as those for setting. • "UNLOCKED" appears in the display window on the DVD player. (Continued on the next page) 28 - JVC EX A10 | Instructions - Page 34
Convenient functions of the DVD player (continued) 3 Press the number buttons to program chapters/tracks. • Refer to "Using the number buttons" (A page 15). ■Display on the DVD player for DVD VIDEO • Select a title number, and then a chapter number. Title indicator Chapter indicator Title - JVC EX A10 | Instructions - Page 35
if PREVIOUS 4 is pressed repeatedly during random playback. (Playback will be returned to the beginning of the current chapter or track.) NOTE • You cannot use the random playback function for some DVD VIDEOs. (PBC off) 7 When a disc is played back 1 Slide the remote control mode selector to DVD - JVC EX A10 | Instructions - Page 36
can be cancelled by following the operations below. • Press 7. • Select A-B and press ENTER twice. (Select OFF .) NOTE • You can use A-B repeat playback only within the same title or track. • You cannot use A-B repeat playback during program playback, random playback or repeat playback. • You cannot - JVC EX A10 | Instructions - Page 37
the operation with displays of a DVD VIDEO as examples. You can use discs of other types in almost the same manner. 7 When a disc ", "L" and "R" displayed when playing back a VCD, SVCD or DVD VR respectively represent "Stereo", "Left sound" and "Right sound". • For a DivX disc, only the number of - JVC EX A10 | Instructions - Page 38
by pressing 5// (cursor). 3 Press ENTER. • The angle setting will change automatically in a few seconds even if ENTER is not pressed. NOTE • You can use this function with the menu bar (A page 36). Magnifying the picture (ZOOM) (only for moving image) 7 When a disc is played back or paused 1 Slide - JVC EX A10 | Instructions - Page 39
the brightness of dark and bright portions. • The "SHARPNESS" setting adjusts the screen sharpness. 3 Press 2/3 (cursor) to select VFP mode AUDIOs with a special group, called "bonus group", recorded. NOTE • You can use this function when "BONUS" lights up in the display window on the DVD player. - JVC EX A10 | Instructions - Page 40
button, the still picture will be changed. You can also switch the picture using 5// (cursor). Example: TV screen 3 Press ENTER. • The picture setting relaxing, natural atmosphere. • Select "THEATER" to enjoy a sound effect as if you were watching the movie in a theater. • Select "3D PHONIC OFF" - JVC EX A10 | Instructions - Page 41
Playing back DVDs/CDs Using the status bar and the menu bar 7 When a disc is played back 1 Slide the remote control mode selector to DVD. 2 Press ON SCREEN DivX/MPEG1/MPEG2 disc) Repeat mode status NOTE • The playback status has the same meaning of the mark on the on-screen guide (A page 25). 36 - JVC EX A10 | Instructions - Page 42
selector to DVD. 2 Press ON SCREEN twice. • The menu bar will appear (A page 36). 3 Press 2/3 (cursor) to select . 4 Press ENTER. 5 Input the time using the number buttons (1-9, 0). Example: When you want to play back a DVD VIDEO from the position of (0 hour) 23 minutes 45 seconds, press the - JVC EX A10 | Instructions - Page 43
player can be changed with the preference screen according to the environment where the DVD player is used. NOTE • The top and bottom of the preference screen may not be displayed on a wide TV. Adjust the picture size on the TV. Basic operations 7 When a disc is stopped or no disc is loaded - JVC EX A10 | Instructions - Page 44
PCM ONLY". DOLBY SURROUND: Dolby Pro Logic decoder-built-in equipment. STEREO : Ordinary audio equipment. D (Dynamic). To correct the difference between When using the supplied XV-EXA10, make sure that "DIGITAL AUDIO OUTPUT" is set to "PCM ONLY". OTHERS Items RESUME ON SCREEN GUIDE AV COMPULINK - JVC EX A10 | Instructions - Page 45
, 16/20/24 bit linear PCM DVD AUDIO* PCM ONLY DIGITAL AUDIO OUTPUT preference DOLBY DIGITAL/PCM 48 kHz, 16 bit stereo linear PCM STREAM/PCM 48 kHz, 16 bit stereo linear PCM 44.1/88.2/176.4 kHz, 16/20/24 bit linear PCM DVD AUDIO* DTS DVD VIDEO/DVD AUDIO* DOLBY DIGITAL - JVC EX A10 | Instructions - Page 46
The source changes to the signal from the AUX terminals. • You can also use SOURCE SELECT on the receiver to select the signal from the AUX terminals as beginning playback, refer to the manual of the connected equipment. 4 Adjust the volume and the sound quality of the system (A page 16). 41 NOTE - JVC EX A10 | Instructions - Page 47
/Timer Timer SET CLOCK/ TIMER Timer Remote control mode selector F AUDIO 2/3 (cursor) Number buttons SLEEP CANCEL Using the sleep timer When the time you specify elapses, the system will be turned off automatically. 1 Slide the remote control mode selector to RECEIVER. 2 Press SLEEP. • Each - JVC EX A10 | Instructions - Page 48
Using the number buttons" (A page 15)), and then press SET. 8 Press 2 or 3 (cursor) to adjust the playback volume, and then press SET. • You can use • You can use the number buttons instead of 2 or 3 (cursor). Refer to "Using the number buttons" (A page 15). • For U.S.A. or Canada models, the time - JVC EX A10 | Instructions - Page 49
Timer 9 Press F AUDIO to turn off the receiver. • The playback timer is available only when the receiver is off. This indicator lights up when the playback timer is activated. NOTE • Complete the playback timer setting at least 1 minute prior to the starting time you have selected in step 4. • - JVC EX A10 | Instructions - Page 50
using these terminals, operating either the TV or the DVD player controls the other equipment at the same time. Connection and setup NOTE • "AV COMPU LINK" is printed for terminals on some JVC manual of the TV to be connected to the DVD player. AV COMPU LINK II or III DVD player (rear panel) JVC - JVC EX A10 | Instructions - Page 51
prevent malfunctions of the system • There are no user-serviceable parts inside. If system. Label sticker Reference Care of the cabinet When cleaning the system, use a soft cloth and follow the relevant instructions on the use of chemically-coated cloths. Do not use of Digital Theater Systems, Inc. - JVC EX A10 | Instructions - Page 52
with CPRM (Content Protection for Recordable Media), DVD VR format can be used. 3 A DivX formatted DVD-ROM is also playable. 4 Among MP3/ from what is explained in this manual. This is due to the disc programming and disc structure, not a malfunction of this system. Discs you can play back: - JVC EX A10 | Instructions - Page 53
)/SP@ML (Simple Profile at Main Level)/ MP@LL (Main Profile at Low Level). • Audio streams should conform to MPEG1 Audio Layer2 or MPEG2 Audio Layer-2. Caution for DualDisc playback: The Non-DVD side of a "DualDisc" does not comply with the "Compact Disc Digital Audio" standard. Therefore, the use - JVC EX A10 | Instructions - Page 54
track/file. Tracks/files are usually grouped into a folder. Folders can also include other folders, creating hierarchical folder layers. This system simplifies the hierarchical construction of a disc and manages folders by "groups". Group 1 Group 2 Track 1/ File 1 Track 2/ File 2 Group 3 Group - JVC EX A10 | Instructions - Page 55
Troubleshooting When you encounter a problem that seems to be a fault, check the following points before contacting the JVC service cord and a component video cord are TYPE" according to the TV you are using. (A page 39) 7 The TV screen No sound comes out of the subwoofer. • "S. WOOFER OFF" is - JVC EX A10 | Instructions - Page 56
Troubleshooting 11) If the system does not work properly despite correction measures aforementioned Many functions of this system are controlled by microprocessors CS CY DA DZ EL EO ET EU FA FI FJ FO FY GA GD GL GN GU HA TH TI TK TL TN TO TR TS TT TW UK UR UZ VI VO WO XH YO ZU Language Macedonian - JVC EX A10 | Instructions - Page 57
mm (91116″ x 3316 ″ x 113 4 ″) Weight (1 unit): 2.7 kg (6.0 lbs) Speakers (SP-EXA10) Type: 2-way bass-reflex type Magnetically shielded type Tweeter: 2 cm (1316″) wood dome Woofer: 10.5 cm (4316 ″) wood cone Power handling capacity: 20 W (Tweeter) Power handling capacity: 30 W (Woofer - JVC EX A10 | Instructions - Page 58
For U.S.A. 53 - JVC EX A10 | Instructions - Page 59
For U.S.A. 54 - JVC EX A10 | Instructions - Page 60
EN c 2005 Victor Company of Japan, Limited 1005SKMMODJEM EX-A10 COMPACT COMPONENT SYSTEM
-
 1
1 -
 2
2 -
 3
3 -
 4
4 -
 5
5 -
 6
6 -
 7
7 -
8
-
9
-
10
-
11
-
12
-
13
-
14
-
15
-
16
-
17
-
18
-
19
-
20
-
21
-
22
-
23
-
24
-
25
-
26
-
27
-
28
-
29
-
30
-
31
-
32
-
33
-
34
-
35
-
36
-
37
-
38
-
39
-
40
-
41
-
42
-
43
-
44
-
45
-
46
-
47
-
48
-
49
-
50
-
51
-
52
-
53
-
54
-
55
-
56
-
57
-
58
-
59
-
60
 |
 |

COMPACT COMPONENT SYSTEM
EX-A10
Consists of RX-EXA10, SP-EXA10 and XV-EXA10
LVT1403-002B
[J, C, UJ]
INSTRUCTIONS
For Customer Use:
Enter below the Model No. and Serial No.
which are located either on the rear,
bottom or side of the cabinet. Retain this
information for future reference.
Model No.
Serial No.
English