JVC FSX3 Instruction Manual
JVC FSX3 - CD Shelf System Manual
 |
UPC - 046838259364
View all JVC FSX3 manuals
Add to My Manuals
Save this manual to your list of manuals |
JVC FSX3 manual content summary:
- JVC FSX3 | Instruction Manual - Page 1
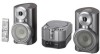
COMPACT COMPONENT SYSTEM FS-X1/FS-X3 Consists of CA-FSX1 and SP-FSX1 Consists of CA-FSX3 and SP-FSX3 SP-FSX1 CA-FSX1 SP-FSX1 SP-FSX3 CA-FSX3 SP-FSX3 INSTRUCTIONS For Customer Use: Enter below the Model No. and Serial No. which are located either on the rear, bottom or side of the cabinet. - JVC FSX3 | Instruction Manual - Page 2
plug then follow the instructions given below: IMPORTANT: DO green-and-yellow. The wires in the mains lead serviceable parts inside the unit; leave all servicing to qualitied service discarding batteries, environmental problems must be considered and FS-X1 10 cm CA-FSX1 FS-X3 Side view CA-FSX3 G-1 - JVC FSX3 | Instruction Manual - Page 3
results and safety is to be assured. Do read the operating instructions before you attempt to use the equipment. Do ensure that all be made for infirm or handicapped people. DON'T use equipment such as personal stereos or radios so that you are distracted from the requirements of traffic safety. - JVC FSX3 | Instruction Manual - Page 4
Introduction Thank you for purchasing the JVC Compact Component System. We hope it will be a valued addition to your home, giving you years of enjoyment. Be sure to read this instruction manual carefully before operating your new stereo system. In it you will find all the information you need to set - JVC FSX3 | Instruction Manual - Page 5
How This Manual Is Organized 1 WARNINGS ...1 IMPORTANT CAUTIONS ...1 Getting Started 4 Accessories...4 How To Put Batteries In the Remote Control 4 Using the Remote Control...4 Connecting the FM Antenna ...5 Connecting the AM (MW) Antenna 6 Connecting the Speakers (SP-FSX1/SP-FSX3 7 Removing - JVC FSX3 | Instruction Manual - Page 6
Table of Contents Correcting the Clock ...25 Setting the Daily Timer ...25 Setting the SLEEP Timer ...28 Timer Priority...28 Troubleshooting 29 Care And Maintenance 30 Specifications 31 3 - JVC FSX3 | Instruction Manual - Page 7
Getting Started Accessories Make sure that you have all of the following items, which are supplied with the System. FM Wire Antenna (1) AM (MW) Loop Antenna (1) Remote Control (1) Batteries (2) Speaker Cords (2) If any of these items are missing, contact your dealer immediately. How To Put Batteries - JVC FSX3 | Instruction Manual - Page 8
Getting Started CAUTION: • Make all connections before plugging the System into an AC power outlet. Connecting the FM Antenna Rear Panel of the Center Unit (CA-FSX1/CA-FSX3) (on the side panel) Using the Supplied Wire Antenna FM wire antenna (supplied) • Fasten it up in the position until you have - JVC FSX3 | Instruction Manual - Page 9
Connecting the AM (MW) Antenna Rear Panel of the Center Unit (CA-FSX1/CA-FSX3) Getting Started AM (MW) loop antenna (Supplied) Outdoor single vinyl-covered wire (not supplied) Attach the AM (MW) loop to its base by snapping the tabs on the loop into the slot in the base. Turn the - JVC FSX3 | Instruction Manual - Page 10
Started Connecting the Speakers (SP-FSX1/SP-FSX3) These speakers are exclusively for this system. Using with other devices will damage the speakers. Connect the speaker cords between the speaker terminals of the Unit and those of the Speakers. • When inserting the speaker wire lead, open the - JVC FSX3 | Instruction Manual - Page 11
Removing the Speaker Grills (SP-FSX1) The speaker grills can be removed. When removing: 1. 's manual of the external equipment.) You can then listen to the external source through the System or record the System's CD player or tuner to the external unit. Signal cord (not supplied) STEREO mini plug - JVC FSX3 | Instruction Manual - Page 12
and the input terminal of the MD recorder, etc. You can record the digital output signal from the System's CD Player to the MD recorder, etc. Cap Optical digital cord (not supplied) MD recorder, etc. (not supplied) COMPU PLAY JVC's COMPU PLAY feature lets you control the most frequently used - JVC FSX3 | Instruction Manual - Page 13
power cord from the wall outlet. When you unplug the AC power cord, the clock will be reset to 0:00. Changing the Source The System has four sound sources, CD, FM, AM (MW) and LINE. Select one of sources you want to listen. For example, when you want to listen to the - JVC FSX3 | Instruction Manual - Page 14
also becomes dark.) DIMMER 2 : Darker (CD lamp goes out.) Power Saving Mode (DIMMER - at Power Off) In power saving mode, you can save the power while the System is turned off (Standby Mode). Each time you press the DIMMER button on the Remote Control at power off, the display alternates as follows - JVC FSX3 | Instruction Manual - Page 15
seconds left before elapsed time reaches three minutes) appears on the display. The displayed time is counted down and, finally, the System is turned off (Standby mode). • If a CD is played back, the "A.P.off" indicator stops blinking and stays lit again. • If you press a button or turn the VOLUME - JVC FSX3 | Instruction Manual - Page 16
Radio Just press the FM/AM button on the Remote Control to turn on the System and start playing the station you were last tuned to. ❑ You can switch on the Unit. 2 Select a station using one of the follow- ing methods. G Manual Tuning Press the ¢ or 4 button on the Unit or the 5 or ∞ button on - JVC FSX3 | Instruction Manual - Page 17
preset stations, repeat the same steps as above. CAUTION: • Even if the system is unplugged or if the power failure occurs, the preset stations will be "FM MONO". FM / PLAY MODE FM AUTO Ô FM MONO To restore the stereo effect, press the FM/PLAY MODE button on the Remote Control until "FM AUTO - JVC FSX3 | Instruction Manual - Page 18
Stations with RDS You can use the RDS (Radio Data System) by using the buttons on the Remote Control. RDS allows MW) broadcasts. To search for a program by PTY codes One of the advantages of the RDS service is that you can locate a particular kind of program by specifying the PTY codes. To search for - JVC FSX3 | Instruction Manual - Page 19
Alarm!: Emergency broadcasts Using the Tuner To temporarily switch to a broadcast program of your choice Enhanced Other Network mode is another convenient RDS service that allows this Unit to switch temporarily to a broadcast program of your choice (TA News and/or Info) from the currently selected - JVC FSX3 | Instruction Manual - Page 20
Using the Tuner Case 1: If there is no station broadcasting the program type you have selected The broadcast station being currently heard will continue to be heard. « When a station starts broadcasting the program you have selected, this Unit automatically switches to the station. The program type - JVC FSX3 | Instruction Manual - Page 21
Using the CD Player Numeric Keys SET 2 CD 6 7 CD DOOR 0 CANCEL 5 3 ∞ REPEAT FM/PLAY MODE CD door Play mode indicator Disc indicator Source selector Repeat indicator 0 CD 6 ¢ 7 4 * When the System is in use, the display shows other items as well. For simplicity, we show here only the items - JVC FSX3 | Instruction Manual - Page 22
same tracks. ❑ You can only make a program when the CD Player is stopped. On the Remote Control 1 Insert a CD. 2 Press the CD 6 button. 3 Press the 7 button to stop the CD. 4 Press the FM/PLAY MODE button until "CD PROGRAM" appears. The System enters the Program Play mode and the "PRGM" indicator - JVC FSX3 | Instruction Manual - Page 23
ALL CLEAR!" appears on the display. Opening the CD door or turning off the System will clear the programmed tracks and release the Program Play mode. To exit the Program Play mode once, while the CD Player is stopped, press the FM/PLAY MODE button until "CD NORMAL" appears on the display. (The "PRGM - JVC FSX3 | Instruction Manual - Page 24
Repeat mode remains in effect even when you change the play mode. CD DOOR LOCK You can prevent unwanted CD ejection by locking the CD door. The CD Player works normally except CD ejection operation. Locking the CD door 1 Turn off the system. 2 While pressing down the 7 button on the Unit, press the - JVC FSX3 | Instruction Manual - Page 25
properly connected to the System. (See page 8). 1 Set the VOLUME control to the mini- mum position. 2 See page 12.) To exit the source "LINE", select other source (e.g. CD). 3 While "NAME CHANGE" is blinking, press the SET button. 4 its Instructions. • The selected name will appear on the display - JVC FSX3 | Instruction Manual - Page 26
the System's CD Player or tune in to a station. ❑ The recording level is not affected by the VOLUME level set by the System. Also it is not affected by the sound effects. • For operation of the external equipment, refer to its Instructions. Adjusting the Input Level If the sound from the component - JVC FSX3 | Instruction Manual - Page 27
available: DAILY Timer Use this timer to set wake up everyday to music from any source, including melodies. SLEEP Timer Fall asleep and have your System turn off automatically after a certain length of time. Setting the Clock When you plug the AC power cord into the wall outlet, the time indication - JVC FSX3 | Instruction Manual - Page 28
as follows. Example: Alternates (clock) Display the source (clock is canceled) 2 Perform steps 2 to 5 in "Setting the Clo- ck" on page 24-25. • When the System is in power saving mode, nothing appears on the display. To see the clock, press the DIMMER button on the Remote Control. • The clock may - JVC FSX3 | Instruction Manual - Page 29
: Plays the specified track on the specified CD. LINE? : Plays an external source. MELODY? : Select one of 10 melodies. Preparation for each music source: Perform the following operation according to the music source you have selected. Then, the System enters Volume Setting mode. G When selecting - JVC FSX3 | Instruction Manual - Page 30
before you set the timer. 8 Press the STANDBY/ON button to turn off the System. The Clock indicator ( ) and "DAILY" indicator are lit on the display, CD will stop playing. • In step 4, the selected melody will be played back for your reference. However, if the melody is selected with the System - JVC FSX3 | Instruction Manual - Page 31
original one. The display is dimmed (DIMMER 2 mode) and the CD lamp goes out. The System is now set to turn off after the number of minutes you have on the display. • Pressing the CLOCK/TIMER button or turning off the System also cancels the SLEEP Timer. • When the SLEEP button is used without - JVC FSX3 | Instruction Manual - Page 32
solve the problem from the hints given here "ERROR!" appears on the display, or the System has been phys- ically damaged, call a qualified person, such as your dealer, for service. Symptom No sound is heard. Poor radio reception Stereo effect is lost in FM broadcast. The CD skips. The CD does not - JVC FSX3 | Instruction Manual - Page 33
Care And Maintenance Handle your CDs carefully, and they will last a long time. Compact Discs • Only CDs bearing these marks can be used with this System. However, continued use of irregular shape CDs (heart-shape, octagonal, etc.) can damage the System. - DO NOT wipe it with a hard cloth. - DO - JVC FSX3 | Instruction Manual - Page 34
CA-FSX1/CA-FSX3 Amplifier mV/4.9 kΩ Phones :16 Ω - 1 kΩ CD Player Signal-To-Noise Ratio:95 dB Wow And Flutter 2.3 kg Speaker Specifications (each unit) SP-FSX1 Type Speaker :1-Way Bass-reflex type :8.0 :Approx. 2.4 kg each Accessories FM Wire Antenna (1) AM (MW) Loop Antenna - JVC FSX3 | Instruction Manual - Page 35
VICTOR COMPANY OF JAPAN, LIMITED EN © 2003 VICTOR COMPANY OF JAPAN, LIMITED 0403MNMCREJEM
-
 1
1 -
 2
2 -
 3
3 -
 4
4 -
 5
5 -
 6
6 -
 7
7 -
8
-
9
-
10
-
11
-
12
-
13
-
14
-
15
-
16
-
17
-
18
-
19
-
20
-
21
-
22
-
23
-
24
-
25
-
26
-
27
-
28
-
29
-
30
-
31
-
32
-
33
-
34
-
35
 |
 |

SP-FSX1
CA-FSX1
SP-FSX1
SP-FSX3
CA-FSX3
SP-FSX3
COMPACT COMPONENT SYSTEM
For Customer Use:
Enter below the Model No. and Serial No.
which are located either on the rear, bot-
tom or side of the cabinet. Retain this
information for future reference.
Model No.
Serial No.
INSTRUCTIONS
LVT1040-003A
[B]
FS-X1/FS-X3
Consists of CA-FSX1 and SP-FSX1
Consists of CA-FSX3 and SP-FSX3