JVC G210 Instruction Manual
JVC G210 - KD Radio / CD Player Manual
 |
UPC - 046838016479
View all JVC G210 manuals
Add to My Manuals
Save this manual to your list of manuals |
JVC G210 manual content summary:
- JVC G210 | Instruction Manual - Page 1
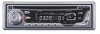
FRANÇAIS ESPAÑOL ENGLISH CD RECEIVER KD-AR260/KD-G210 RECEPTOR CON CD KD-AR260/KD-G210 RECEPTEUR CD ATT SOUND U R SOURCE F D VOL VOL KD-AR260/KD-G210 ATT SOUND U R SOURCE F D VOL VOL • This unit is equipped with the display demonstration. To cancel it, see page 8. • Esta unidad está - JVC G210 | Instruction Manual - Page 2
outlet on a circuit different from that to which the receiver is connected. - Consult the dealer or an experienced radio/TV technician for help. IMPORTANT FOR LASER PRODUCTS 1. CLASS 1 LASER PRODUCT 2. CAUTION: Do not open the top cover. There are no user serviceable parts inside the unit; leave all - JVC G210 | Instruction Manual - Page 3
ENGLISH Thank you for purchasing a JVC product. Please read all instructions carefully before operation, to ensure your complete understanding and to obtain the best possible performance from the unit. CONTENTS How to reset your receiver 2 How to forcibly eject a disc 2 How to use the MODE - JVC G210 | Instruction Manual - Page 4
/on attenuator) button 2 SEL (select) button 3 FM/AM button 4 CD button 5 Loading slot 6 Display window 7 0 (eject) button 8 Remote reverse) button Display window s Tuner reception indicators-MO (monaural), ST (stereo) d CD indicator f RND (random disc) indicator g RPT (repeat) indicator - JVC G210 | Instruction Manual - Page 5
press the button, the sound mode (C-EQ) changes. 6 Selects the source. Each time you press the button, the source changes. 7 • Searches for stations while listening to the radio. • Fast-forwards or reverses the track if pressed and held while listening to a CD. • Skips to the beginning of the next - JVC G210 | Instruction Manual - Page 6
Do not expose the remote sensor to strong light (direct sunlight or artificial lighting). Installing the battery When the controllable range or effectiveness of the remote controller decreases, replace (such as dashboards) exposed to direct sunlight for a long time. Otherwise, it may be damaged. 6 - JVC G210 | Instruction Manual - Page 7
will start from where playback has been stopped previously, next time you turn on the power. To increase the volume To decrease the volume Volume level appears. CAUTION on Volume Setting: CDs produce very little noise compared with other sources. If the volume level is adjusted for the tuner - JVC G210 | Instruction Manual - Page 8
cancel the display demonstration before you use the unit for the first time. DEMO OFF To cancel the display demonstration, follow the procedure below: than 2 seconds. "DEMO", "CLOCK H", "CLOCK M", "DIMMER", or "AMP GAIN" appears on the display. 4 Finish the setting. DEMO ON 2 Select "DEMO" - JVC G210 | Instruction Manual - Page 9
2 3 Set the minute. 1 Select "CLOCK M" (minute). 2 Adjust the minute. 1 2 To check the current clock time or change the display mode Press DISP (display) repeatedly. Each time you press the button, the display changes as follows: • During tuner operation: Frequency Clock • During CD operation - JVC G210 | Instruction Manual - Page 10
OPERATIONS ENGLISH Listening to the radio You can use either automatic searching or manual searching to tune in to a particular station. Searching for a station automatically: Auto search 1 Select the band (FM1 - 3, AM). Each time you press the button, the band changes as follows: FM1 FM2 FM3 - JVC G210 | Instruction Manual - Page 11
). Each time you press the button, the band changes as follows: FM1 FM2 FM3 AM Note: This receiver has three FM bands (FM1, FM2, FM3). You can use any one of them to listen to an FM broadcast. 2 Press and hold ¢ or 4 until "M" (manual) starts flashing on the display. When an FM stereo broadcast is - JVC G210 | Instruction Manual - Page 12
, FM2, and FM3). 1 Select the FM band (FM1 - 3) you want to store FM stations into. Each time you press the button, the band changes as follows: FM1 FM2 FM3 AM 2 Press MODE to enter the functions mode. Manual preset You can preset up to 6 stations in each band (FM1, FM2, FM3, and AM - JVC G210 | Instruction Manual - Page 13
you have not stored them yet, see "Storing stations in memory" on pages 12 and 13. 1 Select the band (FM1 - 3, AM). Each time you press the button, the band changes as follows: FM1 FM2 FM3 AM 2 Select the number (1 - 6) for the preset station you want. Note: You can also use the 5 (up - JVC G210 | Instruction Manual - Page 14
and eject the CD Press 0. CD play stops and the CD automatically ejects from the loading slot. The source changes to the tuner (you will hear the last received station.) • If you change the source, CD play also stops (without ejecting the CD). Next time you select "CD" as the source, CD play starts - JVC G210 | Instruction Manual - Page 15
the button consecutively, the beginning of the next tracks is located and played back. Press 4 briefly, while playing a CD, to go back to the beginning of the current track. Each time you press the button consecutively, the beginning of the previous tracks is located and played back. Selecting - JVC G210 | Instruction Manual - Page 16
play back the current track repeatedly. 1 Press MODE to enter the functions mode while playing a CD. 2 Press RPT (repeat), while "MODE" is still flashing on the display, so that "TRK RPT" appears on the display. Each time you press the button, track repeat play mode turns on and off alternately. RPT - JVC G210 | Instruction Manual - Page 17
mode (C-EQ: custom equalizer) suitable to the music genre. Select the sound mode you want. Each time you press the button, the sound modes change as follows: USER ROCK CLASSIC Indication For: USER (Flat sound) ROCK Rock or disco music CLASSIC Classical music POPS Light music HIP HOP Funk - JVC G210 | Instruction Manual - Page 18
1 Select the item you want to adjust. Each time you press the button, the adjustable items change as follows: BAS (bass) VOL (volume) TRE currently selected sound mode (C-EQ) including "USER". *2 If you are using a two-speaker system, set the fader level to "00". *3 Normally the control dial works - JVC G210 | Instruction Manual - Page 19
"DEMO", "CLOCK H", "CLOCK M", "DIMMER", or "AMP GAIN" appears on the display. Selecting the amplifier gain control You can change the maximum VOL 00" to "VOL 30". • HIGH PWR: You can adjust the volume level from "VOL 00" to "VOL 50". 4 Finish the setting. Note: If you change the setting from - JVC G210 | Instruction Manual - Page 20
ENGLISH Detaching the control panel You can detach the control panel when leaving the car. When detaching or attaching the control panel, be careful not to damage the connectors on the back of the control panel and on the panel - JVC G210 | Instruction Manual - Page 21
ENGLISH TROUBLESHOOTING What appears to be trouble is not always serious. Check the following points before calling a service center. Symptoms Causes Remedies General FM/AM • Sound cannot be heard from the speakers. The volume level is set to the Adjust it to the optimum level. minimum - JVC G210 | Instruction Manual - Page 22
very humid inside the car. Should this occur, the CD player may malfunction. In this case, eject the disc and leave the unit turned on for a few hours until the moisture evaporates. When playing a CD-R or CD-RW Before playing back CD-Rs or CD-RWs, read their instructions or cautions carefully - JVC G210 | Instruction Manual - Page 23
Stereo Separation: 35 dB Capture Ratio: 1.5 dB [AM Tuner] Sensitivity: 20 µV Selectivity: 35 dB SPECIFICATIONS CD PLAYER SECTION Type: Compact disc player (W × H × D): Installation Size (approx.): 182 mm change without notice. If a kit is necessary for your car, consult your telephone - JVC G210 | Instruction Manual - Page 24
receptor. - Consulte a su distribuidor o a un técnico experto en radio/televisión. IMPORTANTE PARA PRODUCTOS LÁSER 1. PRODUCTO LÁSER CLASE 1 2. PRECAUCI manera. Pulse y mantenga pulsados ambos botones simultáneamente. • Esto hará que se reposicione el microcomputador. También se borrarán los ajustes - JVC G210 | Instruction Manual - Page 25
por la compra de un producto JVC. Como primer paso, por favor lea detenidamente este manual para comprender a fondo todas las RADIO 10 Para escuchar la radio 10 Cómo almacenar emisoras en la memoria 12 Cómo sintonizar una emisora preajustada 13 OPERACIÓN DE CD 14 Para reproducir un CD - JVC G210 | Instruction Manual - Page 26
en espera/encendido atenuador) 2 Botón SEL (selección) 3 Botón FM/AM 4 Botón CD 5 Ranura de carga 6 Ventanilla de visualización 7 Botón 0 (expulsión) 8 Sensor personalizable)-ROCK, CLASSIC, POPS, HIP HOP, JAZZ, USER l Pantalla principal / Visualización de fuente Indicador de nivel de - JVC G210 | Instruction Manual - Page 27
la unidad principal. Nota: Estos botones no se utilizan para ajustar "DEMO", "CLOCK H", "CLOCK M", "DIMMER" y "AMP GAIN" (véase páginas 8, 9 y 19 Busca estaciones mientras escucha la radio. • Avanza o retrocede hasta la pista si lo mantiene presionado mientras escucha el CD. • Salta al principio de - JVC G210 | Instruction Manual - Page 28
ESPAÑOL Preparación del control remoto Antes de emplear el control remoto: • Apunte el control remoto directamente hacia el sensor remoto de la unidad principal. Asegúrese de que no haya obstáculos en el camino. Sensor remoto 3. Vuelva a colocar a la portapila. Inserte nuevamente a la portapila - JVC G210 | Instruction Manual - Page 29
el dial de control, también se podrá restablecer el sonido. Para operar el sintonizador (FM o AM), consulte las páginas 10 - 13. Para reproducir un CD, consulte las páginas 14 - 16. 3 Ajuste el volumen. Para aumentar el volumen Para reducir el volumen Aparece el nivel de volumen. Para apagar la - JVC G210 | Instruction Manual - Page 30
cancelar la demostración en pantalla, siga el procedimiento de abajo. 1 Pulse y mantenga pulsado SEL (selección) durante más de 2 segundos. "DEMO", "CLOCK H", "CLOCK M", "DIMMER" o "AMP GAIN" aparecen en la pantalla. DEMO OFF DEMO ON 4 Finalice el ajuste. Para activar la demostración en pantalla - JVC G210 | Instruction Manual - Page 31
de 2 segundos. "DEMO", "CLOCK H", "CLOCK M", "DIMMER" o "AMP GAIN" aparecen en la pantalla. 2 Ajuste la hora. 1 Seleccione "CLOCK H" (hora) si no está operación del sintonizador: Frecuencia Reloj • Durante la operación del CD: Tiempo de reproducción transcurrido Reloj • Durante el apagado: La - JVC G210 | Instruction Manual - Page 32
ESPAÑOL Para escuchar la radio Podrá sintonizar una determinada emisora mediante búsqueda automática o búsqueda manual. Para buscar una emisora automáticamente: Búsqueda automática 1 Seleccione la banda (FM1 - 3, AM). Cada vez que pulsa el botón, la banda cambia de la - JVC G210 | Instruction Manual - Page 33
tiene tres bandas FM (FM1, FM2, FM3). Podrá usar cualquiera de ellas para escuchar un radiodifusión en FM. 2 Pulse y mantenga pulsado ¢ o 4 hasta que "M" (manual) comience a parpadear en la pantalla. Cuando una radiodifusión en FM estéreo sea difícil de recibir: 1 Pulse MODE para entrar en modo de - JVC G210 | Instruction Manual - Page 34
FM: SSM (Memoria secuencia de las emisoras más fuertes) • Preajuste manual de ambas emisoras FM y AM Preajuste automático de emisoras FM: SSM FM1 FM2 FM3 AM 2 Pulse MODE para entrar en modo de funciones. Preajuste manual Podrá preajustar manualmente hasta 6 emisoras en cada banda (FM1, FM2, FM3 y - JVC G210 | Instruction Manual - Page 35
ESPAÑOL 4 Repita el procedimiento de arriba para almacenar otras emisoras en los otros números de preajuste. Notas: • La emisora preajustada previamente se borra cuando se almacena una emisora nueva en el mismo número de preajuste. • Si se deja de suministrar energía al circuito de la memoria (por - JVC G210 | Instruction Manual - Page 36
iniciará desde donde la detuvo. Tiempo de Número total de reproducción total pistas del disco del disco insertado insertado Notas: • Si no saca el CD expulsado en unos 15 segundos, será reinsertado automáticamente en la ranura de carga para protegerlo del polvo. (En este caso no se reproduce el - JVC G210 | Instruction Manual - Page 37
o anteriores Pulse ¢ por un tiempo breve mientras se está reproduciendo un CD para saltar al comienzo de la pista siguiente. Cada vez que pulse el reproducción. Pulse 4 por un tiempo breve mientras se está reproduciendo un CD para regresar al comienzo de la pista actual. Cada vez que pulse el - JVC G210 | Instruction Manual - Page 38
Reproducción repetida de pistas) Podrá escuchar la pista actual repetidamente. 1 Pulse MODE para entrar en modo de funciones mientras se está reproduciendo un CD. 2 Pulse RPT (repetición), mientras "MODE" sigue parpadeando en la pantalla, de manera que aparezca "TRK RPT" en la pantalla. Cada vez que - JVC G210 | Instruction Manual - Page 39
de sonido deseado. Cada vez que pulsa el botón, los modos de sonido cambian de la siguiente manera: USER ROCK CLASSIC Indicación Para: Valores preajustados BAS TRE LOUD USER (Sonido plano) 00 00 OFF ROCK Rock o música de disco +03 +01 ON CLASSIC Música clásica +01 -02 OFF POPS Música - JVC G210 | Instruction Manual - Page 40
, el ajuste realizado por usted quedará almacenado en el modo de sonido seleccionado (C-EQ), incluyendo "USER". *2 Si está usando un sistema de dos altavoces, ajuste el nivel del desvanecedor a "00". *3 El dial de control funciona normalmente como control de volumen. Por consiguiente no es necesario - JVC G210 | Instruction Manual - Page 41
pulsado SEL (selección) durante más de 2 segundos. "DEMO", "CLOCK H", "CLOCK M", "DIMMER" o "AMP GAIN" aparecen en la pantalla. Es El nivel de volumen se puede ajustar entre "VOL 00" a "VOL 30". • HIGH PWR: El nivel de volumen se puede ajustar entre "VOL 00" a "VOL 50". 4 Finalice el ajuste. - JVC G210 | Instruction Manual - Page 42
ESPAÑOL Desmontaje del panel de control Podrá desmontar el panel de control cuando salga de su automóvil. Al desmontar o instalar el panel de control, preste atención para no dañar los conectores provistos al dorso del panel de control y en el portapanel. Cómo desmontar el panel de control Antes de - JVC G210 | Instruction Manual - Page 43
. • Hay ruidos estáticos mientras se escucha la radio. • El CD es expulsado automáticamente. • El CD-R/CD-RW no se puede reproducir. • Las pistas del CD-R/ CD-RW no pueden ser omitidas. • No se puede reproducir ni expulsar el CD. • El sonido del CD se interrumpe algunas veces. • "NO DISC" aparece en - JVC G210 | Instruction Manual - Page 44
MANTENIMIENTO ESPAÑOL Manipulación de los discos Esta unidad ha sido diseñada para reproducir CDs, CD-Rs (regrabables) y CD-RWs (reescribibles). • Esta unidad no es compatible con discos MP3. Cómo tratar los discos Cuando saque un disco de Sujetador central su caja, presione el sujetador central - JVC G210 | Instruction Manual - Page 45
ón estereofónica: 35 dB Relación de captura: 1,5 dB [Sintonizador de AM] Sensibilidad: 20 µV Selectividad: 35 dB ESPECIFICACIONES SECCION DEL REPRODUCTOR DE CD Tipo: Reproductor de discos compactos Sistema de detección de la señal: Captor óptico sin contacto (láser de semiconductor) Número de - JVC G210 | Instruction Manual - Page 46
de radiations laser visible et invisible quand l'appareil est ouvert et que le système de verrouillage ne fonctionne pas ou a été mis hors service. Évitez toute exposition directe au rayon. Avertissement: Si vous souhaitez opérer l'appareil pendant que vous conduisez, assurez-vous de bien regarder - JVC G210 | Instruction Manual - Page 47
JVC. Veuillez lire attentivement toutes les instructions RADIO ....... 10 Ecoute de la radio 10 Mémorisation des stations 12 Accord d'une station présélectionnée ....... 13 FONCTIONNEMENT DU LECTEUR CD ... 14 Lecture d'un CD • N'augmentez pas trop le volume car cela bloquerait Si votre voiture est - JVC G210 | Instruction Manual - Page 48
d'affichage FRANÇAIS 1 Touche (attente en service/sourdine) 2 Touche SEL (sélection) 3 Touche FM/AM 4 Touche CD 5 La fente d'insertion 6 Fenêtre EQ: égaliseur personnalisé)-ROCK, CLASSIC, POPS, HIP HOP, JAZZ, USER l Affichage principal / Affichage de la source Indicateur du niveau de volume - JVC G210 | Instruction Manual - Page 49
Remarque: Ces touches ne sont pas utilisées pour ajuster "DEMO", "CLOCK H", "CLOCK M", "DIMMER" et "AMP GAIN" (voir les pages 8, 9 change. VOL VOL 7 • Recherche des stations en écoutant la radio. • Fait défiler rapidement en avant ou en inverse la plage si est maintenue pressée en écoutant le CD - JVC G210 | Instruction Manual - Page 50
bien fixée dans le porte-pile. Pile bouton au lithium (Produit référencé: CR2025) ATTENTION: NE LAISSEZ pas la télécommande pendant longtemps dans un endroit exposé aux rayons directs du soleil (tel que le tableau de bord). Sinon, elle risque d'être endommagée. 6 - JVC G210 | Instruction Manual - Page 51
touche pour mettre l'appareil sous tension. 2 Choisissez la source. Pour utiliser le tuner (FM ou AM), voir les pages 10 - 13. Pour reproduire un CD, voir les pages 14 - 16. 3 Ajustez le volume. Pour baisser le son instantanément Appuyez brièvement sur pendant l'écoute de n'importe quelle source - JVC G210 | Instruction Manual - Page 52
ci-dessous: 1 Maintenez pressée SEL (sélection) pendant plus de 2 secondes. "DEMO", "CLOCK H", "CLOCK M", "DIMMER", ou "AMP GAIN" apparaît sur l'affichage. DEMO OFF 4 Terminez le réglage. DEMO ON Pour mettre en service la démonstration des affichages, répétez la même procédure et choisissez "DEMO - JVC G210 | Instruction Manual - Page 53
de 2 secondes. "DEMO", "CLOCK H", "CLOCK M", "DIMMER", ou "AMP GAIN" apparaît sur l'affichage. 2 Réglez les heures. 1 Choisissez "CLOCK H" (heures) s'il n' le mode d'affichage change comme suit: • Pendant l'utilisation du tuner: Fréquence Horloge • Pendant l'utilisation du CD: Durée de lecture - JVC G210 | Instruction Manual - Page 54
Ecoute de la radio Vous pouvez utiliser la recherche automatique ou l'accord manuel pour accorder une station particulière. Recherche d'une station automatiquement: Recherche automatique 1 Choisissez la bande (FM1 - 3, AM). Chaque fois que vous appuyez sur la touche, la bande change comme suit: FM1 - JVC G210 | Instruction Manual - Page 55
FM1 - 3, AM). Chaque fois que vous appuyez sur la touche, la bande change comme suit: FM1 FM2 FM3 AM Remarque: Cet appareil a trois bandes FM ( • Si vous relâchez la touche, le mode manuel est mis automatiquement hors service après 5 secondes. • Si vous maintenez la touche pressée, la fréquence - JVC G210 | Instruction Manual - Page 56
ro de la bande (FM1 - 3, AM) où vous souhaitez mémoriser la station (dans cet exemple, FM1). Chaque fois que vous appuyez sur la touche, la bande change comme suit: FM1 FM2 FM3 AM 2 Accordez une station (dans cet exemple à 92,5 MHz). Pour accorder des stations de fréquences supérieures Pour accorder - JVC G210 | Instruction Manual - Page 57
à "Mémorisation des stations" à les pages 12 et 13. 1 Choisissez la bande (FM1 - 3, AM). Chaque fois que vous appuyez sur la touche, la bande change comme suit: FM1 FM2 FM3 AM 2 Choisissez le numéro (1 - 6) de la station présélectionnée souhaitée. Remarque: Vous pouvez aussi utiliser les touches - JVC G210 | Instruction Manual - Page 58
est inséré à l'envers, "EJECT" apparaît sur l'affichage et le CD est éjecté automatiquement. Pour arrêter la lecture et éjecter le CD Appuyez sur 0. La lecture du CD s'arrête et le CD est automatiquement éjecté de la fente d'insertion. La source change sur le tuner (vous entendez la dernière station - JVC G210 | Instruction Manual - Page 59
d'un CD, pour inverser la plage. Pour aller aux plages suivantes ou précédentes Appuyez brièvement sur ¢ lors de la reproduction d'un CD, pour alternativement en et hors service. Indicateur RND (disque aléatoire) Quand la lecture aléatoire de disque est mise en service, l'indicateur RND s'allument - JVC G210 | Instruction Manual - Page 60
pressée 0 pendant plus de 2 secondes. "NO EJECT" clignote sur l'affichage pendant environ 5 secondes, le CD est verrouillé et ne peut plus être éjecté. Quand la lecture répétée de plage est mise en service, l'indicateur RPT s'allume sur l'affichage. Puis, la plage en cours de lecture est reproduite - JVC G210 | Instruction Manual - Page 61
fois que vous appuyez sur la touche, le mode sonore change comme suit: Indication Pour: USER (Son plat) ROCK Musique rock ou disco CLASSIC Musique classique préréglées BAS TRE LOUD 00 00 OFF +03 +01 ON +01 -02 OFF +04 +01 OFF +02 00 ON +02 +03 OFF USER JAZZ ROCK CLASSIC HIP HOP POPS - JVC G210 | Instruction Manual - Page 62
Le modèle d'affichage change quand vous ajustez les grave ou les aigus. Ex. 1: Quand vous ajustez les "TRE" (aigus) Ex. 2: Quand vous mettez en service le loudness 3 Répétez les étapes 1 et 2 pour ajuster d'autres éléments. Pour réinitialiser chaque mode sonore aux réglages de l'usine, répétez - JVC G210 | Instruction Manual - Page 63
est hors service. 1 Maintenez pressée SEL (sélection) pendant plus de 2 secondes. "DEMO", "CLOCK H", "CLOCK M", " 00" à "VOL 50". 4 Terminez le réglage. Remarque: Si vous changez le réglage de "HIGH PWR" sur "LOW PWR" pendant une écoute avec un niveau de volume supérieur à 30, l'appareil change - JVC G210 | Instruction Manual - Page 64
Détachement du panneau de commande Vous pouvez détacher le panneau de commande quand vous quittez la voiture. Lors du détachement ou de la remise en place du panneau de commande, faites attention de ne pas endommager les connecteurs situés à l'arrière du panneau et sur le porte-panneau. Comment - JVC G210 | Instruction Manual - Page 65
) pressée, appuyez sur (attente en service/ sourdine) pendant plus de 2 secondes radio. fermement. Connectez l'antenne fermement. • Le CD est éjecté automatiquement. Le CD est inséré à l'envers. Insérez-le CD correctement. • Le CD-R/CD-RW ne peut pas être reproduit. • Les plages sur un CD-R/ CD - JVC G210 | Instruction Manual - Page 66
du capteur, à l'intérieur de l'appareil, est sale. • Les CD-RW peuvent nécessiter une durée de mise en service plus longue car le facteur de réflexion des CD-RW est inférieur à celui des CD ordinaires. • Les CD-R ou CD-RW sont sensibles aux hautes températures ou à une humidité importante. Ne les - JVC G210 | Instruction Manual - Page 67
é: 20 µV Sélectivité: 35 dB SPÉCIFICATIONS SECTION LECTEUR CD Type: Lecteur de disque compact Système de détection de fonctionnement admissible: 0°C à +40°C (32°F à 104°F) Dimensions (L × H × P): Taille d'installation (approx.): 182 mm × 52 mm × 150 mm (7-3/16 pouces × 2-1/16 pouces × 5- - JVC G210 | Instruction Manual - Page 68
Having TROUBLE with operation? Please reset your unit Refer to page of How to Reset Still having trouble?? USA ONLY Call 1-800-252-5722 http://www.jvc.com We can help you! EN, SP, FR © 2004 Victor Company of Japan, Limited 0904DTSINTJEIN
-
 1
1 -
 2
2 -
 3
3 -
 4
4 -
 5
5 -
 6
6 -
 7
7 -
8
-
9
-
10
-
11
-
12
-
13
-
14
-
15
-
16
-
17
-
18
-
19
-
20
-
21
-
22
-
23
-
24
-
25
-
26
-
27
-
28
-
29
-
30
-
31
-
32
-
33
-
34
-
35
-
36
-
37
-
38
-
39
-
40
-
41
-
42
-
43
-
44
-
45
-
46
-
47
-
48
-
49
-
50
-
51
-
52
-
53
-
54
-
55
-
56
-
57
-
58
-
59
-
60
-
61
-
62
-
63
-
64
-
65
-
66
-
67
-
68
 |
 |

GET0246-001A
[J]
INSTRUCTIONS
MANUAL DE INSTRUCCIONES
MANUEL D’INSTRUCTIONS
CD RECEIVER
KD-AR260/KD-G210
ENGLISH
ESPA
Ñ
OL
FRAN
Ç
AIS
For installation and connections, refer to the separate manual.
Para la instalación y las conexiones, refiérase al manual separado.
Pour l’installation et les raccordements, se référer au manuel séparé.
RECEPTEUR CD
KD-AR260/KD-G210
RECEPTOR CON CD
KD-AR260/KD-G210
For customer Use:
Enter below the Model No. and
Serial No. which are located on
the top or bottom of the
cabinet. Retain this information
for future reference.
Model No.
Serial No.
•
This unit is equipped with the display demonstration. To cancel it, see page 8.
•
Esta unidad está equipada con demostración en la pantalla. Para cancelarla, consulte la página 8.
•
Cet appareil est équipé d’une fonction de démonstration des affichages. Pour l’annuler, référez-
vous à la page 8.
SOUND
VOL
VOL
SOURCE
R
F
U
D
ATT
SOUND
VOL
VOL
SOURCE
R
F
U
D
ATT