JVC GR D270 Instructions - Page 16
Viewfinder Adjustment, Brightness Adjustment Of The Display, Tripod Mounting, Loading/Unloading - windows 8
 |
View all JVC GR D270 manuals
Add to My Manuals
Save this manual to your list of manuals |
Page 16 highlights
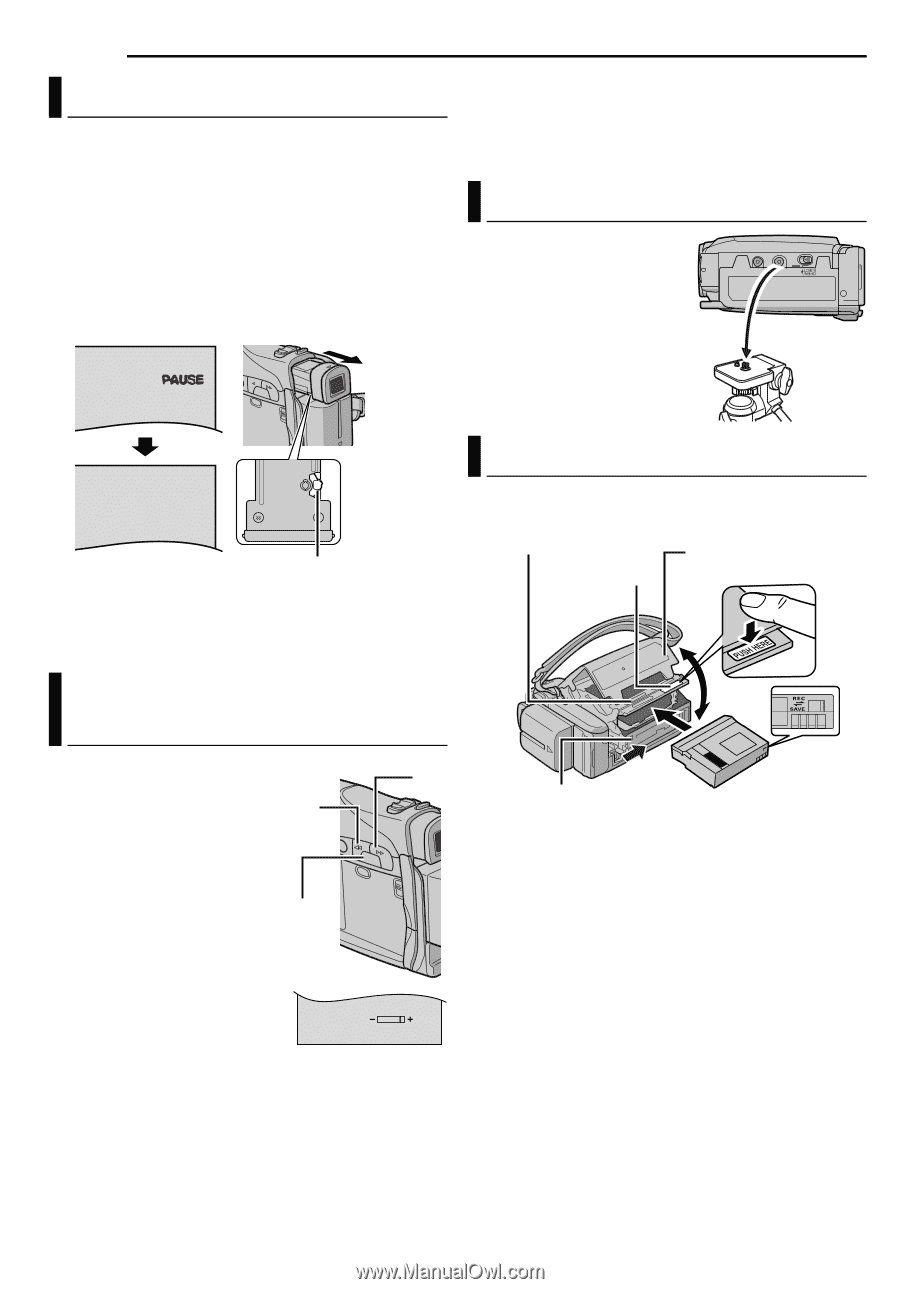
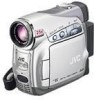
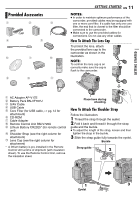
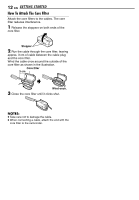
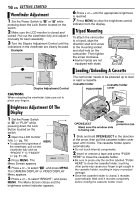
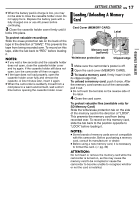
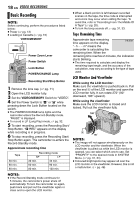
16 EN GETTING STARTED Viewfinder Adjustment 1 Set the Power Switch to "A" or "M" while pressing down the Lock Button located on the switch. 2 Make sure the LCD monitor is closed and locked. Pull out the viewfinder fully and adjust it manually for best viewability. 3 Turn the Dioptre Adjustment Control until the indications in the viewfinder are clearly focused. Example: 6 Press + or - until the appropriate brightness is reached. 7 Press MENU to clear the brightness control indicator from the display. Tripod Mounting To attach the camcorder to a tripod, align the direction stud and screw to the mounting socket and stud hole on the camcorder. Then tighten the screw clockwise. ● Some tripods are not equipped with studs. Loading/Unloading A Cassette PAUSE Dioptre Adjustment Control CAUTION: When retracting the viewfinder, take care not to pinch your fingers. The camcorder needs to be powered up to load or eject a cassette. Cassette holder PUSH HERE Cassette holder cover Brightness Adjustment Of The Display 1 Set the Power Switch + to "M" or "PLAY" while pressing down the Lock - Button located on the switch. 2 Open the LCD monitor fully. (੬ pg. 18) MENU ● To adjust the brightness of the viewfinder, pull out the viewfinder fully and set "PRIORITY" to "FINDER" (੬ pg. 31, 34). 3 Press MENU. The BRIGHT Menu Screen appears. 4 Press + or - to select "n", and press MENU. The CAMERA DISPLAY or VIDEO DISPLAY Menu appears. 5 Press + or - to select "BRIGHT", and press MENU. The Menu Screen closes and the brightness control indicator appears. OPEN/EJECT Make sure the window side is facing out. Erase protection tab 1 Slide and hold OPEN/EJECT in the direction of the arrow, then pull the cassette holder cover open until it locks. The cassette holder opens automatically. ● Do not touch internal components. 2 Insert or remove a tape and press "PUSH HERE" to close the cassette holder. ● Be sure to press only the section labelled "PUSH HERE" to close the cassette holder; touching other parts may cause your finger to get caught in the cassette holder, resulting in injury or product damage. ● Once the cassette holder is closed, it recedes automatically. Wait until it recedes completely before closing the cassette holder cover.
-
 1
1 -
2
-
3
-
4
-
5
-
6
-
7
-
8
-
9
-
10
-
 11
11 -
 12
12 -
 13
13 -
 14
14 -
 15
15 -
 16
16 -
 17
17 -
 18
18 -
 19
19 -
 20
20 -
 21
21 -
22
-
23
-
24
-
25
-
26
-
27
-
28
-
29
-
30
-
31
-
32
-
33
-
34
-
35
-
36
-
37
-
38
-
39
-
40
-
41
-
42
-
43
-
44
-
45
-
46
-
47
-
48
-
49
-
50
-
51
-
52
-
53
-
54
-
55
-
56
 |
 |