JVC GR D270 Instructions - Page 40
Backlight Compensation, Spot Exposure Control, White Balance Adjustment
 |
View all JVC GR D270 manuals
Add to My Manuals
Save this manual to your list of manuals |
Page 40 highlights
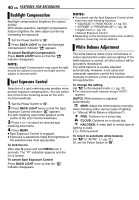
40 EN FEATURES FOR RECORDING Backlight Compensation Backlight compensation brightens the subject quickly. With simple operation, backlight compensation feature brightens the dark subject portion by increasing the exposure. 1 Set the Power Switch to "M". 2 Press BACK LIGHT so that the Backlight Compensation indicator " " appears. To cancel Backlight Compensation Press BACK LIGHT twice so that the " " indicator disappears. NOTE: Using Backlight Compensation may cause the light around the subject to become too bright and the subject to become white. Spot Exposure Control Selection of a spot metering area enables more precise exposure compensation. You can select one of the three metering areas on the LCD monitor/viewfinder. 1 Set the Power Switch to "M". 2 Press BACK LIGHT twice so that the Spot Exposure Control indicator " " appears. ● A spot metering area frame appears at the centre of the LCD monitor/viewfinder. 3 Press + or - to select the desired spot metering area frame. 4 Press MENU. ● Spot Exposure Control is engaged. ● Exposure is adjusted to make the brightness of the selected area most appropriate. To lock the iris After step 3, press and hold MENU over 2 seconds. The " " indication appears and the iris is locked. To cancel Spot Exposure Control Press BACK LIGHT once so that the " " indicator disappears. NOTES: ● You cannot use the Spot Exposure Control at the same time with following functions. • "SQUEEZE" in "WIDE MODE" (੬ pg. 33) • "STROBE" in "PROGRAM AE" (੬ pg. 42) • Digital Zoom (੬ pg. 19) • Manual Exposure Control ● Depending on the shooting location and condition, optimum result may not be attained. White Balance Adjustment The white balance refers to the correctness of colour reproduction under various lighting. If the white balance is correct, all other colours will be accurately reproduced. The white balance is usually adjusted automatically. However, more advanced camcorder operators control this function manually to achieve a more professional colour/ tint reproduction. To change the setting Set "u" to the desired mode. (੬ pg. 31) ● The selected mode indicator except "AUTO" appears. [AUTO]: White balance is adjusted automatically. MWB: Adjust the white balance manually when shooting under various types of lighting. (੬ "Manual White Balance Adjustment") FINE: Outdoors on a sunny day. CLOUD: Outdoors on a cloudy day. HALOGEN: A video light or similar type of lighting is used. [ ] = Factory-preset To return to automatic white balance Set "u" to "AUTO". (੬ pg. 31) Or, set the Power Switch to "A".
-
 1
1 -
2
-
3
-
4
-
5
-
6
-
7
-
8
-
9
-
10
-
11
-
12
-
13
-
14
-
15
-
16
-
17
-
18
-
19
-
20
-
21
-
22
-
23
-
24
-
25
-
26
-
27
-
28
-
29
-
30
-
31
-
32
-
33
-
34
-
 35
35 -
 36
36 -
 37
37 -
 38
38 -
 39
39 -
 40
40 -
 41
41 -
 42
42 -
 43
43 -
 44
44 -
 45
45 -
46
-
47
-
48
-
49
-
50
-
51
-
52
-
53
-
54
-
55
-
56
 |
 |