JVC GY-HD250U KA-HD250U Studio Adapter Owners Manual (15 pages)
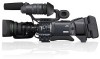
JVC GY-HD250U - 3-ccd Prohd Camcorder Manual
 |
UPC - 046838027383
View all JVC GY-HD250U manuals
Add to My Manuals
Save this manual to your list of manuals |
JVC GY-HD250U manual content summary:
- JVC GY-HD250U | KA-HD250U Studio Adapter Owners Manual (15 pages) - Page 1
e_ka250.book Page 1 Tuesday, September 5, 2006 11:13 AM KA-HD250 STUDIO ADAPTER STUDIO ADAPTER KA-HD250 INSTRUCTIONS © 2006 Victor Company of Japan, Limited LST0445-001A For Customer Use: Enter below the Serial No. which is located on the body. Retain this information for future reference. - JVC GY-HD250U | KA-HD250U Studio Adapter Owners Manual (15 pages) - Page 2
of power supplied to your home, consult your dealer or local power company. For appliance designed to operate from battery power, refer to the operating instructions. a need for service. 18. When replacement parts are required, be sure the service technician has used replacement parts specified by - JVC GY-HD250U | KA-HD250U Studio Adapter Owners Manual (15 pages) - Page 3
user to the presence of important operating and maintenance (servicing) instructions in the literature accompanying the appliance. INFORMATION: This equipment has been tested and found to comply with the limits for a Class B digital the user is BY JVC COULD VOID USER'S AUTHORITY - JVC GY-HD250U | KA-HD250U Studio Adapter Owners Manual (15 pages) - Page 4
V DC only. CAUTION: To prevent electric shocks and fire hazards, do NOT use any other power source. CAUTION: To prevent electric shock, do not open the cabinet. No user serviceable parts inside. Refer servicing to qualified service personnel. Note: The rating plate (serial number plate) is on this - JVC GY-HD250U | KA-HD250U Studio Adapter Owners Manual (15 pages) - Page 5
this product. (These instructions are for: KA-HD250U.) Before operating this unit, read the instruction manual carefully in order to make . In this case, the remote control unit provides power for the camera and thus there is no requirement for a separate power supply for the camera. Multi-system - JVC GY-HD250U | KA-HD250U Studio Adapter Owners Manual (15 pages) - Page 6
and symbols such as ™, ® and © do not appear in this document. • The design, specifications, etc. found in this manual are subject to change without notice for improvement. • This manual refers to the connecting camera as GYHD250. However, the same operations are used when connecting the GY-HD251. - JVC GY-HD250U | KA-HD250U Studio Adapter Owners Manual (15 pages) - Page 7
the power on again to put this unit in the operating status. If this unit still does not function properly, consult your JVC-authorized dealer. 7[VF OUTPUT] (Y/PB/PR/RGB) BNC×3 Component output terminal for viewfinder.Use when connecting a Viewfinder other than VF-P400. The HD/SD (from the GY-HD250 - JVC GY-HD250U | KA-HD250U Studio Adapter Owners Manual (15 pages) - Page 8
, Indicators and Connectors (Cont'd) Rear Section g k[CALL] CALL button/Power indicator Lights green when the studio adapter is turned on. Press to send call signal to the remote control unit operator if intercom headset is not in-use. Button indicator changes from green to red when the button is - JVC GY-HD250U | KA-HD250U Studio Adapter Owners Manual (15 pages) - Page 9
VF-P400 MACRO VF BRIGHT USER 1 USER 2 USER 3 ND FILTER 2 1 MENU STATUS WHT.BAL AUTO AUTO AUDIO CH-1 LEVEL CH-2 ON OFF POWER REC HD CAMERA RECORDER GY-HD250/GY-HD251 PROMPTER OUTPUT terminal Monitor VF OUTPUT terminal (BNC × 3) STUDIO KIT KA-HD250 Conversion plug VF OUTPUT terminal - JVC GY-HD250U | KA-HD250U Studio Adapter Owners Manual (15 pages) - Page 10
base mount is aligned with the pin on this device. Mounting the Camera Prepare the camera as follows before mounting. • Attach the lens. • Attach the microphone. • Remove the viewfinder. For details, refer to GY-HD250's INSTRUCTION MANUAL. 1. Open the side cover. Rear base mount Front base mount - JVC GY-HD250U | KA-HD250U Studio Adapter Owners Manual (15 pages) - Page 11
HD/SD SDI P TC IN REMOTE P TC OUT IEEE 1394 CH2-AUDIO OUT-CH1 VIDEO 5 6 7 3 DC INPUT STUDIO 8 Connect the cable for this device to the camera terminal. Cable GENLOCK REMOTE DC OUTPUT VIDEO Y PB PR STUDIO the viewfinder forward along the viewfinder holder guides on the top of this device. - JVC GY-HD250U | KA-HD250U Studio Adapter Owners Manual (15 pages) - Page 12
verified by connecting this unit's [PROMPTER OUTPUT] terminal located in the front to a monitor using a BNC cable. MEMO • Power for this unit and the camera are supplied by RMP210 via the 26 pin camera cable. • 26 pin camera cable VC-P110 (5 m) VC-P112 (20 m) VC-P113 (50 m) VC-P114 (100 m) 4. Menu - JVC GY-HD250U | KA-HD250U Studio Adapter Owners Manual (15 pages) - Page 13
with [INCOM LEVEL]. MEMO • If both this unit (including the camera) and the remote control unit have the same functional switches, the power is turned on, pictures may appear choppy for a few seconds. This is not a malfunction. • When using the remote control unit, refer to its instruction manual - JVC GY-HD250U | KA-HD250U Studio Adapter Owners Manual (15 pages) - Page 14
RMP210 Some actions are not compatible when setting the GY- HD250 with RM-P210 menu operations. (G: Action available ×: No action) Function BAR OFF ON DETAIL OFF (CONTOUR) ON IRIS MANU AUTO WHITE BAL MANU PRE AUTO1 AUTO2 FAW AUTO SET WHITE GAIN 0dB +3dB +6dB +9dB +12dB - JVC GY-HD250U | KA-HD250U Studio Adapter Owners Manual (15 pages) - Page 15
15 Tuesday, September 5, 2006 4:10 PM OTHERS Specifications RM Multi-pin connector: Composite video signal output ( temperature: • -20°C to 60°C Power supply voltage: DC12 V Power consumption: Max. 40W (GY-HD250, VF-P400) Mass: Approx. 1.8 f Accessories: Instructions 1 Dimensions (Unit: mm) 80
-
 1
1 -
 2
2 -
 3
3 -
 4
4 -
 5
5 -
 6
6 -
 7
7 -
8
-
9
-
10
-
11
-
12
-
13
-
14
-
15
 |
 |

KA-HD250
STUDIO ADAPTER
STUDIO ADAPTER
INSTRUCTIONS
KA-HD250
For Customer Use:
Enter below the Serial No. which is located on the body.
Retain this information for future reference.
Model No.
KA-HD250
Serial No.
LST0445-001A
LST0445-001A
© 2006 Victor Company of Japan, Limited
e_ka250.book
Page 1
Tuesday, September 5, 2006
11:13 AM