JVC GZ HD7 other
JVC GZ HD7 - Everio Camcorder - 1080i Manual
 |
UPC - 046838030413
View all JVC GZ HD7 manuals
Add to My Manuals
Save this manual to your list of manuals |
JVC GZ HD7 manual content summary:
- JVC GZ HD7 | other - Page 1
to pages 48 to 50 of the GZ-HD7 instruction manual. Viewing Images Copied to DVD on the TV A Connect Audio/Video cable (provided) A Disconnect the USB cable and turn off CU-VD40. B Connect CU-VD40 to the TV. z To view high definition images, connect using an optional HDMI cable or component video
-
 1
1
 |
 |
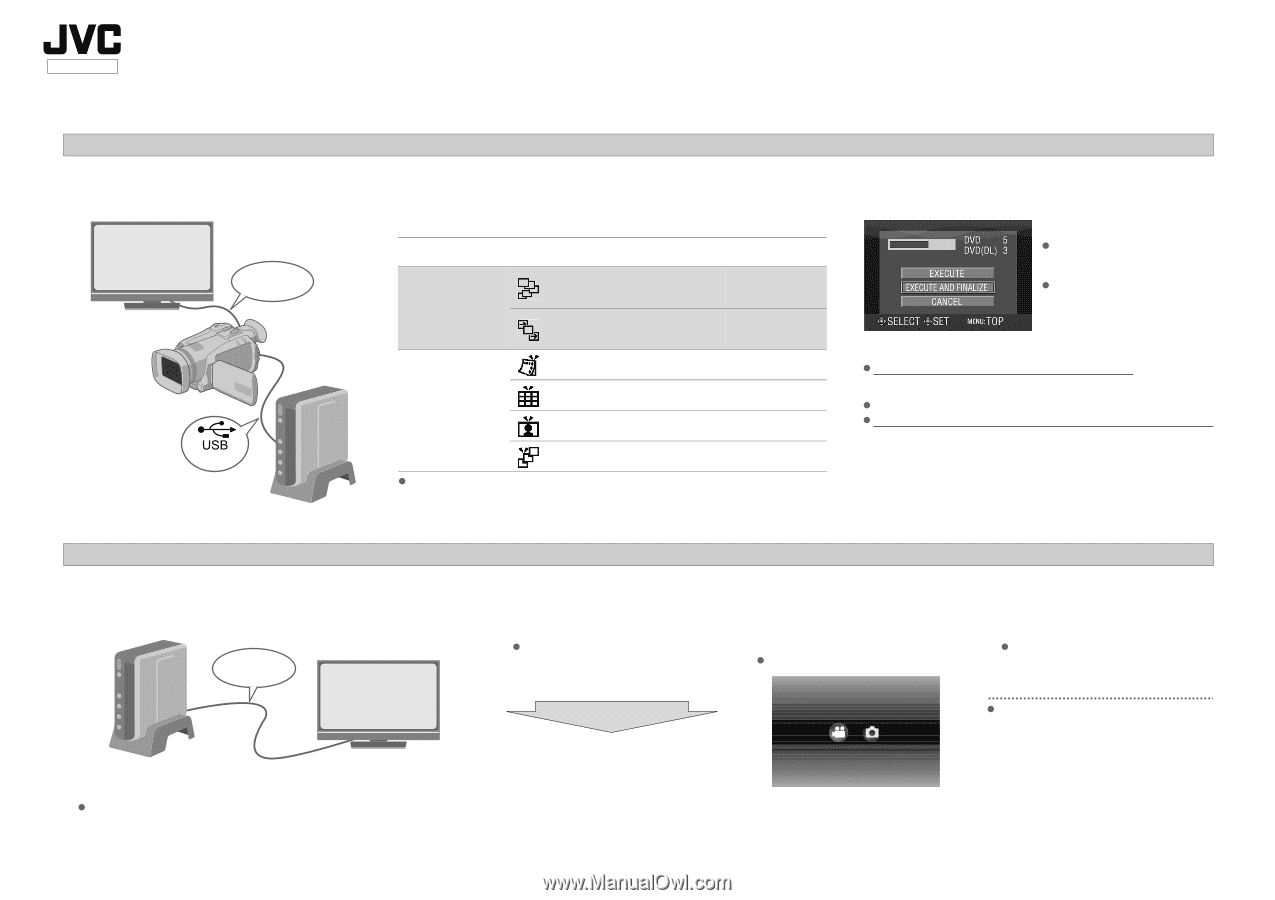
Copying to DVD
GZ-HD7
ENGLISH
Enjoy high definition images copied to DVDs!
B
Select the desired copy method
The following 6 methods of copying are available.
The date for videos created from playlists will be the same as the date the DVD is
created.
Methods of copying
Types of copy operation
GZ-HD7
instruction manual
Copy all
(NORMAL BACK-
UP)
Copy all images shot.
k
Page 48
Copy only newly shot images.
k
Page 48
Copy only favorite
scenes
(SELECT BACK-UP)
Search and copy by date.
k
Page 49
Search and copy by scenes.
k
Page 49
Search and copy by events.
k
Page 49
Copy using playlists.
k
Page 49
LYT1773-001A
0307MNH-SW-VP
C
Copy to DVD
Select and set on
A
EXECUTE AND FINALIZE
B
.
Additional recordings are not possible after finalizing.
To add new recordings
Select and set on
A
EXCUTE
B
instead of
A
EXECUTE AND FINALIZE
B
.
Discs that are not finalized cannot be played back on PC or CU-VD40.
To play back, connect as shown in the diagram on the left, and refer
to pages 48 to 50 of the GZ-HD7 instruction manual.
For details on finalizing, refer to
pages 48 to 50 of the GZ-HD7
instruction manual.
Time taken for copying will be
long if there are a large number
of files.
A
Connect
(provided)
Audio/Video cable
(provided)
Viewing Images Copied to DVD on the TV
A
Connect
A
Disconnect the USB cable and turn off CU-VD40.
B
Connect CU-VD40 to the TV.
To view high definition images, connect using an optional HDMI cable or
component video cable.
Audio/Video cable
(provided)
B
Play back
A
Turn on CU-VD40.
Confirm that the power lamp is lighted in
orange. If the lamp is not lighted in
orange, disconnect the USB cable then
turn off and on the power again.
B
Press the open/close (
M
) button to
eject the tray.
C
Insert a finalized disc.
D
Press the open/close (
M
) button to
close the tray.
The following screen appears.
E
Play back.
For details on playback, refer to page 15
of the CU-VD40 instruction manual.
Before erasing data from GZ-HD7
Confirm that the data has been copied to
DVD before erasing.
Approx. 20 seconds later
PLAY IMAGE
PLAY VIDEO