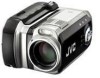
JVC GZ MC200 Separate volume1
JVC GZ MC200 - Everio Camcorder - 2.12 MP Manual
 |
View all JVC GZ MC200 manuals
Add to My Manuals
Save this manual to your list of manuals |
JVC GZ MC200 manual content summary:
- JVC GZ MC200 | Separate volume1 - Page 1
DVD media into instruction sheet "Creating DVDs and Writing Video Files Back to Camera". For more details for creating a DVDs, refer to the user's guide of PowerDirector and PowerProducer installed on the PC. (Refer to the page 16 of "SOFTWARE INSTALLATION AND USB CONNECTION GUIDE". © 2004 Victor
-
 1
1
 |
 |

© 2004 Victor Company of Japan, Limited
LYT1411-001A
1004FOH-AL-VP
How To Create DVDs simply
ENGLISH
1
Install CyberLink DVD Solution. For details, Refer to “SOFTWARE
INSTALLATION AND USB CONNECTION GUIDE”.
2
Connect the camera to the PC
with the USB cable, or remove
the removable hard disk from
the camera and connect it to
the PC using the card reader.
Copy the video file folder (ex.
“PRG001”) in the recording
medium to the PC.
3
Start PowerDirector Express
NE and click [Folder] of the import
button, then select the folder copied
to PC in step
2
to register it to the
library.
4
Drag and drop the videos from the
library to the timeline/storyboard in
the playback order.
If necessary, edit transition or title
on the timeline/storyboard.
Click [Produce] button after finish
editing.
5
Select [Produce a Disc], and
then click the [Next] button.
6
Select the [DVD Format] and click
[Next] button.
●
If the video is [ULTRA FINE], [FINE],
or [NORMAL], select [High Quality
NTSC (or PAL) DVD]. If the video is
[ECONOMY], select [Long Play
NTSC (or PAL) DVD]. Encoding is not
performed on unedited video, and
high-speed processing is performed
at the original image quality.
●
Insert a check mark for [Use SVRT to
save rendering time]. The minimum
required encoding is performed, and
high-speed processing is performed
while keeping the original image quality. Insert a check mark for [After
production, make disc inPowerProducer].
7
Click the [Start] button to create the
file. PowerProducer 2 Gold NE
starts automatically.
8
Load a blank DVD media into the
recordable DVD drive.
9
Click the [
]
] button in the [Import/
Capture Content] screen of
PowerProducer 2 Gold NE.
10
Remove the check mark for
[Include Menu] in the [Preview]
screen, and then click the [
]
]
button.
11
Insert a check mark for [Burn to
disc] in the [Final Output] screen,
and then click the [Burn] button to
create the DVD-Video.
“PRG001” folder
"SD_VIDEO" folder
(Example of transition)
For “Create DVD without title” and “Create DVD with title”, refer to the
instruction sheet “Creating DVDs and Writing Video Files Back to
Camera”.
For more details for creating a DVDs, refer to the user’s guide of
PowerDirector and PowerProducer installed on the PC. (Refer to the
page 16 of “SOFTWARE INSTALLATION AND USB CONNECTION
GUIDE”.