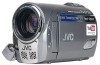
JVC GZ-MS100U Instructions - Page 16
RECORDING/PLAYBACK, Recording Files, Video Recording
 |
UPC - 683728187361
View all JVC GZ-MS100U manuals
Add to My Manuals
Save this manual to your list of manuals |
Page 16 highlights
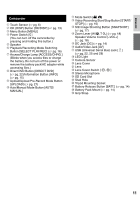
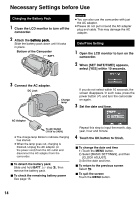
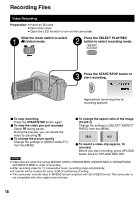
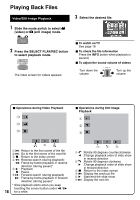
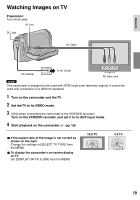
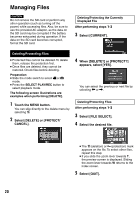
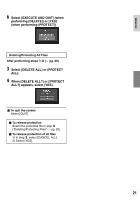
RECORDING Recording Files Video Recording Preparation: • Insert an SD card. • Open lens cover. • Open the LCD monitor to turn on the camcorder. Slide the mode switch to select ! (video) mode. Press the SELECT PLAY/REC button to select recording mode. SELECT PLAY/REC Press the START/STOP button to start recording. Approximate remaining time for recording appears. L To stop recording Press the START/STOP button again. L To view the video you just recorded Select A during pause. During the preview, you can delete the video by selecting *. L To change the picture quality Change the settings in [VIDEO QUALITY] from the MENU L To change the aspect ratio of the image (16:9/4:3) Change the settings in [SELECT ASPECT RATIO] from the MENU. L To record a video clip (approx. 10 minutes) Before you start recording, press UPLOAD button twice to "UPLOAD REC ON". NOTES • Video files are given the names MOV001.MOD to MOV009.MOD, MOV00A.MOD to MOV00F.MOD, and MOV010.MOD in order of recording. • After recording video for 12 consecutive hours, recording stops automatically. • A new file will be created for every 4 GB of continuous shooting. • This camcorder records video in MPEG2 format compliant with SD-VIDEO format. This camcorder is not compatible with other digital video formats. 16
-
 1
1 -
2
-
3
-
4
-
5
-
6
-
7
-
8
-
9
-
10
-
 11
11 -
 12
12 -
 13
13 -
 14
14 -
 15
15 -
 16
16 -
 17
17 -
 18
18 -
 19
19 -
 20
20 -
 21
21 -
22
-
23
-
24
-
25
-
26
-
27
-
28
-
29
-
30
-
31
-
32
-
33
-
34
-
35
-
36
-
37
-
38
-
39
-
40
-
41
-
42
-
43
-
44
-
45
-
46
-
47
-
48
-
49
-
50
-
51
-
52
-
53
-
54
-
55
-
56
-
57
-
58
-
59
-
60
-
61
-
62
-
63
-
64
-
65
-
66
-
67
-
68
-
69
-
70
-
71
-
72
-
73
-
74
-
75
-
76
-
77
-
78
-
79
-
80
 |
 |
