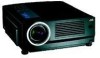
JVC HD2KU Instruction Manual
JVC HD2KU - DLA - D-ILA Projector Manual
 |
View all JVC HD2KU manuals
Add to My Manuals
Save this manual to your list of manuals |
JVC HD2KU manual content summary:
- JVC HD2KU | Instruction Manual - Page 1
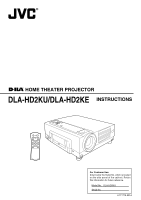
® ® HOME THEATER PROJECTOR DLA-HD2KU/DLA-HD2KE INSTRUCTIONS ON OPERATE OFF FOCUS LIGHT TEST MENU EXIT ENTER PRESET HIDE For Customer Use: Enter below the Serial No. which is located on the side panel of the cabinet. Retain this information for future reference. Model No. DLA-HD2KU Serial No - JVC HD2KU | Instruction Manual - Page 2
image could be burnt into the D-ILA device. Use special care when projecting video games or computer program images.There is no problem with ordinary video-cassette playback images. About the installation place Do not install the projector in a place that cannot support its weight securely. If the - JVC HD2KU | Instruction Manual - Page 3
the operating instructions. Adjust only those controls that are covered by the Operation Manual, as an completion of any service or repairs to this product, ask the service technician to perform changed. Ensure that the power cable used for the projector is the correct type for the AC outlet in - JVC HD2KU | Instruction Manual - Page 4
, to avoid a possible shock hazard by inadvertent connection to the main supply. If a new main plug has to be fitted, then follow the instruction given below: WARNING: THIS APPARATUS MUST BE EARTHED. IMPORTANT: The wires in the mains lead on this product are coloured in accordance with the - JVC HD2KU | Instruction Manual - Page 5
intensity or high contrast on a screen. This video image could be burnt into this D-ILA device. Pay special attention when projecting video games and computer program images. There is no problem with ordinary video cassette playback images. Viewing Conditions (Brightness of Room) ● Brightness of the - JVC HD2KU | Instruction Manual - Page 6
13 Installing the Projector 14 Precautions for Installation 14 Projector and Screen displayed . 32 Warning Indication 33 Troubleshooting 34 Terminal Description 35 Pin Arrangement If any item is missing, please contact your dealer. Instructions ...x 1 Guarantee ...x 1 Power Cord ...x 1 Remote - JVC HD2KU | Instruction Manual - Page 7
when carrying this unit. 4 Foot Lever (for front adjustable foot) Use when extending or retracting the front adjustable foot. (☞ Page 14) 5 Lens This is a 1.3 x manual zoom lens. Before projection, remove the lens cap. (☞ Pages 16, 19) 6 Lens Cap It is recommended that the cap be fitted on the lens - JVC HD2KU | Instruction Manual - Page 8
Controls and Features (continued) Rear Side/Right Side/Bottom Surface r q e 7 w Bottom Surface t 7 y u Blocked as it is not in use. Opening it forcibly will cause damage to the unit. q Connector Panel For details, please refer to 'Connector Panel'. (☞ Page 9) w Lamp Cover Remove this cover when - JVC HD2KU | Instruction Manual - Page 9
. Do not use it. Using it may give rise to error or malfunction of the unit. 2 [SERVICE] Terminal This terminal is intended for servicing purposes. Do not use it. Using it may give rise to error and malfunction of the unit. 3 [RS-232C] Terminal (D-sub 9 Pin) This is the - JVC HD2KU | Instruction Manual - Page 10
Controls and Features (continued) Control Panel 1 2 LAMP TEMP STAND BY OPERATE 6 7 8 3 4 MENU EXIT ENTER 5 PRESET HIDE 9 p q 1 [TEMP] Indicator Blinking : Indicates that temperature inside this unit is abnormally high. (☞ Pages 11, 33) 7 [OPERATE] Indicator Light on: When this unit - JVC HD2KU | Instruction Manual - Page 11
Indicator Display on the Control Panel In addition to the standby mode, operate mode and cool down mode*, this unit also displays other operational states using different combination of indicators. ● Please refer to Page 28 for explanations on warning indication for *1and Page 33 for *2. [STAND BY] - JVC HD2KU | Instruction Manual - Page 12
] Button Press this when adjusting focus, screen size or picture quality. Press the button to switch to the test pattern image for adjustment. ● Alter the test pattern with the [TEST] button. ● Press the [EXIT] button to return to the original image. 1 Remote Control's Signal Transmitter (☞ Page 17 - JVC HD2KU | Instruction Manual - Page 13
, which may in turn lead to malfunction. In cases where the leakage comes to contact with the skin, wipe it away with a cloth. Otherwise, skin problems may occur. 3 Close the back cover Slide in the direction of the arrow to close the back cover. 13 - JVC HD2KU | Instruction Manual - Page 14
Installing the Projector Precautions for Installation Please read the following carefully when installing this unit. Installation Environment This unit is a precision device. Do not install it at the - JVC HD2KU | Instruction Manual - Page 15
Projector and Screen Installation The optimum image can be obtained when the center of this unit lens and the screen are placed perpendicular to each other. - JVC HD2KU | Instruction Manual - Page 16
Installing the Projector (continued) Screen Size and Projection Distance ● This unit uses a 1.3x manual zoom lens for projection. ● Although the ) and projecting distances in the table above are provided only as a guide. Please use them as reference during installation. The projected image size may - JVC HD2KU | Instruction Manual - Page 17
of screen used, operable distance may decrease. Screen 30˚ 30˚ Remote Sensor (Rear) 20˚ A 20˚ B This unit ON OPERATE OFF FOCUS LIGHT TEST MENU EXIT ENTER PRESET HIDE Remote Control Unit Ⅵ When directing remote control unit toward this unit When aiming the remote control unit towards - JVC HD2KU | Instruction Manual - Page 18
off both the projector and the device to be connected. Ⅵ Connecting to digital video processors ● Read the manual that is supplied split system or optical fiber cable. Right Side of this unit SYNC OUT SERVICE RS-232C CONTROL DVI VIDEO IN DVI OUTPUT DVI Connection Cable (sold separately) - JVC HD2KU | Instruction Manual - Page 19
Connecting the Power Cord (supplied) After all devices have been connected, connect the supplied power cord. 1 2 Power Cord (supplied) 1 Connect the supplied power cord to the power in- put terminal of this unit 2 Insert the main plug of the supplied power cord into the wall outlet (e.g.) - JVC HD2KU | Instruction Manual - Page 20
and the [STAND BY] indicator on the unit lights up. Light on LAMP TEMP STAND BY OPERATE 1-2 MENU EXIT ENTER ON OPERATE OFF FOCUS LIGHT TEST MENU EXIT ENTER PRESET HIDE 1-2 LAMP TEMP STAND BY OPERATE Indicators on this unit 2 Press the [OPERATE] button on this unit (or the [OPERATE - JVC HD2KU | Instruction Manual - Page 21
source lamp to cool off. (☞ Page 11) Light off Blinking LAMP TEMP STAND BY OPERATE Indicators on this unit ON OPERATE OFF FOCUS LIGHT TEST MENU EXIT ENTER PRESET HIDE 5-1 4 Note ● The [OPERATE OFF] button will not work within approximately 1 minute after the light source has been turned - JVC HD2KU | Instruction Manual - Page 22
D65 USER1 USER2 ENTER 1 "Image adjust" Menu Submenu (Setting Menu) Image adjust Set up Options Information Gamma Color temp. RED GREEN BLUE Test pattern NORMAL A B CUSTOM D65 USER1 USER2 ENTER E.g.: "Gamma" Setting Menu Image adjust Set up Options Information Gamma Color temp. RED GREEN BLUE - JVC HD2KU | Instruction Manual - Page 23
to return to the previous menu. ● Press to clear the menu screen when the main menu screen is displayed. ● Press to clear the test pattern when a test pattern is displayed. 5/∞: Select menu items and adjustment items. 2/3: Perform setting of the selected adjustment item. (Setting is not possible for - JVC HD2KU | Instruction Manual - Page 24
1 Press the [MENU] button ● The main menu is displayed on the screen. Image adjust Set up Options Information Gamma Color temp. RED GREEN BLUE Test pattern NORMAL A B CUSTOM D65 USER1 USER2 ENTER E.g.: "Image adjust" menu Display of the menu item currently selected becomes solid and icon of the - JVC HD2KU | Instruction Manual - Page 25
" Use this to adjust focus, screen size or picture quality. There are 10 types of test patterns. Press the [ENTER] or [TEST] button to alter the test pattern to be projected. Setting Values : "On", "Off" "Flip V" Inverses image upside down. {"Off"} Setting Values : "On", "Off" {"Off"} "Picture - JVC HD2KU | Instruction Manual - Page 26
4 2 Press the [MENU] button ● The main menu is displayed on the screen. Image adjust Set up Options Information Gamma Color temp. RED GREEN BLUE Test pattern NORMAL A B CUSTOM D65 USER1 USER2 ENTER 3 Press [5/∞] to select "Set up", followed by pressing [ENTER] ● The "Set up" menu appears on the - JVC HD2KU | Instruction Manual - Page 27
the [MENU] button ● The main menu is displayed on the screen. Image adjust Set up Options Information Gamma Color temp. RED GREEN BLUE Test pattern NORMAL A B CUSTOM D65 USER1 USER2 ENTER 3 Press [5/∞] to select "Options", followed by press- ing [ENTER] ● The "Options" menu appears on the right - JVC HD2KU | Instruction Manual - Page 28
. The lamp life may not reach 2000 hours depending on the operating conditions. When the light-source lamp approaches the end of its service life, deterioration progresses rapidly. Get ready or replace with a new lamp (lamp unit) when the accumulated lamp usage time exceeds 1900 hours. Depending - JVC HD2KU | Instruction Manual - Page 29
2 Loosen the screws on the lamp unit and lift up the handle ● Loosen the 2 screws with a ª screwdriver. 3 Pull out the lamp unit 4 Insert the new lamp unit until it is fully in Caution Do not touch the glass surface of the lamp directly with your hand or stain it. Touching it with a bare hand may - JVC HD2KU | Instruction Manual - Page 30
each. After blinking stops, lamp time resets and the unit returns to the standby mode ([STAND BY] indicator lights up). ON OPERATE OFF FOCUS LIGHT TEST MENU EXIT ENTER PRESET HIDE [EXIT] [5] [HIDE] [PRESET] EXIT HIDE Press as per normal PRESET Press for 2 seconds or more To ensure the lamp - JVC HD2KU | Instruction Manual - Page 31
Cleaning and Replacing the Filter Clean the filter regularly or air intake efficiency may deteriorate and malfunction may occur. If the filter is extremely dirty and cannot be cleaned, or if it is damaged, replace the filter with a new one (lower filter: LC32087-002A / inner filter: LC32058002A). - JVC HD2KU | Instruction Manual - Page 32
. In addition, when the accumulated lamp time reaches between 1900 hours to 2000 hours, the "Lamp replacement" message will be displayed each time the projector is turned on. ● The message can be cleared by pressing the [EXIT] button or displaying the menu. [ Get ready a new lamp (lamp unit) in - JVC HD2KU | Instruction Manual - Page 33
Warning Indication Ⅵ About warning indicators If abnormality occurs in this unit during projection, the warning mode will be triggered and the type of abnormality will be indicated by a combination of indicators displayed on the control panel. This unit will then automatically stop projection and - JVC HD2KU | Instruction Manual - Page 34
Troubleshooting Before sending the unit to your authorized dealer for repair, check the following points. Symptom Probable Cause Corrective Action Reference Page Power is not supplied. • - JVC HD2KU | Instruction Manual - Page 35
Terminal Description Pin Arrangement Ⅵ RS-232C Terminal 9876 54321 Pin No. 1 2 3 4 5 Signal Name N/C RD TD N/C GND Pin No. 6 7 8 9 Signal Name N/C N/C N/C N/C Ⅵ DVI Terminal 8 7 65 4 3 2 1 16 15 14 13 12 11 10 9 24 23 22 21 20 19 18 17 Pin No. Signal Name Pin No. 1 TMDS data 2- 13 2 - JVC HD2KU | Instruction Manual - Page 36
CR : Designates the head of data and the data type. ! (21h): Assigns command to the projector ? (3Fh): Query to the projector (Asking command) :1: Identification number of the projector (Factory setting is 1) : Designates the delimiter for ID, Command and Parameter. (20h) : Designates the terminal - JVC HD2KU | Instruction Manual - Page 37
3 Special parameters Parameters for input video image format Character 0 1 Hex Meaning 30 60p 31 50p Operation mode parameters Character 0000 0001 0002 0004 Hex 30h 30h 30h 30h 30h 30h 30h 31h 30h 30h 30h 32h 30h 30h 30h 34h Meaning Standby mode Power-on mode Cool down mode Emergency mode - JVC HD2KU | Instruction Manual - Page 38
) Ⅵ Mass Ⅵ Accessories DLA-HD2KU/DLA-HD2KE D-ILA Home Theater Projector D-ILA*1(Reflective Active Matrix Principle) D-ILA Device*2/0.82" (1920 pixels x 1080 pixels) x 3 (Total no. of pixels: Approx. 6,220,000) x 1.3 zoom lens (1.8:1 to 2.35:1) (Zoom/Focus adjustment: manual) 250 W Ultra-high - JVC HD2KU | Instruction Manual - Page 39
Ⅵ Dimensions (Unit: mm) Top Bottom 181 20 298 300 360 38.2 8.2 92.3 7 298 Front 89 M6 (Depth: 10 mm) 67.5 Mounting screw should be more than 6 Center of Lens 2 mm but less than 10 mm in length. Side 109 115.9 65.4 15 267 25~56 36.2 292 39 - JVC HD2KU | Instruction Manual - Page 40
® VICTOR COMPANY OF JAPAN, LIMITED © 2004 VICTOR COMPANY OF JAPAN, LIMITED Printed in Japan 0504-SW-VP DLA-HD2KU/DLA-HD2KE ® HOME THEATER PROJECTOR
-
 1
1 -
 2
2 -
 3
3 -
 4
4 -
 5
5 -
 6
6 -
 7
7 -
8
-
9
-
10
-
11
-
12
-
13
-
14
-
15
-
16
-
17
-
18
-
19
-
20
-
21
-
22
-
23
-
24
-
25
-
26
-
27
-
28
-
29
-
30
-
31
-
32
-
33
-
34
-
35
-
36
-
37
-
38
-
39
-
40
 |
 |

INSTRUCTIONS
DLA-HD2KU/DLA-HD2KE
®
®
HOME THEATER PROJECTOR
DLA-HD2KU
LCT1719-001A
For Customer Use:
Serial No.
Model No.
Enter below the Serial No. which is located
on the side panel of the cabinet. Retain
this information for future reference.
ON
ENTER
OFF
FOCUS
TEST
MENU
EXIT
PRESET
HIDE
LIGHT
OPERATE