JVC LT37E478 Instructions
JVC LT37E478 - 37" LCD TV Manual
 |
UPC - 046838028939
View all JVC LT37E478 manuals
Add to My Manuals
Save this manual to your list of manuals |
JVC LT37E478 manual content summary:
- JVC LT37E478 | Instructions - Page 1
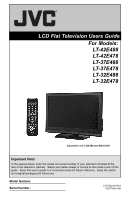
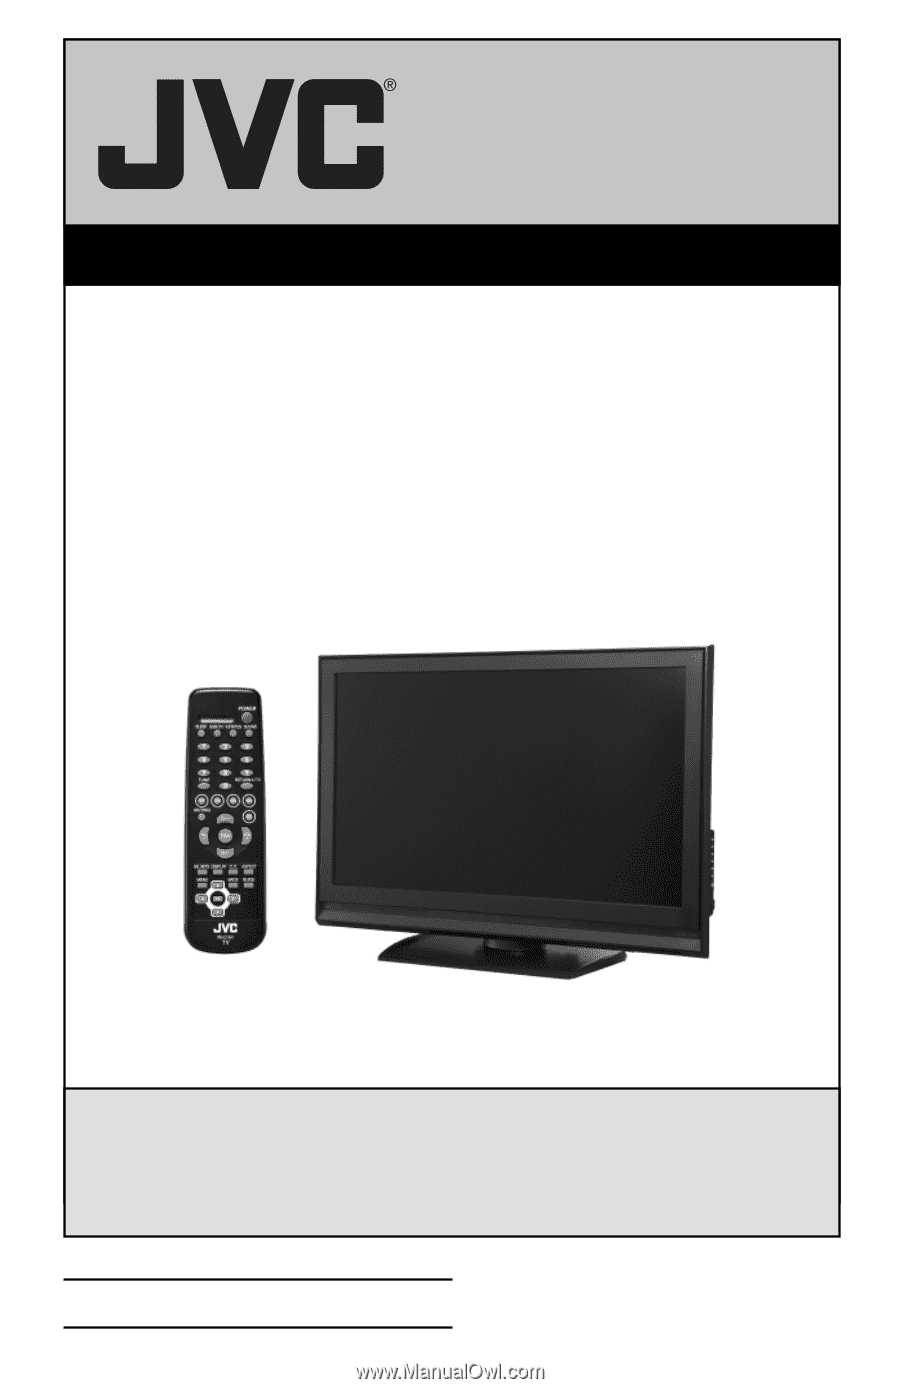
LCD Flat Television Users Guide For Models: LT-42E488 LT-42E478 LT-37E488 LT-37E478 LT-32E488 LT-32E478 Illustration of LT-32E488 and RM-C1291 Important Note: In the spaces below, enter the model and serial number of your television (located at the rear of the - JVC LT37E478 | Instructions - Page 2
serviceable parts inside. Refer servicing to qualified service personnel maintenance (servicing) instructions in the service technician. Do not attempt to repair it yourself or remove the rear cover. Changes or modifications not approved by JVC could void the warranty. * When you don't use this TV - JVC LT37E478 | Instructions - Page 3
authorities or for USA, the Electronic Industries Alliance: http://www.eiae.org IMPORTANT SAFETY INSTRUCTIONS 1) Read these instructions. 2) Keep these instructions. 3) Heed all warnings. 4) Follow all instructions. 5) Do not use this apparatus near water. 6) Clean only with dry cloth. 7) Do not - JVC LT37E478 | Instructions - Page 4
for long periods of time. 14) Refer all servicing to qualified service personnel. Servicing is required when the apparatus has been damaged in any position the unit where good ventilation is impossible. When installing this TV, distance recommendations must be maintained between the set and the wall - JVC LT37E478 | Instructions - Page 5
services (do not have a separate cable box) and plan to use their JVC TV remote control to select channels. Once you run the Auto Tuner Setup (which detects and programs all the channels your TV your cable company for their cable box and remote. Avoiding Ghost Images Displaying fixed images for - JVC LT37E478 | Instructions - Page 6
light dusting with a soft, non-scratching duster will keep your TV clean. If you wish to wipe down the television, first TV through the ventilation slots. • DO NOT use strong or abrasive cleaners on the TV. • DO NOT spray liquids or cleaners directly on the TV's surface. • DO NOT rub or scrub the TV - JVC LT37E478 | Instructions - Page 7
stand, attach the bottom cover and the screw (supplied) into the hole. 1) Place the TV face down on a soft cloth on a table. 2) Remove the four screws from the back of the TV. 3) Pull out the stand from the TV. 4) Cover the hole with a bottom cover and tighten the screw. Note: • To re-install - JVC LT37E478 | Instructions - Page 8
9 TV Models 10 TV Remote Control 11 Getting Started 12 The Remote Control 12 Connecting Your Devices 13 Interactive Plug-in Menu 21 Onscreen Menus 24 Using the Guide 24 Onscreen Menu System 25 Initial Setup 28 Noise Muting 28 Language 28 Front Panel Lock 28 V-Chip 29 Set Lock Code 35 - JVC LT37E478 | Instructions - Page 9
Unpacking your TV Thank you for your purchase of a JVC LCD Flat Television. Before you begin setting up your new television, please check to make sure you have all of the following items. In addition to this guide, your television box should include: 1 Television POWER 1 Remote Control POWER - JVC LT37E478 | Instructions - Page 10
TV and remote. These will help assist you in understanding how to connect your television to another device, as well as use the remote R R R 75 Ω (VHF/UHF) DIGITAL AUDIO INPUT 1 OPTICAL OUT INPUT 2 PHOTO VIEWER / SERVICE 75 Ω (VHF/UHF) DIGITAL AUDIO INPUT 1 OPTICAL OUT INPUT 2 PHOTO VIEWER - JVC LT37E478 | Instructions - Page 11
Quick Setup POWER SLEEP SUB CH V.STATUS SOUND 1 2 3 4 5 6 7 8 9 TUNE RETURN+/TV 0 V1 V2 V3 V4 MUTING CH+ V5 VO- L FAV. VOL + CH- ML/MTS DISPLAY C.C. ASPECT MENU BACK GUIDE OK RM-C1291 TV RM-C1291 Notes: • For information on remote control buttons, see pages 57 - 64. 11 - JVC LT37E478 | Instructions - Page 12
steps, please consult other sections of this manual. Step 1 - The Remote Control Before you can operate your remote control, you first need to install the button at the top right corner of the remote. If this is the first time you are turning on the TV, the interactive plug-in menu appears. POWER - JVC LT37E478 | Instructions - Page 13
connect an external antenna or cable TV system to your TV. S-Video Cable Used to into the nearest power outlet and turn on the TV. • If you follow these diagrams and the television , refer to the satellite TV manual. No VCR Connection Cable or Antenna Output Coaxial Cable TV Rear Panel 75 Ω - JVC LT37E478 | Instructions - Page 14
DVD cables. Some models may vary colors. Please consult the user's manual for your DVD player for more information. • Be careful not to L PR R R R 75 Ω (VHF/UHF) TV Rear Panel DIGITAL AUDIO INPUT 1 OPTICAL OUT INPUT 2 PHOTO VIEWER / SERVICE Green Blue Red Y PB PR OUT AUDIO OUT R - JVC LT37E478 | Instructions - Page 15
COMPONENT INPUT 3 S-VIDEO Y VIDEO PB L PR R INPUT 4 INPUT 5 / INPUT 1 AUDIO AUDIO OUT Y VIDEO VIDEO PB L L L PR R R R 75 Ω (VHF/UHF) TV Rear Panel DIGITAL AUDIO INPUT 1 OPTICAL OUT INPUT 2 PHOTO VIEWER / SERVICE Green Blue Red Y PB PR OUT AUDIO OUT R L DVD Player 15 - JVC LT37E478 | Instructions - Page 16
to a Camcorder You can connect a camcorder to you televison by using the input jacks located on the back of the television. TV Rear Panel CAMCORDER INPUT 3 S-VIDEO Y VIDEO PB L PR R INPUT 4 INPUT 5 / INPUT 1 AUDIO AUDIO OUT Y VIDEO VIDEO PB L L L PR R R R AUDIO AUDIO AUDIO - JVC LT37E478 | Instructions - Page 17
AUDIO INPUT on the amplifier. 2) Connect a red cable from the RIGHT AUDIO OUTPUT on the back of the TV to the RIGHT AUDIO INPUT on the amplifier. Notes: • Refer to your amplifier's manual for more information. • You can use AUDIO OUTPUT for your home theater system. • If you have a device connected - JVC LT37E478 | Instructions - Page 18
(VHF/UHF) DIGITAL AUDIO INPUT 1 OPTICAL OUT INPUT 2 PHOTO VIEWER / SERVICE TV Rear Panel 1) Connect the HDMI to DVI Cable from the DIGITAL OUT on • When setting the "Video-1 Audio - Analog/Digital" menu setting on the TV, please note that this setting only effects the HDMI INPUT-1 jack and that - JVC LT37E478 | Instructions - Page 19
. HDMI (High Definition Multimedia Interface) is the first industry supported, uncompressed, all digital audio/video interface. HDMI provides and (VHF/UHF) DIGITAL AUDIO INPUT 1 OPTICAL OUT INPUT 2 PHOTO VIEWER / SERVICE TV Rear Panel 1) Connect the HDMI Cable from the DIGITAL OUT on the back - JVC LT37E478 | Instructions - Page 20
(VHF/UHF) DIGITAL AUDIO INPUT 1 OPTICAL OUT INPUT 2 PHOTO VIEWER / SERVICE TV Rear Panel 1) Connect the optical cable from underneath the television to the back Sound Adjust Menu. See page 50. • Refer to your owners manual on using your amplifier. • You cannot output sound from your Optical Output - JVC LT37E478 | Instructions - Page 21
to appear. • Setting the TV's clock to the correct time so your timer functions will work properly. You can choose "Auto" or "Manual" for setting the clock. skip over it. Language After the "JVC Interactive Plug-in Menu" has been displayed, the TV automatically switches to the "Language" settings. - JVC LT37E478 | Instructions - Page 22
Mode is set to "Auto", the Daylight Saving Time feature automatically adjusts your TV's clock for Daylight Saving. • The real time and D.S.T. may not be broadcasting signal and receiving conditions. In this case, set your clock manually. • You will have to reset the clock after a power - JVC LT37E478 | Instructions - Page 23
Tuner Setup In auto tuner setup, the TV automatically scans through all available channels, memorizing television, or you can continue on in this guide for more information on programming your remote control, or using the JVC onscreen menu system to customize your television viewing experience - JVC LT37E478 | Instructions - Page 24
Certain symbols are used throughout this guide to help you learn about the features of your new television in orange is the one currently selected. If you use the MENU button on the TV's side panel instead of the remote, Front Menu screen showing "Video Status", "Aspect", "Auto Tuner Setup" and "Menu - JVC LT37E478 | Instructions - Page 25
Menu at first. Detailed explanations on using each menu follow later in this guide. For information about the Interactive Plug-in Menu, see pages 21 - 23. 1. To open the onscreen menu system, press the MENU button on the remote control. The main menu will appear Menu Initial Setup - + Tuner Setup - JVC LT37E478 | Instructions - Page 26
Press the BACK button to return to the previous menu screen Initial Setup 1/2 Noise Muting Language Front Panel Lock V-Chip Set Lock Code Closed Caption On English Off Select BACK Operate Back MENU Exit Initial Setup 1/2 Initial Setup Auto Shut Off Software Version Power Indicator Quick - JVC LT37E478 | Instructions - Page 27
Menu Initial Setup - + Tuner Setup External Input Picture Adjust Sound Adjust Clock/Timers Interactive Plug-in Menu Photo Viewer Auto Demo Onscreen Menus π† √® Press the MENU button The left main menu will appear To select a menu from the main menu To enter The following menu you selected will - JVC LT37E478 | Instructions - Page 28
when finished Noise Muting Language Front Panel Lock V-Chip Set Lock Code Closed Caption On English Off Note: Select • Noise muting will your batteries die, or you lose your remote control. - Use the remote control. - Press the MENU button on the front of the TV for more than 3 seconds. In this - JVC LT37E478 | Instructions - Page 29
10 button keypad Initial Setup > V-Chip V-Chip Set US TV Ratings Set Movie Ratings Set Canadian Ratings English Set Canadian Ratings go back to the initial Setup Menu. • To set the password, see "Set Lock Code", page 35. • "Advanced V-Chip Rating" and "Advanced Canadian Rating" menus may be - JVC LT37E478 | Instructions - Page 30
or comedic violence, which children should be able to discern from reality. Programs with the following ratings are designed for the entire audience. ❒ TV G stands for General Audience Most parents would find these programs suitable for all age groups. They contain little or no violence, no strong - JVC LT37E478 | Instructions - Page 31
Advanced Canadian Rating Unrated Select BACK Operate Back On View MENU Exit Directions to set US V-Chip Ratings Line up the cursor in the column (TV PG, TV G, etc.) with the content row (V/FV, S, etc.) and press the π† or √® to move the cursor to the correct location. Press OK to turn the - JVC LT37E478 | Instructions - Page 32
may contain all types of programming including children's programming, foreign programs, or adult material. ❒ G - General Audience In the opinion of the review board, these films contain nothing in the way of sexual content, violence, or language that would be unsuitable for audiences of any age - JVC LT37E478 | Instructions - Page 33
to lock Press the MENU button to finish Set Canadian Ratings English 18+ 14+ PG - - - G C8+ C - - - Select OK Operate BACK Back MENU Exit Note: • For instructions on "Set Canadian Ratings French", please see page 33 in the French user - JVC LT37E478 | Instructions - Page 34
Programming" category. Examples of Unrated programs: • Emergency Bulletins • News • Public Service Announcements • Sports • Some Commercials Note: • Locally Originated Programming • Political Programs • Religious Programs • Weather • TV programs or movies that do not have rating signals will be - JVC LT37E478 | Instructions - Page 35
Channel guard and V-Chip settings are protected by a four-digit lock code. Your TV comes preset with a lock code of "0000". You may change the code to any four-digit number you wish. To change the lock code, follow the steps below. π† √® π† √® Press the MENU button To "Initial Setup" To enter - JVC LT37E478 | Instructions - Page 36
" To select a caption (CC1 to CC4) or text channel (Text1 to Text4) To "Digital Service" To select 1, 2, 3, 4, 5 or 6 To "Appearance" To enter To select "Auto" ("Manual", see page 37) Press the MENU button when finished Notes: • If you want to reset your settings to the default settings, select - JVC LT37E478 | Instructions - Page 37
Sample Appearance Mode Font Size Font Style Text / Edge Opacity Background Opacity Select Operate Manual Standard Auto Solid Solid BACK Back MENU Exit Closed Caption > Appearance 2/2 Preview Closed the start of the program. • To select the mode, press the C.C. button. See page 60. 37 - JVC LT37E478 | Instructions - Page 38
Signal Auto shut off in 9 min." appears on the screen, and starts the countdown. If no signal is being received within 10 minutes, the TV shuts itself off. Software Version You can confirm the Software Version. Press the MENU button π† √® π† √® To "Initial Setup" To enter To "Software Version - JVC LT37E478 | Instructions - Page 39
Initial Setup Quick Start-up Quick Start-up allows you to lessen the time for the TV to turn on and ready for viewing. π† √® π† √® Press the MENU button To "Initial Setup" To enter To "Quick Start-up" To turn "On" or "Off" - JVC LT37E478 | Instructions - Page 40
settings for Tuner Mode/Scan Mode. • You can also access the "Front Menu" screen by using the MENU button on the side of the TV instead of the remote control. It has "Video Status", "Aspect", "Auto Tuner Setup" and "Menu". Choose "Auto Tuner Setup" by pressing MENU† on the side panel and - JVC LT37E478 | Instructions - Page 41
Tuner Setup Channel Summary Channel summary allows you to customize the line-up of channels received by your TV. You can add or delete channels from the line-up or prevent any unauthorized viewers from watching any or all channels. Press the MENU button π† √® - JVC LT37E478 | Instructions - Page 42
Tuner Setup How to set the channel station. Press the MENU button - + Tuner Setup > Channel Summary > Station π† √® π† √® √® To "Tuner Setup" To enter To "Channel Summary" To enter To "Station" Ch No. 9 Set Reset √® π† Press the OK button to enter To select the character you want To move to - JVC LT37E478 | Instructions - Page 43
Tuner Setup Find Channel Add a digital channel that does not exist in the channel map. π† √® π† √® Press the MENU button To "Tuner Setup" To enter To "Find Channel" To enter Add a channel using 0 to 9 Press the OK button to finish - + Tuner Setup Auto Tuner Setup Channel Summary Find Channel - JVC LT37E478 | Instructions - Page 44
feature is used if you have a DVI or HDMI compatible component connected to your TV. π† √® π† √® Press the MENU button To "External Input" To enter To choose "Analog". • Refer to your DVI or HDMI component's instruction manual for more information. • When you select "Auto", the television will - JVC LT37E478 | Instructions - Page 45
External Input Video Input Label This function is used to label video input connections for the onscreen displays. π† √® π† √® π† √® Press the MENU button To "External Input" To enter To "Video Input Label" To enter To select the desired video input To select the desired preset input label (see - JVC LT37E478 | Instructions - Page 46
0 Color Temperature High Select OK BACK Operate Back MENU Exit Color Temperature You can decide how strong or dull the colors appear on the TV screen. Press the MENU button π† √® π† √® π† To "Picture Adjust" To enter To "Color Temperature" To enter To set "Low" or "High" Press the MENU - JVC LT37E478 | Instructions - Page 47
Picture Adjust Color Management This TV supports the Color Management function to ensure dull colors are compensated "On" or "Off" Color Management On Off Press the MENU button when finished Dynamic Gamma JVC's Dynamic Gamma Circuitry (DGC) makes it easier to see dark areas when a picture has - JVC LT37E478 | Instructions - Page 48
Picture Adjust Natural Cinema Natural cinema corrects the problem of blurred edges which may occur when viewing a program originally shot on film (such as motion pictures) or animation. If you notice blurring at the - JVC LT37E478 | Instructions - Page 49
Picture Adjust Reset Reset resets all picture adjustments at once to the default settings. π† √® π† Press the MENU button To "Picture Adjust" To enter To "Reset" Press the OK button The onscreen menu disappears for a moment, and then the settings are reset to the default setting for all the - JVC LT37E478 | Instructions - Page 50
setting when you select reset. See page 49. Optical Out You can select the optical digital sound output, either PCM or DOLBY DIGITAL when your TV is connected to an amplifier that has DOLBY DIGITAL decoder. If you select DOLBY DIGITAL, you can enjoy listening in 5.1ch sound when watching digital - JVC LT37E478 | Instructions - Page 51
Sound Adjust Turn On Volume Turn On Volume allows you to set the volume level when you turn the TV on. π† √® π† √® Press the MENU button To "Sound Adjust" To enter To "Turn On Volume" To set the volume level Current 0 1 2 3 48 49 50 Press the - JVC LT37E478 | Instructions - Page 52
Press the OK button Press the MENU button when finished When you set the clock manually, choose "Manual" by pressing the √ or ® arrows. π† √® π† √® π† √® To is set to Auto, the Daylight Saving Time feature automatically adjusts your TV's clock for Daylight Saving. • The real time and D.S.T. may - JVC LT37E478 | Instructions - Page 53
√® π† √® π† π† √® π† √® π† To "On Time" To set the hour (AM/PM) you want the TV to turn on To move to minutes To set the minutes To accept "On Time" and move to "Off Time" (the time the "Please set clock first !" will appear on the screen. Please see Manual Set Clock on page 52 to set the clock. 53 - JVC LT37E478 | Instructions - Page 54
TV by using a USB cable. JVC Everio Camera (Example) TV Rear Panel 75 Ω (VHF/UHF) DIGITAL AUDIO INPUT 1 OPTICAL OUT INPUT 2 PHOTO VIEWER / SERVICE USB Cable 5) The TV finished Press the POWER button on remote control to turn the power off Customer Support website at www.jvc.com/support for - JVC LT37E478 | Instructions - Page 55
Screen" To enter Photo Viewer Multi Screen 1/2 Date: Jan/01/04 Dimensions: 640x430 The thumbnail appears √®π† To select an image 101-0001 101-0002 The following image appears. You can look at the pictures by using your remote control buttons. 123 456 789 Prev. + Next - VOLUME - + Rotate - JVC LT37E478 | Instructions - Page 56
Manual", you can change the image to the next image by using the √® buttons. Note: • It may take some extra time to move to the next image depending on the size of your JPEG images. Auto Demo Auto Demo Auto Demo explains this TV any button on the television or remote, with the exception of POWER or - JVC LT37E478 | Instructions - Page 57
can also access by pressing the INPUT button on the side of the TV instead of the remote. Channel +/- Use these buttons to move up or down all the available channels your TV is able to receive. To move rapidly through the channels using JVC's Hyperscan feature, press and hold CH+ or CH-. 57 - JVC LT37E478 | Instructions - Page 58
+ - Lets you program a specific channel to return to while scanning through the channels using the CH+ and CH- buttons. TV - Returns to the TV mode. Press the RETURN+/TV and hold for three seconds Return Channel (123-456) Programmed ! The channel currently active has been programmed as your return - JVC LT37E478 | Instructions - Page 59
the mode by pressing the π† buttons. • You can also access the "Front Menu" screen by using the MENU button on the side of the TV instead of the remote control. It has "Video Status", "Aspect", "Auto Tuner Setup" and "Menu". Choose "Video Status" by pressing MENU† on the side panel and enter - JVC LT37E478 | Instructions - Page 60
, will only show the kind of input and video signal you are receiving. However, the actual signal type you see will be different. This TV converts all signals to the 480i format. C.C. (Closed Caption) Use the C.C. (Closed Caption) button to select the mode of closed caption. Press the C.C. button - JVC LT37E478 | Instructions - Page 61
picture quality. Aspect Ratios Panorama - With this ratio a normal 4:3 aspect picture is stretched to fit the dimensions of the 16:9 aspect screen. Cinema - This ratio "zooms in" on the center part of a 4:3 aspect picture, blowing it up to fill the 16:9 screen. Regular - The regular ratio is - JVC LT37E478 | Instructions - Page 62
"Front Menu" screen by using the MENU button on the side of the TV instead of the remote control. It has "Video Status", "Aspect", "Auto Tuner Setup" and aspect mode you choosed. Menu The Menu button allows you to access JVC's onscreen menu system. Press MENU to activate the onscreen menu system. - JVC LT37E478 | Instructions - Page 63
/MTS ML/MTS technology allows several audio signals to be broadcast in analog at once, giving you a choice in what you wish to hear with a TV program. In addition to mono or stereo sound, an MTS broadcast may also include a second audio program (SAP). When you are receiving a digital broadcast, it - JVC LT37E478 | Instructions - Page 64
456 107-2 8 1 4 CBSXXXX FOXXXX PBSXXXX WEWEWEW HBOXXXX ABCABC NHKNHK MBSMBS Remove Guide You can view the program information from the GUIDE. Notes: • The GUIDE function will only work when you are receiving digital programming only. • The GUIDE will not show the correct time and date if you have - JVC LT37E478 | Instructions - Page 65
OSD Information Weak Signal This OSD warning appears when the digital channel that you have selected is too weak to receive or no signal is being detected for that channel. No Program or Weak Signal Audio / Data Only Channel This OSD appears when the selected channel is not broadcasting any picture - JVC LT37E478 | Instructions - Page 66
Troubleshooting Refer to the table below to check the condition. If you think that there is a problem, contact the JVC Service Center where you purchased the television. PROBLEMS • Make sure the remote has a clear sight path to the TV. at all • You may be too far from the TV. You must be within - JVC LT37E478 | Instructions - Page 67
Troubleshooting PROBLEMS Static electricity CHECK • It is normal to feel static electricity if you brush or touch the screen. You hear occasional crackling sounds It does not operate correctly • It is normal for the TV to make crackling sounds when first turned on or off. Unless the sound or - JVC LT37E478 | Instructions - Page 68
Dimensions (inch/cm) W X H X D Weight (lbs / kg) Accessories LT-32E478 LT-32E488 LCD 95" of the TV set's on-screen cable channel numbers) is not recommended for your TV set. AC 120V .7 / 13.5 (without stand) Refer to "unpacking your TV", page 9 Specifications subject to change without notice. • The - JVC LT37E478 | Instructions - Page 69
Dimensions (inch/cm) W X H X D Weight (lbs / kg) Accessories LT-37E478 LT-37E488 LT-42E478 LT-42E488 LCD TV set's on-screen cable channel numbers) is not recommended for your TV set. 172W 37 23.2 (without stand) Refer to "unpacking your TV", page 9 Specifications subject to change without notice - JVC LT37E478 | Instructions - Page 70
70 - JVC LT37E478 | Instructions - Page 71
71 *LIMITED WARRANTY and "TO OUR VALUED CUSTOMER" is only available for US customers. - JVC LT37E478 | Instructions - Page 72
JVC COMPANY OF AMERICA Division of JVC Americas Corp. 1700 Valley Road Wayne, New Jersey, 07470 JVC CANADA, INC. 21 Finchdene Square Scarborough, Ontario Canada, M1X 1A7
-
 1
1 -
 2
2 -
 3
3 -
 4
4 -
 5
5 -
 6
6 -
 7
7 -
8
-
9
-
10
-
11
-
12
-
13
-
14
-
15
-
16
-
17
-
18
-
19
-
20
-
21
-
22
-
23
-
24
-
25
-
26
-
27
-
28
-
29
-
30
-
31
-
32
-
33
-
34
-
35
-
36
-
37
-
38
-
39
-
40
-
41
-
42
-
43
-
44
-
45
-
46
-
47
-
48
-
49
-
50
-
51
-
52
-
53
-
54
-
55
-
56
-
57
-
58
-
59
-
60
-
61
-
62
-
63
-
64
-
65
-
66
-
67
-
68
-
69
-
70
-
71
-
72
 |
 |
Important Note:
In the spaces below, enter the model and serial number of your television (located at the
rear of the television cabinet).
Staple your sales receipt or invoice to the inside cover of this
guide.
Keep this user’s guide in a convenient place for future reference.
Keep the carton
and original packaging for future use.
LCT2224-001B-A
0207TNH-II-IM
Model Number:
Serial Number:
Illustration of LT-32E488 and RM-C1291
For Models:
LT-42E488
LT-42E478
LT-37E488
LT-37E478
LT-32E488
LT-32E478
LCD Flat Television Users Guide