JVC NXCDR7 Instructions
JVC NXCDR7 - Executive Microsystem Manual
 |
UPC - 046838258091
View all JVC NXCDR7 manuals
Add to My Manuals
Save this manual to your list of manuals |
JVC NXCDR7 manual content summary:
- JVC NXCDR7 | Instructions - Page 1
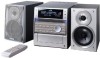
yyyyyyyyyyyyyyyyyyyyyyyyyyyyyyyyyyyyyyyyyyyyyyyyyyyyyyyyyyyyy COMPACT COMPONENT CDR SYSTEM SYSTEME CDR DE COMPOSANTS COMPACT NX-CDR7 - Consists of CA-NXCDR7 and SP-NXCDR7 - Composé yyyyyyyyyyyyyyyyyyyyyyyyyyyyyyyyyyyyyyyyyyyyyyyyyyyyyyyyyyyyy INSTRUCTIONS MANUEL D'INSTRUCTIONS For - JVC NXCDR7 | Instructions - Page 2
user to the presence of important operating and maintenance (servicing) instructions in the literature accompanying the appliance. WARNING: TO any position does not disconnect the mains line. The power can be remote controlled. Attention -- Commutateur STANDBY/ON ! Déconnecter la fiche de secteur - JVC NXCDR7 | Instructions - Page 3
installation. This equipment generates, uses and can radiate radio frequency energy and, if not installed and used in accordance with the instructions, may cause harmful interference to radio communications. However, there is no guarantee that interference will not occur in a particular installation - JVC NXCDR7 | Instructions - Page 4
Contents Introduction 2 About This Manual 2 Precautions 2 Precautions on Disc Playback and Recording ....... 3 Location of the Buttons and Controls 4 Remote Control 4 Main Unit 5 Using Auto Power Off 49 Maintenance 50 Glossary 51 Messages 52 Troubleshooting 53 Specifications 54 - 1 - - JVC NXCDR7 | Instructions - Page 5
manual for future reference. About This Manual Precautions This manual is organized as follows: • This manual mainly explains playback operations using the remote unit since there are no user serviceable parts inside. If anything goes wrong, unplug the AC power cord and consult your dealer. - - JVC NXCDR7 | Instructions - Page 6
for any damage resulting from missed opportunity or accidental erasure that occurs while conducting recording or playback operations due to malfunctioning of or trouble in the unit, or for any incidental damage. • Before recording on a CD-R, it is recommended to make a test recording using a CD-RW - JVC NXCDR7 | Instructions - Page 7
MENU 6 A.P.off CLOCK /TIMER SLEEP 7 ; 8 FM/PLAY BASS MODE PITCH REPEAT 9 a SOUND VOLUME p s d RM-SNXCDR7J REMOTE CONTROL See pages in the parentheses for details. Remote Control 1 Disc number buttons (21, 22) • CD1, CD2, and CD3 Pressing one of these buttons also turns on the unit - JVC NXCDR7 | Instructions - Page 8
English Main Unit 1 2 3 4 5 6 7 8 9 p q STANDBY SOURCE 123 UNFINALIZE DISC MONO STEREO CD TEXT PITCH A . P. o f f BASS SOUND AUTO TRACK DIGITAL CDR DAILY REC SLEEP PROGRAM RANDOM 1CD ALL SKIP ON RDSEON [ TA News Info ] NORMAL HIGH SPEED ANALOG OVER REC LEVEL CD-RW dB REC UNFINALIZE - JVC NXCDR7 | Instructions - Page 9
21, 25, 27, 31) q 4 (reverse skip) button (18, 22, 27) w Display window e OPEN/CLOSE button • Pressing this button also turns on the unit. r Remote sensor t 0 (open/close) CDR button (27, 31) • Pressing this button also turns on the unit. Display Window y CDR lamps (14, 27) u CDR disc tray - JVC NXCDR7 | Instructions - Page 10
English Display Window 1 2 34 56 7 123 UNFINALIZE DISC MONO STEREO CD TEXT PITCH A . P. o f f DAILY REC SLEEP BASS SOUND PROGRAM RANDOM 1CD ALL SKIP ON AUTO TRACK DIGITAL CDR NORMAL HIGH SPEED ANALOG OVER REC LEVEL CD-RW REC dB UNFINALIZE DISC 8 9 2 Timer mode indicators (45 - 49) - JVC NXCDR7 | Instructions - Page 11
have all the following items. The numbers in the parentheses indicate the quantity of the pieces supplied. • AM loop antenna (1) • FM antenna (1) • Remote control (1) • Batteries (2) • Speaker cord (2) If any item is missing, consult your dealer immediately. To connect an outdoor FM antenna Before - JVC NXCDR7 | Instructions - Page 12
English AM antenna AM loop antenna (supplied) 3 Connecting Speakers You can connect the speakers using the speaker cords. 1 2 3 4 Red Red 1 Black Black 2 Black Red Speaker cord Vinyl-covered wire (not supplied) 1 If cords are covered with insulation, twist the core of the cord at - JVC NXCDR7 | Instructions - Page 13
of the speaker grille into the holes of the speaker. Connecting Other Components When you connect and use other components, refer also to the manuals supplied with them. • DO NOT connect other components while the power is on. • DO NOT plug in any component until all connections are complete - JVC NXCDR7 | Instructions - Page 14
English To connect digital components • When connecting a digital component equipped with an optical digital output terminal The following connection allows you to perform digitalto-digital recording (through the digital terminals) and playback of the connected digital component (through the analog - JVC NXCDR7 | Instructions - Page 15
for an extended period of time. Otherwise, it will be damaged from battery leakage. 1 When using the remote control, point it at the remote sensor on the front panel. Remote sensor STANDBY SOURCE OPEN/CLOSE CDR COMPACT COMPONENT CDR SYSTEM N X - C D R7 DISC CD CDR FINALIZE REC PAUSE - JVC NXCDR7 | Instructions - Page 16
Common Operations The buttons and controls enlarged in the illustration below are used and explained in this section (pages 14 to 16). Remote control 10 +10 STANDBY/ON 1 2 3 DISPLAY 4 5 6 CANCEL 7 8 9 SET 10 AUTO PRESET +10 ENTER STANDBY/ON DISPLAY SET BASS SOUND MENU EON PTY - JVC NXCDR7 | Instructions - Page 17
. To save the power consumption while on standby, press DISPLAY on the remote control while the unit is turned off (on standby-while the STANDBY lamp pages 17 to 19. • For operating the external components, refer to its manual. To adjust the input level through the LINE IN jacks If the sound from - JVC NXCDR7 | Instructions - Page 18
the volume level only while the unit is turned on. When using the remote control, press VOLUME + to increase the volume or press VOLUME - to • You can use this effect only for playback, but not for recording. On the remote control ONLY: Press BASS so that "ACT-BASS ON" appears in the main display. - JVC NXCDR7 | Instructions - Page 19
preset sound modes and 2 manual modes. • You can use this effect only for playback, but not for recording. On the remote control ONLY: Press SOUND to create a being-there feeling. **See "Creating Your Own Sound Modes-MANUAL Modes" on the right column. To check the sound mode currently selected, - JVC NXCDR7 | Instructions - Page 20
The buttons and controls enlarged in the illustration below are used and explained in this section (pages 18 to 19). Remote control PTY SELECT- PTY SEARCH SELPETCYT+ STANDBY/ON 1 2 3 DISPLAY 4 5 6 CANCEL 7 8 9 SET 10 AUTO PRESET +10 ENTER MENU 1 2 3 4 5 6 7 8 9 10 AUTO - JVC NXCDR7 | Instructions - Page 21
frequency changes step by step. To change the FM reception mode On the remote control ONLY: When an FM stereo broadcast is hard to receive or noisy, 30 FM and 15 AM stations-using either automatic presetting method or manual presetting method. • You cannot store FM reception mode separately for - JVC NXCDR7 | Instructions - Page 22
English To preset stations manually-Manual Presetting On the remote control ONLY: • There is a time limit in on a used number erases the previously stored one. Tuning into a Preset Station On the remote control ONLY: 1 Press SOURCE repeatedly until FM or AM is selected. UNFINALIZE DISC PITCH - JVC NXCDR7 | Instructions - Page 23
The buttons and controls enlarged in the illustration below are used and explained in this section (pages 21 to 25). Remote control 1 2 3 4 5 6 7 8 9 10 +10 FM/PLAY MODE STANDBY/ON 1 2 3 DISPLAY 4 5 6 CANCEL 7 8 9 SET 10 AUTO PRESET +10 ENTER DISPLAY CANCEL MENU A.P.off - JVC NXCDR7 | Instructions - Page 24
discs into 3-CD Changer. 2 Select a disc, and start playback. On the unit: 1 Press DISC repeatedly to select the disc you want. 2 Press CD 3 / 8. On the remote control: Press one of the disc number buttons (CD1, CD2, and CD3). Track No. CD 123 NORMAL SPEED REC LEVEL dB Good No good • When - JVC NXCDR7 | Instructions - Page 25
. To start playing a disc during playback of another disc On the remote control: Press CD1, CD2 or CD3. The selected disc play starts. tracks play before you start playing. You can program up to 32 tracks. On the remote control ONLY: 1 Load discs into 3-CD Changer. • If the current playing source is - JVC NXCDR7 | Instructions - Page 26
-Random Play The tracks of all loaded discs will play at random. On the remote control ONLY: 1 Load discs into 3-CD Changer. • If the current playing check the program contents by pressing ¡ / ¢ or 4 / 1 on the remote control Shows the programed tracks in the programed order. • 4 / 1 : Shows - JVC NXCDR7 | Instructions - Page 27
many times as you like. • If an unfinalized CD-R or CD-RW is loaded, it will be skipped and not be played back. On the remote control ONLY: Press REPEAT repeatedly during or before playing. • Each time you press the button, Repeat Play mode changes and appears in the main display - JVC NXCDR7 | Instructions - Page 28
and you can show this text information in the main display. On the remote control ONLY: Press DISPLAY repeatedly. • Each time you press the button, playback speed is adjusted (while the PITCH indicator is lit). On the remote control ONLY: 1 Press PITCH during play. The current setting appears in - JVC NXCDR7 | Instructions - Page 29
Recorder The buttons and controls enlarged in the illustration below are used and explained in this section (page 27). Remote control 1 2 3 4 5 6 7 8 9 10 +10 STANDBY/ON 1 2 3 DISPLAY 4 5 6 CANCEL 7 8 9 SET 10 AUTO PRESET +10 ENTER MENU A.P.off CLOCK /TIMER SLEEP BASS - JVC NXCDR7 | Instructions - Page 30
10, +10, then 2. Repeating Tracks-Repeat Play You can repeat an individual track or all tracks in a disc many times as you like. On the remote control ONLY: Press REPEAT repeatedly during or before playing. • Each time you press the button, Repeat Play mode changes and appears in the main display - JVC NXCDR7 | Instructions - Page 31
VOLUME PHONES DIRECT REC FADE IN/OUT REC MUTE CD3 CD2 CD1 Press OPEN/CLOSE to move down (or up) the sliding panel. Remote control STANDBY/ON 1 2 3 DISPLAY 4 5 6 CANCEL 7 8 9 SET 10 AUTO PRESET +10 ENTER DISPLAY SET ENTER MENU A.P.off CLOCK /TIMER SLEEP FM/PLAY BASS MODE - JVC NXCDR7 | Instructions - Page 32
DOES NOT have track marks recorded, this unit functions in the same way for recording an analog source. To cancel auto track-marking and use manual trackmarking, see "Recording Track Marks Manually- Manual Track-Marking" on page 40. - 29 - - JVC NXCDR7 | Instructions - Page 33
English Available recording modes-REC MODE CD Recorder provides a variety of the recording methods-called "Recording Modes." Available recording modes vary according to the playback source and its playback status. By pressing REC MODE after all preparation for recording is finished, you can select - JVC NXCDR7 | Instructions - Page 34
either Program Play or Random Play, press FM/PLAY MODE on the remote control to select Continuous Play. • When recording an FM/AM broadcast: recording from the external component: Start playback. • For details, see the manual supplied with your component. To stop recording for a moment, press REC - JVC NXCDR7 | Instructions - Page 35
ONLY: 1 While CD Recorder is in recording pause mode, press REC LEVEL (inside the sliding panel). Now the VOLUME control (and VOLUME +/- on the remote) works to adjust the recording level. CD 123 AUTO TRACK CDR ANALOG CD-RW REC LEVEL REC dB UNFINALIZE DISC 2 Turn the VOLUME control while - JVC NXCDR7 | Instructions - Page 36
Changer. • If the current playing source is not 3-CD changer, press CD 3 / 8, then 7. To select a disc, press DISC repeatedly, then 7. You can also use the remote control. When using it, press CD1, CD2, or CD3, then 7. You can make a program (see page 22) if you want. (But you cannot select Random - JVC NXCDR7 | Instructions - Page 37
Changer. • If the current playing source is not 3-CD changer, press CD 3 / 8, then 7. To select a disc, press DISC repeatedly, then 7. You can also use the remote control. When using it, press CD1, CD2, or CD3, then 7. You can make a program (see page 22) if you want. (But you cannot select Random - JVC NXCDR7 | Instructions - Page 38
Changer. • If the current playing source is not 3-CD changer, press CD 3 / 8, then 7. To select a disc, press DISC repeatedly, then 7. You can also use the remote control. When using it, press CD1, CD2, or CD3, then 7. • If the current play mode is either Program Play or Random Play, press FM/PLAY - JVC NXCDR7 | Instructions - Page 39
Changer. • If the current playing source is not 3-CD changer, press CD 3 / 8, then 7. To select a disc, press DISC repeatedly, then 7. You can also use the remote control. When using it, press CD1, CD2, or CD3, then 7. • If the current play mode is either Program Play or Random Play, press FM/PLAY - JVC NXCDR7 | Instructions - Page 40
English Continued Recording the External Components -Sound Synchronized Recording With this recording method, you can start recording automatically when the source sound comes into this unit through the LINE IN jacks or the LINE DIGITAL IN terminal. Observe the following when recording from - JVC NXCDR7 | Instructions - Page 41
English Recording a Single Track during Play You can record the current track while playing back a disc on 3-CD changer. • If a recordable disc is not loaded, "CDR NO DISC" appears in the main display. Insert a recordable CD-R or CD-RW. 7 Using the DIRECT REC button On the unit ONLY: Press DIRECT - JVC NXCDR7 | Instructions - Page 42
CDR Functions The buttons and controls enlarged in the illustration below are used and explained in this section (pages 40 to 43). Remote control STANDBY/ON 1 2 3 DISPLAY 4 5 6 CANCEL 7 8 9 SET 10 AUTO PRESET +10 ENTER SET ENTER MENU MENU A.P.off CLOCK /TIMER SLEEP FM/PLAY - JVC NXCDR7 | Instructions - Page 43
are recorded automatically (see "Auto track-marking" on page 29 for more details). To cancel auto-track marking and use manual track marking, follow the procedure below. On the remote control ONLY: 1 Press MENU repeatedly until "AUTO TRACK" appears in the main display. • Each time you press the - JVC NXCDR7 | Instructions - Page 44
." • This function works when "AUTO TRACK" is set to "ON." (See page 40.) To cancel Auto-Track Space, follow the procedure below: On the remote control ONLY: 1 Press MENU repeatedly until "TRACK SPACE" appears in the main display. • Each time you press the button, the following menu items appear as - JVC NXCDR7 | Instructions - Page 45
if a power failure occurs while "ERASE TRACK" is flashing in the main display (in step 4), the disc may not be utilized any more. On the remote control ONLY: 1 Press MENU repeatedly until "TRACK ERASE" appears in the main display. • Each time you press the button, the following menu items appear as - JVC NXCDR7 | Instructions - Page 46
if a power failure occurs while "ERASE DISC" is flashing in the main display (in step 3), the disc may not be utilized any more. On the remote control ONLY: 1 Press MENU repeatedly until "DISC ERASE" appears in the main display. • Each time you press the button, the following menu items appear as - JVC NXCDR7 | Instructions - Page 47
the Timers The buttons and controls enlarged in the illustration below are used and explained in this section (pages 45 to 49). Remote control STANDBY/ON 1 2 3 DISPLAY 4 5 6 CANCEL 7 8 9 SET 10 AUTO PRESET +10 ENTER STANDBY/ON CANCEL SET A.P.off CLOCK /TIMER SLEEP MENU CLOCK - JVC NXCDR7 | Instructions - Page 48
consumption saving mode ("DISPLAY OFF"), you cannot adjust the clock while the unit is turned off (on standby). For details, see page 14. On remote control ONLY: 1 Press CLOCK/TIMER. The hour digit in the main display starts flashing. 2 Press ¡ / ¢ or 4 / 1 to adjust the hour, then press SET. Using - JVC NXCDR7 | Instructions - Page 49
English 2 Press ¡ / ¢ or 4 / 1 to set the hour of the on-time, then press SET. 3 Press ¡ / ¢ or 4 / 1 to set the minute of the on-time, then press SET. 4 Press ¡ / ¢ or 4 / 1 to set the hour of the off-time, then press SET. 5 Press ¡ / ¢ or 4 / 1 to set the minute of the off-time, then press SET. 6 - JVC NXCDR7 | Instructions - Page 50
unit automatically turns off (stands by). • Daily Timer works every day, and the timer settings remain stored in memory until you reset them. On remote control ONLY: 1 Press CLOCK/TIMER repeatedly until the Daily Timer on-time setting screen appears in the main display. The (Timer) indicator lights - JVC NXCDR7 | Instructions - Page 51
English 7 If you have selected "CD" as the source in the above step, select a disc number. Press ¡ / ¢ or 4 / 1 to select the disc number (CD 1, CD 2, or CD 3), then press SET. IMPORTANT: When selecting a disc number, make sure that a disc is already loaded on the selected disc number tray. If - JVC NXCDR7 | Instructions - Page 52
The unit automatically turns off after the specified time length passes. On the remote control ONLY: 1 Press SLEEP. • Each time you press the button, Power Off is canceled temporarily even though no sound comes in. On the remote control ONLY: Press A.P.off so that the A.P.off indicator lights on - JVC NXCDR7 | Instructions - Page 53
English Maintenance To get the best performance of the unit, keep your discs and mechanism clean. General Notes In general, you will have the best performance by keeping your discs and the mechanism clean. • Store discs in their cases, and keep them in cabinets or on shelves. • Keep the disc - JVC NXCDR7 | Instructions - Page 54
English Glossary OPC (Optimum Power Control) OPC is a function that checks the loaded disc and automatically adjusts the laser for optimum recording setting before recording through the Digital Optical Input terminal. PCA (Power Calibration Area) A space reserved at the beginning of a CD-R/CD-RW - JVC NXCDR7 | Instructions - Page 55
English Messages Message Signification Solution ALL SKIP TR Skip marks are recorded to all the tracks. Replace the disc. ALREADY FINAL You are trying to erase a track or add a skip mark on a finalized disc. ALREADY UNFIN. You are trying to unfinalize an unfinalized disc. BLANK DISC Loaded - JVC NXCDR7 | Instructions - Page 56
English Troubleshooting If you are having a problem with your unit, check this list for a possible solution before calling for service. If you cannot solve the problem from the hints given here, or the unit has been physically damaged, call a qualified person, such as your dealer, for service. - JVC NXCDR7 | Instructions - Page 57
English Specifications Amplifier-CA-NXCDR7 Output Power: 28 W per channel, min. RMS, driven into 6 Ω, 40 Hz to 20 kHz, with no more than 10% total harmonic distortion Audio input sensitivity/Impedance (at 1 kHz) Analog input: LINE IN: 125 mV/47 kΩ (at "LEVEL 2") 500 mV/47 kΩ (at "LEVEL 1") 1.3 V/ - JVC NXCDR7 | Instructions - Page 58
VICTOR COMPANY OF JAPAN, LIMITED EN,FR VJ C 0901MWMMDWJEM
-
 1
1 -
 2
2 -
 3
3 -
 4
4 -
 5
5 -
 6
6 -
 7
7 -
8
-
9
-
10
-
11
-
12
-
13
-
14
-
15
-
16
-
17
-
18
-
19
-
20
-
21
-
22
-
23
-
24
-
25
-
26
-
27
-
28
-
29
-
30
-
31
-
32
-
33
-
34
-
35
-
36
-
37
-
38
-
39
-
40
-
41
-
42
-
43
-
44
-
45
-
46
-
47
-
48
-
49
-
50
-
51
-
52
-
53
-
54
-
55
-
56
-
57
-
58
 |
 |

INSTRUCTIONS
MANUEL D’INSTRUCTIONS
NX-CDR7
For Customer Use:
Enter below the Model No. and Serial
No. which are located either on the rear,
bottom or side of the cabinet. Retain this
information for future reference.
Model No.
Serial No.
LVT0749-002A
[J(C)]
COMPACT COMPONENT CDR SYSTEM
SYSTEME CDR DE COMPOSANTS COMPACT
STANDBY
COMPACT COMPONENT
CDR
SYSTEM
NX-CD
R
7
R
SOURCE
OPEN/CLOSE
CDR
VOLUME
CD3
CD2
CD1
3CD Changer System, Play & Exchange
3CD
DISC
CD
CDR
FINALIZE
DIRECT REC
REC PAUSE
FADE IN/OUT
REC MUTE
PHONES
TEXT
DIGITAL AUDIO
COMPACT
Recordable
ReWriteble
DIGITAL AUDIO
STANDBY/ON
DISPLAY
CANCEL
SET
ENTER
RM-SNXCDR7J
REMOTE CONTROL
MENU
A.P.off
CLOCK
/TIMER
SLEEP
BASS
SOUND
VOLUME
PITCH
REPEAT
FM/PLAY
MODE
AUTO PRESET
10
+10
1
2
3
4
5
6
7
8
9
SP-NXCDR7
CA-NXCDR7
SP-NXCDR7
—
Consists of CA-NXCDR7 and SP-NXCDR7
—
Composé du CA-NXCDR7 et SP-NXCDR7