JVC S15U DLA-S15U User instruction manual (2.1MB)
JVC S15U - DLA - D-ILA Projector Manual
 |
View all JVC S15U manuals
Add to My Manuals
Save this manual to your list of manuals |
JVC S15U manual content summary:
- JVC S15U | DLA-S15U User instruction manual (2.1MB) - Page 1
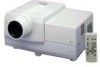
PROJECTOR MANUEL D'INSTRUCTIONS : PROJECTEUR DLA-S15U INSTRUCTIONS ENGLISH FRANÇAIS For customer Use: Enter below the Model No. No de modèle Serial No. No de série DLA-S15U OPERATE COMPUTER VIDEO VOL. PAGE BACK PRESET FOCUS MENU/ENTER QUICK ALIGN. AV MUTING RM-M10SG REMOTE CONTROL UNIT - JVC S15U | DLA-S15U User instruction manual (2.1MB) - Page 2
ENGLISH INSTRUCTIONS PROJECTOR DLA-S15U 1 - JVC S15U | DLA-S15U User instruction manual (2.1MB) - Page 3
with high-intensity or highcontrast on a screen. The video image could be burned in to the D-ILA device. Use special care when projecting video games or computer program images. There is no problem with ordinary videocassette playback images. 2 Electrical energy can perform many useful functions - JVC S15U | DLA-S15U User instruction manual (2.1MB) - Page 4
this can source lamp (lamp unit) of this projector. If you drop or result in a risk of fire or electric shock. impart a shock to the lamp, or discard normally by following the operating instructions. Adjust only those controls that are covered by the Operation Manual, as an improper adjustment of - JVC S15U | DLA-S15U User instruction manual (2.1MB) - Page 5
19 Signals that Can Be Input to the Projector .......... 19 Connecting to Video Devices 20 Connecting to Hi-Vision Devices 20 Connecting -Source Lamp ....... 48 Resetting the Lamp Use Time 50 Cleaning and Replacing the Filter ....... 51 Troubleshooting 52 Specifications 54 * This manual is - JVC S15U | DLA-S15U User instruction manual (2.1MB) - Page 6
Accessories The following accessories are included with this projector. Check for them; if any item is missing, please contact your dealer. Remote control unit (RM-M10SG) AAA/R03-size dry cell battery (×2) (for checking - JVC S15U | DLA-S15U User instruction manual (2.1MB) - Page 7
cap has a string attached and the string is fixed to the projector when shipped from the factory. It is recommended that the cap be projector is not used. CAUTIONS • When carrying the projector, do not give a shock to it. Be careful to keep its balance. • Do not carry it while the light source lamp - JVC S15U | DLA-S15U User instruction manual (2.1MB) - Page 8
POWER switch This is the main power switch. When it is turned on, the projector goes into stand-by state, and the STAND BY indicator on the control panel shortest position when shipped from the factory. Turn the foot to make the projector level. Adjustment can be made in the range of + 1.5° and - JVC S15U | DLA-S15U User instruction manual (2.1MB) - Page 9
y u r Air intake area (filter) Air is taken in through this area to cool the light-source lamp. If this area is blocked or if something that obstructs taking in or exhausting air is placed around the projector, heat may build up inside and could cause a fire. For details, refer to "Precautions for - JVC S15U | DLA-S15U User instruction manual (2.1MB) - Page 10
-down mode is to prevent inner parts from being deformed or broken by heat from the heated lamp as well as to prolong the life of the lamp. Do not turn off the main power switch while in the cool-down mode. Also, do not place the projector on its side or stand it - JVC S15U | DLA-S15U User instruction manual (2.1MB) - Page 11
OPERATE LAMP TEMP EMERGENCY VIDEO COMPUTER video input (AV IN input terminal) signals. +3 QUICK ALIGN. p -2 7 VIDEO button Use this button to select a device such as a video deck connected to the AV IN terminal of the projector , PHASE, H. POS. and V. POS. manually (see pages 31, 37 and 38). 8 - JVC S15U | DLA-S15U User instruction manual (2.1MB) - Page 12
from both L and R. Memo To select the proper audio input for video input: The video input terminals (AV IN input terminals) can be switched with the projector's or remote control's VIDEO button. However, since this projector has only single audio input terminal, reconnect audio input in accordance - JVC S15U | DLA-S15U User instruction manual (2.1MB) - Page 13
to COMPUTER -2 is selected, the audio signal input is reproduced by the projector's speakers. Also, signals can be output from the AUDIO OUT (audio output This is an input terminal (PC) dedicated for computer signals (RGB video signals and sync signals). Connect the display output terminal of the - JVC S15U | DLA-S15U User instruction manual (2.1MB) - Page 14
: COMPUTER 1 COMPUTER 2 3 VIDEO button Use this button to select the devices such as a video connected to the projector's AV IN (AV input) function is not satisfactory, adjust TRACKING, PHASE, H. POS. and V. POS. manually (see pages 31, 37 and 38). 9 PRESET button While making adjustment on - JVC S15U | DLA-S15U User instruction manual (2.1MB) - Page 15
Controls and Features (cont.) Installing Batteries Install batteries in the remote control. If the remote control has started to work erratically, replace the batteries. 1 Open the back cover. While pushing on the back cover, slide it in the direction of the arrow. 2 Install the batteries. Place - JVC S15U | DLA-S15U User instruction manual (2.1MB) - Page 16
-right. This could cause color variation or harm the lamp life. • Do not block the exhaust vents. Do not use a cover which encloses the projector air-tight or blocks the exhaust vents. Allow sufficient space around the projector. When the projector is enclosed in a space of the following dimensions - JVC S15U | DLA-S15U User instruction manual (2.1MB) - Page 17
ratio 90° 90° 90° Center line of the lens Install the projector so the center of the projection screen is at the same height as 3 aspect ratio picture. This value is a guide and should be used as a reference. • If sunlight or lamp light strikes the projection screen directly, the picture - JVC S15U | DLA-S15U User instruction manual (2.1MB) - Page 18
Sizes s Use the table below as a guide or reference when installing the projector. Projection screen size (diagonal length) 36.7" ft approx. 9.09 ft approx. 9.74 ft approx. 10.43 ft approx. 11.09 ft approx. 11.75 ft approx. 12.40 ft approx. 13.06 ft (0.76 m) (0.96 m) (1.16 m) (1.36 m) (1.56 - JVC S15U | DLA-S15U User instruction manual (2.1MB) - Page 19
right to left, and 15° up and down. The effective range and distance of the remote control unit • Use the projector with A+B about 10 m (32.8 ft) or less. Screen Projector (DLA-S15U) 50° 50° A 15° 15° B Remote control unit Note • Depending on the type of the screen used, the effective distance - JVC S15U | DLA-S15U User instruction manual (2.1MB) - Page 20
projector and connected devices. * Read the manual which comes with each device thoroughly. Signals that Can Be Input to the Projector The following signals can be input to the projector: s Video (SVGA1) 35.0kHz 37.5kHz 37.9kHz 66.7Hz 75.0Hz 60.3Hz Non-interlace Non-interlace Non-interlace 800 - JVC S15U | DLA-S15U User instruction manual (2.1MB) - Page 21
To PR/R-Y BNC cable (separately available) • Hi-Vision video camera To select the proper audio input for video input The video input terminal (AV IN input terminal) can be switched with the VIDEO button. However, since this projector has only a single audio input terminal, reconnect audio input - JVC S15U | DLA-S15U User instruction manual (2.1MB) - Page 22
infrared remote sensor extension unit and connect it to the REMOTE terminal of the projector. * Obtain connection cables as required. * For details, consult a JVC-authorized your dealer or service center. • Desktop type Y/C AUDIO PC To RS-232C connector AUDIO R AUDIO L G H/CS R • Note type - JVC S15U | DLA-S15U User instruction manual (2.1MB) - Page 23
connection, be sure to turn off both the projector and computer devices. • Read the manual which comes with each device thoroughly. s Connection or separately available)(D-sub 3-row 15-pin) To monitor connector • RGB output devices Laser video disc player, etc. To R To G To B To H/Cs To V POWER - JVC S15U | DLA-S15U User instruction manual (2.1MB) - Page 24
to Various Devices (Cont.) Connecting to Computer Devices (Cont.) Before connection, be sure to turn off both the projector and computer devices. • Read the manual which comes with each device thoroughly. s Connection to Macintosh • Use the supplied Personal computer connection cable and the - JVC S15U | DLA-S15U User instruction manual (2.1MB) - Page 25
this time, do not turn on the MAIN POWER switch yet. 1 Insert the supplied power cord into the power input terminal (AC IN ~) of the projector. AC IN 1 Power cord (supplied) 2 Insert the plug of the supplied power cord into a wall outlet. 2 CAUTIONS To prevent fire and electric shock, observe - JVC S15U | DLA-S15U User instruction manual (2.1MB) - Page 26
projector w Projector itself w Power switches of devices to which the projector projector uses a high-intensity lamp the light-source lamp is cooled down the light-source lamp is finished (the lamp lights, it takes about 40 seconds for the lamp to go off. To turn the lamp to operate the projector. If it - JVC S15U | DLA-S15U User instruction manual (2.1MB) - Page 27
Basic Operations s Projector's buttons STAND BY OPERATE LAMP TEMP EMERGENCY VIDEO COMPUTER SETTING +3 QUICK ALIGN. -2 STAND BY indicator OPERATE indicator OPERATE button 2, 1 MAIN POWER switch 1, 2 The following describes the basic procedure for normal use of the projector. 1. Turning on the - JVC S15U | DLA-S15U User instruction manual (2.1MB) - Page 28
Screen display VIDEO Projector VIDEO COMPUTER NTSC(480i) s Remote control unit OPERATE COMPUTER VIDEO COMPUTER button VIDEO button VOL. PAGE BACK FOCUS MENU/ENTER * When the input is switched, the line display (ex. VIDEO) and the source display (ex. NTSC(480i)) are shown on the upper part of - JVC S15U | DLA-S15U User instruction manual (2.1MB) - Page 29
Basic Operations (Cont.) s Remote control unit OPERATE COMPUTER VIDEO VOL. FOCUS FOCUS (+/-) buttons PAGE BACK MENU/ENTER 3. Adjust focus s Adjust focus with the remote control's FOCUS (+/-) buttons. s To focus on farther points: Press the - JVC S15U | DLA-S15U User instruction manual (2.1MB) - Page 30
Projector's button STAND BY OPERATE LAMP TEMP EMERGENCY VIDEO COMPUTER SETTING +3 QUICK ALIGN. -2 QUICK ALIGN. buttons ¶ For Operating Other Functions s To turn off video the quick alignment function is not good, manually adjust TRACKING, PHASE, H. POS. and V. POS. (see pages 31, 37 and 38 - JVC S15U | DLA-S15U User instruction manual (2.1MB) - Page 31
Basic Operations (Cont.) s Projector button STAND BY OPERATE LAMP TEMP EMERGENCY VIDEO COMPUTER SETTING +3 QUICK ALIGN. -2 SETTING button s Remote control unit OPERATE COMPUTER VIDEO VOL. PAGE BACK PRESET QUICK ALIGN. FOCUS MENU/ENTER MENU/ENTER button AV MUTING s To display the SETTING - JVC S15U | DLA-S15U User instruction manual (2.1MB) - Page 32
or downward, adjust the vertical position of the screen. (-120 ↔ 0 ↔ +120) FOCUS : Adjust the focus of video picture. -: Focuses on near points. +: Focuses on farther points. ZOOM : This projector does not have the ZOOM function. Though "ZOOM" appears on SETTING menu, it cannot be adjusted - JVC S15U | DLA-S15U User instruction manual (2.1MB) - Page 33
factory-set ratio is 4 : 3. When projecting high-vision video image, a ratio of 16 : 9 can be selected. projector goes into a stand-by state. Sleep time can be selected from 10 minutes, 20 minutes, 30 minutes, and 60 minutes. LAMP TIME : Indicates the accumulated used hours of the light-source lamp - JVC S15U | DLA-S15U User instruction manual (2.1MB) - Page 34
video image input is smaller than that (resolution) of D-ILA device, the video image is then enlarged to a virtually full screen size of D-ILA depleted, the projector goes into a stand-by state. Sleep time can minutes. LAMP TIME : Indicates accumulated used hours of the light-source lamp. - JVC S15U | DLA-S15U User instruction manual (2.1MB) - Page 35
Operating the Main Menu (Cont.) Operating the Main Menu (Basic Operation of the Main Menu) s Remote control unit OPERATE COMPUTER VIDEO MENU/ENTER button For projector's menus, the setting menu and the main menu are available. Here, we explain about the operation of the main menu. (see pages - JVC S15U | DLA-S15U User instruction manual (2.1MB) - Page 36
/ENTER AV MUTING Cursor buttons PAGE BACK button s Main menu VIDEO NTSC(480i) PIXEL CLOCK POSITION PICTURE SOUND OPTIONS SOURCE DECODER AUTO . When video signals from AV devices are input, the item for the color system can be set. AUTO is set for the color system when the projector is shipped - JVC S15U | DLA-S15U User instruction manual (2.1MB) - Page 37
2 : Backward Japanese PAGE BACK button English s Main menu VIDEO NTSC(480i) PIXEL CLOCK POSITION PICTURE SOUND OPTIONS SOURCE DECODER AUTO( Italian French Memo About language display English is selected when the projector is shipped from the factory. The languages in the menu - JVC S15U | DLA-S15U User instruction manual (2.1MB) - Page 38
are correctly adjusted. (Pixel clock menu) 4 Adjust "TRACKING" and "PHASE" with the cursor buttons. • Adjust the tracking and phase of the video screen being projected. To adjust the phase, first check for correct tracking adjustment. Adjustment item Button Adjustment content TRACKING 2 The - JVC S15U | DLA-S15U User instruction manual (2.1MB) - Page 39
/ENTER button. • The submenu items of the POSITION menu appear on the screen. POSITION H.POS. 0 H.POS. 0 PAGE BACK button s Main menu VIDEO NTSC(480i) PIXEL CLOCK POSITION PICTURE SOUND OPTIONS SOURCE DECODER LANGUAGE AUTO(NTSC(480i)) ENGLISH Submenu item (position) Note • The selected - JVC S15U | DLA-S15U User instruction manual (2.1MB) - Page 40
MENU/ENTER button VOL. PAGE BACK PRESET QUICK ALIGN. FOCUS MENU/ENTER AV MUTING Cursor buttons PAGE BACK button s Main menu VIDEO NTSC(480i) PIXEL CLOCK POSITION PICTURE SOUND OPTIONS SOURCE DECODER LANGUAGE AUTO(NTSC(480i)) ENGLISH Adjust brightness, contrast, etc. so you have the - JVC S15U | DLA-S15U User instruction manual (2.1MB) - Page 41
item, TINT, is displayed only for NTSC system. It is not displayed (cannot be adjusted) when PAL or SECAM system signals are input. • When video signals are input to the COMPUTER IN-2 terminal, adjustment items "COLOR" and "TINT" are indicated but cannot be adjusted. s For computer system input • To - JVC S15U | DLA-S15U User instruction manual (2.1MB) - Page 42
Operating the Main Menu (Cont.) Adjusting Picture Quality (Cont.) s Remote control unit OPERATE COMPUTER VIDEO MENU/ENTER button VOL. PAGE BACK PRESET QUICK ALIGN. FOCUS MENU/ENTER AV MUTING Cursor buttons PAGE BACK button s Submenu items [PICTURE menu] PICTURE (SXGA2) - JVC S15U | DLA-S15U User instruction manual (2.1MB) - Page 43
the MENU/ENTER button. •The submenu items of the SOUND menu appear on the screen. SOUND TREBLE 0 BASS 0 PAGE BACK button s Main menu VIDEO NTSC(480i) PIXEL CLOCK POSITION PICTURE SOUND OPTIONS SOURCE DECODER AUTO(NTSC(480i)) LANGUAGE ENGLISH Submenu item (SOUND) Note • The selected item is - JVC S15U | DLA-S15U User instruction manual (2.1MB) - Page 44
and cannot be set or adjusted. When you have replaced with a new light-source lamp, reset the lamp use time (see page 50). Note • The RESIZE function works for only computer system input. It does not work for video system input. 1 Press the MENU/ENTER button. • The main menu appears on the screen - JVC S15U | DLA-S15U User instruction manual (2.1MB) - Page 45
. TOP BOTTOM INV. CLAMP RESIZE BACK COLOR COLOR TEMP. ASPECT CHANGE SLEEP TIME LAMP TIME NO ON OFF OFF BP ON BLUE MIDDLE 4:3 30 Min. 10 H. by the input video is smaller than that (resolution) of D-ILA device, the video image is then enlarged to virtually full screen size of D-ILA device and - JVC S15U | DLA-S15U User instruction manual (2.1MB) - Page 46
BACK COLOR COLOR TEMP. ASPECT CHANGE SLEEP TIME LAMP TIME NO ON OFF OFF BP ON BLUE MIDDLE video picture, which is not wide video picture, on the projector's screen the aspect change function, the upper and lower parts of the video picture become partially invisible. View such an original video - JVC S15U | DLA-S15U User instruction manual (2.1MB) - Page 47
adjustment may be needed after a dedicated source is set. If that is the case, adjust the appropriate items. • When the input mode (SOURCE) is VIDEO or Y/C, and if AUTO is set, the automatic detecting function may work, possibly causing the screen to be intermitted or disturbed. In that case, set - JVC S15U | DLA-S15U User instruction manual (2.1MB) - Page 48
MAC13 VGA VESA SVGA1 SVGA2 MAC16 XGA1 XGA2 MAC19 MAC21 SXGA1 SXGA2 SXGA3 v VIDEO AUTO(NTSC(480i)) s When other than AUTO is selected: The selected item SXGA1 SXGA2 SXGA3 PAGE BACK Press the PAGE BACK button. VIDEO NTSC(480i) PIXEL CLOCK POSITION PICTURE SOUND OPTIONS SOURCE DECODER AUTO - JVC S15U | DLA-S15U User instruction manual (2.1MB) - Page 49
and brightness, replace the light-source lamp a little earlier. Purchase new light-source lamps (part No. : BHL5001-SU) from the JVC-authorized dealer where you have purchased the projector, or consult the nearest JVC Service center. CAUTIONS and NOTES • If the projector is set up in a tight place - JVC S15U | DLA-S15U User instruction manual (2.1MB) - Page 50
switch is activated to prevent the projector from operating. • If the claw on the lamp-replacement opening cover is damaged, the projector may not possibly operate. Then, replace with a new lamp-replacement opening cover. • After replacing the lamp, be sure to reset the lamp use time (see page 50 - JVC S15U | DLA-S15U User instruction manual (2.1MB) - Page 51
works to reset the life calculation of the light-source lamp, allowing the used time of the new light-source lamp to be accumulated. s Projector's button [MAIN POWER switch] 1 [Control panel] STAND BY OPERATE LAMP TEMP EMERGENCY VIDEO COMPUTER SETTING +3 QUICK ALIGN. -2 STAND BY indicator OPERATE - JVC S15U | DLA-S15U User instruction manual (2.1MB) - Page 52
(part No.: LC30208). Otherwise, dirt may get inside and appear on the screen, possibly preventing you from enjoying the video image fully. If dirt gets inside or if you need information about the filter, consult a JVCauthorized dealer where you have purchased the projector or nearest JVC Service - JVC S15U | DLA-S15U User instruction manual (2.1MB) - Page 53
Troubleshooting Solutions to common problems related to your projector are described here. If none of the solutions presented here solves the problem, unplug the projector and consult a JVC-authorized dealer or service center. Symptom Probable cause Corrective action Power is not supplied. • Is - JVC S15U | DLA-S15U User instruction manual (2.1MB) - Page 54
part of the • While computer system signal is input, • Input separate sync signals for vertical video problem still persists, set it to the selected? correct dedicated source (forced mode). Video image and • Are video picture and audio turned off • Turn on video This projector is and cameras). - JVC S15U | DLA-S15U User instruction manual (2.1MB) - Page 55
420 W xenon lamp Electrical system • Color system • Resolution • Scanning frequency NTSC, NTSC4.43, PAL, SECAM (* Automatic switching / manual switching) 1365 dots × 1024 dots (*S-XGA full resolution, during RGB input) 1000TV lines (*Horizontal resolution, aspect ratio 4 : 3, during video input - JVC S15U | DLA-S15U User instruction manual (2.1MB) - Page 56
75Ω B : 0.7V(p-p), 75Ω G : 0.7V(p-p), 75Ω G on sync : 1V(p-p), 75Ω control terminal for controlling this projector with a personal computer. × 9-3/8˝ × 16-3/8˝) (excluding protruding parts) • Weight Approx. 32.78 lbs change without notice. * D-ILA devices are manufactured with a very Video - JVC S15U | DLA-S15U User instruction manual (2.1MB) - Page 57
(Cont.) Outside dimensions s Top 16-3/4 (425)*1 Unit: Inch (mm) *1: Protrusion excluded 13-3/8 (339) 16-3/8 (416) STAND BY LAMP TEMP EMERGENCY VIDEO COMPUTER SETTING +3 QUICK ALIGN -2 7-5/8 (193) 9-3/8 (246) φ 4-1/8 (104) 5-1/4 (133)*1 s Front 16-3/4 (425)*1 s Side 16-3/8 (416) 9-3/8 (246 - JVC S15U | DLA-S15U User instruction manual (2.1MB) - Page 58
Specifications (Cont.) Pin assignment (Specifications for terminals) s Y/C terminal 4 3 2 1 Pin number 1 2 3 4 Signal name GND (Y) GND (C) Y C s RS-232C terminal 1 6 2 7 8 3 4 9 5 Pin number 1 2 3 4 5 Signal name N/C RD TD N/C GND Pin number 6 7 8 9 Signal name N/C N/C N/C N/C s - JVC S15U | DLA-S15U User instruction manual (2.1MB) - Page 59
58 - JVC S15U | DLA-S15U User instruction manual (2.1MB) - Page 60
MANUEL D'INSTRUCTIONS PROJECTEUR DLA-S15U 1 FRANÇAIS - JVC S15U | DLA-S15U User instruction manual (2.1MB) - Page 61
ou modification non approuvés par JVC peut annuler l'autorisation de l'utilisateur écran. L'image vidéo pourrait brûler le dispositif D-ILA. Faites particulièrement attention lors de la projection d'images monté conformément aux instructions du fabricant et doit utiliser un support recommandé par le - JVC S15U | DLA-S15U User instruction manual (2.1MB) - Page 62
à travers les ouvertures car ils pourraient l'intérieur de la lampe source de lumière (module lampe) toucher des points de tension dangereuse ou créer un de pas normalement en suivant Consultez votre revendeur. les instructions de fonctionnement. Ajustez uniquement les commandes couvertes par - JVC S15U | DLA-S15U User instruction manual (2.1MB) - Page 63
autres fonctions (OPTIONS 43 Modification (réglage) de la source 46 Remplacement de la lampe source de lumière 48 Remise à zéro de la durée d'utilisation de la lampe 50 Nettoyage et remplacement du filtre ..... 51 Guide de dépannage 52 * Ce mode d'emploi est divisé en deux parties de langue - JVC S15U | DLA-S15U User instruction manual (2.1MB) - Page 64
Accessoires Les accessoires suivants sont fournis avec ce projecteur.Vérifiez s'ils sont bien tous présents. Si l'un de ces accessoires manquait, veuillez contacter votre revendeur. Télécommande (RM-M10SG) Piles sèches AAA/R03 (×2) (pour vérifier le fonctionnement) Cordon d'alimentation [env. 2,5 - JVC S15U | DLA-S15U User instruction manual (2.1MB) - Page 65
ATTENTION • Lors du transport du projecteur, ne le bousculez pas. Faites attention de bien le tenir. • Ne le déplacez pas quand la lampe est allumée ou quand le ventilateur de refroidissement fonctionne. Cela pourrait blesser quelqu'un. 8 Capuchon d'objectif Le capuchon a un fil attaché qui - JVC S15U | DLA-S15U User instruction manual (2.1MB) - Page 66
POWER switch This is the main power switch. When it is turned on, the projector goes into stand-by state, and the STAND BY indicator on the control panel shortest position when shipped from the factory. Turn the foot to make the projector level. Adjustment can be made in the range of + 1.5° and - JVC S15U | DLA-S15U User instruction manual (2.1MB) - Page 67
r Zone d'entrée d'air (filtre) L'air entre par cette zone pour refroidir la lampe source de lumière. Si cette zone est bloquée ou s'il y a quelque remplacement de la lampe source de lumière Pour le remplacement de la lampe source de lumière, référez-vous à "Remplacement de la lampe source de lumière - JVC S15U | DLA-S15U User instruction manual (2.1MB) - Page 68
utilisée pendant environ plus de 900 heures. 2 Clignote : Remplacez la lampe. Référez-vous à "Remplacement de la lampe source de lumière" 3 à la page 48. LAMP 4 TEMP 5 EMERGENCY 6 VIDEO 7 COMPUTER 8 SETTING 9 +3 QUICK ALIGN. p -2 1 Indicateur STAND BY Allumé : Quand l'appareil - JVC S15U | DLA-S15U User instruction manual (2.1MB) - Page 69
1 2 OPERATE 3 LAMP 4 TEMP 5 EMERGENCY 6 VIDEO 7 COMPUTER 8 SETTING 9 +3 QUICK ALIGN. p -2 7 Touche VIDEO Utilisez cette touche pour est affiché sur l'écran et la fonction d'ajustement rapide entre en service (TRACK, PHASE, POSITION H. et POSITION V. sont automatiquement ajustés). - JVC S15U | DLA-S15U User instruction manual (2.1MB) - Page 70
à la prise de sortie S vidéo d'un magnétoscope, etc. 2 Prise d'entrée VIDEO (vidéo composite) (BNC) Connectez cette prise à la prise de sortie vidéo composite d' ) peuvent être commutées avec le projecteur ou avec la touche VIDEO de la télécommande du projecteur. Cependant, comme ce projecteur n'a qu - JVC S15U | DLA-S15U User instruction manual (2.1MB) - Page 71
Commandes et fonctions (suite) Panneau de connexion (suite) w 12 Y/C VIDEO AUDIO q PC p AUDIO AUDIO R L Y 9 G H/CS R PB/B-Y 3 B COMPUTER OUT V PR/R-Y REMOTE AUDIO OUT RS-232C 4 8 7 65 9 Prises COMPUTER IN (entrée de l'ordinateur) -2 (BNC) Ce sont des - JVC S15U | DLA-S15U User instruction manual (2.1MB) - Page 72
entrée choisie change comme suit: ORDINATEUR 1 ORDINATEUR 2 3 Touche VIDEO Utilisez cette touche pour choisir l'appareil vidéo connecté aux prise vous appuyez sur cette touche, l'entrée choisie change comme suit: Y/C VIDEO YUV 4 Touches FOCUS (+/-) Utilisez ces touches pour ajuster la mise au - JVC S15U | DLA-S15U User instruction manual (2.1MB) - Page 73
Commandes et fonctions (suite) Mise en place des piles Installez les piles dans la télécommande. Si la télécommande a commencé à fonctionner irrégulièrement, remplacez les piles. 1 Ouvrez le couvercle arrière. Tout en appuyant sur le couvercle arrière, faites-le glisser dans la direction de la fl - JVC S15U | DLA-S15U User instruction manual (2.1MB) - Page 74
inclinaison de plus de ±30° de droite à gauche ou de gauche à droite. Cela causerait une variation de couleur et réduirait la vie de la lampe. • Ne bloquez pas les évents de sortie d'air. N'utilisez rien qui puisse enfermer le projecteur en bloquant les évents de sortie d'air. Laissez suffisamment - JVC S15U | DLA-S15U User instruction manual (2.1MB) - Page 75
de format d'image 16 : 9 est d'environ 91,8% de celle du format d'image. Cette valeur est un guide est devrait être utilisée comme référence. • Si la lumière du soleil ou d'une lampe atteint directement l'écran de projection, l'image devient blanchâtre et assombrie. Utilisez un rideau, etc. pour - JVC S15U | DLA-S15U User instruction manual (2.1MB) - Page 76
de l'écran s Utilisez le tableau ci-dessous comme guide ou comme référence lors de l'installation du projecteur. 12 pieds env. 7,76 pieds env. 8,43 pieds env. 9,09 pieds env. 9,75 pieds env. 10,43 pieds env. 11,09 pieds env. 11,75 pieds env. 12,40 pieds env. 13,06 pieds (0,76 m) (0,96 m) (1,16 - JVC S15U | DLA-S15U User instruction manual (2.1MB) - Page 77
. Plage et distance effective de la télécommande • Utilisez le projecteur avec la distance A+B d'environ 10 m (32,8 pieds) ou moins. Écran Projecteur (DLA-S15U) 50˚ 50˚ A 15˚ 15˚ B Télécommande Remarque • Selon le type d'écran utilisé, la distance effective de la télécommande peut être réduite - JVC S15U | DLA-S15U User instruction manual (2.1MB) - Page 78
aux systèmes de couleur Système de couleur Prise d'entrée NTSC NTSC4.43 PAL VIDEO ‡ ‡ ‡ Y/C ‡ ‡*1 ‡ Y, PB/B-Y, PR/R-Y ‡*2 ‡*2 ‡*2 G, B, 35,0kHz 66,7Hz Sans entrelacement 640 × 480 (VGA VESA) 37,5kHz 75,0Hz Sans entrelacement 800 × 600 (SVGA1) 37,9kHz 60,3Hz Sans - JVC S15U | DLA-S15U User instruction manual (2.1MB) - Page 79
utilisé. Mémo • Les autres appareils avec des prises de sortie de signaux en composante (lecteur de DVD (NTSC), etc.) peuvent être connectés. *DVD: Digital Video Disc (Disque vidéo numérique) • Les signaux au format-DTV (480i, 480p, 720p, 1080i) peuvent être entrés. Pour les signaux au format-DTV - JVC S15U | DLA-S15U User instruction manual (2.1MB) - Page 80
la console de jeux. Y/C VIDEO AUDIO L Y R PB/B-Y PR/R-Y REMOTE AUDIO OUT RS-232C Fiche de conversion BNC-RCA (fournie) À VIDEO • Console de jeux, etc * Pour plus de détails, consultez un revendeur autorisé JVC ou un centre de service. • Ordinateur de bureau Y/C AUDIO PC À la prise RS - JVC S15U | DLA-S15U User instruction manual (2.1MB) - Page 81
Connexion de divers appareils (suite) Connexion à des ordinateurs Avant la connexion, assurez-vous de mettre hors tension le projecteur et les ordinateurs. • Lisez attentivement le mode d'emploi fourni avec chaque appareil. s Connexion à un ordinateur IBM PC ou compatible • Utilisez le câble de - JVC S15U | DLA-S15U User instruction manual (2.1MB) - Page 82
Connexion de divers appareils (suite) Connexion à des ordinateurs (suite) Avant la connexion, assurez-vous de mettre hors tension le projecteur et les ordinateurs. • Lisez attentivement le mode d'emploi fourni avec chaque appareil. s Connexion à un Macintosh • Utilisez le câble de connexion d' - JVC S15U | DLA-S15U User instruction manual (2.1MB) - Page 83
Connexion de divers appareils (suite) Connexion du cordon d'alimentation (fourni) Après que tous les appareils ont été connectés, connectez le cordon d'alimentation du projecteur. Ne le mettez pas encore sous tension à l'aide de l'interrupteur MAIN POWER. 1 Insérez le cordon d'alimentation dans la - JVC S15U | DLA-S15U User instruction manual (2.1MB) - Page 84
l'appareil n'est pas sous tension: Si le filtre ou le couvercle de remplacement de la lampe est mal placé, le projecteur ne se met pas sous tension. Vérifiez qu'ils sont le cordon d'alimentation et consultez un revendeur autorisé JVC ou un centre de service pour le faire réparer. 25 FRANÇAIS - JVC S15U | DLA-S15U User instruction manual (2.1MB) - Page 85
Fonctionnement de base s Touches du projecteur STAND BY OPERATE LAMP TEMP EMERGENCY Indicateur STAND BY Indicateur OPERATE Touche OPERATE 2, 1 Interrupteur MAIN POWER VIDEO COMPUTER SETTING +3 QUICK ALIGN. -2 1, 2 Ce qui suit décrit la procédure de base pour l'utilisation normale du projecteur - JVC S15U | DLA-S15U User instruction manual (2.1MB) - Page 86
Fonctionnement de base (suite) s Touches du projecteur STAND BY OPERATE LAMP TEMP EMERGENCY VIDEO COMPUTER SETTING +3 QUICK ALIGN. -2 Touche VIDEO Touche COMPUTER 2. Sélection de l'entrée vidéo à projeter s Appuyez sur la touche VIDEO ou sur la touche COMPUTER pour choisir l'entrée. • Chaque - JVC S15U | DLA-S15U User instruction manual (2.1MB) - Page 87
Fonctionnement de base (suite) s Télécommande OPERATE COMPUTER VIDEO VOL. FOCUS Touches FOCUS (+/-) PAGE BACK MENU/ENTER 3. Ajustement de la mise au point s Ajustez la mise au point avec les touches FOCUS (+/-) de la télé - JVC S15U | DLA-S15U User instruction manual (2.1MB) - Page 88
. PAGE BACK PRESET QUICK ALIGN. FOCUS MENU/ENTER AV MUTING Touche AV MUTING Touche QUICK ALIGN. s Touches du projecteur STAND BY OPERATE LAMP TEMP EMERGENCY VIDEO COMPUTER SETTING +3 QUICK ALIGN. -2 Touches QUICK ALIGN. ¶ Pour utiliser les autres fonctions s Pour couper l'image vidéo et le son - JVC S15U | DLA-S15U User instruction manual (2.1MB) - Page 89
base (suite) s Touches du projecteur STAND BY OPERATE LAMP TEMP EMERGENCY VIDEO COMPUTER SETTING +3 QUICK ALIGN. -2 Touche SETTING s Le menu principal apparaît sur l'écran. Télécommande MENU/ENTER OPERATE COMPUTER VIDEO VOL. PAGE BACK PRESET QUICK ALIGN. FOCUS MENU/ENTER Touche MENU/ENTER - JVC S15U | DLA-S15U User instruction manual (2.1MB) - Page 90
Utilisation du menu de réglage Réglages de base s Touches du projecteur EMERGENCY VIDEO COMPUTER SETTING +3 QUICK ALIGN. -2 Touche SETTING Touches QUICK ALIGN. s Menu de réglage REGLAGE TRACKING PHASE POSITION H. POSITION V. FOCUS ZOOM VOLUME 0 0 0 0 - + W T 0 Ici, nous faisons les ajustement - JVC S15U | DLA-S15U User instruction manual (2.1MB) - Page 91
(OUI) ou hors (NON) service l'effacement automatique des menus. AFF SOURCE : Met en (ON) ou hors (OFF) service l'affichage de la ligne pendant environ , 30 minutes et 60 minutes. TEMPS LAMPE : Indique le nombre d'heures accumulées d'utilisation de la lampe. SOURCE : Normalement utilisé sur AUTO. - JVC S15U | DLA-S15U User instruction manual (2.1MB) - Page 92
NON) service l'effacement automatique des menus. AFF SOURCE : Met en (ON) ou hors (OFF) service l' appareil D-ILA, l'image vidéo est alors agrandie à la taille plein écran de l'appareil D-ILA et minutes. TEMPS LAMPE : Indique le nombre d'heures accumulées d'utilisation de la lampe. SOURCE : - JVC S15U | DLA-S15U User instruction manual (2.1MB) - Page 93
de l'affichage du menu principal: Affichage de la ligne: Le nom du mode d'entrée choisi est affiché. Pour le nom du mode d'entrée, "Y/C", "VIDEO", "YUV", "ORDINATEUR 1" et "ORDINATEUR 2" sont disponibles. Affichage de la source: Le type de signal entré est affiché. Avec ce projecteur, des - JVC S15U | DLA-S15U User instruction manual (2.1MB) - Page 94
réglez sur AUTO. Le système de couleur du signal entré est identifié automatiquement. NTSC(480i Spécialisé pour NTSC(480i). s Menu principal VIDEO NTSC(480i) HORLOGE PIXEL POSITION IMAGE SON OPTIONS SOURCE DECODEUR AUTO(NTSC(480i)) LANGUAGE FRANÇAIS NTSC4.43 Spécialisé pour NTSC4.43. PAL Sp - JVC S15U | DLA-S15U User instruction manual (2.1MB) - Page 95
de curseur2 ou 3, la langue choisie change comme suit. 3 : Avant / 2 : Arrière japonais Touche PAGE BACK anglais s Menu principal allemand espagnol VIDEO NTSC(480i) HORLOGE PIXEL POSITION IMAGE SON OPTIONS SOURCE DECODEUR AUTO(NTSC(480i)) LANGUAGE FRANÇAIS Affichage de la langue - JVC S15U | DLA-S15U User instruction manual (2.1MB) - Page 96
Utilisation du menu principal (suite) Ajustement de l'horloge pixel s Télécommande OPERATE COMPUTER VIDEO VOL. PAGE BACK PRESET QUICK ALIGN. FOCUS Touche MENU/ ENTER MENU/ENTER AV MUTING Touches de curseur L'horloge pixel doit être principalement ajustée pour les - JVC S15U | DLA-S15U User instruction manual (2.1MB) - Page 97
Ajustez la position de l'écran s'il est décalé. 1 Appuyez sur la touche MENU/ENTER. • Le menu principal apparaît sur l'écran. OPERATE COMPUTER VIDEO VOL. PAGE BACK PRESET QUICK ALIGN. FOCUS Touche MENU/ ENTER MENU/ENTER AV MUTING Touches de curseur 2 Choisissez "POSITION" avec la touche de - JVC S15U | DLA-S15U User instruction manual (2.1MB) - Page 98
ments de sous-menu du menu IMAGE apparaissent sur l'écran. s Quand des signaux AV sont entrés Touche PAGE BACK s Menu principal VIDEO NTSC(480i) HORLOGE PIXEL POSITION IMAGE SON OPTIONS SOURCE DECODEUR AUTO(NTSC(480i)) LANGUAGE FRANÇAIS IMAGE (NTSC(480i)) LUMINOSITE 0 CONTRASTE 0 DETAIL - JVC S15U | DLA-S15U User instruction manual (2.1MB) - Page 99
Utilisation du menu principal (suite) Ajustement de la qualité de l'image (suite) s Télécommande OPERATE COMPUTER VIDEO VOL. PAGE BACK PRESET QUICK ALIGN. FOCUS Touche MENU/ ENTER MENU/ENTER AV MUTING Touches de curseur Touche PAGE BACK s Éléments de sous-menu [Menu - JVC S15U | DLA-S15U User instruction manual (2.1MB) - Page 100
Utilisation du menu principal (suite) Ajustement de la qualité de l'image (suite) s Télécommande OPERATE COMPUTER VIDEO VOL. PAGE BACK PRESET QUICK ALIGN. FOCUS Touche MENU/ ENTER MENU/ENTER AV MUTING Touches de curseur Touche PAGE BACK s Éléments de sous-menu [Menu - JVC S15U | DLA-S15U User instruction manual (2.1MB) - Page 101
la touche MENU/ENTER. •Les éléments de sous-menu du menu SON apparaissent sur l'écran. SON AIGUE 0 GRAVE 0 Touche PAGE BACK s Menu principal VIDEO NTSC(480i) HORLOGE PIXEL POSITION IMAGE SON OPTIONS SOURCE DECODEUR LANGUAGE AUTO(NTSC(480i)) FRANÇAIS (Menu SON) 4 Ajustez "AIGUË" et "GRAVE - JVC S15U | DLA-S15U User instruction manual (2.1MB) - Page 102
AV MUTING Touches de curseur Touche PAGE BACK s Menu principal VIDEO NTSC(480i) HORLOGE PIXEL POSITION IMAGE SON OPTIONS SOURCE DECODEUR LANGUAGE D-G INVERS H-B CLAMP REDIMENSION COULEUR FOND TEMP. COULEUR CHG FORMAT VEILLE TEMPS LAMPE NON ON OFF OFF BP ON BLEU MIDDLE 4:3 30 Min. 10 Hrs. - JVC S15U | DLA-S15U User instruction manual (2.1MB) - Page 103
étapes 4 et 5. OPERATE COMPUTER VIDEO VOL. PAGE BACK PRESET QUICK ALIGN TEMP. COULEUR CHG FORMAT VEILLE TEMPS LAMPE NON ON OFF OFF BP ON fonction REDIMENSION en service (ON), permettant agrandie à la taille plein écran de l'appareil D-ILA et projetée. (Indication de redimension). (Réglage usine - JVC S15U | DLA-S15U User instruction manual (2.1MB) - Page 104
(Réglage usine: BLEU) COULEUR FOND 2/3 BLEU CYAN NOIR VERT OPERATE COMPUTER VIDEO VOL. PAGE BACK PRESET QUICK ALIGN. FOCUS Touche MENU/ ENTER MENU/ENTER INVERS H-B CLAMP REDIMENSION COULEUR FOND TEMP. COULEUR CHG FORMAT VEILLE TEMPS LAMPE NON ON OFF OFF BP ON BLEU NORMAL 4:3 30 Min. 10 - JVC S15U | DLA-S15U User instruction manual (2.1MB) - Page 105
signaux 480p ou 720p ne peuvent pas être détectés.) 1 Appuyez sur la touche MENU/ENTER. • Le menu principal apparaît sur l'écran. s Menu principal VIDEO AUTO(NTSC(480i)) HORLOGE PIXEL POSITION IMAGE SON OPTIONS SOURCE DECODEUR AUTO(NTSC(480i)) LANGUAGE FRANÇAIS Élément de sous-menu (SOURCE - JVC S15U | DLA-S15U User instruction manual (2.1MB) - Page 106
) SDTV(480p) HDTV1(720p) HDTV2(1080i) PAL/SECAM PC-98 VGA1 VGA3 MAC13 VGA VESA SVGA1 SVGA2 MAC16 XGA1 XGA2 MAC19 MAC21 SXGA1 SXGA2 SXGA3 v VIDEO AUTO(NTSC(480i)) Touche PAGE BACK s Élément de sous-menu [Menu SOURCE] SOURCE (AUTO) AUTO NTSC(480i) SDTV(480p) HDTV1(720p) HDTV2(1080i) PAL/SECAM - JVC S15U | DLA-S15U User instruction manual (2.1MB) - Page 107
usées, référez-vous au manuel fourni avec la nouvelle lampe de remplacement que vous avez achetée. Si vous avez des questions, consultez le revendeur autorisé JVC où vous avez acheté la lampe de remplacement ou le centre de service JVC le plus proche. 1 Retirez le couvercle de l'ouverture pour le - JVC S15U | DLA-S15U User instruction manual (2.1MB) - Page 108
jamais Poignée Vis la partie en métal ou la surface frontale en verre. FRANÇAIS 4 Replacez le couvercle de l'ouverture pour le remplacement de la lampe et serrez les vis. Serrez les deux vis avec un tournevis plat. Couvercle d'ouverture pour le remplacement de la - JVC S15U | DLA-S15U User instruction manual (2.1MB) - Page 109
Touches du projecteur [Interrupteur MAIN POWER] 1 [Panneau de commande] Indicateur STAND BY STAND BY OPERATE Indicateur OPERATE LAMP TEMP EMERGENCY VIDEO COMPUTER SETTING +3 QUICK ALIGN. -2 2 3 1 Mettez le projecteur en mode d'attente avec l'interrupteur MAIN POWER. • ON [ ƒ ]: Le projecteur - JVC S15U | DLA-S15U User instruction manual (2.1MB) - Page 110
pénètrent à l'intérieur ou si vous avez besoin d'informations à propos de ce filtre, consultez le revendeur autorisé JVC où vous avez acheté le projecteur ou le centre de service JVC le plus proche. 1 Mettez l'appareil hors tension avec l'interrupteur MAIN POWER. Après que le projecteur est mis en - JVC S15U | DLA-S15U User instruction manual (2.1MB) - Page 111
Guide de dépannage Les solutions aux problèmes communs relatifs à votre projecteur sont décrits ici. Si aucune des solutions présentées ici ne résout le problème, débranchez le projecteur et consultez un revendeur autorisé JVC ou un centre de service correctes avec les touches VIDEO et COMPUTER. 27 - JVC S15U | DLA-S15U User instruction manual (2.1MB) - Page 112
Symptôme Cause probable Correction à apporter La partie supérieure des images vidéo est courbée ou déformée. • Quand un signal d'ordinateur est entré, • Entrez des signaux à synchronisation le signal est-il un signal composite avec verticale (V) et horizontale (H) synchronisation sur (Cs) ou - JVC S15U | DLA-S15U User instruction manual (2.1MB) - Page 113
: 4 : 3) • Lampe source de lumière Lampe au xénon 420 W 75Ω [PAL] • VIDEO 1 ligne, BNC × 1 Signal vidéo composite : 1V(p-p), 75Ω (sync. négative) • Y, PB/B-Y, PR/R-Y 1 ligne, BNC × 3 Signaux en composante (Y,B-Y,R-Y) Y : 1V(p-p), 75Ω (sync. négative) B-Y : 0,7V(p-p), 75Ω R-Y : 0,7V(p-p), 75 - JVC S15U | DLA-S15U User instruction manual (2.1MB) - Page 114
: 0,7V(p-p), 75Ω B (B) : 0,7V(p-p), 75Ω G (V) : 0,7V(p-p), 75Ω Sync sur V : 1V(p-p), 75Ω (sync. négative sujettes à changement sans notification. * Les appareils D-ILA sont fabriqués avec une technologie de haute pré organisation sans but lucratif, Video Electronics Standard Association. Tous - JVC S15U | DLA-S15U User instruction manual (2.1MB) - Page 115
extérieures s Dessus 425 (16-3/4)*1 Unité: mm (pouces) *1: Protubérances exclues 339 (13-3/8) 416 (16-3/8) STAND BY LAMP TEMP EMERGENCY VIDEO COMPUTER SETTING +3 QUICK ALIGN -2 193 (7-5/8) 246 (9-3/8) φ 104 (4-1/8) 133 (5-1/4)*1 s Avant 425 (16-3/4)*1 s Côté 416 (16-3/8) 246 (9-3/8) 180 - JVC S15U | DLA-S15U User instruction manual (2.1MB) - Page 116
Spécifications (suite) Affectation des broches (Spécification pour les prises) s Prise Y/C 4 3 2 1 No de broche Nom du signal 1 Masse (Y) 2 Masse (C) 3 Y 4 C s Prise RS-232C 1 6 2 7 8 3 4 9 5 No de broche Nom du signal 1 NC 2 RD 3 TD 4 NC 5 Masse No de broche Nom - JVC S15U | DLA-S15U User instruction manual (2.1MB) - Page 117
58 - JVC S15U | DLA-S15U User instruction manual (2.1MB) - Page 118
VICTOR COMPANY OF JAPAN, LIMITED © 2000 VICTOR COMPANY OF JAPAN, LIMITED Printed in Japan LCT0700-001A 0100-K-M-VP PROJECTOR DLA-S15U
-
 1
1 -
 2
2 -
 3
3 -
 4
4 -
 5
5 -
 6
6 -
 7
7 -
8
-
9
-
10
-
11
-
12
-
13
-
14
-
15
-
16
-
17
-
18
-
19
-
20
-
21
-
22
-
23
-
24
-
25
-
26
-
27
-
28
-
29
-
30
-
31
-
32
-
33
-
34
-
35
-
36
-
37
-
38
-
39
-
40
-
41
-
42
-
43
-
44
-
45
-
46
-
47
-
48
-
49
-
50
-
51
-
52
-
53
-
54
-
55
-
56
-
57
-
58
-
59
-
60
-
61
-
62
-
63
-
64
-
65
-
66
-
67
-
68
-
69
-
70
-
71
-
72
-
73
-
74
-
75
-
76
-
77
-
78
-
79
-
80
-
81
-
82
-
83
-
84
-
85
-
86
-
87
-
88
-
89
-
90
-
91
-
92
-
93
-
94
-
95
-
96
-
97
-
98
-
99
-
100
-
101
-
102
-
103
-
104
-
105
-
106
-
107
-
108
-
109
-
110
-
111
-
112
-
113
-
114
-
115
-
116
-
117
-
118
 |
 |

ENGLISH
FRANÇAIS
DLA-S15U
INSTRUCTIONS
PROJECTOR
MANUEL D’INSTRUCTIONS : PROJECTEUR
OPERATE
VOL.
PAGE
BACK
PRESET
FOCUS
COMPUTER
VIDEO
QUICK
ALIGN.
AV
MUTING
RM-M10SG REMOTE CONTROL UNIT
MENU/ENTER
For customer Use:
Enter below the Serial No. which is located
on the side panel of the cabinet. Retain this
information for future reference.
Pour l’utilisateur:
Inscrivez ci-dessous le No de série situé sur
le panneau latéral du coffret de l’appareil.
Conservez cette information à titre
d’information.
Model No.
No de modèle
DLA-S15U
Serial No.
No de série