JVC SR-V10U SR-V10U Instruction manual (1MB, PDF) - Page 39
Notes
 |
View all JVC SR-V10U manuals
Add to My Manuals
Save this manual to your list of manuals |
Page 39 highlights
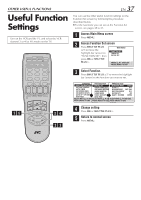
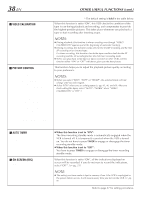
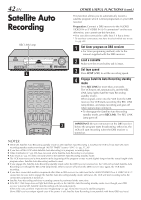
Ⅵ ON SCREEN (PLAY) ON OFF Ⅵ AUTO SP = EP TIMER ON OFF Ⅵ DIGITAL R3 ON OFF Ⅵ VIDEO STABILIZER ON OFF EN 39 * The default setting is bold in the table below. When this function is set to "ON", various VCR status information (on-screen display) appears on the screen during playback. NOTES: ● When you use this VCR as the playback VCR for editing a tape, be sure to set this function to "OFF"; otherwise, the VCR status information (on-screen display) will be recorded on the edited tape. ● If you select a channel on which no signal is received, the channel number is displayed regardless of this function setting. ● The setting you have made is kept in memory. Even if the VCR is unplugged or the power failure occurs, it will resume every time you turn on the VCR. (੬ pg. 9) When this function is set to "ON", the VCR automatically switches to EP mode to allow complete recording if there is not enough tape to record the entire program while timer-recording in SP mode. For Example . . . Recording a program of 140 minutes in length onto a 120-minute tape Approximately 110 minutes SP mode Approximately 30 minutes EP mode Make sure you set this function to "ON" before the timer-recording starts. NOTES: ● If you have programed the VCR to timer-record 2 or more programs, the second program and those thereafter may not fit on the tape with this function set to "ON". In this case, do not use this function, but change the tape speed manually during timer programing. ● In order to ensure that the recording fits on the tape, this function may leave a slight non-recorded portion at the end of the tape. ● There may be some noise and sound disturbance where the tape speed switches from SP to EP mode on the tape. ● This function will not work properly on the following tapes: T(ST)-30, T(ST)-60, T(ST)90, and T(ST)-120. When this function is set to "ON", edge correction to the luminance signal is performed to enhance details. Normally set this function to "ON". NOTES: ● Depending on the type of tape being used, picture quality may be better with "DIGITAL R3" set to "OFF". ● If you use this VCR as the playback VCR for editing, be sure to set "DIGITAL R3" to "OFF" before starting. When this function is set to "ON", you can automatically correct vertical vibrations in the picture when playing back unstable recordings made on another VCR. NOTES: ● When you finish viewing a tape, be sure to set this function to "OFF". ● Regardless of the setting, this function has no effect during recording and during special effects playback. ● The on-screen display may jitter vertically when this function is set to "ON". ● To watch recordings with close-caption, set this function to "OFF". Refer to page 37 for setting procedures.
-
 1
1 -
2
-
3
-
4
-
5
-
6
-
7
-
8
-
9
-
10
-
11
-
12
-
13
-
14
-
15
-
16
-
17
-
18
-
19
-
20
-
21
-
22
-
23
-
24
-
25
-
26
-
27
-
28
-
29
-
30
-
31
-
32
-
33
-
 34
34 -
 35
35 -
 36
36 -
 37
37 -
 38
38 -
 39
39 -
 40
40 -
 41
41 -
 42
42 -
 43
43 -
 44
44 -
45
-
46
-
47
-
48
-
49
-
50
-
51
-
52
-
53
-
54
-
55
-
56
-
57
-
58
-
59
-
60
-
61
-
62
-
63
-
64
 |
 |
