JVC SXM250 Instruction Manual
JVC SXM250 - S-VHS-C Camcorder With 2.5" LCD Manual
 |
UPC - 046838161506
View all JVC SXM250 manuals
Add to My Manuals
Save this manual to your list of manuals |
JVC SXM250 manual content summary:
- JVC SXM250 | Instruction Manual - Page 1
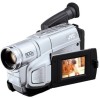
INSTRUCTIONS ENGLISH COMPACT VHS CAMCORDER GR-SXM250 LYT1078-001A For Customer Use: Enter below the Model No. and Serial No. which is located on the bottom of the camcorder. Retain this information for future reference. Model No. Serial No. US Printed in Malaysia 1102-DY-YL-PJ COPYRIGHT© 2002 - JVC SXM250 | Instruction Manual - Page 2
PROVIDED ACCESSORIES • AC Adapter AP-V13U or AP-V11U • Cassette Adapter C-P7U • Shoulder Strap • Battery Pack BN-V11U • Lens Cap • AA (R6) Battery (for Cassette Adapter) NOTE: In order to maintain optimum performance of the camcorder, provided cables may be equipped with one or more core - JVC SXM250 | Instruction Manual - Page 3
of important operating and maintenance (servicing) instructions in the literature accompanying the JVC BN-V11U/V12U/V20U/V400U battery packs and, to recharge them or to supply power to the camcorder from an AC outlet, use the provided multi-voltage AC Adapter. (An appropriate conversion adapter - JVC SXM250 | Instruction Manual - Page 4
battery indicates JVC is voluntarily participating in an industry program to collect and recycle these batteries at the end of their useful life, when taken out of service INSTRUCTIONS (1) Read these instructions. (2) Keep these instructions. (3) Heed all warnings. (4) Follow all instructions. - JVC SXM250 | Instruction Manual - Page 5
Cassette Adapter pg. 16 Charge Marker pg. 6 Charging The Battery Pack pg. 6 Clean The Camcorder pg. Viewfinder, Indications pg. 9, 10, 17 Load A Tape pg. 8 M Manual Focus pg. 12 Menu Screen pg. 20 - 22 Super VHS Expansion Technology pg. 20 T Tape Counter pg. 14 Tape Dubbing pg. 15 Tape - JVC SXM250 | Instruction Manual - Page 6
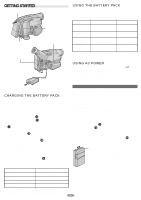
STARTED Hook on. Push in. BATTERY RELEASE Switch Power Switch Battery pack To DC IN connector To AC outlet AC Adapter CHARGING THE BATTERY PACK 1) Hook the end of the battery pack to the camcorder and push the battery in until it locks in place. • If the battery pack is attached in the wrong - JVC SXM250 | Instruction Manual - Page 7
Power Switch @ to "PLAY", " " or " ". • Disconnect the AC Adapter from the camcorder. • Unplug the AC Adapter's power cord from the AC outlet. • Detach the battery from the camcorder. • Using the optional AA-V15 AC Power Adapter/ Charger in clock battery runs out. Consult an authorised JVC dealer for - JVC SXM250 | Instruction Manual - Page 8
cassettes have removable tabs. If the tab has been removed, cover the hole with adhesive tape. • The cassette holder cannot be opened while the camcorder is in the record mode or detached from the power source. Shoulder Strap Attachment Thread the strap through the eyelet t, then fold it back and - JVC SXM250 | Instruction Manual - Page 9
reading the instructions. During shooting # $ % ^& * ( 5 6 7 8 90 ! @ Keep the lens cap attached to the camcorder. Cassette holder j k h 120M I N A S - ET T30 REC SP 444 T W I L I GHT +02 S - VHS REC MWB PAUSE 5M I N 1/2 S CONGRATULATIONS 25. 12. 02 11 : 45 : 18 BRIGHT 6- - - + l - JVC SXM250 | Instruction Manual - Page 10
. REC pg. 12 3 Power Zoom Lever [T/W pg. 13 4 • Manual Focus Button [ FOCUS pg. 12 t Shoulder Strap Eyelets pg. 8 y Battery Pack Mount pg. 6 u Close Button pg. Tripod Mounting Socket pg. 8 W Tape Remaining Time pg. 21 E Mode Indicator pg. 19 S S-VHS/S-VHS ET Recording Indicator pg. 20 D - JVC SXM250 | Instruction Manual - Page 11
REC MODE, S-VHS (S-VHS ET), TAPE LENGTH and DATE/TIME in SYSTEM MENU. (੬ pg. 18 - 22, "MENU SETTINGS") 1 Remove the lens cap. Set the Power Switch @ to The viewfinder and LCD monitor cannot be used simultaneously on this camcorder. Therefore, when opening the LCD monitor and tilting it upward to - JVC SXM250 | Instruction Manual - Page 12
0. Recording starts, and after 5-second recording is finished, the camcorder re-enters the Record- Standby mode automatically. 4) To cancel the manual Exposure Control mode (੬ pg. 18) is engaged. Auto/Manual Focus If correct focus cannot be obtained with Auto Focus, use Manual Focus. 1) Set the Power - JVC SXM250 | Instruction Manual - Page 13
battery indicator ( ) does not blink if the battery pack's charge is low, the camcorder Power Zoom Lever 3, the quicker the zoom action. • Focusing may become unstable during Zooming. In this case, set the zoom while in Record- Standby, lock the focus by using the manual focus (੬ pg. 12, "Auto/Manual - JVC SXM250 | Instruction Manual - Page 14
or set the Power Switch @ to "OFF" and then "PLAY" again. "AT" : blinks. When Auto Tracking finishes, the indication disappears. • When noise bars appear during playback, the camcorder enters the Auto Tracking mode and "AT" : appears. • Manual Tracking may not work with tapes recorded on other - JVC SXM250 | Instruction Manual - Page 15
JVC Service Conter described on the sheet included in the package for details on its availability. Make sure to connect the end with a core filter to the camcorder. The core filter reduces interference. Tape Dubbing 1) Connect the camcorder and the VCR (੬ "Connections To A TV/VCR"). Set the Power - JVC SXM250 | Instruction Manual - Page 16
Using The Cassette Adapter Use this to play back an S-VHS-C/VHS-C video cassette recorded with this camcorder on a S-VHS/ VHS VCR. 1) Slide the battery cover up to remove it, install one "AA (R6)" size battery, then reattach the cover. 2) Slide the latch to open the compartment door, then insert the - JVC SXM250 | Instruction Manual - Page 17
to this diagram while reading the instructions. During shooting # $ % ^& * ( Keep the lens cap attached to the camcorder. Cassette holder )q w er : 120M I N A S - ET T30 REC SP 444 T W I L I GHT +02 S - VHS REC MWB PAUSE 5M I N 1/2 S CONGRATULATIONS 25. 12. 02 11 : 45 : 18 BRIGHT 6- - - JVC SXM250 | Instruction Manual - Page 18
the Power Switch E X T R E C MOD E SP D . Z OOM 50x S. LX NORMA L WI DE OF F S - VHS ON TAPE L ENGTH T 3 0 D I SPLAY FULL DAT E T I ME D I SP . .R E T U RN 3 Press the subject light. 1) Rotate the MENU Wheel 1 to select "MANUAL", then press it, 2) To brighten the image, rotate the - JVC SXM250 | Instruction Manual - Page 19
until "MWB" begins blinking. When the setting is completed, "MWB" stops blinking. • Once you adjust white balance manually, the setting is retained even if the power is turned off or the battery removed. • White balance cannot be used when the "SEPIA" or "MONOTONE" mode (੬ pg. 24, "Digital Effects - JVC SXM250 | Instruction Manual - Page 20
be played back on this camcorder. • Tapes recorded in S-VHS or S-VHS ET mode can be played back not only on this camcorder but also on a Super VHS VCR. - Tapes recorded in S-VHS ET mode cannot be played back on some VCRs, including some JVC VCRs. • Tapes recorded in S-VHS or S-VHS ET mode cannot be - JVC SXM250 | Instruction Manual - Page 21
: , tape remaining time, , tape length (੬ pg. 9, 17). DATE/TIME DISP. Makes the date/time appear in the camcorder or on or wipe-in/out cannot be performed. • This function is cancelled when the power is shut off or when the cassette is ejected. • To use this function lens may go out of focus. 21 - JVC SXM250 | Instruction Manual - Page 22
stops the demonstration temporarily. Set to OFF to stop completely. • When a tape whose erase protection tab is in the position that allows recording is loaded in the camcorder, demonstration is not available. • If you do not detach the Lens Cap, you cannot see the actual changes of the Automatic - JVC SXM250 | Instruction Manual - Page 23
start, and fadeor wipe-out works at recording end. 1) Set the Power Switch @ to " " while pressing down the Lock Button ! located on the picture look misty white, as when an external fog filter is attached to the lens. Softens the image and gives it a "fantasy" look. TWILIGHT: Dusk, twilight - JVC SXM250 | Instruction Manual - Page 24
Digital Effects 1) Set the Power Switch @ to " " while pressing down the Lock Button ! located on the switch. 2) Press DIGIFECT % repeatedly until the desired mode appears. • To cancel the effect, press - JVC SXM250 | Instruction Manual - Page 25
EJECT switch ( does not function. The camcorder is a microcomputer-controlled device. External noise and interference (from a TV, a radio, etc.) might prevent it from functioning properly. In such cases, first disconnect its power supply unit (battery pack, AC Adapter, etc.); and then re-connect it - JVC SXM250 | Instruction Manual - Page 26
JVC dealer. Plug adapter • If there is dust or dirt on the AC Adapter, wipe it clean before using. Video Light DANGER: • The video light becomes extremely hot. Do not touch it either while in operation or soon after turning it off, otherwise serious injury may result. • Do not place the camcorder - JVC SXM250 | Instruction Manual - Page 27
place the camcorder with the LCD monitor on the bottom. 2. To prolong service life . instructions JVC dealer. For Your Maintenance 1 1. After Use Set the Power Switch to "OFF" to turn off the 2 camcorder BATTERY RELEASE to remove the battery pack. 6 Attach the provided lens cap to the camcorder's lens - JVC SXM250 | Instruction Manual - Page 28
SPECIFICATIONS General Camcorder Format : S-VHS/VHS standard Power source : DC 11 V (Using AC Adapter) DC 6 V (Using battery pack) Power consumption Viewfinder on : 4.5 W LCD monitor on : 5.0 W Video light : 3.0 W Signal system : NTSC-type Video recording system Luminance : FM - JVC SXM250 | Instruction Manual - Page 29
mara de video. Para la extracción de la batería . . . ... deslice BATTERY RELEASE 8 y extraiga la batería. Batería BN-V11U BN-V12U (opcional) BN LA BATERÍA". 2) Presione REFRESH q durante más de 2 segundos. La lámpara POWER $ destellará para indicar que la descarga se ha iniciado. 3) Cuando finalice - JVC SXM250 | Instruction Manual - Page 30
ALMACENAMIENTO DE LAS PILAS: Antes de almacenar los paquetes de pilas por un largo período de tiempo, asegurarse de descargarlos completamente tomando las siguientes medidas para no reducir el rendimiento de la pilas. 1) Coloque la pila en la videocámara sín ningún cassette insertado. 2) Ajuste el - JVC SXM250 | Instruction Manual - Page 31
ESPAÑOL - GUIA PARA OPERACION RAPIDA Si la unidad comienza a funcionar mal, deje de usarla inmediatamente y consulte a su concesionario local de JVC. Colocación/Extracción de un cassette 1) Abra completamente el monitor LCD y manténgalo alineado verticalmente con la cámara (no lo lnclinc de un - JVC SXM250 | Instruction Manual - Page 32
MENU 1 hacia "+" para aumentarlo o hacia "-" para disminuirlo. Mientras filme, el sonido no será escuchado desde los altavoces. O simplemente reproduzca la cinta en un VCR de VHS utilizando el adaptador de cassette. ੬ p. 16 1 &* !@ er 32
-
 1
1 -
 2
2 -
 3
3 -
 4
4 -
 5
5 -
 6
6 -
 7
7 -
8
-
9
-
10
-
11
-
12
-
13
-
14
-
15
-
16
-
17
-
18
-
19
-
20
-
21
-
22
-
23
-
24
-
25
-
26
-
27
-
28
-
29
-
30
-
31
-
32
 |
 |

1
INSTRUCTIONS
ENGLISH
LYT1078-001A
US
Printed in Malaysia
1102-DY-YL-PJ
COMPACT VHS CAMCORDER
GR-SXM250
COPYRIGHT©
2002 VICTOR COMPANY OF JAPAN, LTD
For Customer Use:
Enter below the Model No. and Serial No. which is
located on the bottom of the camcorder. Retain this
information for future reference.
Model No.
Serial No.
Dear Customer,
Thank you for purchasing the JVC Compact VHS camcorder. Before use, please read
“PRECAUTIONS” (
±
pg. 3, 4) to ensure safe use of this product.
AUTOMATIC DEMONSTRATION
Automatic Demonstration takes place when “DEMO MODE” is set to “ON”
(factory-preset).
• Available when the Power Switch
@
is set to “
” or “
” while pressing down the Lock Button
!
located on the switch.
•Performing any operation during the demonstration stops the demonstration temporarily. If no operation
is performed for more than 1 minute after that, the demonstration will resume.
•“DEMO MODE” remains “ON” even if the camcorder power is turned off.
•To cancel Automatic Demonstration, set the Power Switch
@
to “
” and press the MENU Wheel
1
in
while the demo is in progress. This takes you directly to the demo mode’s Setting Menu (so you will not
have to go through the main Menu Screen). Rotate the MENU Wheel
1
to select “OFF” and press it.
NOTES:
• When a tape whose Erase Protection tab is in the position that allows recording is loaded in the
camcorder, demonstration is not available.
• If you do not detach the Lens Cap, you cannot see the actual changes of the Automatic Demonstration
activated on the LCD monitor or viewfinder.