JVC TK-T8101WPRU TK-T8101WPRU Instruction Manual
JVC TK-T8101WPRU Manual
 |
View all JVC TK-T8101WPRU manuals
Add to My Manuals
Save this manual to your list of manuals |
JVC TK-T8101WPRU manual content summary:
- JVC TK-T8101WPRU | TK-T8101WPRU Instruction Manual - Page 1
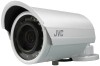
IR BULLET CAMERA TK-T8101WPRU IR BULLET CAMERA TK-T8101WPRE INSTRUCTIONS - JVC TK-T8101WPRU | TK-T8101WPRU Instruction Manual - Page 2
Important Safety Information Before attempting to connect or operate this product, please read these instructions carefully and save this manual for future use. 1 - JVC TK-T8101WPRU | TK-T8101WPRU Instruction Manual - Page 3
Important Safety Information Warning and Operating Notes Installation and serving the camera should be performed only by qualified and experienced technicians to conform to all local codes and to maintain your warranty. WARNING! The use of CSA certified/UL Listed Class 2 power adapters are - JVC TK-T8101WPRU | TK-T8101WPRU Instruction Manual - Page 4
CONTENTS 1 Instructions ...4 1.1 Before You Begin ...4 1.2 Dimensions ...4 1.3 Names of Camera Parts...5 1.4 Routine Maintenance ...6 2 Installation ...7 2.1 Mounting the Camera...7 3. OSD Settings...10 3.1 Lens ...10 3.2 SHUTTER/AGC ...10 3.3 WHITE BAL...11 3.4 - JVC TK-T8101WPRU | TK-T8101WPRU Instruction Manual - Page 5
Introductions 1ēInstructions The IR Bullet camera is ideal for indoor installation in commercial and residential environment. 1.1 Before You Begin Please read this guide carefully before you install the bullet camera. Keep this guide for future reference. 1.2 Dimensions 4 - JVC TK-T8101WPRU | TK-T8101WPRU Instruction Manual - Page 6
Part Names and Locations 1.3 Names of Camera Parts Figure 2-1 1. Camera main body 2. Sun shield: Minimize the effects of rain and sunlight on image quality. 3. Externally adjustable focal length & focus 4. OSD menu joystick: To use the OSD joystick control: • Press the OSD joystick control - JVC TK-T8101WPRU | TK-T8101WPRU Instruction Manual - Page 7
Part Names and Locations 1.4 Routine Maintenance y Use a soft, dry cloth to remove any fingerprints or dust. y Clean the camera housing with a soft, dry cloth. For more stubborn stains, use a cloth dampened with a small quantity of neutral detergent, then wipe dry. Caution: Do not use volatile - JVC TK-T8101WPRU | TK-T8101WPRU Instruction Manual - Page 8
Installation 2 Installation 2.1 Mounting the Camera Step 1: Drill mounting holes and insert anchors. In desired location, use the supplied Guide Pattern to drill three 5mm mounting holes. Then insert the supplied anchors into the holes. To prevent the camera from falling off, ensures it is - JVC TK-T8101WPRU | TK-T8101WPRU Instruction Manual - Page 9
Installation Step 2: Pass all the signal cables through the hole for the cables. Optionally connect a video monitor to the BNC connector if you want to perform focus/zoom adjustments during the installation. Step 3: For static electricity protection, ensure that the rubber pad is placed inside the - JVC TK-T8101WPRU | TK-T8101WPRU Instruction Manual - Page 10
Installation Step 5: Adjustment It can be adjusted once the screw is fully loosened. After adjustment, be sure to lock it tightly for waterproof. Notice: Please be careful when adjusting Tele/Wide and Near/Far so as to avoid damage to the lens Near& Far Control Tele& Wide Control OSD joystick Step - JVC TK-T8101WPRU | TK-T8101WPRU Instruction Manual - Page 11
allow you to configure Lens and brightness. Options are AUTO (Auto Iris lens) and MANUAL. The default setting is AUTO. In the AUTO submenu, you can set the MODE DC OPEN 046 3.2 SHUTTER/AGC You can set the SHUTTER/AGC as AUTO or MANUAL. The default setting is AUTO. When LENS is set to AUTO: It is - JVC TK-T8101WPRU | TK-T8101WPRU Instruction Manual - Page 12
controls color on the screen. Options include ATW (Auto White Balance), PUSH, PUSH LOCK, USER1, USER2, ANTI CR (Anti Color Rolling Suppression) and MANUAL. The default is ATW. y ATW: Select ATW when the scene illumination varies between indoor scenes and outdoor scene lighting. SPEED DELAY CNT ATW - JVC TK-T8101WPRU | TK-T8101WPRU Instruction Manual - Page 13
the privacy zones. In addition, you can enable MOSAIC function for the privacy zone. Note: If you enable MOTION DET function, then PRIVACY function will support 4 zones only. REA SEL 1/8 TOP 000 BOTTOM 000 LEFT 000 RIGHT 000 COLOR 1 TRANSP 0.00 MOSAIC OFF RETURN 12 - JVC TK-T8101WPRU | TK-T8101WPRU Instruction Manual - Page 14
camera title up to 26 characters with 2 lines and also select where the title appears on the monitor screen. 3.12 LANGUAGE OSD supports 8 multiple languages. Options include ENGLISH (default), JAPANESE, GERMAN, FRENCH, RUSSIAN, PORTUGUESE, SPANISH and SIMPLIFIED CHINESE. 3.13 CAMERA RESET To restore - JVC TK-T8101WPRU | TK-T8101WPRU Instruction Manual - Page 15
FCC CE Accessories FCC Class B CE Class B IR BULLET CAMERA X 1 INSTRUCTIONS X 1 SAFETY PRECAUTIONS X 1 WARRANTY CARD X 1 CAUTION CARD X 1 3 SCREW ANCHOR X 3 OSD JOYSTICK X 1 IR BULLET CAMERA X 1 INSTRUCTIONS X 1 SAFETY PRECAUTIONS X 1 CAUTION CARD X 1 TEMPLATE X 1 WASHER
-
 1
1 -
 2
2 -
 3
3 -
 4
4 -
 5
5 -
 6
6 -
 7
7 -
8
-
9
-
10
-
11
-
12
-
13
-
14
-
15
 |
 |

IR BULLET CAMERA
TK-T8101WPRU
IR BULLET CAMERA
TK-T8101WPRE
INSTRUCTIONS