JVC UX-G200 Instruction Manual
JVC UX-G200 Manual
 |
View all JVC UX-G200 manuals
Add to My Manuals
Save this manual to your list of manuals |
JVC UX-G200 manual content summary:
- JVC UX-G200 | Instruction Manual - Page 1
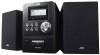
MICRO COMPONENT SYSTEM UX-G200-Consists of CA-UXG200 and SP-UXG200 INSTRUCTIONS For Customer Use: Enter below the Model No. and Serial No. which are located either on the rear, bottom or side of the cabinet. Retain this information for future reference. Model No. Serial No. LVT1956-005A [J] - JVC UX-G200 | Instruction Manual - Page 2
user to the presence of important operating and maintenance (servicing) instructions in the literature accompanying the appliance. Le symbole de in particular, specifies that the cable ground shall be connected to the grounding system of the building, as close to the point of cable entry as - JVC UX-G200 | Instruction Manual - Page 3
support d'au moins dix centimètres de hauteur. Front Face Side Côté 15 cm (5-15/16") 1 cm (7/16") 15 cm (5-15/16") 1 cm (7/16") 15 cm (5-15/16") 15 cm (5-15/16") 10 cm (3-15/16") SP-UXG200 CA-UXG200 SP-UXG200 15 cm (5-15/16") CA-UXG200 CAUTION Changes or modifications not approved by JVC - JVC UX-G200 | Instruction Manual - Page 4
using the remote control is mainly explained; however, you can use the buttons and controls on the main unit if they have the same (or similar) name and marks. • Some related tips and notes are explained later in the sections "Learning More about This System" and "Troubleshooting," but not - JVC UX-G200 | Instruction Manual - Page 5
Getting Started 3 Step 1: Unpack 3 Step 2: Prepare the Remote Control 3 Step 3: Hook Up 4 Before Operating the System 6 Daily Operations-Playback 7 Listening to the Radio 8 Playable 18 Learning More about This System 18 Troubleshooting 19 Maintenance 20 Specifications 21 Parts Index 22 2 - JVC UX-G200 | Instruction Manual - Page 6
-) correctly. • If the range or effectiveness of the remote control decreases, replace both batteries. 1 2 Step 3: Connect the AM/FM antennas and speakers (see pages 4 and 5). CO7F5AMΩXL 3 ALMOAEMOXPT ANTENNA Finally plug the AC power cord. Now you can operate the System. 3 R03(UM-4)/AAA(24F) - JVC UX-G200 | Instruction Manual - Page 7
Step 3: Hook Up If you need more detailed information, see page 5. Turn the power off to all components before connections. FM antenna (supplied) Extend it so that you can obtain the best reception. Right speaker AM loop antenna (supplied) Turn it until the - JVC UX-G200 | Instruction Manual - Page 8
than one speaker to each terminal. • DO NOT allow the conductor of the speaker cords to be in touch with the metallic parts of the System. ALMOAEMOXPT ANTENNA • If the AM loop antenna wire or speaker cords are covered with vinyl, remove the vinyl to expose the tip of the antenna - JVC UX-G200 | Instruction Manual - Page 9
The indications on the display teach you a lot of things while you are operating the System. Before operating the System, be familiar with when and how the indicator illuminates on the display. 12 3 45 678 REPEAT1GROUP RANDOM PROG. TRACK WMA MP3 CD USB TAPE 9 10 - JVC UX-G200 | Instruction Manual - Page 10
playback source on the external component. 3 Adjust the volume. 4 Operate the target source as explained later. To turn off (standby) the System The STANDBY lamp on the activate the speakers again. DO NOT turn off (standby) the System with the volume set to an extremely high level; otherwise, the - JVC UX-G200 | Instruction Manual - Page 11
signal strength is tuned in, the searching will stop. To stop searching manually, press either button. • When you press the button repeatedly, the frequency step by step. If the received FM station is hard to listen From the remote control: FM/AM/ AUDIO IN FM FM MONO A_IN AM (AUDIO IN) On - JVC UX-G200 | Instruction Manual - Page 12
files on a CD-R, CD-RW, or USB mass storage class device Audio CD CD-R CD-RW • This System may not play back some files even though their formats are listed above. • In this manual, "file" and "track" are used interchangeably for MP3 and WMA operations. • Caution for DualDisc playback The Non - JVC UX-G200 | Instruction Manual - Page 13
-forwards the track. Fast-reverses the track. To locate a track directly and Remote start play ONLY 1 2 3 To select a number, see "How to when connecting or disconnecting the other equipment. To select AUDIO IN From the remote control: FM/AM/ AUDIO IN FM A_IN (AUDIO IN) On the main - JVC UX-G200 | Instruction Manual - Page 14
moment ONLY FADE MUTING To restore the volume, press again, or adjust the volume level. Adjusting the Sound To reinforce the bass sound-HBS Remote ONLY You can enjoy powerful bass sound with the Hyper-Bass Sound effect. HBS HBS Canceled (No indication) To select Sound Mode You can select - JVC UX-G200 | Instruction Manual - Page 15
Clock Set the clock before using the Daily Timer (see page 16). • You can set the clock only when the System is turned off (on standby). 1 Turn off (standby) the System. Turning Off the Power Automatically -Sleep Timer 1 Activate the sleep timer mode. 2 sec. CLOCK/ SLEEP SLEEP 2 Activate the clock - JVC UX-G200 | Instruction Manual - Page 16
Advanced Disc/USB Mass Storage Class Device Operations Remote control Number buttons CD 6 4, x TUNING/ GROUP K, 5 RANDOM DISPLAY/ PROGRAM USB MEMORY 6 STOP 7 REPEAT Programming the Playing Order- Program Play You can arrange the playing order - JVC UX-G200 | Instruction Manual - Page 17
device while the source is USB mass storage class device. • When you start Random Play. • When you change the source. • When you turn off the System. or USB MEMORY To release, press again. • You cannot select the track with the number buttons during Program Play. 14 - JVC UX-G200 | Instruction Manual - Page 18
Random Play ends when all tracks are played. To skip a track: To pause: CD To stop: STOP or USB MEMORY Playing Repeatedly-Repeat Play Remote ONLY You can play back tracks repeatedly. For audio CD: REPEAT REPEAT1 REPEAT Canceled (No indication) For MP3/WMA: REPEAT REPEAT1 REPEAT Canceled - JVC UX-G200 | Instruction Manual - Page 19
Remote control TIMER USB MEMORY 6 CD 6 4, x Daily Timer Operations FM/AM/ AUDIO IN STOP 7 Setting the Daily Timer Using the Daily Timer, you can wake up - JVC UX-G200 | Instruction Manual - Page 20
Proceed to the playback source setting. To deactivate the Daily Timer When the System is turned on... TIMER The (Timer) indicator on the display and the TIMER same time everyday until the timer is turned off manually. When the on-time comes The System turns on, tunes in to the specified station or - JVC UX-G200 | Instruction Manual - Page 21
is FAT16/FAT32. - JVC bears no responsibility for any loss of data in the USB mass storage class device while using this System. MP3/WMA groups/tracks configuration This System plays back MP3/WMA tracks plug of the audio output. Refer to the manuals supplied with the other equipment. 18 - JVC UX-G200 | Instruction Manual - Page 22
will be canceled. You need to set the clock first, then the timer again. Troubleshooting If you are having a problem with your System, check this list for a possible solution before calling for service. General: Adjustments or settings are suddenly canceled before you finish. ] There is a time - JVC UX-G200 | Instruction Manual - Page 23
-time and off-time. Maintenance To get the best performance of the System, keep your discs, and mechanism clean. Handling discs • When removing detergent and wrung well, then wipe clean with a dry cloth. • Since the System may deteriorate in quality, it become damaged or get its paint peeled off, be - JVC UX-G200 | Instruction Manual - Page 24
/Impedance: 250 mV/50 kΩ USB MEMORY: USB specification Compatible with USB 2.0 Full- Speed Compatible device: Mass storage class Compatible system: FAT16, FAT32 Output power: DC 5 V 500 mA General Power requirement: Power consumption: Dimensions (approx.): Mass (approx.): AC 120 V , 60 - JVC UX-G200 | Instruction Manual - Page 25
Parts Index Refer to the pages to see how to use the buttons and controls. Remote control 16, 17 12 7, 8, 10 7, 9, 13 - 15, 17 10, 12 - 17 8, 10, 13 - 14, 16, 17 8, 10, 13 7, 8, 17 7, 9, 13, 14, 17 7, 10 9, 13, 14, 16 7 9 Remote sensor 6 16, 17 12 8, 10, 13, 14 7, 11 7, 9, 13, 14, 17 11 9, 10 22 - JVC UX-G200 | Instruction Manual - Page 26
http://www.jvc.com Remember to retain your Bill of Sale for Warranty Service. Do not attempt to service the product yourself Caution To prevent electrical shock, do not open the cabinet. There are no user serviceable parts inside. Please refer to qualified service personnel for repairs. BT-51018 - JVC UX-G200 | Instruction Manual - Page 27
defective parts with new or rebuilt equivalents at no charge to the original owner. Such repair and replacement services shall be rendered by JVC during normal business hours at JVC authorized service centers. Parts used for replacement are warranted only for the remainder of the Warranty Period - JVC UX-G200 | Instruction Manual - Page 28
EN © 2008 Victor Company of Japan, Limited 1208YAMMDWMTS UX-G200 MICRO COMPONENT SYSTEM
-
 1
1 -
 2
2 -
 3
3 -
 4
4 -
 5
5 -
 6
6 -
 7
7 -
8
-
9
-
10
-
11
-
12
-
13
-
14
-
15
-
16
-
17
-
18
-
19
-
20
-
21
-
22
-
23
-
24
-
25
-
26
-
27
-
28
 |
 |

MICRO COMPONENT SYSTEM
UX-G200
—Consists of CA-UXG200 and SP-UXG200
INSTRUCTIONS
LVT1956-005A
[J]
For Customer Use:
Enter below the Model No. and Serial No.
which are located either on the rear,
bottom or side of the cabinet. Retain
information for future reference.
Model No.
Serial No.
this