JVC VN-C215VP4U Instruction Manual
JVC VN-C215VP4U - Fixed Ip Network Mini Dome Manual
 |
UPC - 046838030192
View all JVC VN-C215VP4U manuals
Add to My Manuals
Save this manual to your list of manuals |
JVC VN-C215VP4U manual content summary:
- JVC VN-C215VP4U | Instruction Manual - Page 1
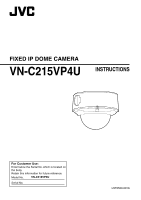
FIXED IP DOME CAMERA VN-C215VP4U INSTRUCTIONS For Customer Use: Enter below the Serial No. which is located on the body. Retain this information for future reference. Model No. VN-C215VP4U Serial No. LST0529-001A - JVC VN-C215VP4U | Instruction Manual - Page 2
service personnel under the following conditions: a. When the power cord or plug is damaged or frayed. b. If liquid has been spilled into the appliance. c. If the appliance has been exposed to rain or water. d. If the appliance does not operate normally by following the operating instructions - JVC VN-C215VP4U | Instruction Manual - Page 3
user to the presence of important operating and maintenance (servicing) instructions FCC Rules. Changes or modifications not approved by JVC could void the user's authority to operate the equipment. This equipment and used in accordance with the instruction manual, may cause harmful interference to - JVC VN-C215VP4U | Instruction Manual - Page 4
please contact your local municipal office, your household waste disposal service or the shop where you purchased the product. Penalties may with national legislation. (Business users) If you wish to dispose of this product, please visit our web page www.jvc-europe.com to obtain information - JVC VN-C215VP4U | Instruction Manual - Page 5
the camera shooting direction. This manual describes detailed usage of VN-C215VP4U. For basic usage of VN-C215VP4U, please refer to [START-UP GUIDE]. For latest information, please refer to AReadmeB file in the supplied CD-ROM. ● The supplied CD-ROM includes [INSTRUCTIONS (this manual)] (pdf), [API - JVC VN-C215VP4U | Instruction Manual - Page 6
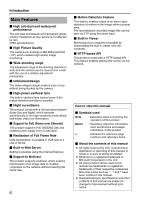
camera is not affected by rain. (IP66 specifications) Ⅵ High Picture Quality The camera low illumination. Ⅵ Support for PoE (Power over Ethernet) This product supports PoE (IEEE802.3af) and of this manual ● All rights reserved by JVC. Unauthorized duplication or reprinting of this manual, in whole - JVC VN-C215VP4U | Instruction Manual - Page 7
Features 14 Setup Procedures 16 Removing the dome cover 17 Mounting the base 17 Cable connection 18 Mounting the camera 19 Mounting the camera via electrical box 21 Mounting the camera via piping in Viewer 81 Shortcut for Built-in Viewer 82 Others Troubleshooting 83 Specifications 85 7 - JVC VN-C215VP4U | Instruction Manual - Page 8
hub when PoE is in use. ● IGMPv2-compliant network when multicast is in use. Memoɿ ● The above PC specifications are merely guides for smooth vent of an air conditioner.The drastic change in temperature may fog up the dome cover. ⅷ Do not install at locations that may trap heat. This product also - JVC VN-C215VP4U | Instruction Manual - Page 9
product is set to wide angle to support wide range equipment. When the lens zoom PoE at the same time may result in failure or malfunction of the camera. (A Pg. 24)(A Pg. 25) Copyrights of video ⅷ With the exception of the user . ⅷ Wipe off dirt on the dome cover with a lenscleaning cloth or a - JVC VN-C215VP4U | Instruction Manual - Page 10
ɿ ● To mount the camera using an electrical box, please check with your dealer or nearest JVC servicing center. B Holes for Dome cover The dome cover is fragile. Take care when handling it. F Inner dome Before mounting the camera, remove it and perform image angle setting. (A Pg. 17) G Dome - JVC VN-C215VP4U | Instruction Manual - Page 11
2 only (Fou USA), Isolated power supply only (For Europe). ● Please consult your nearest JVC dealer regarding heaters. J Base GND cable (Purple) (A Pg. 25) K Power supply/Alarm Noteɿ ● Do not use PoE together with DC 12 V power supply. Simultaneous connection will cause failure or malfunction. 11 - JVC VN-C215VP4U | Instruction Manual - Page 12
the camera L M N O P Q R S T U L [10BASE-T/100BASE-TX(PoE)] prevention wire It connects the base H to the dome cover E. P Camera Fastening Screw ן2 This secures the camera unit T and the base H. How to remove 5 seconds or longer switches the camera to the service verification mode. Do not press the - JVC VN-C215VP4U | Instruction Manual - Page 13
: KAZH215). U Heater space Memoɿ ● When mounting the heater (sold separately :KA-ZH215), read the instruction manual of the heater carefully before mounting. V Camera unit W Camera Fastening Claw ן2 This claw fastens the camera unit to the base. To remove the base, push it towards the direction of - JVC VN-C215VP4U | Instruction Manual - Page 14
Via Multicast Monitoring using multiple computers is possible via multicast. AStreaming PageB (A Pg. 58) ABuilt-in Viewer SettingsB (A Pg. 78) VN-C215VP4U Alarm VN-C215VP4U comes with a motion detection feature and dual alarm input. By motion detection or alarm input, action such as mail delivery - JVC VN-C215VP4U | Instruction Manual - Page 15
or deny image acquisition of designated IP addresses. (A Pg. 60) Control via customized application software The following uses are also possible by developing a customized application software that supports the API of VN-C215VP4U. For details, please refer to the [API Guide] in the attached CD-ROM - JVC VN-C215VP4U | Instruction Manual - Page 16
unit. ⅷ When mounting the heater (sold separately : KA-ZH215), read the instruction manual of the heater carefully before mounting. step 1 K step 2 K step 3 K step 4 Setup (A Pg. 16) Mount the camera and configure image settings. Network Settings (A Pg. 32) Configure the network settings of the - JVC VN-C215VP4U | Instruction Manual - Page 17
to malfunction. Claw (3 locations) Inner dome Mounting the base Remove the camera unit from the base and mount the base to the ceiling or wall. To mount on a wall, use the same procedures below but replace the word "ceiling" with "wall". Setup If necessary, use the attached template to drill - JVC VN-C215VP4U | Instruction Manual - Page 18
Setup Mounting the base (continued) 2. Mount the fall-prevention wire to the cable (A Pg. 24)(A Pg. 26)(A Pg. 27) Memoɿ ● The power cable must not be connected when PoE is used. ● When the camera is installed with a heater (sold separately: KA-ZH215), be sure to connect it to AC 24 V power supply. - JVC VN-C215VP4U | Instruction Manual - Page 19
in the two claws until you hear a click sound. Noteɿ ● Mount the camera such that the cables and fall-prevention wire of the dome cover are not caught in between. 3. Secure the camera with the camera fastening screws (x2). Tighten the camera fastening screws (x2) with the screw driver and secure the - JVC VN-C215VP4U | Instruction Manual - Page 20
reinstall the camera during repair or maintenance. ● For replacement, please consult your nearby JVC's dealer. Use silica gel of service parts number LW40500 so may fog up the camera lens or dome cover. ● If the field angle is not adjusted immediately after mounting the camera, insert the silica gel - JVC VN-C215VP4U | Instruction Manual - Page 21
electrical box Mount the base to an electrical box. 1. Remove the camera unit from the base (A Pg. 17) 2. Mount the base to procedures are the same as normal mounting ● Cable connection (A Pg. 18) ● Mounting the camera to the base (A Pg. 19) ● Image adjustment (A Pg. 28) ● Mounting the inner - JVC VN-C215VP4U | Instruction Manual - Page 22
Setup Mounting the camera via piping Use a piping hole to mount the camera. Use the piping hole at the bottom of the base to mount the camera 1. Remove the camera of the camera. 5. here. AMounting the camera via electrical boxB (A camera to the base (A Pg. 19) ● Image adjustment (A Pg. 28 - JVC VN-C215VP4U | Instruction Manual - Page 23
the side of the base. Piping hole plug 6. The following procedures are the same as normal mounting ● Cable connection (A Pg. 18) ● Mounting the camera to the base (A Pg. 19) ● Image adjustment (A Pg. 28) ● Mounting the inner dome (A Pg. 30) ● Mounting the dome cover (A Pg. 30) Mounting screw 23 - JVC VN-C215VP4U | Instruction Manual - Page 24
Connecting the power cable and the LAN cable for the PoE at the same time may result in failure or malfunction of the camera. Using the PoE Connect to a device that supports PoE and supply electricity from the LAN cable. What is PoE (Power over Ethernet)? This is a function that enables operation of - JVC VN-C215VP4U | Instruction Manual - Page 25
Access to VN-C215VP4U may be denied unless you restore the power supply of all network devices under the same LAN environment. ● To use AA-P700 in the power supply unit, connect one unit of this product. Also refer to the AA-P700 instruction manual. Base GND cable connection To mount the camera to - JVC VN-C215VP4U | Instruction Manual - Page 26
instruction manual carefully before installing. ● The AC 24 V power supply should conform to the following : Class 2 only (Fou USA), Isolated power supply only (For Europe). ● Please consult your nearest JVC VNC215VP4U directly to a computer, make sure to check the computer's LAN specifications in - JVC VN-C215VP4U | Instruction Manual - Page 27
devices, such as an infrared sensor, door sensor, metal sensor, manual switch, etc. Ⅵ Input requirements ● No-voltage relay NPN open 100 ms to 5000 ms) output (Set time via the Internet Explorer (A Pg. 50)) Camera unit Example of annunciating devices Output 1 DC 12 V or Output 2 IN R Noteɿ - JVC VN-C215VP4U | Instruction Manual - Page 28
Setup Adjusting Images When the camera is mounted, adjust the image settings while looking at the actual image. Mounting the test monitor Connect the [MONITOR] terminal of the camera to the test monitor to adjust the camera shooting direction, field angle and focus. T When configuring, turn on the - JVC VN-C215VP4U | Instruction Manual - Page 29
is made thicker for performance purposes. If focus is not adjusted with the dome cover held over the lens, the camera may be out of focus when the dome cover is actually attached. ● When adjusting focus, hold the dome cover over the lens such that the optical axis of the lens and the center - JVC VN-C215VP4U | Instruction Manual - Page 30
Setup Mounting the inner dome After all settings are complete, mount the inner dome to the camera. 1. Mount the inner dome Mount the inner dome to the claws (x3). Claw (3 locations) Inner dome Mounting the dome cover 1. Clean the dome cover Before mounting, remove and clean any dust or dirt on the - JVC VN-C215VP4U | Instruction Manual - Page 31
mounting may increase humidity, fog up the camera or the cover may drop. ● When the cover is removed again after mounting the dome cover, adjust the field angle. ● Make sure that the fall-prevention wire of the dome cover is not caught between the dome cover and the base. Otherwise, the anti - JVC VN-C215VP4U | Instruction Manual - Page 32
-C215VP4U VN-C215VP4U uses the protocols and port numbers listed below. Ensure that these ports are allowed through the firewall when a firewall is to be installed. Protocol/Port No. Purpose of Use TCP/80 JPEG acquisition, Web Settings page, API TCP/20, 21 FTP TCP/25 Mail delivery TCP/User - JVC VN-C215VP4U | Instruction Manual - Page 33
setting the IP address. ● Minimum computer specifications for setting OS : Windows XP (Professional or Home Edition) (SP2) Web browser : Internet Explorer Version 6.0 Noteɿ ● When setting the IP address for VNC215VP4U, do so by using a network that is made up only of VN-C215VP4U, the computer - JVC VN-C215VP4U | Instruction Manual - Page 34
Networks] and [Internet Protocol(TCP/IP)] check boxes are selected. 3. Select [Internet Protocol(TCP/IP)] and click [Properties]. 4. Set the IP address A Select [Use the following IP adress]. B Set the [IP Address]. (For example, use 192.168.0.100 when VN-C215VP4U is in its default settings) Memo - JVC VN-C215VP4U | Instruction Manual - Page 35
ⅷ Changing the IP address using the Internet Explorer 1. Launch the Internet Explorer on the [Require server verification(https:) for all sites in this zone] in the displayed window. Next, add VNC215VP4U web site to the zone. Example: http://192.168.0.2 ● Next, select [Trusted sites] under [ - JVC VN-C215VP4U | Instruction Manual - Page 36
be able to specify the IP address directly. In this case, change the proxy settings of the Internet Explorer. ● After the Security Warning screen appears, press the [OK] button to proceed. 5. Enter the user name and password (login as an administrator) VN-C215 A Enter the user name. This is set to - JVC VN-C215VP4U | Instruction Manual - Page 37
the [OK] button. The VN-C215VP4U restarts using the new IP address. It takes about 1 minute for the camera to reboot. Memoɿ ● Access from this computer may fail when the IP address of VN-C215VP4U is changed. To enable access to VN-C215VP4U from the same computer, alter the IP address at the computer - JVC VN-C215VP4U | Instruction Manual - Page 38
the computer to access the built-in web page of VN-C215VP4U. See ASetting Using Internet ExplorerB (A Pg. 39). When the IP address of VN-C215VP4U is unknown Changing of settings by accessing via a computer is not possible when the IP address of VNC215VP4U is unknown. In this case, you can know the - JVC VN-C215VP4U | Instruction Manual - Page 39
Setting Using Internet Explorer Setup 1. Launch the Internet Explorer on the computer 2. When proxy Require server verification(https:) for all sites in this zone] in the displayed window. Lastly, add VN-C215VP4U web site to the zone. Example: http://192.168.0.2 ● Click [Trusted sites] under [ - JVC VN-C215VP4U | Instruction Manual - Page 40
. ● To allow only specific sites such as VNC215VP4U, select [Tools]-[Pop-up Blocker][Turn On Pop-up Blocker], followed by selecting the active [Tools]-[Pop-up Blocker]-[Pop-up Blocker Settings], and open the [Pop-up Blocker Settings] window. In the opened window, add the address of VN-C215VP4U as an - JVC VN-C215VP4U | Instruction Manual - Page 41
● operator Image External Utility Status JPEG View Camera Encoding Alarm Alarm Environment Motion Detection Miscellaneous Operation Settings ● user Image Utility JPEG View Miscellaneous Memoɿ ● The Security Alarm screen appears before the top page is displayed. Press the [Yes] button to proceed. - JVC VN-C215VP4U | Instruction Manual - Page 42
still image. Links to each page are found at the left end. The links displayed vary according to the user name. For example, in the case of AadminB or AoperatorB, 3 links, namely [JPEG View], [Camera] and [Encoding] will be displayed upon clicking [Image]. In the case of AuserB, only [JPEG View] is - JVC VN-C215VP4U | Instruction Manual - Page 43
Options...]-[General], click the [Settings] button under [Temporary Internet Files], and select AEvery visit to the pageB. Noteɿ ● When a firewall is installed between VN-C215VP4U and the computer, JPEG images may not be displayed on the JPEG View page of the web browser. For such systems, check the - JVC VN-C215VP4U | Instruction Manual - Page 44
Setting Setting Using Internet Explorer (continued) Camera Page This page is for setting the camera's parameters. This page can be used during access using AadminB or AoperatorB. ● Press the [OK] button to enable the new settings upon changing. ● If the [ - JVC VN-C215VP4U | Instruction Manual - Page 45
will be written to the JPEG comment segment (item name: camera). Refer to the [API Guide] on the file formats of JPEG. For setting AGC , setting for BAGC also becomes AOnB at the same time. Noteɿ ● When the camera is switched on under a low temperature, the image may become black-and-white for 10 - JVC VN-C215VP4U | Instruction Manual - Page 46
Setting Setting Using Internet Explorer (continued) Encoding Page This page is for setting JPEG encoding parameters. This page can be used during access using AadminB or AoperatorB. ● Press the [OK] button to enable the new settings upon changing. ● If the [OK] button is pressed upon entering an - JVC VN-C215VP4U | Instruction Manual - Page 47
is as follows. Frame Size : VGA Picture Quality : VFS4 Frame Rate : 30 fps (The maximum bit rate from VN-C215VP4U is about 9 Mbps.) Each video frame is made up of 2 fields. When Fine is set to AOnB, the flip the image data upside down. Refer to the [API Guide] on the file formats of JPEG. 47 - JVC VN-C215VP4U | Instruction Manual - Page 48
Setting Setting Using Internet Explorer (continued) Alarm Page This page is for setting actions when there is an alarm. Up to 5 actions (No. 01 to No. 05) can be set. This page can be used during access using AadminB or AoperatorB. ● Press the [OK] button to enable the new settings upon changing. - JVC VN-C215VP4U | Instruction Manual - Page 49
recipient's mail address. The title of the mail will appear as [Alarm from VN-C215] and the sender as [Title]. Enter the message to send in [Mail entered in the [TCP/UDP Data] field to the destination specified in [TCP/UDP IP Address] and [TCP/UDP Port Number] via TCP. UDP : Send the character - JVC VN-C215VP4U | Instruction Manual - Page 50
Setting Setting Using Internet Explorer (continued) Alarm Environment Page This page is for setting alarm-related environments. This page can be used during access using AadminB or AoperatorB. ● Press the [OK] button to enable the new settings upon changing. ● If the [OK] button is pressed upon - JVC VN-C215VP4U | Instruction Manual - Page 51
notation method of describing the entire host or domain name on the TCP/IP network without abbreviating. For example, if the host name is AwwwB and the second, and number. Example: Camera1_20051114161032001.jpg When AFixedB is selected, user-defined character string can be used as a file name. Noteɿ - JVC VN-C215VP4U | Instruction Manual - Page 52
JPEG file during a trigger input, and as A0B if otherwise. For setting the alarm output. For setting the output time of [Manual Output]. For operating alarm output manually. The current output status appears on the right. When [Duration Outoput1] is set to A0B, pressing the [Make] button switches - JVC VN-C215VP4U | Instruction Manual - Page 53
Motion Detection Page Page for setting motion detection. ● The area valid for motion detection is displayed in blue. ● The area where motion is detected is displayed in red. A B C D EF 53 - JVC VN-C215VP4U | Instruction Manual - Page 54
detection feature is not intended to prevent theft or fire. This feature may not function properly depending on the conditions of the object and settings. JVC shall not be liable for any accident or damage that occurs. 54 - JVC VN-C215VP4U | Instruction Manual - Page 55
will be denied. Press the [Cancel] button to restore the invalid entry to the current value. ● When settings of the Basic page is changed, all services that are currently running will end immediately. For example, when changes are made to the Basic page during JPEG distribution, distribution will be - JVC VN-C215VP4U | Instruction Manual - Page 56
to AEnableB, VNC215VP4U will start running with the 192.168.0.2 IP address and 255.255.255.0 subnet mask in about 2 minutes after startup. Refer to AIP Address SettingsB (A Pg. 33) for the IP address. For setting the IP address of VN-C215VP4U. For setting the subnet mask of VN-C215VP4U. For setting - JVC VN-C215VP4U | Instruction Manual - Page 57
) B TTL Unicast C TTL Multicast D MTU E Negotiation For setting the TOS value of IP packets in which JPEG is stored. The upper 6 bits out of 8 bits in TOS so A255B is set. TOS values are used in networks that support priority control. By setting priority control to the network switch, VNC215VP4U. 57 - JVC VN-C215VP4U | Instruction Manual - Page 58
Setting Setting Using Internet Explorer (continued) Streaming Page This page is for setting manual multicast transmission. This page can be used during access using AadminB. ● Press the [OK] button to enable the new settings upon changing. ● If the [OK] - JVC VN-C215VP4U | Instruction Manual - Page 59
the Encoding page when a value that is larger than the frame rate in the Encoding page is specified. (A Pg. 46) Memoɿ ● When the power of VN-C215VP4U shuts down accidentally during multicast transmission, transmission will restart automatically when - JVC VN-C215VP4U | Instruction Manual - Page 60
Setting Setting Using Internet Explorer (continued) Access Restrictions Page This page is for setting client restrictions. This page can be used during access using AadminB. ● Press the [OK] button to enable the new settings upon changing. ● If the [OK] button is pressed upon entering an invalid - JVC VN-C215VP4U | Instruction Manual - Page 61
Web Setting page. In addition, VN-C215VP4U will also deny access when instructions for JPEG transmission to the specified IP address are sent via API. Memoɿ ● To specify a specific IP address range, enter a combination of the IP address and subnet mask in the [IP Address] field. ● Define the subnet - JVC VN-C215VP4U | Instruction Manual - Page 62
distributed by VNC215VP4U. Discontinuity in JPEG header's time may occur immediately before and after acquiring time from the SNTP server. For setting the IP address of the SNTP server. For setting the time interval for access to the SNTP server. Displays the time on the clock of VN-C215VP4U. The - JVC VN-C215VP4U | Instruction Manual - Page 63
. ● Press the [OK] button to enable the new settings upon changing. A B C A Username B New Password C New Password Again Select a user name. Enter a new password. Passwords shall be at least 4 characters and not more than 16 characters. VN-C215VP4U is case sensitive. Enter again to confirm the new - JVC VN-C215VP4U | Instruction Manual - Page 64
camera to initialize and reboot.) Passwords will also be initialized. However, the built-in clock of VNC215VP4U will not be affected. JPEG transmission and all others services that are running will be discontinued. Upgrades the firmware version of VN-C215VP4U and reboots the unit. The VN-C215VP4U - JVC VN-C215VP4U | Instruction Manual - Page 65
Camera Page Item Factory Settings Camera ID VN Image TCP/UDP IP Address TCP/UDP Password Periodic FTP Periodic FTP Interval Periodic FTP Naming Pre Post Recording Frame Rate Pre Post Recording Before Trigger Pre Post Recording After Trigger Duration Outoput1 Duration Outoput2 Manual Output1 Manual - JVC VN-C215VP4U | Instruction Manual - Page 66
IP Address Factory Settings deny - Ⅵ Time Page Item SNTP SNTP Server Access Interval Time Zone Factory Settings Off 0.0.0.0 hour/1 (GMT)UTC Ⅵ Password Page Item Username Current Password Factory Settings AadminB Not Displayed Default passwords are: AadminB : vn-c215 AoperatorB : vn - JVC VN-C215VP4U | Instruction Manual - Page 67
Miscellaneous Page This page is for acquiring information. This page can be used during access using AadminB, AoperatorB and AuserB. A A Open Source Software Press the [Show] button to display the software information used at VNC215VP4U. 67 - JVC VN-C215VP4U | Instruction Manual - Page 68
C A Total Sending Bitrate B Destination C System Log Displays the total TCP/UDP bit rate sent by VN-C215VP4U as well as the individual bit rates. Displays the destination that VN-C215VP4U is sending data to. Displays the following information. ● Number of seconds after startup ● Alarm information - JVC VN-C215VP4U | Instruction Manual - Page 69
Settings Page This page displays the version information and settings of VN-C215VP4U. This page can be used during access using AadminB or AoperatorB. 69 - JVC VN-C215VP4U | Instruction Manual - Page 70
Setting Setting Using Internet Explorer (continued) Settings Page (continued) 70 - JVC VN-C215VP4U | Instruction Manual - Page 71
SNTP SNTP㧦ແޮ SNTPαʔόʔɿ0.0.0.0 71 - JVC VN-C215VP4U | Instruction Manual - Page 72
Operation Operation of Built-in Viewer Using the built-in viewer enables display of a series of images, one-shot recording of images and receiving of alarm information. ࡗSetting Up the Internet Explorer (A Pg. 73) ࡗInstalling the built-in viewer (A Pg. 75) ࡗScreen Configuration of Built-in Viewer (A - JVC VN-C215VP4U | Instruction Manual - Page 73
Setting Up the Internet Explorer 1. Launch the Internet Explorer on the computer 2. When proxy setting is enabled in the Internet Explorer, follow the steps below to disable the proxy of the Internet Explorer ● Select in the order of [Tools]-[Internet Options...]-[Connections]-[LAN Setting], - JVC VN-C215VP4U | Instruction Manual - Page 74
sites in this zone] in the displayed window. Next, add the IP address of VN-C215VP4U. If the setting is factory default, add the following web site to Off Pop-up Blocker] permits all sites. ● To allow only specific sites such as VN-C215VP4U, select [Tools]-[Pop-up Blocker]-[Turn On Pop-up Blocker], - JVC VN-C215VP4U | Instruction Manual - Page 75
IP address of VN-C215VP4U is 192.168.0.2, enter as follows: http://192.168.0.2/cgi-bin/c215viewing.cgi A Enter the URL of the built-in viewer of this camera cgi 2. Enter the user name and password VN-C215 A Enter the user name. This is set to AadminB by default. B Enter the password. This is set - JVC VN-C215VP4U | Instruction Manual - Page 76
Operation Operation of Built-in Viewer (continued) Screen Configuration of Built-in Viewer ● VN-C215VP4U is set to encode at 15 fps by default. A B C D E 76 - JVC VN-C215VP4U | Instruction Manual - Page 77
Display Size C Pause D Capture E Setup Appears blinking when alarm packets are sent from VN-C215VP4U to the computer. The alarm will name is based on the time at the computer and not the internal clock of VN-C215VP4U. This feature is unable to capture motion images. Displays the setting window of - JVC VN-C215VP4U | Instruction Manual - Page 78
in Viewer Settings The setting window of the built-in viewer will be displayed upon clicking the [Setup] button. A Turn Over B Title C Time D Display MD 78 A B C D . 46) Select AOnB to display the camera ID. The camera ID can be set on the Camera page of the VN-C215VP4U unit. (A Pg. 44) Select AOnB - JVC VN-C215VP4U | Instruction Manual - Page 79
Rate For selecting the acquisition frame rate of the viewer. In the case of a 1-to-1 connection between VN-C215VP4U and the viewer, it is recommended that the frame rate of the viewer and VNC215VP4U be set to the same value. To play back multiple viewers at different frame rates, set the frame - JVC VN-C215VP4U | Instruction Manual - Page 80
alarm action for sending the notification to VN-C215VP4U via TCP. Set the destination of the alarm action to the IP address of the computer that is Pg. 48) For setting the port number for receiving the alarm notification from VNC215VP4U via TCP. For selecting the time out to turn off the blinking of - JVC VN-C215VP4U | Instruction Manual - Page 81
built-in viewer, launch the Internet Explorer and enter the URL of the built-in viewer in the address field. For example, if the IP address of VN-C215VP4U is 192.168.0.2, enter as follows: http://192.168.0.2/cgi-bin/c215viewing.cgi ● After the Security Warning screen appears, press the [OK] button - JVC VN-C215VP4U | Instruction Manual - Page 82
built-in viewer on the Desktop screen of the computer saves you the trouble of having to enter the URL in the Internet Explorer. Create the of the built-in viewer in the URL field For example, if the IP address of VNC215VP4U is 192.168.0.2, enter as follows: http://192.168.0.2/cgi-bin/c215viewing. - JVC VN-C215VP4U | Instruction Manual - Page 83
Others Troubleshooting Symptom IP address of VN-C215VP4U is unknown The web page of VNC215VP4U cannot be displayed AOnB and VN- C215VP4U is started up via a LAN in which a DHCP server does not exist, the startup will time-out after several minutes and the camera will run using the IP address A192 - JVC VN-C215VP4U | Instruction Manual - Page 84
manually from the Streaming page of VN-C215VP4U. ● In the case of multicast reception at the built-in viewer, check that the multicast address and port number of the built-in viewer settings coincide with those on the Streaming page of VNC215VP4U. Make use of a network that supports ]-[Setup]-[ - JVC VN-C215VP4U | Instruction Manual - Page 85
Specifications Camera Unit Image pickup device : 1/4 inch Interline transfer CCD Effective pixels : Approx. 380, TX/ 10BASE-T/FULL/HALF/ auto negotiation supported LAN Specifications Compliant with IEEE802.3, IEEE802.3u and IEEE802.3af Communication protocol : TCP/IP, UDP, HTTP, FTP, ICMP, - JVC VN-C215VP4U | Instruction Manual - Page 86
Specifications by power feeding device that supports Power over Ethernet) : AC24 VH 50 Hz/60 Hz (When using KA-ZH215) Consumption current : 0.5 A (VN-C215VP4U) : 18 W(KA-ZH215 /Accessories Start-up Guide 1 CD-ROM 1 Installation Precautions 1 Warranty Card 1 Service Information Card 1 - JVC VN-C215VP4U | Instruction Manual - Page 87
121(4-3/4) 113(4-1/2) Ǿ160(6-1/4 5(1/4) 42(1-5/8) G3/4-14 UNC screw for piping (bottom surface, side surface) 9 (3/8) 125(4-7/8) SR(523-1.7/8) Ǿ160(6-1/4) T Specifications and appearance of this unit and related products are subject to change for product improvement without prior notice. 87 - JVC VN-C215VP4U | Instruction Manual - Page 88
© 2006 Victor Company of Japan, Limited LST0529-001A VN-C215VP4U FIXED IP DOME CAMERA
-
 1
1 -
 2
2 -
 3
3 -
 4
4 -
 5
5 -
 6
6 -
 7
7 -
8
-
9
-
10
-
11
-
12
-
13
-
14
-
15
-
16
-
17
-
18
-
19
-
20
-
21
-
22
-
23
-
24
-
25
-
26
-
27
-
28
-
29
-
30
-
31
-
32
-
33
-
34
-
35
-
36
-
37
-
38
-
39
-
40
-
41
-
42
-
43
-
44
-
45
-
46
-
47
-
48
-
49
-
50
-
51
-
52
-
53
-
54
-
55
-
56
-
57
-
58
-
59
-
60
-
61
-
62
-
63
-
64
-
65
-
66
-
67
-
68
-
69
-
70
-
71
-
72
-
73
-
74
-
75
-
76
-
77
-
78
-
79
-
80
-
81
-
82
-
83
-
84
-
85
-
86
-
87
-
88
 |
 |

For Customer Use:
Enter below the Serial No. which is located on
the body.
Retain this information for future reference.
Model No.
Serial No.
FIXED IP DOME CAMERA
VN-C215VP4U
INSTRUCTIONS
LST0529-001A
VN-C215VP4U