JVC VS-DT8 Instruction Manual
JVC VS-DT8 Manual
 |
View all JVC VS-DT8 manuals
Add to My Manuals
Save this manual to your list of manuals |
JVC VS-DT8 manual content summary:
- JVC VS-DT8 | Instruction Manual - Page 1
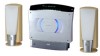
AUX SET CANCEL FM/AM DISPLAY DIMMER SLEEP AHB PRO COLOR CLOCK /TIMER OPEN/ CLOSE VOLUME RM-SVSDT8U REMOTE CONTROL SP-VSDT8 COMPACT COMPONENT SYSTEM CA-VSDT8 SP-VSDT8 INSTRUCTIONS For Customer Use: Enter below the Model No. and Serial No. which are located either on the rear, bottom or - JVC VS-DT8 | Instruction Manual - Page 2
. The exclamation point within an equilateral triangle is intended to alert the user to the presence of important operating and maintenance (servicing) instructions in the literature accompanying the appliance. WARNING: TO REDUCE THE RISK OF FIRE OR ELECTRIC SHOCK, DO NOT EXPOSE THIS APPLIANCE - JVC VS-DT8 | Instruction Manual - Page 3
direct exposure to beam. 3. CAUTION: Do not open the top cover. There are no user ser- viceable parts inside the unit; leave all servicing to qualitied service personnel. CAUTION To reduce the risk of electrical shocks, fire, etc.: 1 Do not remove screws, covers or cabinet. 2. Do not expose this - JVC VS-DT8 | Instruction Manual - Page 4
JVC Compact Component System. We hope it will be a valued addition to your home, giving you years of enjoyment. Be sure to read this instruction manual not the power cord. 3 Malfunctions, etc. • There are no user serviceable parts inside. In case of system failure, unplug the power cord and consult - JVC VS-DT8 | Instruction Manual - Page 5
Table of Contents Introduction ...1 Features ...1 How This Manual Is Organized 1 WARNINGS ...1 IMPORTANT CAUTIONS ...1 Getting Started 3 Accessories...3 How To Put Batteries In Daily Timer ...23 Setting the SLEEP Timer ...24 Care And Maintenance 25 Troubleshooting 26 Specifications Back cover 2 - JVC VS-DT8 | Instruction Manual - Page 6
Getting Started Accessories Make sure that you have all of the following items, which are supplied with the System. Power Cord (1) AM Loop Antenna (1) Remote Control (1) Batteries (2) FM Wire Antenna (1) Speaker Cords (2) Stand (1) (for Center Unit) Legs (2) (for Stand) Screw (1) (for Stand) Paper - JVC VS-DT8 | Instruction Manual - Page 7
Getting Started CAUTION: • Make all connections before plugging the System into an AC power outlet. (Only if you install the Center Unit vertically) • To place the Center Unit vertically, the Stand and Legs must be attached. (See page 8.) To make connections, let the cords pass in the holes of the - JVC VS-DT8 | Instruction Manual - Page 8
Getting Started Connecting the AM Antenna Rear Panel of the Center Unit H V DISP.SET SPEAKERS R L SPEAKER IMPEDANCE 4 16 AC IN SUB WOOFER AM CD DIGITAL LOOP OUT MD/AUX OUT IN ANTENNA FM (75 ) COAXIAL AM EXT AM loop antenna (Supplied) AM LOOP ANTENNA FM (75 ) COAXIAL Attach the AM - JVC VS-DT8 | Instruction Manual - Page 9
difference of the load impedance causes failures. • Do not use the supplied speakers in parallel with other speakers. CAUTION: • Although the speaker SP-VSDT8 has internal magnetic shielding, a TV may display irregular colors if located near the speakers. If this happens, set the speakers away from - JVC VS-DT8 | Instruction Manual - Page 10
Getting Started Connecting a Subwoofer Connect a signal cord (not supplied) between the System's SUBWOOFER terminal and the input terminal of an external subwoofer. Subwoofer (not supplied) Signal cord (not supplied) SUB WOOFER AM CD DIGITAL LOOP OUT MD/AUX OUT IN ANTENNA FM (75 ) COAXIAL AM - JVC VS-DT8 | Instruction Manual - Page 11
for this unit has certain one-way direction connections to prevent electric shock. Refer to the illustration for correct connection. CAUTIONS: • ONLY USE THE JVC POWER CORD PROVIDED WITH THIS SYSTEM TO AVOID MALFUNCTION OR DAMAGE TO THE SYSTEM. • BE SURE TO UNPLUG THE POWER CORD FROM THE OUTLET WHEN - JVC VS-DT8 | Instruction Manual - Page 12
whether the strength of the wall will be sufficient not only to support the weight of the Center Unit itself but also to withstand the do not know the strength of the wall and other aspects, consult a qualified service person. • The screws needed for attachment are not supplied. Use screws which - JVC VS-DT8 | Instruction Manual - Page 13
Example of attachment (Speakers) (SP-VSDT6 only) The speakers can be attached to a wall. Attach a screw (not supplied) on the wall, then hook the speaker onto the screw. Getting Started - JVC VS-DT8 | Instruction Manual - Page 14
sensor (when the Unit is placed vertically) • Make sure that the "DISP.SET" switch on the rear of the Unit is set correctly. COMPU Play JVC's COMPU PLAY feature lets you control the most frequently used System functions with a single touch. With One Touch Operation you can play a CD, turn on - JVC VS-DT8 | Instruction Manual - Page 15
Basic Operations BASS 1 4 7 10 BASS STANDBY/ON 23 PLAY MODE 56 REPEAT 89 +10 FM MODE TREBLE MD/AUX SET CANCEL % indicator TREBLE DISPLAY AHB PRO COLOR (VS-DT8 only) FM/AM DISPLAY DIMMER SLEEP AHB PRO COLOR CLOCK /TIMER OPEN/ CLOSE VOLUME DIMMER VOLUME +/- Operation indicators - JVC VS-DT8 | Instruction Manual - Page 16
Basic Operations Changing the Color (COLOR) (VS-DT8 only) (Using the Remote Control) You can change the color of the illumination on the Unit. 1 Press the % button to turn on the Sys- tem. 2 Press the COLOR button on the Remote Control. "RANDOM COLOR" is displayed. 3 Press the or button to select - JVC VS-DT8 | Instruction Manual - Page 17
Basic Operations Reinforcing the Bass Sound (AHB PRO) (Using the Remote Control) You can reinforce the bass sound to maintain rich, full bass at low volume. To get the effect, press the AHB (Active Hyper Bass) PRO button. The "AHB PRO" indicator lights up on the display. To cancel the effect, press - JVC VS-DT8 | Instruction Manual - Page 18
you press the button, the sound source changes. SOURCE FM AM MD/AUX (on the Unit) 2 Select a station using one of the follow- ing methods. G Manual Tuning Press the 4 or ¢ ( or ) button repeatedly to move from frequency to frequency until you find the station you want. OR G Auto Tuning If you - JVC VS-DT8 | Instruction Manual - Page 19
frequencies prior to shipment. This is not a malfunction. You can preset the stations you want into memory by following one of the presetting methods below. Manual Presetting FM/AM SET SET When changing the Band or FM = 30, AM = 15 STORED SET 1 Select a band by pressing the FM/AM button - JVC VS-DT8 | Instruction Manual - Page 20
Using the CD Player Number buttons STANDBY/ON 123 4 7 10 BASS PLAY MODE 56 REPEAT 89 +10 FM MODE TREBLE MD/AUX SET CANCEL PLAY MODE REPEAT +10 SET SOURCE PRESET Panel VOL FM/AM DISPLAY DIMMER SLEEP AHB PRO COLOR CLOCK /TIMER OPEN/ CLOSE VOLUME OPEN/ CLOSE Track number, Playing - JVC VS-DT8 | Instruction Manual - Page 21
To Unload a CD Press the 0 button on the Unit to eject a CD. The CD is ejected automatically, then take out the CD. (when the Unit is placed horizontally) COMPACT COMPONENT SYSTEM SOURCE PRESET VOL COMPACT COMPONENT SYSTEM (when the Unit is placed vertically) SOURCE PRESET VOL Basics of Using - JVC VS-DT8 | Instruction Manual - Page 22
Using the CD Player Programming the Playing Order of the Tracks (Using the Remote Control) You can program the playing order of the tracks. I You can program up to 32 tracks in any desired order in- cluding the same tracks. I You can only make a program when the CD Player is stopped. 1 Insert a CD. - JVC VS-DT8 | Instruction Manual - Page 23
Using the CD Player Random Play (Using the Remote Control) The tracks will play in no special order when you use this mode. • To enter Random Play mode, stop playback first. 1 Press the PLAY MODE button on the Remote Control until the "RANDOM" indicator lights. 2 Press the 3/8 button. The tracks - JVC VS-DT8 | Instruction Manual - Page 24
level set by the System. Also it is not affected by the sound effects. • For operation of the external equipment, refer to its Instructions. • For operation of the external equipment, refer to its Instructions. • While using the tuner, no signals come out from the CD DIGITAL OUT terminal. 21 - JVC VS-DT8 | Instruction Manual - Page 25
Using the Timers STANDBY/ON 123 4 7 10 BASS PLAY MODE 56 REPEAT 89 +10 FM MODE TREBLE MD/AUX SET CANCEL SET CLOCK /TIMER FM/AM DISPLAY DIMMER SLEEP AHB PRO CLOCK COLOR /TIMER OPEN/ CLOSE VOLUME SLEEP ON time, OFF time, Source, Volume SLEEP Timer indicator SLEEP indicator * - JVC VS-DT8 | Instruction Manual - Page 26
Using the Timers Setting the Daily Timer (Using the Remote Control) Once you have set the Daily Timer, the timer will be activated at the same time every day. The Timer indicator ( ) on the display shows that the Daily Timer you have set is in effect. • When the Timer Indicator ( ) is displayed, the - JVC VS-DT8 | Instruction Manual - Page 27
6 Before turning off the System, prepare the music source selected in step 3. TUNER: Tune in to the desired station. CD: Insert a CD. (Playback will start from the first track at Timer on.) 7 Press the % button to turn off the Sys- tem. In standby mode, you can see the Timer indicator ( ) on the - JVC VS-DT8 | Instruction Manual - Page 28
Care And Maintenance Handle your CDs carefully, and they will last a long time. Compact Discs • Only CDs bearing this mark can be used with this System. However, continued use of irregular shape CDs (heart-shape, octagonal, etc.) can damage the System. • Remove the CD from its case by holding it at - JVC VS-DT8 | Instruction Manual - Page 29
Troubleshooting • If you are having a problem with your System, check this list for a possible solution before calling for service. • If you cannot solve the problem from the hints given here, or the System has been physically damaged, call a qualified person, such as your dealer, for service. - JVC VS-DT8 | Instruction Manual - Page 30
- JVC VS-DT8 | Instruction Manual - Page 31
- JVC VS-DT8 | Instruction Manual - Page 32
Unit Dimensions* 325mm ✕ 86mm ✕ 237mm (W/H/D) (CA-VSDT6/CA-VSDT8) (12 - 13/16" ✕ 3 - 7/16" ✕ 9 - 3/8") Mass* (CA-VSDT6) Approx. 3.9kg (8.6 lbs) (CA-VSDT8) Approx. 4.0kg (8.9 lbs) * without Stand and Legs Speaker Specifications (each unit) SP-VSDT6 Speakers Impedance Dimensions Mass 8 cm
-
 1
1 -
 2
2 -
 3
3 -
 4
4 -
 5
5 -
 6
6 -
 7
7 -
8
-
9
-
10
-
11
-
12
-
13
-
14
-
15
-
16
-
17
-
18
-
19
-
20
-
21
-
22
-
23
-
24
-
25
-
26
-
27
-
28
-
29
-
30
-
31
-
32
 |
 |

COMPACT COMPONENT SYSTEM
For Customer Use:
Enter below the Model No. and Serial No.
which are located either on the rear, bot-
tom or side of the cabinet. Retain this
information for future reference.
Model No.
Serial No.
INSTRUCTIONS
LVT0853-001A
[J]
VS-DT6/VS-DT8
Consists of CA-VSDT6 and SP-VSDT6
Consists of CA-VSDT8 and SP-VSDT8
1
2
3
6
9
10
10
7
4
5
8
+
2
8
1
3
6
9
10
10
7
4
5
+
CA-VSDT8
CA-VSDT6
SP-VSDT6
SP-VSDT6
SP-VSDT8
SP-VSDT8