Kenmore 7851 Use and Care Guide
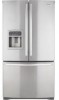
Kenmore 7851 - 25.0 cu. Ft. Bottom-Freezer Refrigerator Manual
 |
UPC - 719192615878
View all Kenmore 7851 manuals
Add to My Manuals
Save this manual to your list of manuals |
Kenmore 7851 manual content summary:
- Kenmore 7851 | Use and Care Guide - Page 1
BOTTOM FREEZER REFRIGERATOR Use & Care Guide o 2 CONGELADOR INFERIOR REFRIGERADOR Guia para el Uso y Cuidado ° 36 CONGCLATEUR INFCRIEUR RCFRIGCRATEUR Guide d'Utilisation et d'Entretien o 70 Models / Modelos / Modeles 795.7850;!-_, 7851 ;!-_ ;!-_=color number, n0mero de color, numero de couleur == - Kenmore 7851 | Use and Care Guide - Page 2
Version 70 Warranty 3 Protection Agreements 4 Safety Instructions 5-6 Grounding Requirements 6 Parts And Features 7 Refrigerator Installation 8-15 Unpacking Your Refrigerator 8 Installation 8 Removing And Replacing Your Refrigerator Handles And Doors Leveling And Door Alignment - Kenmore 7851 | Use and Care Guide - Page 3
BOTTOM FREEZER REFRIGERATOR WARRANTY J® f Kenmore Appliance Warranty One Year Limited Warranty When installed, operated and maintained according to all instructions supplied with the product, if this appliance fails due to a defect in material or workmanship within one year from the date of purchase - Kenmore 7851 | Use and Care Guide - Page 4
Kenmore [d Parts and service by a force of more than 10,000 authorized Sears service service calls and nationwide service "talking owner's manual." [_ Power covered refrigerator or freezer service and related installed parts Service For Sears professional installation of home appliances refrigerator - Kenmore 7851 | Use and Care Guide - Page 5
guide Read all instructions before using this appliance. • NEVER unplug your refrigerator by pulling refrigerator before cleaning or making any repairs. NOTE:We strongly recommend that any servicing . • In refrigerators with automatic icemakers, avoid contact with the moving parts of the ejector - Kenmore 7851 | Use and Care Guide - Page 6
by a qualified servicer, tf you intentionally release this CFC refrigerant, you can be subject to fines and imprisonment under provisions of environmental legislation. IMPORTANT: Please read carefully. TO CONNECT ELECTRICITY Electrical Shock Hazard FOR PERSONAL SAFETY, this appliance must be - Kenmore 7851 | Use and Care Guide - Page 7
L ,I {. Use this page to become more familiar with the parts and features. Page references are included for your convenience. NOTE: This guide covers several different models. The refrigerator you have purchased may have some or all of the items listed below. The locations of the features shown - Kenmore 7851 | Use and Care Guide - Page 8
cleaners to remove tape or glue. These products can damage the surface of your refrigerator. For more information, see the important Safety instructions section. Refrigerator the refrigerator on a platform or weakly supported structure. it. 2. Install this appliance in an area where the temperature - Kenmore 7851 | Use and Care Guide - Page 9
.f it is necessartyo removethehandlesfollowthedirectionsbelow. HOW TO REMOVE DOOR HANDLES NOTE: Handle appearance may vary from illustrations on this page. 1. Removing Refrigerator Handle • Grasp the handle tightly with both hands and slide the handle up (1)(this may require some force). • The - Kenmore 7851 | Use and Care Guide - Page 10
HOW TO REPLACE DOOR HANDLES NOTE: Handle appearance may vary from illustrations on this page. 1. Reinstalling the Refrigerator Door Handle • Align keyhole slots (1) on the top and bottom of the back of the handle with the screws (2) mounted on the front of the - Kenmore 7851 | Use and Care Guide - Page 11
to push the collet by opposite direction of arrow in the upper picture and tube pull out by direction of arrow. To remove the right refrigerator door: F @ A CAUTION: Before you begin, remove food and bins from the doors. • Open the door. Remove the top hinge cover screw (1). Lift up the cover - Kenmore 7851 | Use and Care Guide - Page 12
Reinstalling the Refrigerator Door I_ Right Door 1. Lower the door onto middle hinge pin (8). 2. Fit top hinge (5) over hinge lever latch (6) and into place. Insert hinge lever (4) under - Kenmore 7851 | Use and Care Guide - Page 13
INSTALL THE PULLOUT DRAWER IMPORTANT: To avoid possible injury or product or property damage, you will need two people to perform the following instructions. 1. Removing Pullout Drawer • Pull the drawer open to full extension. Remove the lower basket (1) by lifting basket from rail system. (If you - Kenmore 7851 | Use and Care Guide - Page 14
property damage, you will need two people to perform the following instructions. 2. Installing Pullout Drawer • With both hands, hold the center the rail cover with the top holes of the door supports to assemble the rail covers. • Hook door supports (1) into rail tabs (2). J Assembly Hole • With - Kenmore 7851 | Use and Care Guide - Page 15
the refrigerator's tilt using the instructions below: 1. Plug the refrigerator's power cord into a 3-prong grounded outlet. Move the refrigerator into with the refrigerator in the Use & Care Guide packet.) 2. Turn the leveling leg clockwise to raise that side of the refrigerator or counterclockwise - Kenmore 7851 | Use and Care Guide - Page 16
less cold air flows into the refrigerator. Ultra Ice • When you press the "Ultra Ice" button, the graphic [ 0 ] will light up in the display and it continues for 24 hours. It will automatically shut off after 24 hours have passed. Or you can stop this function manually by pressing the button one - Kenmore 7851 | Use and Care Guide - Page 17
the ice compartment will gradually warm up to the temperature of the refrigerator compartment. To prevent ice cubes from melting and leaking from the remove the in-door ice bank, grip the front handle, slightly lift the lower part, and slowly pull out the bin as shown. f- 3. To reinstall the - Kenmore 7851 | Use and Care Guide - Page 18
when ice cream is firm. The refrigerator control functions as the thermostat for the entire appliance (refrigerator and freezer sections). The higher the , wait 24 hours, then recheck FOOD STORAGE GUIDE Wrap or store food in the refrigerator in airtight and moisture-proof material unless otherwise - Kenmore 7851 | Use and Care Guide - Page 19
food storage times, check a freezer guide or a reliable cookbook. Packaging Successful plastic bags Follow package or container instructions for proper freezing methods. Do freeze. Cooling hot foods before freezing saves energy. REFRIGERATOR SECTION WATER DISPENSER Tray can be easily removed by - Kenmore 7851 | Use and Care Guide - Page 20
you want easier; it will also reduce the amount of time the refrigerator door is open, saving energy. IMPORTANT: Do not clean glass shelves with ] -'":'_'_" • To reinstall a shelf--Tilt the front of the shelf up and guide the shelf hooks into the slots at a desired height. Then lower the front of - Kenmore 7851 | Use and Care Guide - Page 21
and adjusting. Simply lift the bin and pull it straight out to remove it. To replace the bin, slide it in above the desired support button and push down until it stops. CRISPER HUMIDITY CONTROL The crispers provide fresher-tasting fruit and vegetables by letting you easily control humidity inside - Kenmore 7851 | Use and Care Guide - Page 22
FREEZER SECTION TILTING DOOR The tilting door provides easy access for stored foods. How to use Tilt the door down and pull it out. A WARNING: Be careful when you open tilting door so that you do not injure your foot! EXTRA ICE BIN 1. To separate the ice bin, pull out the drawer as much as possible - Kenmore 7851 | Use and Care Guide - Page 23
to organize the Durabase area into sections. To install, reposition the gear part of rear left and right side of the drawer after pulling out both push down both left and right side while checking the hook on the front part. 1. To remove, pull the divider straight up. 2. To install, hook the - Kenmore 7851 | Use and Care Guide - Page 24
dispenser for 3 minutes to purge the system. Pull out the filter cartridge. NOTE: To purchase replacement water filter cartridges, call 1-800-4-MY-HOME ®.Ask for part number 9990. 24 - Kenmore 7851 | Use and Care Guide - Page 25
or disconnect power. • Remove all removable parts, such as shelves, crispers, etc. Refer to sections in Using Your Refrigerator for removal instructions. • Use a clean sponge or soft cloth and a mild detergent in warm water. Do not use abrasive or harsh cleaners. • Hand wash, rinse and dry all - Kenmore 7851 | Use and Care Guide - Page 26
dry thoroughly. 5. Take out all removable parts, wrap them well and tape them together so they don't shift and rattle during the move. Refer to sections in Using your Refrigerator for removable instructions. 6. Depending on the model, raise the front of the refrigerator so it rolls more easily OR - Kenmore 7851 | Use and Care Guide - Page 27
conditions. • It takes about 12 to 24 hours for a newly installed refrigerator to make ice. • Icemaking stops when the ice storage bin is full. icemaker is defective. Personal Injury Hazard Avoid contact with the moving parts of the ejector mechanism, or with the heating element that releases - Kenmore 7851 | Use and Care Guide - Page 28
water supply. If the problem continues, contact an Authorized Service Center. Do not use the ice or water until the problem is corrected. • Keep children power switch to O (off) and shut off the water supply to the refrigerator. NOTE: Ice Bin should be emptied anytime the icemaker on/off switch is - Kenmore 7851 | Use and Care Guide - Page 29
installation is not warranted by the refrigerator or icemaker manufacturer. Follow these instructions carefully to minimize the risk of expensive water damage. Water hammer (water banging in the pipes) in house plumbing can cause damage to refrigerator parts and lead to water leakage or flooding - Kenmore 7851 | Use and Care Guide - Page 30
INSTRUCTIONS clamp screws until the sealing washer begins to swell. NOTE: Do not overtighten or you may crush the tubing. Washer Pipe Clamp __ -- cold water line and the refrigerator. Route the tubing through a hole drilled in the wall or floor (behind the refrigerator or adjacent base cabinet) - Kenmore 7851 | Use and Care Guide - Page 31
Arrange the coil of tubing so that it does not vibrate against the back of the refrigerator or against the wall. Push the refrigerator back to the wall. Tubi"ngcComlamprpe_s_s,i_o_nl/4 Nut /_ 1/41_T" ubing Ferrule (sleeve) RCeofnrnigeecrtiaotnor A CAUTION: Check to see if water dripping - Kenmore 7851 | Use and Care Guide - Page 32
cord into a live outlet with proper voltage. Turn the refrigerator control to the OFF position and unplug the refrigerator. Gently remove the bulb and reinsert. Then plug in refrigerator and reset the refrigerator control. Replace with an appliance bulb of the same wattage, size and shape available - Kenmore 7851 | Use and Care Guide - Page 33
refrigerator. It is normal for the refrigerator to run longer in order to cool the refrigerator back down. Adding a large amount of food warms the refrigerator. See the Food Storage Guide and Replacing Refrigerator handles and doors section on pages 9-14, or call a qualified service technician. - Kenmore 7851 | Use and Care Guide - Page 34
properly. A filter may need to be installed to eliminate taste and odor problems. See Care and Cleaning section on pages 25-26. Empty and wash . THERE IS WATER IN THE DEFROST DRAIN PAN Check if... Then... The refrigerator is defrosting. It is more humid than normal. The water will evaporate. It - Kenmore 7851 | Use and Care Guide - Page 35
appliance polish or kitchen wax on the gaskets after cleaning. When you open the door, warmer air enters the refrigerator. As the warm air cools, it can create a vacuum refrigerator to avoid moisture accumulation. If necessary, repackage food according to the guidelines in the Food Storage Guide - Kenmore 7851 | Use and Care Guide - Page 36
expert troubleshooting and home solutions advice: e www.ma.agomyhome.com For repair- in your home - of all major brand appliances, lawn and garden equipment, or heating and cooling systems, no matter who made it, no matter who sold it! For the replacement parts, accessories and owner's manuals
-
 1
1 -
 2
2 -
 3
3 -
 4
4 -
 5
5 -
 6
6 -
 7
7 -
8
-
9
-
10
-
11
-
12
-
13
-
14
-
15
-
16
-
17
-
18
-
19
-
20
-
21
-
22
-
23
-
24
-
25
-
26
-
27
-
28
-
29
-
30
-
31
-
32
-
33
-
34
-
35
-
36
 |
 |

BOTTOM
FREEZER
REFRIGERATOR
Use & Care Guide
o
2
CONGELADOR
INFERIOR
REFRIGERADOR
Guia para el Uso y Cuidado
° 36
CONGCLATEUR
INFCRIEUR
RCFRIGCRATEUR
Guide d'Utilisation
et d'Entretien
o 70
Models
/
Modelos
/
Modeles
795.7850;!-_, 7851 ;!-_
;!-_=colornumber,
n0mero de color, numero de couleur
==trio
MFL37933510
Sears,
Roebuck
and Co., Hoffman
Estates,
IL 60179 U.S.A.
www.sears.com
Printed in Korea
Sears Canada,
Inc., Toronto,
Ontario,
Canada
M5B 2B8
www.sears.ca