Kenmore 8031 Use and Care Guide
Kenmore 8031 - 7.3 cu. Ft. Electric Dryer Manual
 |
UPC - 719192813083
View all Kenmore 8031 manuals
Add to My Manuals
Save this manual to your list of manuals |
Kenmore 8031 manual content summary:
- Kenmore 8031 | Use and Care Guide - Page 1
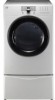
Use & Oa_e Guide and _nsta_ation _nst_uctions Secadoras Gu_a de uso y cuidado e mnstrucciones de instalaci6n Models/Modelos Electric/Electrico Gas/A Gas * = co,or number, 796.8031#9## 796.9031 #9## n_mero de co,or Protocol P154 Sanitization Performance of Residetial Clothes dryer Protocolo P154 - Kenmore 8031 | Use and Care Guide - Page 2
new IMPORTANT SAFETY INSTRUCTIONS 3-6 Kenmore - Kenmore 8031 | Use and Care Guide - Page 3
messages in this manual and on your appliance. Always read appliance or any other appliances. installation and service must be performed by a qualified installer, service agency, or the gas supplier. install the clothes dryer according to the manufacturer's * Save these instructions. instructions - Kenmore 8031 | Use and Care Guide - Page 4
or explode. • Do not reach into the dryer if the drum or any other part is moving. • Do not repair or replace any part of the dryer or attempt any servicing unless specifically recommended in this Use and Care Guide or in published user-repair instructions that you understand and have the skills to - Kenmore 8031 | Use and Care Guide - Page 5
. Install and store the dryer where it will not be exposed to temperatures below freezing or exposed to the weather. All repairs and servicing must be performed by an authorized servicer unless specifically recommended in this Owner's Guide. Use only authorized factory parts. Failure to follow this - Kenmore 8031 | Use and Care Guide - Page 6
result in electrical shock or injury. Refer to the installation instructions in this manual for specific electrical requirements for your model. Failure to follow these instructions can create an electrical shock hazard and/or a fire hazard. This dryer must be plugged into a properly grounded outlet - Kenmore 8031 | Use and Care Guide - Page 7
exhaust system that reduce airflow from the dryer. Maintaining clean exhaust system ducts improves operating efficiency and helps minimize service calls, saving you money. Power Cord Location (Gas Models) Terminal Block Access Panel (Electric Models) ULTRA-CAPACITY STAINLESS STEEL DRUM WITH DRUM - Kenmore 8031 | Use and Care Guide - Page 8
Models only. LOCATION REQUIREMENTS ! IMPORTANT: Read all installation instructions completely before installing and operating your dryer! It is important that you review this entire manual before installing and using your dryer. Detailed instructions for installation and servicing is recommended. - Kenmore 8031 | Use and Care Guide - Page 9
dryer using an optional pedestal base or stacking kit, please refer to the instructions mount the dryer on top of the washer to save dryer gas connections from Natural Gas (NG) to LiquefiedPropane Gas (LP) 383EEL3002A NOTE: Installationof the LP conversion kit must be performedby a qualified service - Kenmore 8031 | Use and Care Guide - Page 10
-in. water column for (LP). . A qualified service or gas company technician must connect the dryer to the gas service. Failure to do so can result in fire, explosion, or death. • Isolate the dryer from the gas supply system by closing its individual manual shutoff valve during any pressure testing - Kenmore 8031 | Use and Care Guide - Page 11
I I CONNECTING GAS DRYERS (cont.) VV/_I-II_I II_lk._" TO reduce the risk of fire, electric shock, or injury to persons when using this appliance, follow basic precautions, including the following: • Installation and service must be performed by a qualified installer, service agency, or the gas - Kenmore 8031 | Use and Care Guide - Page 12
-, OR 120-VOLT CIRCUIT. Heating elements are available for field installation in dryers which are to be connected to an electrical service of a different voltage than that listed on the rating plate. Failure to follow these instructions can result in fire, explosion, or death. If branch circuit to - Kenmore 8031 | Use and Care Guide - Page 13
CONNECTING ELECTRIC DRYERS (cont.) CONNECTING ELECTRIC DRYERS WARNING" . Connect the power cord to the terminal block. Each colored wire should be connected to same color screw. Wire color indicated on manual is connected to the same color screw in block. Failure to follow these instructions may - Kenmore 8031 | Use and Care Guide - Page 14
EXHAUST SYSTEM FOR PROBLEMS The most common cause of dryer problems is poor exhaust venting. Before you install your new dryer, check the items of wall cap. O Select row that matches the number of elbows required in the dryer duct run. O Select the duct type. The length shown in the chart at this - Kenmore 8031 | Use and Care Guide - Page 15
for use with the appliance by the manufacturer and that comply with the Outline for Clothes Dryer Transition Duct, Subject 2158A dryer per the guidelines included within these instructions may result in unsatisfactory dryer performance. All venting and ductwork beyond the exterior of the dryer - Kenmore 8031 | Use and Care Guide - Page 16
installation. • Failure to follow these instructions can result in injury. To ensure that the dryer provides optimal drying performance, it must be corners of the dryer to make sure that the dryer does not rock from corner to corner. O Open the dryer door. NOTE: Be sure to support the weight of - Kenmore 8031 | Use and Care Guide - Page 17
ignites. If this happens, the igniter will reattempt gas ignition until all the air is purged from the gas line. ELECTRIC MODELS O Close the dryer door. O Press the Power button to turn the dryer on. O Turn Cycle Selector Knob to Normal drying cycle. O Press the Cycle Selector Knob to start the - Kenmore 8031 | Use and Care Guide - Page 18
manual, including the Important Safety Instructions, before operating this dryer. CONTROL PANEL FEATURES iii Iz O POWER (On/Off) BUTTON Press to turn the dryer ON. Press again to turn the dryer anytime before starting the cycle. (See the cycle guide on page 20 for allowable settings. To protect - Kenmore 8031 | Use and Care Guide - Page 19
POWER _ High Loud i 15o t Extra Dry I 60 | _o_r_o |40 I !30 Soft Off il H/ jJ START/PAUSE O LOAD THE DRYER Load the dryer with the wet laundry from the washer. If the load is extra large, you may need to divide it into smaller loads for proper performance and fabric care. O CLEAN THE LINT - Kenmore 8031 | Use and Care Guide - Page 20
CYCLE GUIDE The cycle guide below Lingerie Mid Low,Low _ Max 99 J Sensor Dry Cycles Manual Dry Cycles Sensor Dry cycles utilize a sensor that detects moisture levels drying time as needed to ensure superior results. The dryer automatically sets the dryness level and temperature at the - Kenmore 8031 | Use and Care Guide - Page 21
manual, includ- ing the Important Safety Instructions, before operating this dryer. SORTING LOADS Fabric Care Labels Most articles of clothing feature fabric care labels that include instructions off the screen with your fingers. Do not rinse or wash the screen to remove lint. Push the lint screen - Kenmore 8031 | Use and Care Guide - Page 22
does not indicate any problems with your dryer. If this light blinks, it indicates that your home's exhaust system has a serious restriction, which is not covered by your dryer's warranty. Call Sears duct cleaning service to set up an appointment to have your exhaust system serviced. O CONTROL LOCK - Kenmore 8031 | Use and Care Guide - Page 23
dryness level, temperature, or option is available with every cycle. See the Cycle Guide on page 20 for details. High Q Medium • Low R Extra Dry 60 your preferences. • This option is not available with MANUAL DRY cycles. • The dryer will automatically adjust the cycle time. Selecting EXTRA DRY - Kenmore 8031 | Use and Care Guide - Page 24
carefully dry items that should not be tumbled in the dryer, such as sweaters stuffed animals, gym shoes, etc. can be used. Once the washer has shut off, the power button will allow the machine to be turned on, but to be dried on the rack. Make sure no part of the articles hang over the edges of the - Kenmore 8031 | Use and Care Guide - Page 25
cleaners, or solvents to clean the dryer. They will damage the finish. REGULAR CLEANING Cleaning the Exterior Proper care of your dryer can extend its life. The outside of the machine Cleaning Around and Under the Dryer Vacuum lint and dust from around the dryer and underneath it regularly. ALWAYS - Kenmore 8031 | Use and Care Guide - Page 26
or service turned off (gas models only). Greasy or dirty spots on clothes Check if... Clean and dirty clothes being dried together. Clothes were not properly cleaned or rinsed before placing them in the dryer. Then... Install a shorter or straighter duct run. See the Installation Instructions for - Kenmore 8031 | Use and Care Guide - Page 27
SERVICE Even an unbalanced load in the washer can cause poor spinning resulting in . Large load of heavy fabrics. Dryer controls are not set properly. Lint filter If it looks dirty, follow the cleaning instructions on page 25. With some loads fuse capacity. If the problem is a circuit overload, - Kenmore 8031 | Use and Care Guide - Page 28
care instructions for your garment, because some fabrics will naturally shrink when washed. Other fabrics can be washed but will shrink when dried in a dryer. Use in clothes. Dryer is overloaded. Tissue, paper, etc., left in pockets. Then,.. Turn off the dryer and call for service. I Then,.. - Kenmore 8031 | Use and Care Guide - Page 29
, stable, level floor capable of supporting the weight of both appli ances. Failure to follow this warning can result in seri ous injury. Do NOT stack the washer on top of the dryer. Failure to follow this warning can result in serious injury. If appliances are already installed, disconnect them - Kenmore 8031 | Use and Care Guide - Page 30
Parts The following parts are included with the pedestal. • 18 screws for mounting • 4 dryer brackets • 1 adjusting wrench for leveling feet • 1 Phillips-head screwdriver • Installation instructions is a risk of serious injury. • If appliances are already installed, disconnect them from all power, - Kenmore 8031 | Use and Care Guide - Page 31
during installation. • Failure to follow these instructions can result or fire. in death Your new dryer is shipped to vent to the rear. It can also be configured to vent to the bottom or side (right-side venting is not available on gas models). Option 2 : Bottom venting Retaining Screw Rear - Kenmore 8031 | Use and Care Guide - Page 32
repair. If this appliance is ever used for service technician to instruct the user in correct product installation, operation or maintenance. O A service cleaners, chemicals or utensils other than those recommended in all instructions supplied with the product. O Damage to or failure of parts - Kenmore 8031 | Use and Care Guide - Page 33
33 - Kenmore 8031 | Use and Care Guide - Page 34
Felicidades por realizar una compra inte/igente. Su nuevo producto Kenmore ha sido disefiado y fabricado para proporcionarle afios de funcionamiento fiable en todos los productos pot parte de un representante de Sears. Piense en nosotros como en un "manual del usuario parlante". . Proteccibn - Kenmore 8031 | Use and Care Guide - Page 35
electrica, o para prevenir da_os a la propiedad, lesiones personales o muerte. Su Seguridad y la de los demas son de suma importancia. En este manual yen su electrodomestico figuran muchos mensajes importantes de seguridad. Lea y cumpla siempre con todos los mensajes de seguridad. _ E_lstme isems - Kenmore 8031 | Use and Care Guide - Page 36
usar, la secadora debe estar correctamente instalada como se describe en este manual. • No coloque artfculos que hayan sido expuestos a aceites, incluyendo en lugares donde tambor o las otras partes esten en movimiento. • No repare o reemplace ninguna parte de la secadora ni intente reparar la - Kenmore 8031 | Use and Care Guide - Page 37
autorizado a menos que se den otras recomendaciones especificas en el Manual del Usuario. Utilice s61o piezas de f#.brica autorizadas. Si no de un conducto de ventilacibn al exterior. La acumulaci6n de pelusa en cualquier parte de la casa puede crear riesgos de salud e incendio. Use 0nicamente - Kenmore 8031 | Use and Care Guide - Page 38
INSTRUCTIONS FOR CONNECTING ELECTRICITY n WARNING: To reduce the risk of fire, electric shock, or injury to persons when using this appliance de instalacibn de este manual para obtener los requisitos cortar debido a cualquier movimiento de su parte central, resultando en una descarga electrica. - Kenmore 8031 | Use and Care Guide - Page 39
PIEZAS Y COMPONENTES SIGNIFICATIVOS Existen varies componentes importantes a los que se hace referencia en este manual. O PANEL DE CONTROL FACIL DE USAR Gire el mando selector de ciclo para seleccionar gas (modetos de gas) Satida det conducto de evacuacion Parte posterior de la secadora 39 I I - Kenmore 8031 | Use and Care Guide - Page 40
funcionamiento su secadora! Es importante que revise por completo este manual antes de instalar y utilizar su secadora. En las siguientes espacio libre requerido. • Permita al menos 21 pulgadas (53,3 cm) en la parte frontal de la secadora para abrir la puerta. 48 pulgadas_ (310cm) o 34pulgada2s ( - Kenmore 8031 | Use and Care Guide - Page 41
I I INSTALACION CON BASE DE PEDESTAL 0 KIT DE APILADO OPCIONAL IMPORTANTE: Si va a instalar su secadora utilizando una base de pedestal o kit de apilado opcional, consulte las instrucciones de dicho elemento antes de proceder con la instalaci6n. f_ Dimensiones precisas para la instalacibn con - Kenmore 8031 | Use and Care Guide - Page 42
torna de surninistro: Sulavadero debe disponer de una torna de surninistro de gas rigida para su secadora. IEn los EE.UU., debe instalarse una v_lvula manual de corte individual en un radio de al rnenos 6pies (1,8 rn) de la secadora, seg_n el National Fuel Gas Code ANSI Z223.1. Debe instalarse un - Kenmore 8031 | Use and Care Guide - Page 43
de gas disponible en su lavadero es el adecuado para utilizar la secadora. Retire el tap6n de transporte del adaptador de gas situado en la parte posterior de la secadora. Asegerese de no dafiar las roscas del conector de gas al retirar el tap6n de transporte. OConecte la secadora al suministro - Kenmore 8031 | Use and Care Guide - Page 44
I I REQUISITOS ELI:!:CTRICOS CONEXION DE SECADORAS ELI:!:CTRICAS ADVERTENCIAPara ayudar a prevenir incendios, descargas electricas, lesiones graves o incluso la muerte, el cableado y la puesta a tierra deben cumplir la edici6n mas reciente del National Electrical Code, ANSI/NFPA 70 y todas las - Kenmore 8031 | Use and Care Guide - Page 45
de un color en concreto debe El cable del color indicado en el manual est_ conectado al tornillo del mismo color en el bloque. No acatar estas de acceso al bloque de terminales situado en la secci6n superior de la parte posterior de la secadora. O Instale un sujetacables con clasificaci6n UL dentro - Kenmore 8031 | Use and Care Guide - Page 46
I I VENTILACION DE LA SECADORA COMPRUEBE LA EXISTENCIA DE PROBLEMAS EN SU SISTEMA DE EVACUACION La causa mds habitual de problemas en la secadora es una ventilacibn de evacuacibn deficiente. Antes de instalar su nueva secadora, compruebe los elementos enumerados a continuaci6n para garantizar el - Kenmore 8031 | Use and Care Guide - Page 47
tipo aluminio identificados especificamente para el uso con este electrodomestico por el propio fabricante y que cumplan la normativa Clothes Dryer Transition Duct, Subject 2158A. ces tendrb, como resultado un rendimiento deficiente, ADVERTENCIA: fallos del producto y/o podria producir incendios - Kenmore 8031 | Use and Care Guide - Page 48
la secadora en su ubicaci6n final. Coloque un nivel sobre la parte superior de la secadora. • Los cuatro pies de nivelaci6n deben apoyarse clockwise lowers the foot and raises the dryer; turning the foot counterclockwise raises the foot and lowers the dryer.Girar el pie de nivelaci6n en sentido - Kenmore 8031 | Use and Care Guide - Page 49
vez instalada en su ubicaci6n final, vuelva a comprobar la nivelaci6n correcta de la secadora. AsegQrese de que exista una nivelaci6n correcta entre la parte posterior y frontal y entre los laterales de la secadora y de que todos los pies de nivelaci6n esten apoyados firmemente sobre el suelo. 49 - Kenmore 8031 | Use and Care Guide - Page 50
START/PAUSE para que comience el ciclo. La pantalla cambiar#, y la secadora mostrar#. el tiempo restante estimado (SECADO POR SENSOR) o ajustado (SECADO MANUAL) y comenzar#. Para pausar el ciclo en cualquier momento, abra la puerta de la secadora o presione el bot6n PAUSE. Para reanudar el ciclo - Kenmore 8031 | Use and Care Guide - Page 51
I I FUNCIONAMIENTO DE LA SECADORA POWER Loud Soft Off ();: ! START/PAUSE O CARGARLASECADORA Cargue en la secadora la colada hOmeda procedente de la lavadora. Si la carga es muy grande, deber#. dividirla en cargas m#.s pequefias para obtener un buen rendimiento y proteger los tejidos. O LIMPIAR - Kenmore 8031 | Use and Care Guide - Page 52
_ iiiiiiliiiiii,i,ii iiii! iiiiiii i iI!i Con bandeja JerseiSlenlacneari,asdeeda, I _ Mediabaja,baja I M&x.99 J I Ciclos de secado por sensor Ciclos de secado manual Los ciclos de secado per sensor utilizan un sensor que detecta los niveles de humedad en las prendas y ajusta el tiempo de - Kenmore 8031 | Use and Care Guide - Page 53
I I A DVE RTE NCIA" pletamente este manual, incluyenpdaoralarsedinusctirrueccl iroiensegso imdepoinrtcaenntedsio, ddeessecagrugraidade,lecatrnicteas odelespioonneers efnisicfuansc,iolneaamcieonmto- esta secadora. CLASIFICACION DE CARGAS Etiquetas de prendas delicadas La mayorfa de las etiquetas - Kenmore 8031 | Use and Care Guide - Page 54
parpadean, indican que el sistema de evacuaci6n de su vivienda presenta una limitaci6n grave, no cubierta por la garantfa de su secadora.system serviced. Llame al servicio tecnico de limpieza de conductos de Sears para concertar una cita y reparar su sistema de evacuaci6n. O INDICADOR DE BLOQUEO DE - Kenmore 8031 | Use and Care Guide - Page 55
. Utilice este bot6n para ajustar el tipo de secado que prefiera para la carga. • Esta opci6n no est#. disponible para los ciclos de SECADO MANUAL. • La secadora ajustar#, autom#.ticamente el tiempo de duraci6n del ciclo. Seleccionar EXTRA DRY o MORE DRY (muy seco o m_.s seco incrementar#, el tiempo - Kenmore 8031 | Use and Care Guide - Page 56
tejidos delicados. O Con la puerta de la secadora abierta, deslice la bandeja hasta el interior del tambor de la secadora. @Asegerese de que la parte frontal de la bandeja asiente correctamente en el hueco del alojamiento del filtro de pelusas situado en el frente de la secadora. Las dos pestafias - Kenmore 8031 | Use and Care Guide - Page 57
I I /_ i-_\ i i-- l_Y-l-l-- i_ i f_ i A I_l/llJVl- FIll- I_lbl/l" a fin de reducir el riesgo de incendio, descargas electricas o ,esiones a terceros durante el uso de este electrodomestico, siga las precauciones basicas de seguridad, incluidas las expuestas a continuaci6n: • Desenchufe la - Kenmore 8031 | Use and Care Guide - Page 58
I I ANTES DE SOLICITAR ASISTENCIA TI_CNICA (cont.) COMPRUEBE SI EL INDICADOR DE VENTILACION EST.& PARPADEANDO Compruebe si... Entonces: El conducto tiene demasiada Iongitud o demasiados cambios de direcci6n/restricciones, Instaleun conductocon un recorridoma.scorto o recto. Consulte las - Kenmore 8031 | Use and Care Guide - Page 59
I I ANTES DE SOLICITAR ASISTENCIA TI_CNICA El tiempo de secado no es consistente Compruebe si... Los ajustes de calor, tamaSo de la carga o humedad en las prendas no son consistentes. E nton ces: El tiempo de secado para una carga variara,dependiendodel tipo de calor utilizado (electrico,gas - Kenmore 8031 | Use and Care Guide - Page 60
I I ANTES DE SOLICITAR ASISTENCIA TI_CNICA (cont.) Las prendas estan arrugadas Compruebe si... Las prendas est#.n sec#.ndose demasiado tiempo (secadas en exceso). Las prendas han permanecido en la secadora demasiado tiempo una vez terminado el ciclo. Entonces: Secaruna cargaen - Kenmore 8031 | Use and Care Guide - Page 61
I I ACCESORIOS OPCIONALES "3 C Utiticeun pedestal para alcanzar la ropa con m_.s facitidad. Btanco= 796.51022 Rojo chile = 796.51029 Jengibre = 796.51028 Utilice un kit de apitado para montar la secadorasobre la lavadoray ahorrar espacio D2617002(Blanco) D2617008(Rojochile) D2617009(Jengibre) - Kenmore 8031 | Use and Care Guide - Page 62
I I INSTALACION DEL PEDESTAL Listado de piezas Las siguientes piezas estb.ninctuidas con et pedestal. • 18 tornillos de montaje • 4 soportes para la secadora • 1 tlave de ajuste para ajustar los pies de nivetaci6n • 1 destorniltador de cabeza Phillips • Instrucciones de instalaci6n Herramientas - Kenmore 8031 | Use and Care Guide - Page 63
instrucciones puede provocar incen- dios o, incluso, peligro de muerte. Su nueva secadora viene preajustada de f#.brica con la ventilaci6n a traves de la parte posterior. Tambien puede configurarse para que ventile a traves de la base o por el lateral (la ventilaci6n a traves del lateral derecho no - Kenmore 8031 | Use and Care Guide - Page 64
I I f Garantia limitada de un a_o Si, tras ser instalado, operado y mantenido segdn todas las instrucciones incluidas con el producto, este electrodomestico sufriera averias debidas a defectos de material y mano de obra, dentro del periodo de un aho desde la fecha de compra, Ilame al 1-800-4-MY-
-
 1
1 -
 2
2 -
 3
3 -
 4
4 -
 5
5 -
 6
6 -
 7
7 -
8
-
9
-
10
-
11
-
12
-
13
-
14
-
15
-
16
-
17
-
18
-
19
-
20
-
21
-
22
-
23
-
24
-
25
-
26
-
27
-
28
-
29
-
30
-
31
-
32
-
33
-
34
-
35
-
36
-
37
-
38
-
39
-
40
-
41
-
42
-
43
-
44
-
45
-
46
-
47
-
48
-
49
-
50
-
51
-
52
-
53
-
54
-
55
-
56
-
57
-
58
-
59
-
60
-
61
-
62
-
63
-
64
 |
 |
I
I
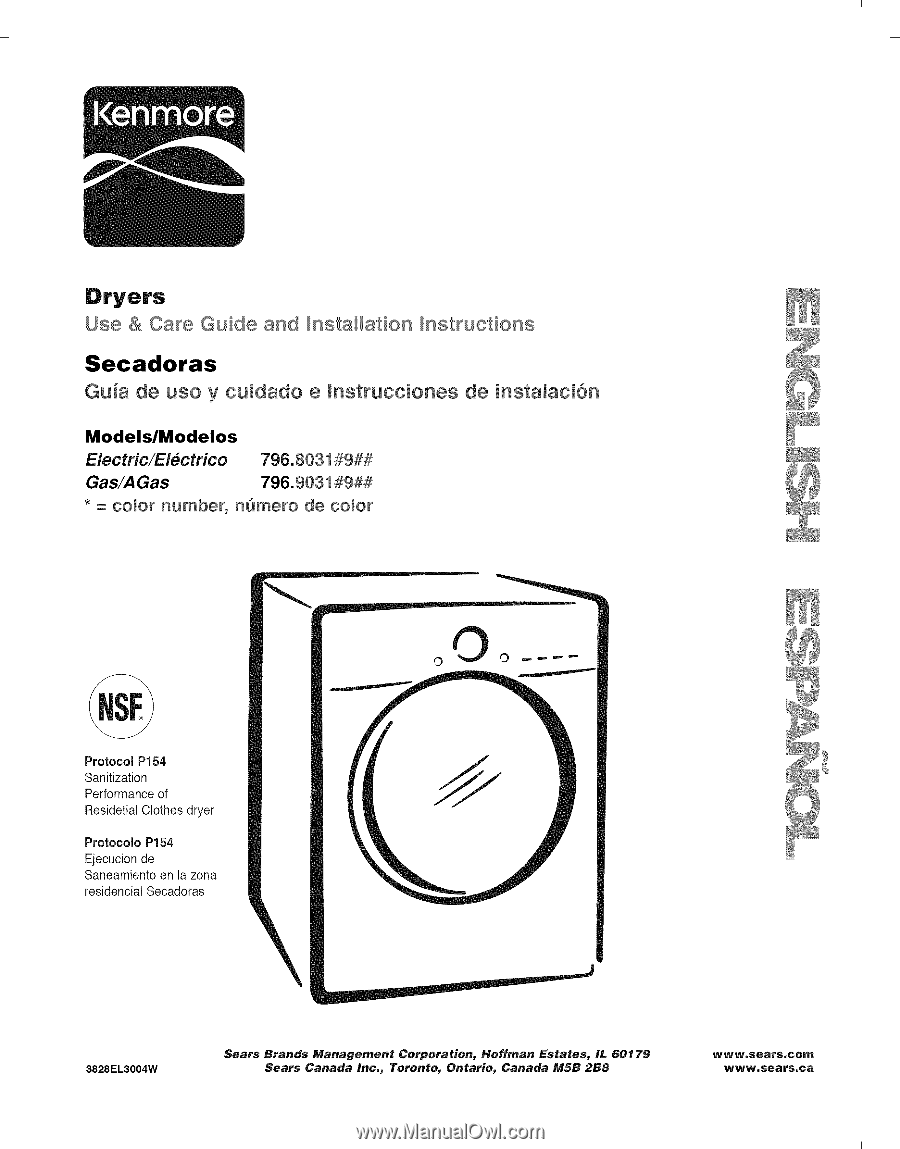
Dryers
Use & Oa_e Guide and _nsta_ation
_nst_uctions
Secadoras
Gu_a de uso y cuidado
e mnstrucciones
de instalaci6n
Models/Modelos
Electric/Electrico
796.8031#9##
Gas/A Gas
796.9031
#9##
*
=
co,or
number,
n_mero
de co,or
Protocol P154
Sanitization
Performance of
Residetial Clothes dryer
Protocolo P154
Ejecucion de
Saneamiento en la zona
residencial Secadoras
3828EL3004W
Sears
Brands
Management
Corporation,
Hoffman
Estates,
IL
60179
Sears
Canada
Inc.,
Toronto,
Ontario,
Canada
M5B
2B8
www.seavs.cont
www.sears.ca
I
I