Kenwood DNX6180 Quick Start Guide
Kenwood DNX6180 Manual
 |
UPC - 019048192714
View all Kenwood DNX6180 manuals
Add to My Manuals
Save this manual to your list of manuals |
Kenwood DNX6180 manual content summary:
- Kenwood DNX6180 | Quick Start Guide - Page 1
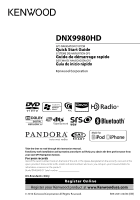
DNX9980HD GPS NAVIGATION SYSTEM Quick Start Guide SYSTÈME DE NAVIGATION GPS Guide de démarrage rapide SISTEMA DE NAVEGACIÓN GPS Guía de inicio rápido Take the time to read through this instruction manual. Familiarity with installation and operation procedures will help you obtain the best - Kenwood DNX6180 | Quick Start Guide - Page 2
Unit............28 Installation on Toyota, Nissan or Mitsubishi Car using Brackets 28 Removing Monitor/Player Unit 29 About the Quick Start Guide This Quick Start Guide explains the basic functions of this unit. For functions not covered in this Guide, refer to the Instruction Manual (PDF file - Kenwood DNX6180 | Quick Start Guide - Page 3
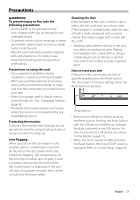
optional accessories, check with your Kenwood dealer to make sure that they work with your model and in your area. • Select a language used to display menus, audio file tags, etc. See (page 6). • The Radio Data System feature won't work where the service is not supported by - Kenwood DNX6180 | Quick Start Guide - Page 4
Read this information carefully before starting to operate the Kenwood Car Navigation System and follow the instructions in this manual. Neither Kenwood nor Garmin shall be liable for problems or accidents resulting from failure to observe the instructions in this manual. 2WARNINGS Failure to avoid - Kenwood DNX6180 | Quick Start Guide - Page 5
Map Data Information One of the goals of Garmin is to provide customers with the most complete and accurate cartography that is available to us at inaccurate or incomplete data. In some countries, complete and accurate map information is either not available or is prohibitively expensive. English | 5 - Kenwood DNX6180 | Quick Start Guide - Page 6
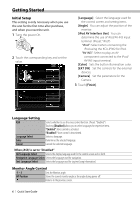
Getting Started Initial Setup This setting is only necessary when you use the unit for the first time after purchase, and when you reset the unit. 1 Turns the power On. 2 Touch the corresponding key and set the value. [Language] Select the language used for the control screen and setting items. [ - Kenwood DNX6180 | Quick Start Guide - Page 7
: "Other") "CMOS-300": When the CMOS-300 with ID 1 set is connected. When setting to "CMOS-300", camera adjustment screen appears. For the adjustment method, refer to the manual of CMOS-300. "Other": When the other camera is connected. Sets a method to switch to the rear view camera video display - Kenwood DNX6180 | Quick Start Guide - Page 8
Store the tag data of the current music from the HD Radio broadcast. AUD Displays Graphic Equalizer screen. 1 sec. Camera view display On/Off. NAV Displays the navigation screen. 1 sec. While watching the navigation screen Picture in Picture function On/Off. TEL Displays the Hands Free Control - Kenwood DNX6180 | Quick Start Guide - Page 9
display is an example when the source is DVD. Displays Audio Control Menu screen. Displays SETUP Menu screen. Displays the EXT SW (External Switch) Control screen. Closes the common menu bar. How to Clear the Message on the Rear View Camera Screen A caution message is displayed on the rear view - Kenwood DNX6180 | Quick Start Guide - Page 10
1 Press [SRC] to display the Source Control screen. When a video screen is displayed, press [SRC]. 2 Touch [Menu] on Source Control screen. 3 Touch [ HD RADIO]. Control the station you are listening to on the source control screen 4 / ¢ Tunes in a station. CH∞ / CH5 Selects a channel (program - Kenwood DNX6180 | Quick Start Guide - Page 11
the iPod2's music. Connect iPod2 to the iPod1 terminal. SD card This SD card slot is used to upgrade the Navigation System. For how to upgrade the Navigation System, refer to the instruction manual of the navigation system. 0 To disconnect the USB device, touch [0] on the source control screen, and - Kenwood DNX6180 | Quick Start Guide - Page 12
screen. DVD VCD Hand Device Allows you to operate iPod with the control of the iPod. (When two iPods are connected, iPod2 cannot be selected.) Switches between the two iPods connected. Closes the multi function bar. Search the file you want to listen to CD DVD media 1 Start List Search DVD - Kenwood DNX6180 | Quick Start Guide - Page 13
the top folder. [ UP]: Moves up a hierarchy level. [ CUR]: Displays the currently playing folder. Music or Video list of USB device 2 1 1 : Switches to the lower level of the category. 2 : Returns to the Source Control screen. [ ]: When the text is longer, the text display is scrolled by touching it - Kenwood DNX6180 | Quick Start Guide - Page 14
the Playback Screen. 3 Displays the Source Control Screen. 38 Plays or pauses. 7 Stops playing. When touched twice, the disc is played from its beginning when you play it the next time. 4 / ¢ Searchs the previous/next content. 1 / ¡ Fast forwards or Fast backwards. 14 | Quick Start Guide - Kenwood DNX6180 | Quick Start Guide - Page 15
this unit, operate the cellphone to download it.) Answering a Phone Call Touch [ ]. Disconnecting a Call Touch [ ]. Calling a number in the Phone Book To use the phone book it must have been downloaded from the cell phone in advance. 1 Press [TEL] to display the Hands-Free Control screen. 2 Touch - Kenwood DNX6180 | Quick Start Guide - Page 16
System 1 Press [NAV] to use the navigation system. Using the Main Menu 1 2 3 4 5 1 GPS satellite strength. 2 Touch to find a destination. 3 Touch to view the map. 4 Touch to adjust the settings. 5 Touch to use the tools such as ecoRoute and Help. Following Your Route Notes The speed - Kenwood DNX6180 | Quick Start Guide - Page 17
of the instruction manual from manual.kenwood.com/edition/ im332/. Updating the Software To update the navigation system software, you must have an SD card, an SD card reader, and an Internet connection. 1 Go to www.garmin.com/Kenwood. 2 Find your model and Select Software Updates > Download. 3 Read - Kenwood DNX6180 | Quick Start Guide - Page 18
a selected source or tuner source, etc. • DVD mode: Switch to this mode when playing DVDs or CDs etc. with the player integrated in this unit. • TV mode: Switch to this mode when controlling TV. • NAV mode: Switch to this mode when controlling Navigation unit. Notes When controlling a player that is - Kenwood DNX6180 | Quick Start Guide - Page 19
Top Menu: 6 [ROUTE M] • DVD Menu: 7 [VOICE] In CD/ DVD media/ USB source (AUD mode) • Music select: 9 [4]/[¢] • Folder select: 8 [FM+]/[AM-] • Pause/Play: - [38/ POSITION] In iPod source (AUD mode) • Music select: 9 [4]/[¢] • Pause/Play: - [38/ POSITION] In TV source (TV mode) • Band select: 8 [FM - Kenwood DNX6180 | Quick Start Guide - Page 20
harness. 4. Connect the wiring harness wires in the following order: ground, battery, ignition. 5. Connect the wiring harness connector to the unit. 6. Install the unit in your car. 7. Reconnect the - battery. 8. Press the reset button. 9. Perform the Initial Setup. (Refer to the Instruction Manual - Kenwood DNX6180 | Quick Start Guide - Page 21
may drop if there are metal objects near the Bluetooth antenna. Bluetooth antenna unit ¤ CAUTION Install this unit in the console of your vehicle. Do not touch the metal part of this unit during and shortly after the use of the unit. Metal part such as the heat sink and enclosure become hot - Kenwood DNX6180 | Quick Start Guide - Page 22
's parking brake detection switch harness. Light Green (Parking sensor wire) PRK SW For safety reasons, be sure to connect the parking sensor. Connect to vehicle's reverse lamp harness when using the optional rear view camera. To steering remote ⁄ To use the steering wheel remote control feature - Kenwood DNX6180 | Quick Start Guide - Page 23
Bluetooth Microphone (Accessory #) (see page 26) Voice Control Switch (Accessory $) (see page 26) Cooling fan GPS Antenna (Accessory !) (see page 26) FUSE (15A ) Purple/White (Reverse sensor wire) REVERSE Light Blue/Yellow (Steering remote control wire) REMOTE CONT STEERING WHEEL REMOTE INPUT - Kenwood DNX6180 | Quick Start Guide - Page 24
stereo type mini plug (3.5φ) Visual input (iPod/AV Input 3 switchable) Resistance-free mini plug (3.5φ) Accessory 3 Accessory 2 To Camera control terminal Green/Red Green/White To Relay Box Blue/Red Blue/Red RELAY 2 RELAY 1 24 | Quick Start Guide CENTER SUB WOOFER REAR FRONT REAR VIEW - Kenwood DNX6180 | Quick Start Guide - Page 25
-iP302 (Video / Audio supported) (Optional Accessory) Visual Output (Yellow) Audio Output (Black) ⁄ USB terminal Maximum Supply current : DC 5 V 1 A iPod2 5V 1A iPod1/USB 5V 1A TV ANTENNA INPUT TO MONITOR UNIT USB terminal USB device (commercially available) To SIRIUS Satellite Radio tuner/ XM - Kenwood DNX6180 | Quick Start Guide - Page 26
(accessory @). Installing the Push-To-Talk Switch and the Microphone Unit 1. Check the installation position of the microphone (accessory #) and the PushTo-Talk switch (accessory $). 2. Remove oil and other dirt from the installation surface. 3. Install the microphone. 4. Wire the microphone cable - Kenwood DNX6180 | Quick Start Guide - Page 27
Installing the Escutcheon For General Motors 1. Cut out accessory 6 to meet the shape of the opening of the center console. 2. Attach accessory 6 to the unit. Cut out to meet the shape of the opening in the vehicle. For Toyota/Scion 1. Cut out accessory 6 as illustrated. Cutting line Accessory 6 - Kenwood DNX6180 | Quick Start Guide - Page 28
⁄ Make sure that the unit is installed securely in place. If the unit is unstable, it may malfunction (eg, the sound may skip). Installation on Toyota, Nissan or Mitsubishi Car using Brackets Accessory 8 (M5x6mm) or Accessory 9 (M5x7mm) Car Bracket 28 | Quick Start Guide Accessory 8 (M5x6mm) or - Kenwood DNX6180 | Quick Start Guide - Page 29
5 deeply into the slots on each side, as shown. Accessory 5 Catch Lock ⁄ • The frame can be removed from the top side in the same manner. 2. When the lower level is removed, remove the upper two locations. 3. Lower the removal tool toward the bottom, and pull out the unit halfway while pressing - Kenwood DNX6180 | Quick Start Guide - Page 30
use of such marks by Kenwood Corporation is under license. Other trademarks and trade names are those of their respective owners. "Made for iPod" and "Made for iPhone" mean that an electronic accessory has been designed to connect specifically to iPod or iPhone, respectively, and has been certified - Kenwood DNX6180 | Quick Start Guide - Page 31
accordance with the instructions. However, there is no guarantee that interference will not occur in a particular installation. If this equipment does cause harmful interference to radio or television reception, which can be determined by turning the equipment off and on, the user is encouraged to - Kenwood DNX6180 | Quick Start Guide - Page 32
de l'antenne GPS 56 Installation du bouton Push-To-Talk et du microphone 56 Installation de l'écusson 57 Installation pour unité moniteur/lecteur ..58 Installation sur les véhicules Toyota, Nissan ou Mitsubishi avec des supports 58 Pour enlever l'unité moniteur/lecteur.......59 À propos - Kenwood DNX6180 | Quick Start Guide - Page 33
utilisée pour afficher les menus, les balises des fichiers audio, etc. Voir (page 36). • La fonction Radio Data System ne fonctionnera pas dans les endroits où le ce service n'est pas supporté par les stations de radio. Protection du moniteur Ne touchez pas le moniteur avec - Kenwood DNX6180 | Quick Start Guide - Page 34
importantes Lisez ces informations attentivement avant de commencer à utiliser le système de navigation pour voiture Kenwood et suivez les instructions contenues dans ce manuel. Ni Kenwood, ni Garmin ne peuvent être tenus responsables de problèmes ou d'accidents résultant du non respect - Kenwood DNX6180 | Quick Start Guide - Page 35
en marche, autant que possible. L'utilisation du système de navigation pendant une durée prolongée avec le moteur éteint peut entraîner le déchargement de la batterie. Informations relatives aux données de la carte L'un des objectifs de Garmin est d'offrir à ses clients la cartographie la plus compl - Kenwood DNX6180 | Quick Start Guide - Page 36
borne d'entrée iPod/AV-IN3. [Color] Configure la couleur d'éclairage des touches. [EXT SW] Configure les commandes des dispositifs externes. [Camera] Configure les sur l'écran de commande et ainsi de suite. Navigation Language Select Sélectionne la langue utilisée pour la navigation. Text Language - Kenwood DNX6180 | Quick Start Guide - Page 37
la sortie dès que la touche de l'écran de commande EXT SW est pressée. Pulse Set Configure la durée de sortie du signal à impulsion. [AUD Key Longer than 1 Second] au préalable. Front Camera Activer cette fonction quand la CMOS-300 identifiée comme ID2 est connectée. Lorsque ce paramètre est - Kenwood DNX6180 | Quick Start Guide - Page 38
du morceau en cours d'écoute à partir du signal de la HD Radio. AUD Affiche l'écran de l'égaliseur graphique. 1 sec. Affichage de User Interface]. 38 | Guide de démarrage rapide 3. L'élément [Panel Switch Sensitivity] vous permet de régler la sensibilité. Comment afficher l'écran de commande - Kenwood DNX6180 | Quick Start Guide - Page 39
en fonction de la source lue. Ci-dessus, icône affichée lorsque la source est un DVD. Affiche l'écran du menu de commande audio. Affiche l'écran du menu de CONFIGURATION. Affiche l'écran de commande EXT SW (Commutateur externe). Ferme la barre de menu commune. Comment supprimer le message de - Kenwood DNX6180 | Quick Start Guide - Page 40
de la station que vous écoutez à l'écran de commande de la source Touche HD FM HD AM Opérations générales Passe à la bande HD FM1/2/3. Passe à la bande HD AM. 40 | Guide de démarrage rapide 4 / ¢ Syntonise une station de radio. CH∞ / CH5 Sélectionne une station (programme). TI Active ou - Kenwood DNX6180 | Quick Start Guide - Page 41
Comment lire les supports Supports disque iPod 0 1 sec. Appuyez sur la touche [0] pendant une seconde pour ouvrir/fermer le panneau avant. Si un disque est déjà inséré, il est éjecté en appuyant sur la touche [0] pendant une seconde. Remarques • Disques lisibles : DVD-Video, DVD±R/RW, DVD±DL, CD, - Kenwood DNX6180 | Quick Start Guide - Page 42
| Guide de démarrage rapide Affiche la liste des dossiers. Périphérique USB Appuyez sur [ ] pour ouvrir la barre multifonctions. [Music]: Affiche la liste des morceaux. [Video]: Affiche la liste des vidéo. [Picture]: Affiche le visualiseur de vignettes. [Folder]: Affiche la liste des dossiers. iPod - Kenwood DNX6180 | Quick Start Guide - Page 43
ou de vidéos du périphérique USB 2 1 1 : Passe au niveau inférieur de la catégorie. 2 : Revient à l'écran de commande de la source. [ ]: Lorsque le en plein écran. 2 : Revient à l'écran de commande de la source. Liste de morceaux ou de vidéos de l'iPod 2 1 1 : Les catégories et les morceaux - Kenwood DNX6180 | Quick Start Guide - Page 44
DVD : Affiche l'écran de commande du menu 1 ou la commande de surbrillance (menu DVD). VCD : Affiche l'écran de commande du zoom. DivX : Affiche l'écran de commande du menu. Picture : Affiche l'écran de commande écédent/suivant. 1 / ¡ Avance rapide ou recul rapide. 44 | Guide de démarrage rapide - Kenwood DNX6180 | Quick Start Guide - Page 45
portable, enregistrez le kit mains libres (association). Sélectionner "DNX9980HD" dans la liste des appareils trouvés. 2 Entrez le en saisissant un numéro de téléphone 1 Appuyez sur [TEL] pour afficher l'écran de commande du système mains libres. 2 Appuyez sur [Direct Number]. 3 Saisissez un numéro - Kenwood DNX6180 | Quick Start Guide - Page 46
navigation. Utilisation du menu principal 1 2 3 4 5 1 Puissance du signal du satellite GPS. 2 Appuyez pour trouver une destination. 3 Appuyez pour visualiser la carte. 4 Appuyez pour régler les paramètres. 5 Appuyez pour utiliser les outils tels qu'ecoRoute moment. Garmin et Kenwood ne pourront - Kenwood DNX6180 | Quick Start Guide - Page 47
de navigation, vous devez avoir une carte SD, un lecteur de carte SD et une connexion à Internet. 1 Rendez-vous sur www.garmin.com/ Kenwood. 2 Trouvez votre modèle et sélectionnez Software Updates > Download. 3 Lisez et acceptez les termes du contrat de licence du logiciel. 4 Suivez les instructions - Kenwood DNX6180 | Quick Start Guide - Page 48
. 48 | Guide de démarrage rapide Interrupteur de mode de la télécommande • Mode AUD : Passez à ce mode pour commander une source sélectionnée, une source de syntoniseur, etc. • Mode DVD : Passez à ce mode pour lire des DVD ou des CD etc. avec le lecteur intégré à cet appareil. • Mode TV : Passez - Kenwood DNX6180 | Quick Start Guide - Page 49
• Menu du DVD : 7 [VOICE] En source CD/ supports DVD/ USB (mode AUD) • Sélection d'un morceau : 9 [4]/[¢] • Sélection du dossier : 8 [FM+]/[AM-] • Pause/Lecture : - [38/ POSITION] En source iPod (mode AUD) • Sélection d'un morceau : 9 [4]/[¢] • Pause/Lecture : - [38/ POSITION] En source TV (mode TV - Kenwood DNX6180 | Quick Start Guide - Page 50
Guide de démarrage rapide Procédure d'installation la première mise en service. (Veuillez consulter le mode aux câbles par le biais du fusible. Acquisition des signaux GPS La première fois que vous mettez le DNX9980HD en marche, il faut attendre que le système puisse acquérir les signaux satellite - Kenwood DNX6180 | Quick Start Guide - Page 51
d'égratignures, des dommages ou un dysfonctionnement. • La qualité de réception peut chuter si des objets métalliques se trouvent près de l'antenne Bluetooth. Antenne Bluetooth ¤ ATTENTION Installez cette unité dans la console de votre véhicule. Ne touchez pas la partie métallique de cette - Kenwood DNX6180 | Quick Start Guide - Page 52
montage et le câblage aux professionnels. Lors de l'installation de l'appareil, le câ commande au volant ⁄ Pour utiliser la fonction de télécommande au volant, vous avez besoin d'un adaptateur de télécommande interrupteur de commande d'éclairage de sa borne de commande d'alimentation. ⁄ Si aucune connexion - Kenwood DNX6180 | Quick Start Guide - Page 53
Microphone Bluetooth (Accessoire #) (voir page 56) Interrupteur de commande vocale (accessoire $) (voir page 56) Ventilateur de refroidissement Antenne GPS (Accessoire !) (voir page 56) FUSIBLE ( 15A ) Violet/Blanc (Fil de capteur inverse) REVERSE Bleu clair/Jaune (Entrée de télécommande au volant) - Kenwood DNX6180 | Quick Start Guide - Page 54
USB iPod/ Périphérique USB (disponible dans le commerce) iPod1/USB 5V 1A Entrée audio (Entrée iPod/AV 3 commutable) Mini-prise sans résistance de type stéréo (3,5φ) Entrée vidéo entrée (iPod/AV 3 commutable) Mini-prise sans résistance (3,5φ) Accessoire 3 Accessoire 2 Vers la borne de commande - Kenwood DNX6180 | Quick Start Guide - Page 55
) Sortie audio (Noir) ⁄ Intensité maximale d'alimentation de la borne USB : 5 V c.c. 1 A iPod2 5V 1A iPod1/USB 5V 1A TV ANTENNA INPUT TO MONITOR UNIT Prise USB Périphérique USB (disponible dans le commerce) Vers syntoniseur radio SIRIUS Satellite/ syntoniseur radio XM Satellite (Accessoire - Kenwood DNX6180 | Quick Start Guide - Page 56
l'antenne GPS (accessoire !) au dessus de la plaque de métal (accessoire @). Installation du bouton Push-To-Talk et du microphone 1. Vérifiez la position d'installation du microphone (accessoire #) et du bouton Push-To-Talk (accessoire $). 2. Ôtez toute trace de graisse et autres impuretés de la - Kenwood DNX6180 | Quick Start Guide - Page 57
Installation de l'écusson Pour General Motors 1. Découpez l'accessoire 6 de façon à ce qu'il corresponde à la forme de l'ouverture de la console centrale. 2. Attachez l'accessoire 6 à l'unité. Découpez de façon à correspondre à la forme de l'ouverture du véhicule. Pour Toyota/Scion 1. Découpez l' - Kenwood DNX6180 | Quick Start Guide - Page 58
il pourrait ne pas bien fonctionner (par ex., le son pourrait sauter). Installation sur les véhicules Toyota, Nissan ou Mitsubishi avec des supports Accessoire 8 (M5x6mm) ou Accessoire 9 (M5x7mm) Support pour voiture 58 | Guide de démarrage rapide Accessoire 8 (M5x6mm) ou Accessoire 9 (M5x7mm) - Kenwood DNX6180 | Quick Start Guide - Page 59
les deux crochets situés sur le niveau inférieur. Baissez le cadre et tirez-le vers l'avant comme montré sur l'illustration. Accessoire 5 Pour enlever l'unité 1. Enlevez le cadre en caoutchouc dur en suivant la procédure de démontage expliquée dans la partie - Kenwood DNX6180 | Quick Start Guide - Page 60
and the Symbol are registered trademarks & DTS Digital Surround and the DTS logos are trademarks of DTS, Inc. Product includes software. © DTS, Inc. All Rights Reserved. Cet élément comprend une technologie de protection de copyright qui est protégée par des brevets aux États-Unis et par d'autres - Kenwood DNX6180 | Quick Start Guide - Page 61
suivantes : (1) il ne doit pas produire de brouillage et (2) l'utilisateur du dispositif doit être prêt à accepter tout brouillage radioélectrique reçu, même si ce brouillage est susceptible de compromettre le fonctionnement du dispositif." L'expression "IC:" avant le numéro d'homologation - Kenwood DNX6180 | Quick Start Guide - Page 62
68 Escuchar HD Radio 70 Cómo reproducir PDF) que se incluye en el CD-ROM suministrado "Manual de instrucciones". Para consultar el Manual de instrucciones incluido en el CD-ROM, será necesario un PC en el que se haya instalado Microsoft® Windows XP/Vista/7 o un Mac OS X® 10.4, así como el software - Kenwood DNX6180 | Quick Start Guide - Page 63
opcionales, pregunte a su distribuidor Kenwood si dichos accesorios son compatibles con su modelo en su región. • Seleccione un idioma para mostrar los menús, las etiquetas de los archivos de audio, etc. Consulte (página 66). • La función Radio Data System no funcionará en - Kenwood DNX6180 | Quick Start Guide - Page 64
automóviles Kenwood y siga las instrucciones de este manual. Ni Kenwood ni Garmin se responsabilizarán manual. 2ADVERTENCIAS Si no se evitan las siguientes situaciones potencialmente peligrosas, podrían producirse accidentes o colisiones mortales o con lesiones graves. Durante la navegación, compare - Kenwood DNX6180 | Quick Start Guide - Page 65
un tiempo prolongado con el motor apagado puede agotar la batería. Información de datos cartográficos Uno de los objetivos de Garmin es proporcionar a los clientes la cartografía más completa y precisa disponible a un precio razonable. Utilizamos una combinación de fuentes de datos gubernamentales - Kenwood DNX6180 | Quick Start Guide - Page 66
de entrada iPod/AV-IN3. [Color] Ajusta el color de iluminación del botón. [EXT SW] Ajuste los mandos para los dispositivos externos. [Camera] Ajuste los el idioma de visualización utilizado para la pantalla de control, etc. Navigation Language Select Selecciona el idioma utilizado para la navegaci - Kenwood DNX6180 | Quick Start Guide - Page 67
cada vez que se pulsa el botón en la pantalla de control del interruptor externo. Pulse Set Ajusta el tiempo de salida de señales de pulsos. CAM" en [AUD Key Longer than 1 Second]. Front Camera Active esta función cuando haya conectado CMOS-300 con ID2 asignado. Cuando se elige la variable "ON - Kenwood DNX6180 | Quick Start Guide - Page 68
actual de la emisión de HD Radio. AUD Muestra la pantalla del ecualizador User Interface]. 3. El elemento [Panel Switch Sensitivity] le permite ajustar la sensibilidad. 68 | Guía de inicio rápido Cómo mostrar la pantalla de control de fuente Pulse [SRC] para visualizar la pantalla de control - Kenwood DNX6180 | Quick Start Guide - Page 69
de reproducción. El icono mostrado anteriormente es un ejemplo cuando la fuente es DVD. Muestra la pantalla del menú de control de audio. Muestra la pantalla del menú de configuración. Muestra la pantalla de control del interruptor externo. Cierra la barra de menús comunes. Cómo borrar el - Kenwood DNX6180 | Quick Start Guide - Page 70
de fuente. Cuando aparezca una pantalla de vídeo, pulse [SRC]. 2 Toque [Menu] en la pantalla de control de fuente. 3 Toque [ HD RADIO]. Controle la emisora que está escuchando en la pantalla de control de fuente Botón Operaciones generales HD FM Cambia a la banda HD FM1/2/3. 70 | Guía de inicio - Kenwood DNX6180 | Quick Start Guide - Page 71
2 al terminal del iPod 1. Tarjeta SD Esta ranura para la tarjeta SD se utiliza para actualizar el sistema de navegación. Para obtener información sobre cómo actualizar el sistema de navegación, consulte el manual de instrucciones de dicho sistema. 0 Para desconectar un dispositivo USB, toque [0] en - Kenwood DNX6180 | Quick Start Guide - Page 72
pido Visualiza la lista de carpetas. Dispositivo USB Toque [ ] para abrir la barra multifunción. [Music]: Muestra la lista de música. [Video]: Muestra la lista de vídeo. [Picture]: Muestra el visor de vistas en miniatura. [Folder]: Visualiza la lista de carpetas. iPod Toque [ ] para abrir la barra - Kenwood DNX6180 | Quick Start Guide - Page 73
musicales o vídeos del dispositivo USB 2 1 1 : Cambia al nivel inferior de la categoría. 2 : Regresa a la pantalla de control de fuente. [ ]: Si el á a pantalla completa. 2 : Regresa a la pantalla de control de fuente. Lista de temas musicales o vídeos del iPod 2 1 1 : Se listan las categorías y la - Kenwood DNX6180 | Quick Start Guide - Page 74
3 Toque cualquier área de la pantalla. 1 2 Área Operaciones generales 1 DVD: Visualiza la pantalla de control del menú 1 o el control de resalte (con el menú para DVD). VCD: Visualiza la pantalla de control del zoom. DivX: Muestra la pantalla de control de menú. Picture: Muestra la pantalla de - Kenwood DNX6180 | Quick Start Guide - Page 75
la unidad de manos libres (conéctela) mediante el teléfono móvil. Seleccione "DNX9980HD" en la lista de unidades encontradas. 2 Escriba el código PIN de esta del teléfono móvil. 1 Pulse [TEL] para visualizar la pantalla de control del sistema manos libres. 2 Toque [Phonebook]. 3 Toque [1] - [Z] - Kenwood DNX6180 | Quick Start Guide - Page 76
5 Toque aquí para utilizar herramientas como ecoRoute y Ayuda. Ayuda cuando es necesaria 1 Toque de forma segura en todo momento. Garmin y Kenwood declinan toda responsabilidad en el caso de de voz, flechas en el mapa, e indicaciones en la parte superior del mapa. Si se desvía de la ruta original, - Kenwood DNX6180 | Quick Start Guide - Page 77
desde manual.kenwood.com/ edition/im332/. Actualización del software Para actualizar el software del sistema de navegación debe disponer de una tarjeta SD, un lector de tarjetas SD y una conexión a Internet. 1 Acceda a www.garmin.com/Kenwood. 2 Localice su modelo y seleccione Software Updates - Kenwood DNX6180 | Quick Start Guide - Page 78
a este modo para controlar una fuente seleccionada o una fuente del sintonizador, etc. • Modo DVD: Cambie a este modo cuando reproduzca discos DVD o CD, etc. con el reproductor integrado en esta unidad. • Modo TV: Cambie a este modo para controlar la televisión. • Modo NAV: Cambie a este modo para - Kenwood DNX6180 | Quick Start Guide - Page 79
[VOICE] Con un CD, otros DVD o un dispositivo USB como fuente (modo AUD) • Selección de música: 9 [4]/[¢] • Selección de carpeta: 8 [FM+]/[AM-] • Pausa/Reproducción: - [38/ POSITION] Con un iPod como fuente (modo AUD) • Selección de música: 9 [4]/[¢] • Pausa/Reproducción: - [38/ POSITION] Con la TV - Kenwood DNX6180 | Quick Start Guide - Page 80
el mazo de cables a la unidad. 6. Instale la unidad en el automóvil. 7. Vuelva a conectar la batería -. 8. Pulse el botón Reset. 9. Realice la configuración inicial. (Consulte el manual de instrucciones.) 2 ADVERTENCIA • Si conecta el cable de encendido (rojo) y el cable de la batería (amarillo - Kenwood DNX6180 | Quick Start Guide - Page 81
• Si se funden los fusibles, asegúrese primero de que los cables no están en contacto pues pueden ocasionar un cortocircuito, luego reemplace el cerca de la antena Bluetooth. Unidad de antena Bluetooth ¤ PRECAUCIÓN Instale esta unidad en la consola de su vehículo. No toque la parte metálica de esta - Kenwood DNX6180 | Quick Start Guide - Page 82
motriz, o al terminal de alimentación del amplificador de refuerzo de la antena tipo pelicular. Si utiliza el amplificador de potencia opcional, conecte su terminal de control de potencia. ⁄ Si no se efectúan las conexiones, no deje que el cable sobresalga de la lengüeta. 82 | Guía de inicio rápido - Kenwood DNX6180 | Quick Start Guide - Page 83
ófono Bluetooth (Accesorio #) (consulte la página 86) Interruptor de control de voz (accesorio $) (consulte la página 86) Ventilador de refrigeración Antena GPS (accesorio !) (consulte la página 86) FUSIBLE (15A) Púrpura/Blanco (cable del sensor de marcha atrás) REVERSE Azul claro/Amarillo (cable - Kenwood DNX6180 | Quick Start Guide - Page 84
en las tiendas) iPod1/USB 5V 1A Entrada de audio (entrada de iPod/AV 3 conmutable) Toma mini tipo estéreo sin resistencia (3,5φ) Entrada visual (entrada de iPod/AV 3 conmutable) Toma mini sin resistencia (3,5φ) Accesorio 3 Accesorio 2 Hacia el terminal de control de la cámara Verde/Rojo - Kenwood DNX6180 | Quick Start Guide - Page 85
de audio (Negro) ⁄ Corriente máxima de suministro del terminal USB : CC 5 V 1 A iPod2 5V 1A iPod1/USB 5V 1A TV ANTENNA INPUT TO MONITOR UNIT Terminal USB Dispositivo USB (disponible en el comercio) Al sintonizador de radio por satélite SIRIUS / sintonizador de radio por satélite XM (accesorio - Kenwood DNX6180 | Quick Start Guide - Page 86
Limpie el salpicadero o cualquier otra superficie. 2. Quite la parte trasera del adhesivo en la parte inferior de la placa de metal (accesorio @). 3. Presione de suciedad de la superficie de instalación. 3. Instale el micrófono. 4. Conecte el cable del micrófono a la unidad de forma segura - Kenwood DNX6180 | Quick Start Guide - Page 87
Instalación de la placa protectora Para General Motors 1. Corte el accesorio 6 para realizar la forma de la apertura de la consola central. 2. Coloque el accesorio 6 a la unidad. Corte para realizar la forma de la apertura en el vehículo. Para Toyota/Scion 1. Corte el accesorio 6 como se muestra - Kenwood DNX6180 | Quick Start Guide - Page 88
Instalación para el monitor/unidad de reproductor Doble las lengüetas del manguito de montaje con un destornillador o similar y fíjelo. ⁄ Asegúrese de que la unidad está instalada en forma segura. Si la unidad está en una posición inestable, es posible que no funcione correctamente (por ejemplo, el - Kenwood DNX6180 | Quick Start Guide - Page 89
se muestra. Accesorio 5 Uñas de agarre Bloqueo ⁄ • El marco puede extraerse desde el lado superior del mismo modo. 2. Después de extraer la parte inferior, libere de la misma manera los dos lugares del lado superior. 3. Mueva la herramienta de extracción hacia abajo, y extraiga la unidad hasta la - Kenwood DNX6180 | Quick Start Guide - Page 90
Digital Surround and the DTS logos are trademarks of DTS, Inc. Product includes software. © DTS, Inc. All Rights Reserved. Este elemento incorpora tecnología de protección de copia protegida por patentes de EE. UU. y otros derechos de propiedad intelectual de Rovi Corporation. Reverse engineering - Kenwood DNX6180 | Quick Start Guide - Page 91
Español | 91 - Kenwood DNX6180 | Quick Start Guide - Page 92
-
 1
1 -
 2
2 -
 3
3 -
 4
4 -
 5
5 -
 6
6 -
 7
7 -
8
-
9
-
10
-
11
-
12
-
13
-
14
-
15
-
16
-
17
-
18
-
19
-
20
-
21
-
22
-
23
-
24
-
25
-
26
-
27
-
28
-
29
-
30
-
31
-
32
-
33
-
34
-
35
-
36
-
37
-
38
-
39
-
40
-
41
-
42
-
43
-
44
-
45
-
46
-
47
-
48
-
49
-
50
-
51
-
52
-
53
-
54
-
55
-
56
-
57
-
58
-
59
-
60
-
61
-
62
-
63
-
64
-
65
-
66
-
67
-
68
-
69
-
70
-
71
-
72
-
73
-
74
-
75
-
76
-
77
-
78
-
79
-
80
-
81
-
82
-
83
-
84
-
85
-
86
-
87
-
88
-
89
-
90
-
91
-
92
 |
 |
DNX9980HD
GPS NAVIGATION SYSTEM
Quick Start Guide
SYSTÈME DE NAVIGATION GPS
Guide de démarrage rapide
SISTEMA DE NAVEGACIÓN GPS
Guía de inicio rápido
B59-2041-00/00 (KW)
©
2010 Kenwood Corporation All Rights Reserved.
Take the time to read through this instruction manual.
Familiarity with installation and operation procedures will help you obtain the best performance from
your new GPS Navigation System.
For your records
Record the serial number, found on the back of the unit, in the spaces designated on the warranty card, and in the
space provided
below. Refer to the model and serial numbers whenever you call upon your Kenwood dealer for
information or service on the product.
Model DNX9980HD
Serial number
US Residents Only
Register Online
Register your Kenwood product at
www.Kenwoodusa.com