Kenwood DPX502 Instruction Manual
Kenwood DPX502 - DPX 502 Radio Manual
 |
View all Kenwood DPX502 manuals
Add to My Manuals
Save this manual to your list of manuals |
Kenwood DPX502 manual content summary:
- Kenwood DPX502 | Instruction Manual - Page 1
DUAL DIN SIZED CD RECEIVER DPX502 INSTRUCTION MANUAL Take the time to read through this instruction manual. Familiarity with installation and operation procedures will help you obtain the best performance from your new CD-receiver. For your records Record the serial number, found on the back of the - Kenwood DPX502 | Instruction Manual - Page 2
Preset Recall Firmware version display Demonstration mode Setting Basic Operations of remote control 30 Accessories/ Installation Procedure 32 Connecting Wires to Terminals 33 Installing the Escutcheon 34 Installation 35 Removing the Unit 36 Troubleshooting Guide 37 Specifications 40 - Kenwood DPX502 | Instruction Manual - Page 3
for installation. If you use wrong screws, you could damage the unit. Do Not Load 3-in. CDs in the CD slot If you try to load a 3 in. CD with its adapter into the unit, the adapter might separate from the CD and damage the unit. About CD players/disc changers connected to this unit Kenwood disc - Kenwood DPX502 | Instruction Manual - Page 4
29). About KENWOOD "Music Editor" of PC application attached to DPX502 • "Music Editor" is recorded in the CD-ROM attached to this unit. • Refer to the attached installation manual for the installation method of "Music Editor". • Refer to the user's manual recorded in the installation CD-ROM and - Kenwood DPX502 | Instruction Manual - Page 5
AAC-LC (.m4a), MP3 (.mp3), WMA (.wma), WAV (.wav) • Playable disc media CD-R/RW/ROM • Playable disc file format ISO 9660 Level 1/2, Joliet, Romeo, Long file name. • Playable USB device USB mass storage class, iPod with KCA-iP200 • Playable USB device file system FAT16, FAT32 Although the - Kenwood DPX502 | Instruction Manual - Page 6
your CD-R/CDRW recorder instruction manual.) 6 | English FCC WARNING This equipment may generate or use radio frequency energy. Changes or modifications to this equipment may cause harmful interference unless the modifications are expressly approved in the instruction manual. The user could lose - Kenwood DPX502 | Instruction Manual - Page 7
accessory) USB device (iPod) CD External disc (Optional accessory) Auxiliary input* Auxiliary input (Optional accessory) Standby (Illumination only mode) Display "SAT" "TUNER" or "HD RADIO" "USB" ("iPod") "CD" "CD CH" "AUX" "AUX EXT" "STANDBY" * An equipment such as a portable audio player - Kenwood DPX502 | Instruction Manual - Page 8
is displayed. Each time you press the button, the sound setting alternates. Sound setting User memory Rock Pops Easy Top 40 Jazz Natural Display "USER" "ROCK" "POPS" "EASY" "TOP40" "JAZZ" "NATURAL" ⁄ • User memory: The values set on the (page 8). • Change each setting value with - Kenwood DPX502 | Instruction Manual - Page 9
/120/ 150/180/220 Hz Through/40/60/80/100/120/ 150/180/220 Hz 50/60/80/100/120/Through Hz Reverse (180°)/ Normal (0°) -8 - ±0 (AUX: -8- +8) OFF/ON OFF/ON ⁄ • Volume offset: Sets each source's volume as a difference from the basic volume. • Loudness: Compensates for low and high tones during low - Kenwood DPX502 | Instruction Manual - Page 10
need to hook up the MUTE wire to your telephone using a commercial telephone accessory. Refer to (page 33). Service name or Frequency (FM) Radio text, Program Service name or Frequency (FM) Frequency (AM) Clock Display "FREQ/PS" "R-TEXT" "FREQ" "CLOCK" In CD - Kenwood DPX502 | Instruction Manual - Page 11
be displayed in WAV file. • If the selected display item does not have any information, alternative information is displayed. • * When playing music from iPod or music edited by "Music Editor", the folder name display may show something different such as playlist or artist name depending on the - Kenwood DPX502 | Instruction Manual - Page 12
down band Push the Control knob towards [4] or [¢]. ⁄ • During reception of stereo stations the "ST" indicator is ON. Preset station number Tuning Mode Choose the Tuning mode Auto seek Preset station seek Manual Display "AUTO 1" "AUTO 2" "MANUAL" Operation Automatic search for a station. Search - Kenwood DPX502 | Instruction Manual - Page 13
Cancelling Direct Access Tuning Press the [DIRECT] button on the remote control. Auto Memory Entry Putting stations with good reception in the least 2 seconds. "A-MEMORY" is displayed. When 6 stations that can be received are put in the memory Auto Memory Entry closes. Preset Tuning Recalling the - Kenwood DPX502 | Instruction Manual - Page 14
RDS features AUTO 1 - 6 Radio text Control knob RDS indicator TI indicator PTY indicator Radio Text Scroll Scrolling the displayed radio text. Push the Control knob toward up for at least 2 seconds. ⁄ • When the (page 25) is set to OFF, the display may black out - Kenwood DPX502 | Instruction Manual - Page 15
2 Recall the Program Type Press the desired [1] - [6] button. Registration of a station as a PTY Registering a Program Type for stations with no PTY data. 1 Receive the station you want to register 2 Select the Program Type to register Refer to (page 14). 3 Register the Program - Kenwood DPX502 | Instruction Manual - Page 16
Control knob. Each time you press the knob, the audio pauses or plays. Eject the CD Press the [0] button. ⁄ • For the audio files and discs you can play to (page 5). • You can play the file made by KENWOOD Music Editor by the same operation. • You can eject the disc for 10 minutes - Kenwood DPX502 | Instruction Manual - Page 17
file> (page 5). • The word "iPod" appearing in this manual indicates the iPod connected with the KCA-iP200 (optional accessory). Refer to (page as far as it will go. • You can play the file made by KENWOOD Music Editor by the same operation. Pause and play Press the Control knob. - Kenwood DPX502 | Instruction Manual - Page 18
accessory disc player connected to this unit. Press the [SRC] button. Select the display for the disc player you want. Display examples: Display "CD CH" "MD CH" Disc player CD not available on iPod and the music edited by "Music Editor". Function of disc changers with remote control Direct Disc - Kenwood DPX502 | Instruction Manual - Page 19
the Repeat Play alternates between the modes shown in the tables below. In CD & External disc source Repeat play Track Repeat Disc Repeat (In Disc Changer) FOLD REP" "REP OFF" ⁄ • * This function is not available on iPod and the music edited by "Music Editor". Scan Play Playing the first part - Kenwood DPX502 | Instruction Manual - Page 20
CD/USB device/Audio file/External disc control features Function of the [F.SEL] button. Select the "F-SEL1" display. Folder name display Displays the current folder name. Function of iPod, "Music Editor" file File select Selecting the music you want to listen to from the device or media being - Kenwood DPX502 | Instruction Manual - Page 21
Function of non-iPod and non-"Music Editor" file File Select 2 mode Select the Select the "F-SEL2" display. Folder name display Displays the current folder name. Text/Title Scroll Scrolling the displayed CD text, Audio file text, or MD title. Push the Control knob toward up for at least 2 seconds. - Kenwood DPX502 | Instruction Manual - Page 22
HD Radio control features AUTO/AME Band display 1 - 6 Frequency display FM Control knob AM SRC ST indicator Preset station number About HD Radio • When you connect an HD Radio, Tuner features of the unit are disabled and changed to HD Radio tuner features. A portion of the setting methods - Kenwood DPX502 | Instruction Manual - Page 23
is entered. (Normally the setting listed at the top of the chart is the original setting.) Also, the explanation for items that are not applicable ( etc.) are entered step by step. English | 23 - Kenwood DPX502 | Instruction Manual - Page 24
activation prevents your precious audio unit from stealing. ⁄ • You can set the Security Code with a 4 digit number of your choice. • The Security Code cannot be displayed or referenced. Make a note of the Security Code and treasure it up. 1 Enter Standby Press the [SRC] button. Select the "STANDBY - Kenwood DPX502 | Instruction Manual - Page 25
Tone Setting the operation check sound (beep sound) ON/OFF. Display "BEEP ON" "BEEP OFF" Setting Beep is heard. Beep canceled. In Standby mode Manual Clock Adjustment ⁄ • You can do this adjustment when the (page 25) is set as OFF. 1 Select Clock Adjustment mode Push the - Kenwood DPX502 | Instruction Manual - Page 26
is not available on the iPod. Other than Standby mode Traffic indicator is ON. When a traffic information station isn't being received the "TI" indicator blinks. When a traffic bulletin starts, System Circuit) Temporarily have reception alternate from stereo to mono to reduce multi-path noise when - Kenwood DPX502 | Instruction Manual - Page 27
broadcasts only. 4 Exit Receive mode Press the [MENU] button. ⁄ • Even if the Receive mode is set to "AUTO service changes. Auxiliary Input Display Setting Selecting the display when changing to Auxiliary input source. 1 Select Auxiliary input source Press the [SRC] button. Select the "AUX"/"AUX - Kenwood DPX502 | Instruction Manual - Page 28
. "AUX ON" When selecting the source there's Auxiliary Input. In Standby mode CD Read Setting When there is a problem with playing a CD with special format, this setting plays the CD by force. Display "CD READ1" "CD READ2" Setting Play CD and Audio file. Play CD by force. ⁄ • Some music CDs may - Kenwood DPX502 | Instruction Manual - Page 29
Preset Press the Control knob for at least 2 seconds. The "RECALL" display blinks 1 time. 7 Exit Audio Preset mode Press the [MENU] button. ⁄ • The User memory of (page 8) is changed to the value which was recalled. • The source tone memory item of (page 8) is changed to - Kenwood DPX502 | Instruction Manual - Page 30
: This button is used when Kenwood Bluetooth HANDS FREE BOX is connected. For more information, refer to the instruction manual of Bluetooth HANDS FREE BOX. Basic operations [ battery is accidentally swallowed. ¤ • Do not set the remote control in hot places such as on the dashboard. 30 | English - Kenwood DPX502 | Instruction Manual - Page 31
Audio Control [AUD] button Selects the Audio item to be adjusted. [VOL] buttons Adjusts the Audio item. ⁄ • Refer to (page 8) for the operation method, such as the procedures for Audio control and others operations. Dual Zone System [2-ZONE] button Each time you press the button, " - Kenwood DPX502 | Instruction Manual - Page 32
After the unit is installed, check whether the brake lamps, blinkers, wipers, etc. on the car are working properly. • Mount the unit so that the mounting angle is 30° or less. If You Want to Connect iPod KCA-iP200 (Optional accessory) iPod AUDIO OUT • No other optional accessory can be connected - Kenwood DPX502 | Instruction Manual - Page 33
instruction manuals. To Kenwood disc changer/ External optional accessory Fuse (10A) FM/AM antenna input Front left output (White) Front right output (Red) Wiring harness conversation. ⁄ To connect the Kenwood navigation system, consult your navigation manual. To car light control switch FRONT L - Kenwood DPX502 | Instruction Manual - Page 34
in the vehicle. Accessory2 Cutting line Accessory2 3 Fold double-sided adhesive (accessory 3) along the slit and attach it to accessory 2 cut-out against the center rib as illustrated. Use 2 pieces of accessory 3 for 1 accessory 2 cut-out. 4 Attach accessory 2 cut-out to the unit. Accessory3 34 - Kenwood DPX502 | Instruction Manual - Page 35
or metal support Screw (M4X8) (commercially available) Bend the tabs of the mounting sleeve with a screwdriver or similar utensil and attach it in place. Self-tapping screw (commercially available) Metal mounting strap (commercially available) Accessory6 Installing in Japanese-Made Cars and - Kenwood DPX502 | Instruction Manual - Page 36
Removing the Unit Removing the Hard Rubber Frame (escutcheon) 1 Engage the catch pins on the removal tool 7 and remove the two locks on the lower level. Lower the frame and pull it forward as shown in the figure. 2 When the lower level is removed, remove the upper two locations. ⁄ • The frame can be - Kenwood DPX502 | Instruction Manual - Page 37
Troubleshooting Guide Some functions of this unit may be disabled by some settings made on this unit. ! Cannot switch to Aux source. ▲ • AUX is not turned on. ☞ (page 28) • AUX cannot be used when the KCA-iP200 is connected. ! • Cannot set up the subwoofer. • - Kenwood DPX502 | Instruction Manual - Page 38
Troubleshooting Guide HD Radio source ? No sound can be heard, or the volume is low. ✔ The preset broadcast station is not transmitting in the mode that was set with (page 27). ☞ Please set to "AUTO". ✔ In digital AM broadcasting, receive mode switches - Kenwood DPX502 | Instruction Manual - Page 39
IN (Blink): The CD player section is not operating properly. ➪ Reinsert the CD. If the CD cannot be ejected or the display continues to flash even when the CD has been properly reinserted, please switch off the power and consult your nearest service center. PROTECT: The speaker wire has a short - Kenwood DPX502 | Instruction Manual - Page 40
Stereo separation (1 kHz) : 40 dB AM tuner section Frequency range (10 kHz space) : 530 kHz - 1700 kHz Usable sensitivity (S/N = 20dB) : 28 dBμ (25 μV) CD player Operating voltage (11 - 16V allowable) : 14.4 V Current consumption : 10 A Installation Size (W x H x D) : 182 x 112 x 160 mm 7-3/16 x
-
 1
1 -
 2
2 -
 3
3 -
 4
4 -
 5
5 -
 6
6 -
 7
7 -
8
-
9
-
10
-
11
-
12
-
13
-
14
-
15
-
16
-
17
-
18
-
19
-
20
-
21
-
22
-
23
-
24
-
25
-
26
-
27
-
28
-
29
-
30
-
31
-
32
-
33
-
34
-
35
-
36
-
37
-
38
-
39
-
40
 |
 |

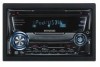
DUAL DIN SIZED CD RECEIVER
DPX502
INSTRUCTION MANUAL
©
B64-3826-00/00 (KW)
Take the time to read through this instruction manual.
Familiarity with installation and operation procedures will help you obtain the best
performance from your new CD-receiver.
For your records
Record the serial number, found on the back of the unit, in the spaces designated on the
warranty card, and in the space provided
below. Refer to the model and serial numbers
whenever you call upon your Kenwood dealer for information or service on the product.
Model DPX502
Serial number
US Residence Only
Register Online
Register your Kenwood product at
www.kenwoodusa.com