Kenwood KIV-BT900 Quick Start Guide
Kenwood KIV-BT900 Manual
 |
UPC - 019048189790
View all Kenwood KIV-BT900 manuals
Add to My Manuals
Save this manual to your list of manuals |
Kenwood KIV-BT900 manual content summary:
- Kenwood KIV-BT900 | Quick Start Guide - Page 1
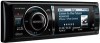
KIV-BT900 KIV-700 DIGITAL MEDIA RECEIVER Quick Start Guide AUTORADIO NUMÉRIQUE Guide de démarrage rapide RECEPTOR DE MEDIOS DIGITALES Guía de inicio rápido © B59-2016-00/00 (KW) - Kenwood KIV-BT900 | Quick Start Guide - Page 2
5 Playing Music (USB/iPod/Zune) ......... 6 Listening to the Radio 7 Hands-free phoning 8 Basic Operations of Remote Control ... 9 Accessories 10 This Quick Start Guide explains the basic functions of this unit. For functions not covered in this Guide, refer to the Instruction Manual (PDF file - Kenwood KIV-BT900 | Quick Start Guide - Page 3
the [MENU] button, press the [SRC] button for at least 3 seconds. The unit returns to factory settings when the reset operation is complete. SRC MENU Volume Notes • If you experience problems during installation, consult your Kenwood dealer. • When you purchase optional accessories, check with your - Kenwood KIV-BT900 | Quick Start Guide - Page 4
", and then press the [Volume] knob. The demonstration mode can also be canceled in the Menu List mode. Refer to (page 39) of Instruction manual. Adjusting the Clock & Date 1 Press the [MENU] button to enter the Menu List mode. 2 Set the clock, time zone and date. Refer - Kenwood KIV-BT900 | Quick Start Guide - Page 5
"HD RADIO") j USB ("USB"), iPod ("iPod") or Zune ("Zune") j Internal Memory ("Int.Mem.") j Auxiliary Input ("AUX") j Standby ("STANDBY") j Tuner... Volume Turn the [Volume] knob to adjust the sound volume. USB terminal iPod can be connected. iPod VIDEO IN iPod AUDIO IN iPod VIDEO OUT iPod AUDIO - Kenwood KIV-BT900 | Quick Start Guide - Page 6
display mode. 6 | Quick Start Guide Selects the Artwork small, Artwork large, Video or Clock. Music Search 1 Press the [MENU] button. 2 Turn the [Volume] knob and press it when the desired item is displayed. USB: Select "USB List" or "Music". iPod: Select "Music" or "Videos". Zune: Select "Music - Kenwood KIV-BT900 | Quick Start Guide - Page 7
] knob to select preset number ("1" - "6"), and then press the [Volume] knob for at least 2 seconds. Recalling the stations in the memory 1 Press the [MENU] button. 2 Turn the [Volume] knob to select "List & Memory", and then press the [Volume] knob. 3 Turn the [Volume] knob to select recall number - Kenwood KIV-BT900 | Quick Start Guide - Page 8
KIV-BT900, KIV-700 with KCA-BT300/KCA-BT200 (Optional Accessory) Hands-free phoning SRC Volume KIV-BT900 KIV-700 PLAY MODE Registering your cellphone in this unit 1 By operating the cellphone, register the hands-free unit (pairing). Select "KENWOOD Press the [SRC] button. 8 | Quick Start Guide - Kenwood KIV-BT900 | Quick Start Guide - Page 9
the previous level. In Tuner/HD Radio source • Band select: [FM+]/[AM-] • Station select: [4]/[¢] • Recall preset stations: [1] - [6] In USB/ Internal Memory source • Music select: [4]/[¢] • Folder select: [FM+]/[AM-] • Pause/Play: [38] • Movement between Menulist mode: [5]/[∞] • Return to previous - Kenwood KIV-BT900 | Quick Start Guide - Page 10
: ground, battery, ignition. 5. Connect the wiring harness connector to the unit. 6. Install the unit in your car. 7. Reconnect the - battery. 8. While pressing the [Volume] knob and the [MENU] button, press the [SRC] button for at least 3 seconds. 10 | Quick Start Guide 2WARNING If you connect the - Kenwood KIV-BT900 | Quick Start Guide - Page 11
to a rear output terminal. • After the unit is installed, check whether the brake lamps, blinkers, wipers, etc. on the car are working properly. • Reception may drop if there are metal objects near the Bluetooth antenna. For Good Reception To assure good reception, note the following: • Communicate - Kenwood KIV-BT900 | Quick Start Guide - Page 12
) iPod cable (Accessory 4) iPod AUDIO OUT iPod VIDEO OUT ⁄ Do not remove the cap when you do not use the USB cable. The connector will cause the unit to malfunction if it gets in touch with any metallic part of the vehicle. Microphone input (KIV-BT900 only) Microphone (Accessory7) (KIV-BT900 only - Kenwood KIV-BT900 | Quick Start Guide - Page 13
) RL Wiring harness (Accessory 1) Antenna Cord FM/AM antenna input (JASO) AUX input (Stereo) Use the mini-plug (3.5 mm ø) which is stereo type and does not have any resistance. To Kenwood disc changer/ External optional accessory ⁄ To connect these leads, refer to the relevant instruction manuals - Kenwood KIV-BT900 | Quick Start Guide - Page 14
. 3. Lower the removal tool toward the bottom, and pull out the unit halfway while pressing towards the inside. Accessory 2 5 6 8 mm MAX. ø5mm ø5mm Accessory5...for Nissan car Accessory6...for Toyota car T: Toyota cars N: Nissan cars 8mm MAX. ¤ • Be careful to avoid injury from the catch pins - Kenwood KIV-BT900 | Quick Start Guide - Page 15
KIV-BT900 only Installation the Microphone Unit 1. Check the installation position of the microphone (accessory 7). 2. Remove oil and other dirt from the installation surface. 3. Install the microphone. 4. Wire the cable up to the unit with it secured at several positions using tape or the like. ⁄ - Kenwood KIV-BT900 | Quick Start Guide - Page 16
ère version du Mode d'emploi sur le site www.kenwood.com/cs/ce/. Accessoires 24 Procédure d'installation 24 Avant installation 24 Connexion des câbles aux bornes .......26 Installation/Retrait de l'appareil ...........28 Installation de l'unité de microphone 29 16 | Guide de démarrage - Kenwood KIV-BT900 | Quick Start Guide - Page 17
[SRC] pendant au moins 3 secondes. L'appareil retourne aux paramètres d'usine quand l'opération de réinitialisation est terminée. SRC MENU Volume Remarques • Si vous rencontrez des problèmes pendant l'installation, consultez votre revendeur Kenwood. • Lorsque vous achetez des accessoires en option - Kenwood KIV-BT900 | Quick Start Guide - Page 18
mode démonstration La première fois que vous utilisez l'appareil après l'avoir installé, vous devez désactiver le mode mode de démonstration peut également être désactivé dans le mode Liste des menus. Reportez-vous à la section (page 39) dans le mode mode Mode". mode - Kenwood KIV-BT900 | Quick Start Guide - Page 19
ou "HD RADIO") j USB ("USB"), iPod ("iPod"), ou Zune ("Zune") j Mémoire interne ("Int.Mem.") j Entrée auxiliaire ("AUX") j Veille ("STANDBY") j Tuner... Volume Tournez la molette [Volume] pour régler le volume. Prise USB L'iPod peut être connecté. iPod VIDEO IN iPod AUDIO IN iPod VIDEO OUT iPod - Kenwood KIV-BT900 | Quick Start Guide - Page 20
Zune) MENU Volume DISP SEARCH MODE 4 38 ¢ KIV-BT900 KIV-700 PLAY MODE Lecture du périphérique USB Connectez un périphérique USB, iPod ou un Zune fichier audio le mode d' Music". iPod: Sélectionnez "Music" ou "Videos". Zune: Sélectionnez "Music MODE]. Appuyez sur la touche [DISP] ou [ ] / [PLAY MODE - Kenwood KIV-BT900 | Quick Start Guide - Page 21
Écoute de la radio SRC MENU Volume 4 ¢ Sélection d'une source Tuner 1 Appuyez sur la touche [SRC]. 2 Tournez la molette [Volume] pour sélectionner "TUNER", puis appuyez sur la molette [Volume]. Sélection de la bande 1 Appuyez sur la touche [MENU]. 2 Tournez la molette [Volume] pour sélectionner - Kenwood KIV-BT900 | Quick Start Guide - Page 22
SRC Volume KIV-BT900 KIV-700 PLAY MODE Enregistrement de votre téléphone portable dans cet appareil 1 Avec le téléphone portable, enregistrez le kit mains libres (association). Sélectionnez "KENWOOD BT [Volume]. Mettre fin à un appel Appuyez sur la touche [SRC]. 22 | Guide de démarrage rapide - Kenwood KIV-BT900 | Quick Start Guide - Page 23
de nouveau sur la touche, le volume revient à son niveau précédent. En source tuner/HD Radio • Sélection de la bande: [FM+]/ [AM-] • Sélection de la station: : [FM+]/ [AM-] • Pause/Lecture: [38] • Mouvement entre le mode Liste de menu: [5]/[∞] • Revenir au dossier précédent: [ ] En source iPod • - Kenwood KIV-BT900 | Quick Start Guide - Page 24
Accessoires Avant installation 1 5 ........1 ........4 2 6 ........2 ........4 3 7* ....1 (2 m) ....1 (3 m) * KIV-BT900 4 uniquement ....1 (2,5 m) Procédure d'installation 1. Pour éviter tout court-circuit, retirez la clé du contact et déconnectez la borne - de la batterie. 2. - Kenwood KIV-BT900 | Quick Start Guide - Page 25
é peut entraîner des interférences avec la communication à cause d'un signal trop fort. Antenne Bluetooth Au sujet des lecteurs de CD/ changeurs de disque connectés à cet appareil Si le lecteur de CD/ changeur de disque possède le commutateur "O-N", mettez-le dans la position "N". Les fonctions - Kenwood KIV-BT900 | Quick Start Guide - Page 26
iPod AUDIO IN iPod VIDEO IN iPod AUDIO OUT iPod VIDEO OUT Connexion des câbles aux bornes Câ iPod AUDIO OUT iPod VIDEO OUT Entrée microphone (KIV-BT900 uniquement) Microphone (Accessoire 7) (KIV-BT900 uniquement) Connecteur USB (1m) Sortie audio iPod ) - + Batterie 26 | Guide de démarrage rapide - Kenwood KIV-BT900 | Quick Start Guide - Page 27
STEERING WHEEL REMOTE INPUT Pour connecter au système de navigation Kenwood, consultez votre manuel de navigation. ⁄ Connectez à la borne qui est mise à la masse lorsque le téléphone sonne ou pendant les conversations. (KIV-700 uniquement) Vers le commutateur de commande de phares Pour utiliser - Kenwood KIV-BT900 | Quick Start Guide - Page 28
de montage avec un tournevis ou un outil similaire et fixer. ⁄ • Assurez-vous que l'appareil est solidement installé. Si l'appareil est instable, il risque de mal fonctionner (par ex. le son risque de sauter). les mains, en faisant attention de ne pas le faire tomber. 28 | Guide de démarrage rapide - Kenwood KIV-BT900 | Quick Start Guide - Page 29
KIV-BT900 uniquement Installation de l'unité de microphone 1. Vérifiez la position d'installation du microphone (Accessoire 7). 2. Retirez toute huile et autres impuretés à la surface de l'installation. 3. Installez le microphone. 4. Connectez le câble à l'unité en le sécurisant en plusieurs - Kenwood KIV-BT900 | Quick Start Guide - Page 30
Reproducción de música (USB/iPod/Zune 34 Escuchar la radio 35 Dispositivo manual de instrucciones (archivo PDF) que se incluye en el CD-ROM suministrado "Manual de instrucciones". Para consultar el Manual de instrucciones incluido en el CD versión del Manual de instrucciones en www.kenwood.com/cs/ce - Kenwood KIV-BT900 | Quick Start Guide - Page 31
con su distribuidor Kenwood. • Cuando compre accesorios opcionales, verifique antes con su distribuidor Kenwood que dichos accesorios ilustraciones de la pantalla de visualización y del panel que aparecen en este manual son solo ejemplos que se utilizan para explicar claramente la forma en la - Kenwood KIV-BT900 | Quick Start Guide - Page 32
de menú. Consulte el (página 39) del Manual de instrucciones. Ajuste del reloj y la fecha 1 Pulse el botón [ [MENU] para finalizar el ajuste de fechas. 5 Formato de fecha Seleccione "Date Mode". Seleccione el formato de fecha. Pulse el botón [MENU] durante al menos - Kenwood KIV-BT900 | Quick Start Guide - Page 33
"HD RADIO") j USB ("USB"), iPod ("iPod") o Zune ("Zune") j Memoria interna ("Int.Mem.") j Entrada auxiliar ("AUX") j Modo de espera ("STANDBY") j Sintonizador... Volumen Gire la rueda [Volumen] para ajustar el volumen. Terminal USB El iPod puede conectarse. iPod VIDEO IN iPod AUDIO IN iPod VIDEO - Kenwood KIV-BT900 | Quick Start Guide - Page 34
Zune) MENU Volumen DISP SEARCH MODE 4 38 ¢ KIV-BT900 KIV-700 PLAY MODE Reproducción de un dispositivo USB Conecte un dispositivo USB, iPod o un Zune o retroceder rápidamente el archivo de audio que contiene las canciones. Pausa y "Music". iPod: Seleccione "Music" o "Videos". Zune: Seleccione "Music - Kenwood KIV-BT900 | Quick Start Guide - Page 35
Escuchar la radio SRC MENU Volumen 4 ¢ Selección de una fuente del sintonizador 1 Pulse el botón [SRC]. 2 Gire la rueda [Volumen] para seleccionar "TUNER" y, a continuación, pulse la rueda [Volumen]. Selección de la banda 1 Pulse el botón [MENU]. 2 Gire la rueda [Volumen] para seleccionar la - Kenwood KIV-BT900 | Quick Start Guide - Page 36
KCA-BT300/KCA-BT200 (accesorio opcional) Dispositivo manos libres SRC Volumen KIV-BT900 KIV-700 PLAY MODE Registre su teléfono móvil en esta unidad 1 Registre la unidad de manos libres (conéctela) mediante el teléfono móvil. Seleccione "KENWOOD USB/R-3P1", "KCABT300" o "KCA-BT200" en la lista de - Kenwood KIV-BT900 | Quick Start Guide - Page 37
Reducción de volumen: [ATT] Al pulsar de nuevo el botón, el volumen vuelve al nivel anterior. En fuente de Sintonizador/Radio HD • Selección de banda: [FM+]/[AM-] • Selección de emisora: [4]/[¢] • Recuperación de emisoras presintonizadas: [1] - [6] En la fuente de USB/memoria interna • Selección de - Kenwood KIV-BT900 | Quick Start Guide - Page 38
(2 m) ....1 (3 m) * solo KIV-BT900 4 ....1 (2,5 m) Procedimiento de instalación de 12V CC con conexión a tierra negativa. • No instale la unidad en un sitio expuesto a la luz directa Si no se enciende la alimentación (se muestra "Protect"), el cable de altavoz puede que haya sufrido un - Kenwood KIV-BT900 | Quick Start Guide - Page 39
puede interferir con la comunicación debido a una señal demasiado fuerte. Unidad de antena Bluetooth Acerca de los reproductores de CD/ cambiadores de discos conectados a esta unidad Si el reproductor de CD/ cambiador de disco tiene el interruptor "O-N", ajústelo en la posición "N". Las funciones - Kenwood KIV-BT900 | Quick Start Guide - Page 40
(accesorio 4) iPod AUDIO OUT iPod VIDEO OUT ⁄ No quite la tapa cuando no utilice el cable USB. El conector provocará que la unidad funcione incorrectamente si toca cualquier pieza metálica del vehículo. Salida de micrófono (solo KIV-BT900) Micrófono (accesorio 7) (solo KIV-BT900) ⁄ • Impedancia - Kenwood KIV-BT900 | Quick Start Guide - Page 41
JASO) Entrada AUX (estéreo) manual del sistema de navegación. ⁄ Conéctelo al terminal de tierra cuando suene el teléfono o durante la conversación. (solo KIV-700) Al interruptor de control de luces del vehículo Mando a distancia de la dirección (azul claro/amarilla) REMOTE CONT STEERING WHEEL REMOTE - Kenwood KIV-BT900 | Quick Start Guide - Page 42
Instalación/Desmontaje de la unidad Automóviles no japoneses Extracción del marco de goma rígida 1. Enganche las arandelas de agarre en la herramienta de extracción y quite los dos enganches del nivel superior. Suba el bastidor y tire de él hacia adelante tal como se indica en la figura. Doble - Kenwood KIV-BT900 | Quick Start Guide - Page 43
Solo KIV-BT900 Instalación de la unidad de micrófono 1. Compruebe la posición de instalación del micrófono (accesorio 7). 2. Elimine la grasa y la suciedad de la superficie de instalación. 3. Instale el micrófono. 4. Conecte el cable del micrófono a la unidad y fíjelo en varias posiiones utilizando - Kenwood KIV-BT900 | Quick Start Guide - Page 44
are expressly approved in the instruction manual. The user could lose the authority to protection against harmful interference in a residential installation. This equipment may cause harmful interference to radio communications, if it is not installed and used in accordance with the instructions - Kenwood KIV-BT900 | Quick Start Guide - Page 45
HD Radio Ready logo are proprietary trademarks of iBiquity Digital Corporation. • The Bluetooth word mark and logos are owned by the Bluetooth SIG, Inc. and any use of such marks by Kenwood with iPhone" means that an electronic accessory has been designed to connect specifically to iPhone and has - Kenwood KIV-BT900 | Quick Start Guide - Page 46
- Kenwood KIV-BT900 | Quick Start Guide - Page 47
- Kenwood KIV-BT900 | Quick Start Guide - Page 48
-
 1
1 -
 2
2 -
 3
3 -
 4
4 -
 5
5 -
 6
6 -
 7
7 -
8
-
9
-
10
-
11
-
12
-
13
-
14
-
15
-
16
-
17
-
18
-
19
-
20
-
21
-
22
-
23
-
24
-
25
-
26
-
27
-
28
-
29
-
30
-
31
-
32
-
33
-
34
-
35
-
36
-
37
-
38
-
39
-
40
-
41
-
42
-
43
-
44
-
45
-
46
-
47
-
48
 |
 |

KIV-BT900
KIV-700
DIGITAL MEDIA RECEIVER
Quick Start Guide
AUTORADIO NUMÉRIQUE
Guide de démarrage rapide
RECEPTOR DE MEDIOS DIGITALES
Guía de inicio rápido
© B59-2016-00/00 (KW)