KitchenAid KCM222CU Use & Care Guide - Page 10
Kitchen Aid Coffee Maker Use - 14 cup
 |
View all KitchenAid KCM222CU manuals
Add to My Manuals
Save this manual to your list of manuals |
Page 10 highlights
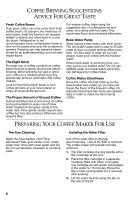
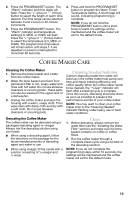
KITCHENAID® COFFEE MAKER USE Brewing Coffee NOTE: Brew one pot of fresh, cool water and discard before brewing the first pot of coffee (first time use only). 1. Remove the water tank and fill with enough fresh, cool water to make the desired amount of coffee. A graduated scale on the tank measures the amount of water needed. When replacing the tank, make sure to align it with the tab(s). NOTE: The tank can be filled using the carafe without removing the tank from the coffee maker. For thermal carafes only, it is recommended that the lid be positioned in the "Pour" or "Lock" position while brewing. The "Lock" position will reduce heat loss from the carafe. Position in the "Unlock" position to remove the lid. IMPORTANT: Be sure to empty the carafe before brewing coffee. C For glass carafe models only, the right side of the scale ("coffee") is a measurement of coffee volume. The left side of the scale ("water") is based upon 4³⁄₄ oz (140 mL) cups. A B A. Lock position B. Pour position C. Unlocked position 2. Open the brew basket door and remove the brew basket from the front of the coffee maker. After filling the water tank, place the carafe in the coffee maker. IMPORTANT: Make sure the lid is securely in position and the bottom of the carafe is fully seated. If the carafe is not seated, the Pause and Pour feature may not engage and may cause water and coffee to overflow the brew basket. To maximize coffee temperature, it is recommend that you fill and empty the carafe with hot water to preheat the carafe. 3. Insert a 12-14 cup flat bottom paper filter or the Gold Tone permanent filter into the brew basket. IMPORTANT: Do not use both types of filters at the same time. Using both filters might cause water and coffee to overflow the brew basket. 10
-
 1
1 -
2
-
3
-
4
-
 5
5 -
 6
6 -
 7
7 -
 8
8 -
 9
9 -
 10
10 -
 11
11 -
 12
12 -
 13
13 -
 14
14 -
 15
15 -
16
-
17
-
18
-
19
-
20
-
21
-
22
-
23
-
24
-
25
-
26
-
27
-
28
-
29
-
30
-
31
-
32
-
33
-
34
-
35
-
36
-
37
-
38
-
39
-
40
-
41
-
42
-
43
-
44
-
45
-
46
-
47
-
48
-
49
-
50
-
51
-
52
-
53
-
54
-
55
-
56
 |
 |
