KitchenAid KFP1344CA Use & Care Guide - Page 16
Installing/using the dicing kit
 |
View all KitchenAid KFP1344CA manuals
Add to My Manuals
Save this manual to your list of manuals |
Page 16 highlights
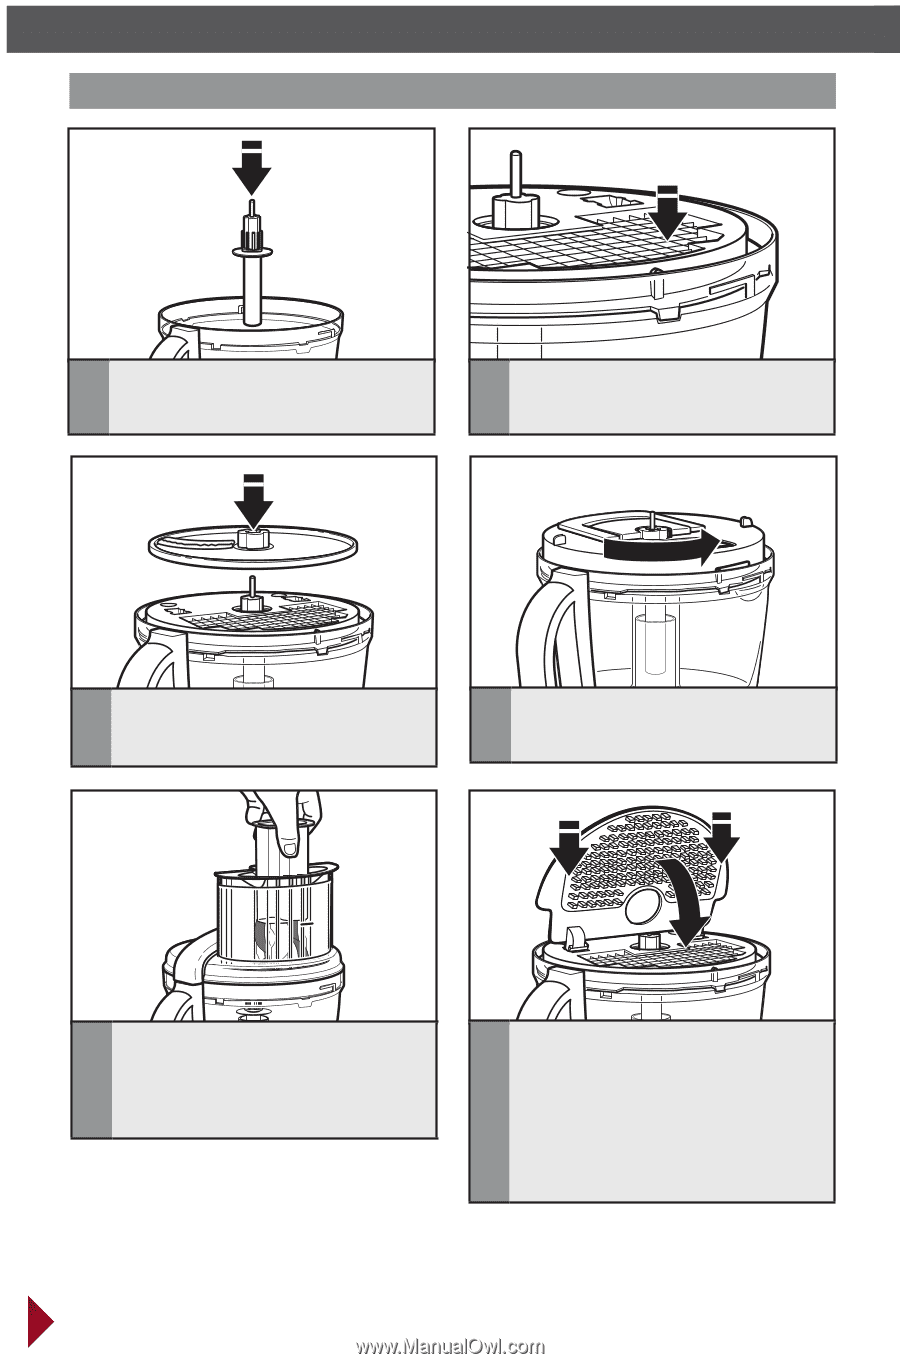
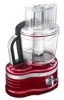
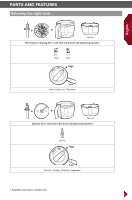
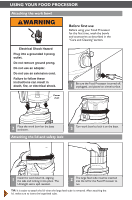
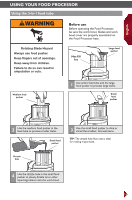
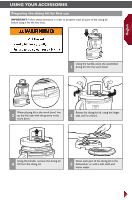
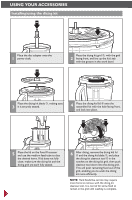
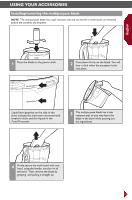
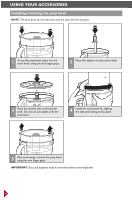
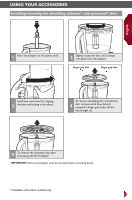
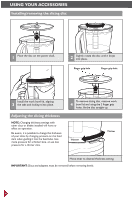
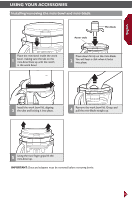
Using Your Accessories Installing/using the dicing kit Place the disc adapter onto the 1 power shaft. Place the dicing kit grid ➁, with the grid 2 facing front, and line up the kit's tab with the groove in the work bowl. Place the dicing kit blade ➂, making sure 3 it is securely seated. 4 Place the dicing kid lid ➃ onto the assembled kit with the hole facing front, and lock into place. 5 Place the lid on the Food Processor and use the medium feed tube to dice the desired items. If lid does not fully close, make sure the dicing kit and the dicing grid are each fully seated. 16 6 After dicing, remove the dicing kid lid ➃ and the dicing kit blade ➂, and place the dicing kit cleanout tool ➄ in the notches on the dicing kit grid, then push cleanout tool down into the dicing grid. This will push remaining food out of the grid, enabling you to wash the dicing kit more efficiently. NOTE: Hard foods like carrots may require more force to remove with the dicing kit cleanout tool. It is normal for some food to remain in the grid until washing is complete.
-
 1
1 -
2
-
3
-
4
-
5
-
6
-
7
-
8
-
9
-
10
-
 11
11 -
 12
12 -
 13
13 -
 14
14 -
 15
15 -
 16
16 -
 17
17 -
 18
18 -
 19
19 -
 20
20 -
 21
21 -
22
-
23
-
24
-
25
-
26
-
27
-
28
-
29
-
30
-
31
-
32
-
33
-
34
-
35
-
36
-
37
-
38
-
39
-
40
-
41
-
42
-
43
-
44
-
45
-
46
-
47
-
48
-
49
-
50
-
51
-
52
-
53
-
54
-
55
-
56
-
57
-
58
-
59
-
60
-
61
-
62
-
63
-
64
-
65
-
66
-
67
-
68
-
69
-
70
-
71
-
72
-
73
-
74
-
75
-
76
-
77
-
78
-
79
-
80
-
81
-
82
-
83
-
84
-
85
-
86
-
87
-
88
-
89
-
90
-
91
-
92
-
93
-
94
-
95
-
96
 |
 |