KitchenAid KSM70SKXXMH Owners Manual
KitchenAid KSM70SKXXMH Manual
 |
View all KitchenAid KSM70SKXXMH manuals
Add to My Manuals
Save this manual to your list of manuals |
KitchenAid KSM70SKXXMH manual content summary:
- KitchenAid KSM70SKXXMH | Owners Manual - Page 1
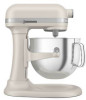
Knob 15 Spiral Dough Hook 4 Hub Cover 16 Wire Whip** 5 Beater Shaft 6 Speed Control Lever 7 Bowl-Lift Lever 8 Beater Height Adjustment Screw 9 Bowl Support 10 Locating Pins 11 Bowl* 12 Bowl Handle* 17 11-Wire Stainless Steel Elliptical Whip** 18 Pouring Shield** 19 Spring Latch and Bowl Pin - KitchenAid KSM70SKXXMH | Owners Manual - Page 2
lack of experience and knowledge unless they are closely supervised and instructed concerning the use of the appliance by a person responsible for or damaged in any manner. Return appliance to the nearest Authorized Service Facility for examination, repair, or electrical or mechanical adjustment. 7. - KitchenAid KSM70SKXXMH | Owners Manual - Page 3
: 12. If the power cord is damaged, it must be replaced by the manufacturer or its service agent or by qualified personnel to avoid any risk. 13. The appliance is not intended for use . It could lead to possible injury. SAVE THESE INSTRUCTIONS This product is designed for household use only. 3 - KitchenAid KSM70SKXXMH | Owners Manual - Page 4
. Do not use an extension cord. Failure to follow these instructions can result in death, fire, or electrical shock. Voltage: is too short, have a qualified electrician or service person install an outlet near the appliance. The less power. ACCESSORY/SPEED GUIDE ACCESSORY USE FOR DESCRIPTION - KitchenAid KSM70SKXXMH | Owners Manual - Page 5
PRODUCT ASSEMBLY 1 2 0 .5 1 2 3 4 5 6 7 8 9 10 Spring Latch Locating Pin Turn the Stand Mixer to "0" (OFF) and then Unplug. To attach the Bowl: Fit the Bowl Supports over Locating Pins and press down on back of the Bowl until Bowl Pin snaps into Spring Latch. 3 Pin To Remove Bowl: Place Bowl - KitchenAid KSM70SKXXMH | Owners Manual - Page 6
PRODUCT ASSEMBLY 7 Lower Bowl Raise Bowl IMPORTANT: When properly adjusted, the Flat Beater will not strike on the bottom or sides of the Bowl. If the Flat Beater or the Wire Whip is so close that it strikes the bottom of the Bowl, coating may wear off the beater or wires on the whip may wear. - KitchenAid KSM70SKXXMH | Owners Manual - Page 7
to avoid splashing and increase it gradually. Refer to the "Speed Control Guide". Electrical Shock Hazard Plug into a grounded 3 prong outlet. Do not an adapter. Do not use an extension cord. Failure to follow these instructions can result in death, fire, or electrical shock. WARNING Injury Hazard - KitchenAid KSM70SKXXMH | Owners Manual - Page 8
CARE AND CLEANING IMPORTANT: Do not immerse the Stand Mixer body in water or other liquids. Allow the appliance to cool completely before putting on or taking off parts, and before cleaning the appliance. 1. Turn the Stand Mixer to "0" (OFF) and then Unplug. 2. Wipe the Stand Mixer Body with a soft, - KitchenAid KSM70SKXXMH | Owners Manual - Page 9
ENGLISH TROUBLESHOOTING GUIDE WARNING Electrical Shock Hazard Plug into a grounded 3 prong outlet. Do not remove ground prong. Do not use an adapter. Do not use an extension cord. Failure to follow these instructions can result in death, fire, or electrical shock. PROBLEM SOLUTION If Stand Mixer - KitchenAid KSM70SKXXMH | Owners Manual - Page 10
Year Full Warranty from date of purchase. Hassle-Free Replacement of your Stand Mixer. See the next page for details on how to arrange for service, or call the Customer eXperience Center toll-free at 1-800-541-6390. OR The replacement parts and repair labor costs to correct defects in materials - KitchenAid KSM70SKXXMH | Owners Manual - Page 11
KitchenAid dealer or the store where you purchased the Stand Mixer for information on how to obtain service. For service information in Canada: Call toll-free 1-800-807-6777. For service information in Mexico: Call toll-free 01-800-0022-767. ®/™ ©2022 KitchenAid. All rights reserved. KITCHENAID and - KitchenAid KSM70SKXXMH | Owners Manual - Page 12
4 Couvercle de la prise 5 Arbre du fouet 6 Levier de réglage de la vitesse 7 Levier lève-bol 8 Vis de réglage de la hauteur du fouet 9 Support du bol 10 Goupilles de positionnement 11 Bol* 12 Poignée du bol* 13 Fouet aux deux côtés souples** 14 Fouet plat 15 Crochet pétrisseur en spirale - KitchenAid KSM70SKXXMH | Owners Manual - Page 13
'elles ne soient placées sous supervision ou qu'elles aient reçu des instructions concernant l'utilisation de l'appareil par une personne responsable de leur sécurité. Une façon. Retourner l'appareil au centre de service agréé le plus proche pour examen, réparation ou réglage électrique ou mécanique. - KitchenAid KSM70SKXXMH | Owners Manual - Page 14
d'alimentation est endommagé, il doit être remplacé par le fabricant, son agent de service ou une autre personne qualifiée afin d'éviter tout risque. 13. L'appareil ne convient Il pourrait causer des blessures. CONSERVER CES INSTRUCTIONS Ce produit est conçu uniquement pour un usage domestique. 14 - KitchenAid KSM70SKXXMH | Owners Manual - Page 15
. Ne pas utiliser un câble de rallonge. Le non-respect de ces instructions peut causer un décès, un incendie ou un choc électrique. Tension: 120 V~ recommandés peuvent tirer beaucoup moins de puissance. GUIDE DES ACCESSOIRES/VITESSES ACCESSOIRE UTILISATION DESCRIPTION VITESSE Fouet - KitchenAid KSM70SKXXMH | Owners Manual - Page 16
10 Loquet à ressort Goupille de positionnement Déplacer le bouton d'alimentation vers "0", puis débrancher le batteur sur socle. Ajouter le bol: Placer les supports du bol par-dessus les goupilles de positionnement puis appuyer sur l'arrière du bol jusqu'à ce que la goupille du bol s'emboîte dans - KitchenAid KSM70SKXXMH | Owners Manual - Page 17
FRANÇAIS ASSEMBLAGE DU PRODUIT 7 Abaisser le bol Relever le bol IMPORTANT: Lorsqu'il est correctement ajusté, le fouet plat ne frappe ni le fond ni les parois du bol. Si le fouet plat ou le fouet métallique est trop proche du fond du bol et qu'il le touche, le revêtement du fouet ou des fils mé - KitchenAid KSM70SKXXMH | Owners Manual - Page 18
inférieure pour éviter les éclaboussures et l'augmenter progressivement. Consulter le "guide de réglage de la vitesse". Risque de choc électrique Brancher sur une batteur avant de toucher aux fouets. Le non-respect de cette instruction peut entraîner des fractures d'os, des coupures ou des bleus - KitchenAid KSM70SKXXMH | Owners Manual - Page 19
FRANÇAIS ENTRETIEN ET NETTOYAGE IMPORTANT: Ne pas immerger le corps du batteur sur socle dans de l'eau ou tout autre liquide. Attendre que l'appareil ait refroidi complètement avant d'installer ou de retirer des pièces, et avant de nettoyer l'appareil. 1. Déplacer le bouton d'alimentation vers "0", - KitchenAid KSM70SKXXMH | Owners Manual - Page 20
GUIDE DE DÉPANNAGE AVERTISSEMENT Risque de choc électrique Brancher sur une prise à 3 alvéoles reliée à la terre. Ne pas enlever la broche de liaison à la terre. Ne pas utiliser un adaptateur. Ne pas utiliser un câble de rallonge. Le non-respect de ces instructions peut causer un décès, un incendie - KitchenAid KSM70SKXXMH | Owners Manual - Page 21
FRANÇAIS GARANTIE ET SERVICE GARANTIE DU FOUET AUX DEUX CÔTÉS SOUPLES KITCHENAID® POUR LES 50 ÉTATS DES ÉTATS-UNIS, LE DISTRICT FÉDÉRAL DE COLUMBIA, PORTO RICO ET LE CANADA La - KitchenAid KSM70SKXXMH | Owners Manual - Page 22
RECHANGE Aux États-Unis et à Porto Rico : Pour des informations sur le service de dépannage ou pour commander des accessoires ou des pièces de rechange, souples a été acheté pour obtenir des informations sur le service de dépannage. Pour des informations concernant toute intervention de dépannage - KitchenAid KSM70SKXXMH | Owners Manual - Page 23
Batidora con base - Tazón levantable KSM55 0 .5 1 2 3 4 5 6 7 8 9 10 6 1 2 3 4 7 KSM60 KSM70 7KSM60 18 7KSM70 8 5 22 19 21 9 20 10 11 12 13 16 14 15 17 1 Cabeza del motor 13 Batidor doble de borde flexible** 2 Receptáculo para aditamentos 3 Perilla para aditamentos 4 Tapa - KitchenAid KSM70SKXXMH | Owners Manual - Page 24
ESPAÑOL SEGURIDAD DEL PRODUCTO MEDIDAS DE PRECAUCIÓN IMPORTANTES Al utilizar electrodomésticos eléctricos, se deben seguir las precauciones básicas de seguridad, entre las que se incluyen las siguientes: 1. Lea todas las instrucciones. 2. Para protegerse contra el riesgo de choque eléctrico, no - KitchenAid KSM70SKXXMH | Owners Manual - Page 25
ESPAÑOL SEGURIDAD DEL PRODUCTO 6. No utilice ningún electrodoméstico con un cable o enchufe dañado, si el electrodoméstico no ha funcionado correctamente, si se ha caído o si está dañado de alguna forma. Devuelva el aparato al lugar de servicio técnico autorizado más cercano para la inspección, la - KitchenAid KSM70SKXXMH | Owners Manual - Page 26
SEGURIDAD DEL PRODUCTO REQUISITOS ELÉCTRICOS ADVERTENCIA Peligro de Choque Eléctrico Conecte a un contacto de pared de conexión a tierra de 3 terminales. No quite la terminal de conexión a tierra. No use un adaptador. No use un cable eléctrico de extensión. No seguir estas instrucciones puede - KitchenAid KSM70SKXXMH | Owners Manual - Page 27
ESPAÑOL MONTAJE DEL PRODUCTO 1 2 0 .5 1 2 3 4 5 6 7 8 9 10 Seguro con resorte Clavija de ubicación Ponga el control de velocidades de la batidora con base en la posición "0" y luego desenchufe. Para fijar el tazón: Encaje los soportes del tazón sobre las clavijas de ubicación y presione la - KitchenAid KSM70SKXXMH | Owners Manual - Page 28
MONTAJE DEL PRODUCTO 7 Bajar el tazón Levantar el tazón IMPORTANTE: Cuando se ajusta correctamente, el batidor plano no golpeará el fondo ni los lados del tazón. Si el batidor plano o el de alambre están tan cerca que golpean el fondo del tazón, los revestimientos de los batidores o alambres se - KitchenAid KSM70SKXXMH | Owners Manual - Page 29
para aditamentos. Ajuste la perilla del aditamento girándola hacia la derecha, hasta que el aditamento quede fijado a la batidora con base. NOTA: Consulte el Manual de uso y cuidado de cada aditamento específico para obtener más información. 29 - KitchenAid KSM70SKXXMH | Owners Manual - Page 30
CUIDADO Y LIMPIEZA IMPORTANTE: No sumerja el cuerpo de la batidora con base en agua u otros líquidos. Deje que el aparato se enfríe completamente antes de colocar o quitar piezas y antes de limpiar el aparato. 1. Ponga el control de velocidades de la batidora con base en la posición "0" y luego - KitchenAid KSM70SKXXMH | Owners Manual - Page 31
ESPAÑOL GUÍA DE SOLUCIÓN DE PROBLEMAS ADVERTENCIA Peligro de Choque Eléctrico Conecte a un contacto de pared de conexión a tierra de 3 terminales. No quite la terminal de conexión a tierra. No use un adaptador. No use un cable eléctrico de extensión. No seguir estas instrucciones puede ocasionar - KitchenAid KSM70SKXXMH | Owners Manual - Page 32
GARANTÍA Y SERVICIO GARANTÍA DEL BATIDOR DOBLE CON BORDE FLEXIBLE DE KITCHENAID® PARA LOS 50 ESTADOS DE ESTADOS UNIDOS, EL DISTRITO DE COLUMBIA, PUERTO RICO Y CANADÁ Esta garantía se extiende al comprador y a cualquier propietario subsiguiente para el batidor doble de borde flexible en los 50 - KitchenAid KSM70SKXXMH | Owners Manual - Page 33
ESPAÑOL GARANTÍA Y SERVICIO GARANTÍA DE REEMPLAZO SIN DIFICULTADES: EN LOS 50 ESTADOS DE LOS ESTADOS UNIDOS, EL DISTRITO DE COLUMBIA Y PUERTO RICO Confiamos tanto en que la calidad de nuestros productos cumple con las exigentes normas de KitchenAid que, si el batidor doble de borde flexible - KitchenAid KSM70SKXXMH | Owners Manual - Page 34
GARANTÍA Y SERVICIO CERTIFICADO DE GARANTÍA DE PEQUEÑOS ELECTRODOMÉSTICOS DE LA MARCA KITCHENAID GARANTÍA VÁLIDA SÓLO EN EL PAÍS DE ADQUISICIÓN DEL PRODUCTO GARANTIZADO IMPORTANTE: Este Certificado o Tarjeta de Garantía debería presentarse junto a la factura o boleta de compra o recepción original - KitchenAid KSM70SKXXMH | Owners Manual - Page 35
en el presente Certificado de Garantía - incluyendo los contactos para la adquisición o compra de repuestos legítimos - se encuentran detalladas en este Manual de Uso. La solicitud de cumplimiento de ésta Garantía se podrá efectuar de forma personal y/o telefónica y/o por correo electrónico al - KitchenAid KSM70SKXXMH | Owners Manual - Page 36
GARANTÍA Y SERVICIO La presente Garantía no constituye y en ningún caso podrá ser interpretada como una prórroga o plazo adicional en los términos y condiciones de la garantía legal del producto establecida por la ley local. La presente Garantía no extiende ni otorga al Beneficiario/Titular de ésta, - KitchenAid KSM70SKXXMH | Owners Manual - Page 37
ESPAÑOL GARANTÍA Y SERVICIO México Lugar donde también podrá obtener las partes, componentes, consumibles y accesorios originales. Dirección: Antigua Carretera a Roma Km 9, Col. El Milagro, Apodaca, N.L. México 66634 Línea telefónica gratuita nacional: 01800-0022-767 Horarios de Atención: Lunes a - KitchenAid KSM70SKXXMH | Owners Manual - Page 38
NOTES - KitchenAid KSM70SKXXMH | Owners Manual - Page 39
NOTES - KitchenAid KSM70SKXXMH | Owners Manual - Page 40
DISCOVER MORE. DÉCOUVREZ PLUS. DESCUBRA MÁS. KITCHENAID.COM/QUICKSTART PRODUCT QUESTIONS OR RETURNS QUESTIONS SUR LE PRODUIT OU LES RETOURS PREGUNTAS SOBRE EL PRODUCTO O DEVOLUCIÓNES USA: 1.800.541.6390 | KitchenAid.com CANADA: 1.800.807.6777 | KitchenAid.ca MEXICO: KitchenAid.com.mx LATIN AMERICA:
-
 1
1 -
 2
2 -
 3
3 -
 4
4 -
 5
5 -
 6
6 -
 7
7 -
8
-
9
-
10
-
11
-
12
-
13
-
14
-
15
-
16
-
17
-
18
-
19
-
20
-
21
-
22
-
23
-
24
-
25
-
26
-
27
-
28
-
29
-
30
-
31
-
32
-
33
-
34
-
35
-
36
-
37
-
38
-
39
-
40
 |
 |

Stand Mixer - Bowl Lift
KSM55
KSM60
KSM70
7KSM60
7KSM70
1
Motor Head
2
Attachment Hub
3
Attachment Knob
4
Hub Cover
5
Beater Shaft
6
Speed Control Lever
7
Bowl-Lift Lever
8
Beater Height Adjustment Screw
9
Bowl Support
10
Locating Pins
11
Bowl*
12
Bowl Handle*
13
Double Flex Edge Beater**
14
Flat Beater
15
Spiral Dough Hook
16
Wire Whip**
17
11-Wire Stainless Steel Elliptical
Whip**
18
Pouring Shield**
19
Spring Latch and Bowl Pin
(Not Shown)
20
Pastry Beater**
21
Flex Edge Beater**
22
Scraper** ***
*Bowl type may vary. Bowls are also available for purchase as separate accessories.
**Included with select models. Picture/Style may vary from product depending on model.
***Can also be used to scrape your Bowl.
0
.5
1
2
3
4
5
6
7
8
9
10
1
3
2
6
8
7
9
10
11
12
13
14
15
16
17
18
4
19
20
21
5
22