KitchenAid MTK2230PV Installation Instructions
KitchenAid MTK2230PV Manual
 |
View all KitchenAid MTK2230PV manuals
Add to My Manuals
Save this manual to your list of manuals |
KitchenAid MTK2230PV manual content summary:
- KitchenAid MTK2230PV | Installation Instructions - Page 1
electric or gas built-in oven, up to 30" (76.2 cm) wide INSTRUCTIONS D'INSTALLATION DE LA TROUSSE DE GARNITURE DU FOUR À MICRO-ONDES ENCASTRÉ Trousse are very important. We have provided many important safety messages in this manual and on your appliance. Always read and obey all safety messages. - KitchenAid MTK2230PV | Installation Instructions - Page 2
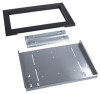
Tools and Parts Tools Needed Gather the required tools and parts before starting installation. Read and follow the instructions provided with any tools listed here. ■ Measuring tape ■ Pencil ■ Phillips screwdriver ■ Drill ■ 7/64" drill bit Parts Supplied (not shown to scale) Rails (2) Bottom - KitchenAid MTK2230PV | Installation Instructions - Page 3
/ 4" (33.57cm) 13/16"(2.14 cm)* 25/16"(5.87 cm)** *27" (68.6 cm) trim kit **30" (76.2 cm) trim kit 13/16" (2.99 cm) GROUNDING INSTRUCTIONS I For all cord connected appliances: The microwave oven must be grounded. In the event of an electrical short circuit, grounding reduces the risk of electric - KitchenAid MTK2230PV | Installation Instructions - Page 4
Prepare Microwave Oven WARNING Excessive Weight Hazard Use two or more people to move and install microwave oven. Failure to do so can result in back or other injury. Prepare Cutout/Cabinet Opening 1. On the cutout floor, find and mark the centerline. 2. Place the bottom duct in the opening, with - KitchenAid MTK2230PV | Installation Instructions - Page 5
Plug into a grounded 3 prong outlet. Do not remove ground prong. Do not use an adapter. Do not use an extension cord. Failure to follow these instructions can result in death, fire, or electrical shock. 5 - KitchenAid MTK2230PV | Installation Instructions - Page 6
frame in place, use 7/64" (0.28 cm) drill to drill four pilot holes into the front facing of the cutout/cabinet through the mounting hole guides in the upper and lower corners of the trim kit frame. NOTES: ■ The holes will be drilled downward from the top, and upward from the - KitchenAid MTK2230PV | Installation Instructions - Page 7
pilot holes drilled in Step 2 above. A 2:1 B 2:1 Installation is now complete. Replace any loose items that have been removed from microwave oven cavity. Save these Installation Instructions for future reference. 7 - KitchenAid MTK2230PV | Installation Instructions - Page 8
: DANGER Risque possible de décès ou de blessure grave si vous ne suivez pas immédiatement les instructions. AVERTISSEMENT Risque possible de décès ou de blessure grave si vous ne suivez pas les instructions. Tous les messages de sécurité vous diront quel est le danger potentiel et vous disent - KitchenAid MTK2230PV | Installation Instructions - Page 9
Outils et pièces Outils nécessaires Rassembler les outils et pièces nécessaires avant d'entreprendre l'installation. Lire et observer les instructions fournies avec chacun des outils de la liste suivante. ■ Ruban à mesurer ■ Crayon ■ Tournevis à tête cruciforme ■ Perceuse ■ Foret de 7/64 po - KitchenAid MTK2230PV | Installation Instructions - Page 10
la broche de liaison à la terre. Ne pas utiliser un adaptateur. Ne pas utiliser un câble de rallonge. Le non-respect de ces instructions peut causer un décès, un incendie ou un choc électrique. Observer les dispositions de tous les codes et règlements en vigueur. Exigences : ■ Alimentation de - KitchenAid MTK2230PV | Installation Instructions - Page 11
Risque du poids excessif Utiliser deux ou plus de personnes pour déplacer et installer le four à micro-ondes. Le non-respect de cette instruction peut causer une blessure au dos ou d'autre blessure. 1. Installer le joint avant de procéder à l'installation. (cadre PMMA seulement) 2. Débrancher le - KitchenAid MTK2230PV | Installation Instructions - Page 12
pas enlever la broche de liaison à la terre. Ne pas utiliser un adaptateur. Ne pas utiliser un câble de rallonge. Le non-respect de ces instructions peut causer un décès, un incendie ou un choc électrique. 12 - KitchenAid MTK2230PV | Installation Instructions - Page 13
3. Brancher le four à micro-ondes. Installation du cadre de la trousse de garniture 1. Placer le cadre de la trousse de garniture sur l'ouverture, de sorte que les languettes inférieures reposent sur le plancher de l'ouverture, comme illustré. 4. Réinsérer le four à micro-ondes dans la cavité pour - KitchenAid MTK2230PV | Installation Instructions - Page 14
-trous percés à l'étape 2 ci-dessus. A 2:1 B 2:1 L'installation est maintenant terminée. Réinstaller tous les articles qui auraient été retirés de la cavité du four à micro-ondes. Conserver ces Instructions d'installation pour une éventuelle réutilisation ultérieure. 14 - KitchenAid MTK2230PV | Installation Instructions - Page 15
SEGURIDAD DEL HORNO MICROONDAS Su seguridad y la seguridad de los demás es muy importante. Hemos incluido muchos mensajes importantes de seguridad en este manual y en su electrodoméstico. Lea y obedezca siempre todos los mensajes de seguridad. Este es el símbolo de alerta de seguridad. Este símbolo - KitchenAid MTK2230PV | Installation Instructions - Page 16
INSTRUCCIONES DE INSTALACIÓN Herramientas y piezas Herramientas necesarias Reúna las herramientas y las piezas necesarias antes de comenzar la instalación. Lea y siga las instrucciones provistas con cualquiera de las herramientas detalladas aquí. ■ Cinta métrica ■ Lapicero ■ Destornillador - KitchenAid MTK2230PV | Installation Instructions - Page 17
NOTAS: ■ Los requisitos de profundidad dependen del receptáculo y de su ubicación dentro o fuera de la región recomendada. Véase la ilustración y el cuadro anteriores. ■ Las dimensiones de altura son críticas: 171⁄8" (43,5 cm) mínimo,173⁄16" (43,7 cm) máximo. ■ La medición de anchura tiene una - KitchenAid MTK2230PV | Installation Instructions - Page 18
Preparación del horno microondas ADVERTENCIA Peligro de Peso Excesivo Use dos o más personas para mover e instalar el horno de microondas. No seguir esta instrucción puede ocasionar una lesión en la espalda u otro tipo de lesiones. 1. Instale la junta antes de proceder a la instalación. (Solo marco - KitchenAid MTK2230PV | Installation Instructions - Page 19
4. Marque los tres orificios de montaje a través del canal inferior sobre la base del recorte. D B 8. Alinee los orificios del espaciador con los orificios del conducto inferior y proceda con la instalación. Este paso puede incorporarse utilizando uno de los siguientes juegos de moldura. Tamaño - KitchenAid MTK2230PV | Installation Instructions - Page 20
3. Enchufe el horno microondas. Instalación del marco del juego de moldura 1. Coloque el marco del juego de moldura sobre la abertura de modo que las lengüetas inferiores descansen sobre el suelo recortado, como se muestra. 4. Deslice el horno microondas hacia atrás hasta que llegue a su lugar. - KitchenAid MTK2230PV | Installation Instructions - Page 21
3. Asegure el marco del juego de moldura al recorte/gabinete instalando cuatro tornillos de madera largos (pintados) en los orificios piloto que se taladraron en el Paso 2 anterior. Se ha completado la instalación. Vuelva a colocar los artículos sueltos que se quitaron de la cavidad del horno - KitchenAid MTK2230PV | Installation Instructions - Page 22
Notas 22 - KitchenAid MTK2230PV | Installation Instructions - Page 23
Notas 23 - KitchenAid MTK2230PV | Installation Instructions - Page 24
W11667246B ©2023 All rights reserved. Tous droits réservés. Todos los derechos reservados. 08/23
-
 1
1 -
 2
2 -
 3
3 -
 4
4 -
 5
5 -
 6
6 -
 7
7 -
8
-
9
-
10
-
11
-
12
-
13
-
14
-
15
-
16
-
17
-
18
-
19
-
20
-
21
-
22
-
23
-
24
 |
 |

You can be killed or seriously injured if you don't immediately
You
can be killed or seriously injured if you don't follow
All safety messages will tell you what the potential hazard is, tell you how to reduce the chance of injury, and tell you what can
happen if the instructions are not followed.
Your safety and the safety of others are very important.
We have provided many important safety messages in this manual and on your appliance. Always read and obey all safety
messages.
This is the safety alert symbol.
This symbol alerts you to potential hazards that can kill or hurt you and others.
All safety messages will follow the safety alert symbol and either the word “DANGER” or “WARNING.”
These words mean:
follow instructions.
instructions.
DANGER
WARNING
MICROWAVE OVEN BUILT-IN TRIM KIT
INSTALLATION INSTRUCTIONS
Built-In Trim Kit Models MTK1627P*, MTK1630P*, MTK2227P*, MTK2230P*
UL listed for use over any electric or gas built-in oven, up to 30" (76.2 cm) wide
INSTRUCTIONS D’INSTALLATION DE LA TROUSSE DE
GARNITURE DU FOUR À MICRO-ONDES ENCASTRÉ
Trousse de garnitures modèles MTK1627P*, MTK1630P*, MTK2227P*, MTK2230P*
Homologué UL pour une utilisation au-dessus d’un four électrique ou au gaz encastré de 30 po (76,2 cm) de large maximum
INSTRUCCIONES DE INSTALACIÓN DEL JUEGO DE
MOLDURA EMPOTRABLE PARA HORNO MICROONDAS
Modelos de juego de moldura empotrable MTK1627P*, MTK1630P*, MTK2227P*, MTK2230P*
Aprobado por UL para utilizarse sobre cualquier horno empotrado eléctrico o a gas de hasta 30" (76,2 cm) de ancho
Table of Contents/
Table des matières/
Índice
MICROWAVE OVEN SAFETY
............................................
1
INSTALLATION INSTRUCTIONS
.......................................
2
Tools and Parts
................................................................
2
Location Requirements
...................................................
2
Required Cutout Dimensions
..........................................
2
Trim Kit Frame Dimensions
.............................................
3
Electrical Requirements
...................................................
3
Prepare Microwave Oven
................................................
4
Prepare Cutout/Cabinet Opening
....................................
4
Install the Microwave Oven
.............................................
5
Install Trim Kit Frame
.......................................................
6
SÉCURITÉ DU FOUR À MICRO-ONDES
..........................
8
INSTRUCTIONS D’INSTALLATION
...................................
9
Outils et pièces
................................................................
9
Exigences d’emplacement
..............................................
9
Dimensions requises des ouvertures à découper
...........
9
Dimensions du cadre de la trousse de garniture
...........
10
Spécifications électriques
.............................................
10
Préparation du four à micro-ondes
...............................
11
Préparation de l’ouverture d’encastrement
...................
11
Installation du four à micro-ondes
.................................
12
Installation du cadre de la trousse de garniture
............
13
SEGURIDAD DEL HORNO MICROONDAS
....................
15
INSTRUCCIONES DE INSTALACIÓN
.............................
16
Herramientas y piezas
...................................................
16
Requisitos de ubicación
................................................
16
Dimensiones de recorte requeridas
..............................
16
Dimensiones del marco del juego de moldura
..............
17
Requisitos eléctricos
.....................................................
17
Preparación del horno microondas
...............................
18
Preparación del recorte/abertura del gabinete
..............
18
Instalación del horno microondas
.................................
19
Instalación del marco del juego de moldura
.................
20
MICROWAVE OVEN SAFETY
W11667246B