Kodak 8500 Digital Photo Printer User Guide - Page 58
Close the top cover, and turn on the printer.
 |
UPC - 041778106044
View all Kodak 8500 Digital Photo Printer manuals
Add to My Manuals
Save this manual to your list of manuals |
Page 58 highlights
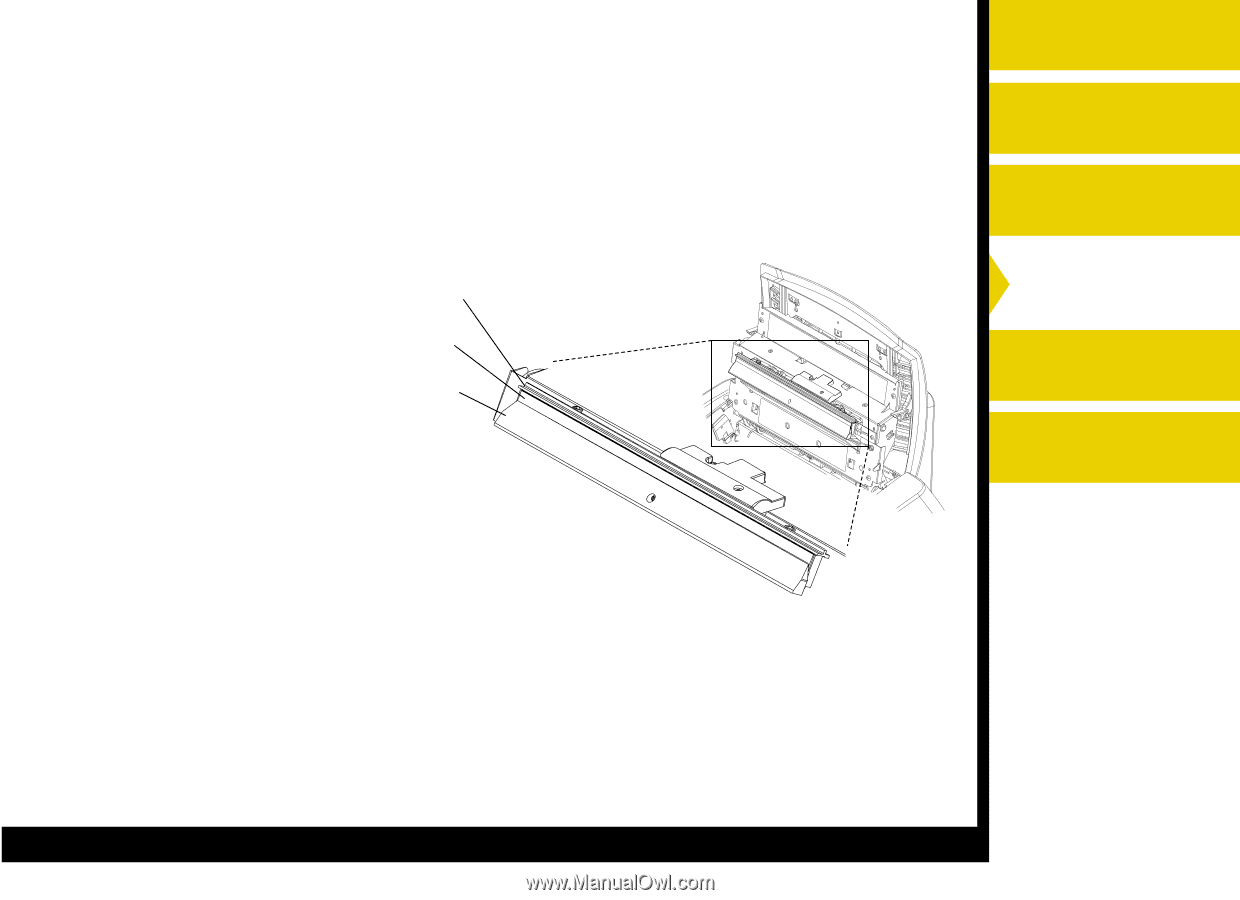
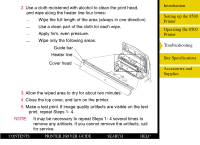
2. Use a cloth moistened with alcohol to clean the print head, and wipe along the heater line four times: Wipe the full length of the area (always in one direction). Use a clean part of the cloth for each wipe. Apply firm, even pressure. Wipe only the following areas. Guide bar Heater line Cover head Introduction Setting up the 8500 Printer Operating the 8500 Printer Troubleshooting Site Specifications Accessories and Supplies 3. Allow the wiped area to dry for about two minutes. 4. Close the top cover, and turn on the printer. 5. Make a test print. If image quality artifacts are visible on the test print, repeat Steps 1- 4. NOTE: It may be necessary to repeat Steps 1- 4 several times to remove any artifacts. If you cannot remove the artifacts, call for service. CONTENTS PRINTER DRIVER GUIDE SEARCH HELP
-
 1
1 -
2
-
3
-
4
-
5
-
6
-
7
-
8
-
9
-
10
-
11
-
12
-
13
-
14
-
15
-
16
-
17
-
18
-
19
-
20
-
21
-
22
-
23
-
24
-
25
-
26
-
27
-
28
-
29
-
30
-
31
-
32
-
33
-
34
-
35
-
36
-
37
-
38
-
39
-
40
-
41
-
42
-
43
-
44
-
45
-
46
-
47
-
48
-
49
-
50
-
51
-
52
-
 53
53 -
 54
54 -
 55
55 -
 56
56 -
 57
57 -
 58
58 -
 59
59 -
 60
60 -
 61
61 -
 62
62 -
 63
63 -
64
-
65
-
66
-
67
-
68
-
69
-
70
-
71
-
72
-
73
 |
 |