Kodak C875 User Manual
Kodak C875 - EasyShare 8MP Digital Camera Manual
 |
UPC - 041778869598
View all Kodak C875 manuals
Add to My Manuals
Save this manual to your list of manuals |
Kodak C875 manual content summary:
- Kodak C875 | User Manual - Page 1
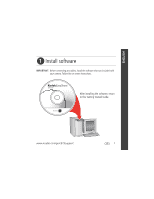
ENGLISH ᕡ Install software IMPORTANT: Before connecting any cables, install the software that was included with your camera. Follow the on-screen instructions. After installing the software, return to this Getting Started Guide. www.kodak.com/go/c875support 1 - Kodak C875 | User Manual - Page 2
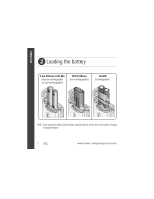
ᕢ Loading the battery 2 AA lithium or Ni-Mn (may be rechargeable or non-rechargeable) CRV3 lithium (non-rechargeable) Ni-MH (rechargeable) NOTE: If your package includes a battery charger or EasyShare dock, see the device user's guide to charge a rechargeable battery. 2 www.kodak.com/go - Kodak C875 | User Manual - Page 3
ENGLISH ᕣ Turning on the camera ᕤ Setting the language, date/time Language: 1 to change. 2 OK to accept. Date/Time: 1 At the prompt, press OK. 2 to change. for previous/next field. OK to accept. OK www.kodak.com/go/c875support 3 - Kodak C875 | User Manual - Page 4
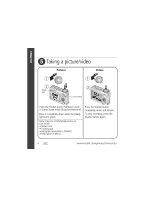
• Histogram (assessible in PASM/C) • Help (when in Menu) Press the Shutter button completely down and release. To stop recording, press the Shutter button again. 4 www.kodak.com/go/easysharecenter - Kodak C875 | User Manual - Page 5
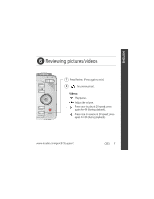
pictures/videos 1 Press Review. (Press again to exit.) 2 for previous/next. Videos: Play/pause. Adjust the volume. Press once to play at 2X speed; press again for 4X (during playback). Press once to reverse at 2X speed; press again for 4X (during playback). www.kodak.com/go/c875support 5 - Kodak C875 | User Manual - Page 6
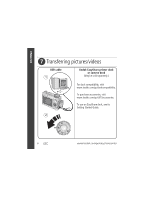
videos USB cable 1 Kodak EasyShare printer dock or camera dock (May be sold separately.) For dock compatibility, visit www.kodak.com/go/dockcompatibility. To purchase accessories, visit www.kodak.com/go/c875accessories. To use an EasyShare dock, see its Getting Started Guide. 2 6 www.kodak.com - Kodak C875 | User Manual - Page 7
best pictures! Visit www.kodak.com/go/c875support and www.kodak.com/go/easysharecenter for: • the extended user's guide • interactive troubleshooting and repairs • interactive tutorials • FAQs • downloads • accessories • printing information • product registration www.kodak.com/go/c875support 7 - Kodak C875 | User Manual - Page 8
ENGLISH Front view 1 23 456 7 1 Shutter button 2 Mode dial 3 Power light 4 Flash button 5 Self-timer/Burst button 8 10 9 8 6 Speaker 7 Flash 8 Microphone 9 Lens 10 Self-timer/AF Assist light www.kodak.com/go/easysharecenter - Kodak C875 | User Manual - Page 9
5 Zoom lever (wide angle) 6 Zoom lever (telephoto) 7 Strap post 8 Joystick ( , press for OK) 9 Optional SD or MMC card 10 USB, A/V Out 11 DC-In (3V), for optional AC adapter 12 Share button 13 Battery compartment 14 Menu button 15 Review button 16 Tripod socket 17 Dock connector www.kodak.com - Kodak C875 | User Manual - Page 10
with your camera Using optical zoom Use optical zoom to get up to 5X closer to your subject. Optical zoom is effective when Zoom lever T (Telephoto) to zoom in. Press W (Wide Angle) to zoom out. Zoom indicator Optical zoom Digital zoom range range 3 Take the picture or video. 10 www.kodak - Kodak C875 | User Manual - Page 11
decreased image quality when using digital zoom. The blue slider on the zoom indicator pauses and turns red when the picture quality reaches the limit for an acceptable 4 x 6-in. (10 x 15 cm) print. Using camera Help Use camera Help to familiarize yourself with the camera and its features. Help is - Kodak C875 | User Manual - Page 12
Using the self-timer 1 Place the camera on a tripod or flat surface. 2 In any Still mode, except for Panorama, press : • Once for a 10-second delay (so you video stops when no storage space remains. Only the 2- and 10-second options are available in video mode. 12 www.kodak.com/go/easysharecenter - Kodak C875 | User Manual - Page 13
). In low light, hold the camera steady or use a tripod. The camera automatically detects and removes red eye from the picture. The flash never fires. Flash-to-subject distances Wide angle 2-13.5 ft (0.6-4.1 m) @ ISO 200 Telephoto 2-8.5 ft (0.6-2.6 m) @ ISO 200 www.kodak.com/go/c875support 13 - Kodak C875 | User Manual - Page 14
analyzes and selects the best Scene mode available from Smart Scene. If the camera cannot determine the best Scene mode, it will take the picture in standard Auto. Manually selecting a specific Scene mode for picture-taking under special conditions. (See Scene modes, page 16.) Capturing - Kodak C875 | User Manual - Page 15
affected when using optical zoom. Use the Joystick to to change other settings. Manual Enjoying the highest level of acceptable exposure. Use the Joystick to select settings. Press the Menu button to change other settings. To prevent camera shake, use a tripod for slow shutter speeds. www.kodak - Kodak C875 | User Manual - Page 16
For The "user-created" mode. For applying P, A, S, M plus any Custom settings (exposure compensation and ISO speed) which are saved independent of other camera settings. Use motion. Landscape Far-away scenes. The camera uses infinity auto-focus. Auto-focus framing marks are not available in Landscape - Kodak C875 | User Manual - Page 17
of flash if possible. The camera automatically sets the focus distance depending on the zoom position. Night Reduces red eye of people in night scenes or low-light conditions. Place the Portrait* camera on the subject appears still. Shutter speed > 1/180 sec. www.kodak.com/go/c875support 17 - Kodak C875 | User Manual - Page 18
SCN mode Candle Light Captures the ambiance of the candle light. Sunset Preserves the deep hues seen in sunsets. * This camera features Face Detection for Portrait, Night Portrait, and Backlight settings. It automatically selects the proper exposure for the face when taking pictures indoors or - Kodak C875 | User Manual - Page 19
Doing more with your camera Taking panoramic pictures Use panorama to MP for each picture. Exposure and white balance are set with the first picture. The flash is set to Off.) 1 Turn the Mode dial to . 2 Press to highlight or 3 pictures. Get 1 panoramic picture www.kodak.com/go/c875support 19 - Kodak C875 | User Manual - Page 20
with your camera Understanding picture-taking icons Smart Scene mode Self-timer Date stamp Album name Flash Picture size Pictures/time remaining Storage location Framing marks Low battery (flashing=exhausted) Smart Scene mode Self-timer Date stamp Album name Zoom indicator Manual mode (PASM - Kodak C875 | User Manual - Page 21
Doing more with your camera Using the histogram to view picture brightness Use the histogram to evaluate the the peak is in the middle of the histogram. To turn on the histogram in PASM/C or Review, press until the histogram appears. NOTE: If a scene is dark or light, you can adjust the exposure compensation - Kodak C875 | User Manual - Page 22
2 Working with pictures/videos Magnifying a picture during review T magnify 2X-8X. view other parts of the picture. OK return to 1X. Viewing thumbnails (multi-up) W view thumbnails. T view single picture. 22 www.kodak.com/go/easysharecenter - Kodak C875 | User Manual - Page 23
Deleting pictures/videos Working with pictures/videos 1 Press Review. 2 for previous/next. 3 Press Delete. 4 only available immediately after you delete a picture. Protecting pictures/videos from deletion 1 Press Review. 2 for previous/next. 3 Press Menu. 4 Press to highlight Protect, then - Kodak C875 | User Manual - Page 24
the slide show is running. 1 Connect the audio/video cable (included) from the camera USB, A/V Out port to the television video-in port (yellow) and audio-in port (white). See your television user's guide for details. 2 Review pictures/videos on the television. 24 www.kodak.com/go/easysharecenter - Kodak C875 | User Manual - Page 25
Working with pictures/videos Using Kodak Perfect Touch technology Kodak Perfect Touch technology helps ensure better, brighter pictures. 1 Press the Review button, then for previous/next picture. 2 Press the Menu button, choose Perfect Touch tech., then press the OK button. The enhancement is - Kodak C875 | User Manual - Page 26
Working with pictures/videos Editing videos You can do incredible things with your videos! Trimming a video You can delete an unwanted portion from the beginning or end of a video. 1 Press the Review button, . (Press the Menu button to exit the menu.) 26 www.kodak.com/go/easysharecenter - Kodak C875 | User Manual - Page 27
Working with pictures/videos Selecting multiple pictures/videos Use the multi-select feature when you have two or more pictures/videos to print, transfer, delete, etc. (Multi-select is used most effectively in Viewing thumbnails (multi-up), page 22.) 1 Press the Review button, then picture/video. - Kodak C875 | User Manual - Page 28
Interactive Troubleshooting & Repairs. Status Solution Camera does not turn on Camera does not turn off and the lens does not retract ■ Remove battery and verify that it's the correct type, then reinsert it. ■ Insert a new or charged battery. ■ Connect the camera to a Kodak 3-volt AC adapter - Kodak C875 | User Manual - Page 29
Important safety instructions CAUTION: Do not disassemble this product; there are no user-serviceable parts inside. Refer servicing to qualified service personnel. Do not expose this product to liquid, moisture, or extreme temperatures. Kodak AC adapters and battery chargers are intended for - Kodak C875 | User Manual - Page 30
sales receipt. Proof of the date of purchase will be required with any request for warranty repair. This limited warranty will be honored only within the geographical location that Kodak digital cameras and accessories were purchased. Kodak will REPAIR or REPLACE Kodak EasyShare digital cameras - Kodak C875 | User Manual - Page 31
does not apply to the battery(s) used in digital cameras or accessories. This warranty does not cover circumstances beyond Kodak's control, nor problems caused by failure to follow the operating instructions in the Kodak EasyShare digital cameras and accessories User's Guides. This warranty does not - Kodak C875 | User Manual - Page 32
Kodak EasyShare C875 zoom digital camera This equipment has been tested and found to comply with the limits for a Class B digital device user's authority to operate the equipment. Where shielded interface cables have been provided with the product or specified additional components or accessories - Kodak C875 | User Manual - Page 33
may cause radio interference. Install and use the equipment according to the instruction manual. Korean Class B ITE MPEG-4 Use of this product in any Eastman Kodak Company Rochester, New York 14650 © Eastman Kodak Company, 2006 Kodak, EasyShare, and Perfect Touch are trademarks of Eastman Kodak - Kodak C875 | User Manual - Page 34
Appendix Notes 34 www.kodak.com/go/easysharecenter
-
 1
1 -
 2
2 -
 3
3 -
 4
4 -
 5
5 -
 6
6 -
 7
7 -
8
-
9
-
10
-
11
-
12
-
13
-
14
-
15
-
16
-
17
-
18
-
19
-
20
-
21
-
22
-
23
-
24
-
25
-
26
-
27
-
28
-
29
-
30
-
31
-
32
-
33
-
34
 |
 |
www.kodak.com/go/c875support
1
ENGLISH
±
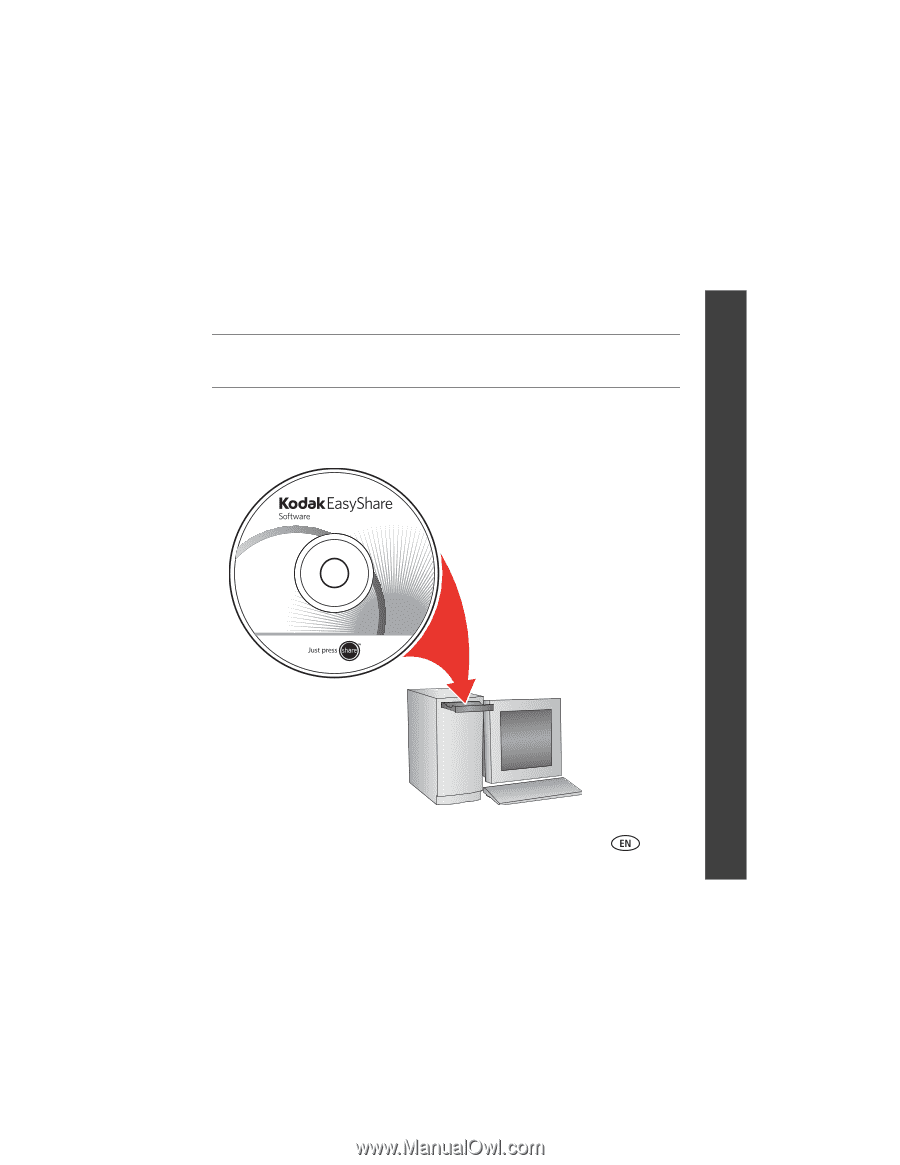
Install software
IMPORTANT:
Before connecting any cables, install the software that was included with
your camera. Follow the on-screen instructions.
After installing the software, return
to this Getting Started Guide.