Kodak DX7440 User Manual - Page 24
Using exposure bracketing, Using exposure compensation with exposure bracketing - manual
 |
UPC - 041771842734
View all Kodak DX7440 manuals
Add to My Manuals
Save this manual to your list of manuals |
Page 24 highlights
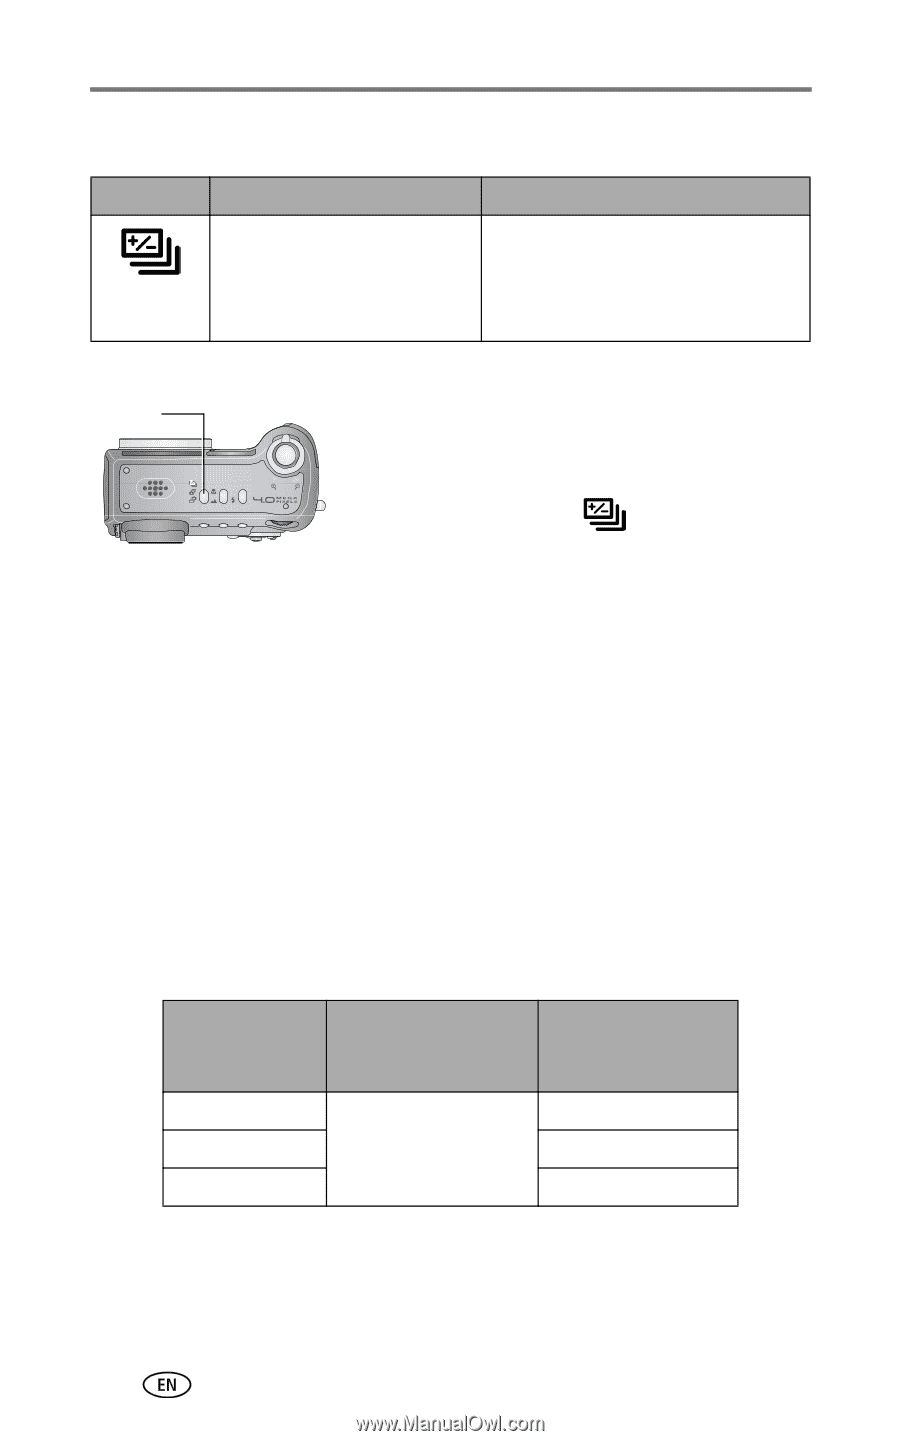
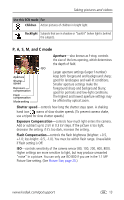
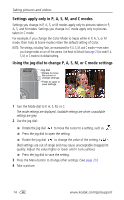
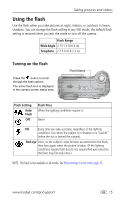
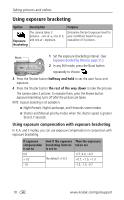
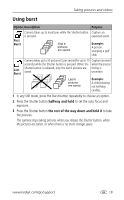
Taking pictures and videos Using exposure bracketing Option Description Purpose The camera takes 3 pictures-one at +, one at 0, Exposure and one at - exposure. Bracketing Determine the best exposure level for your conditions based on your evaluation of 3 pictures. Burst 1 Set the exposure bracketing interval. (See Exposure Bracketing Interval, page 21.) 2 In any Still mode, press the Burst button repeatedly to choose . 3 Press the Shutter button halfway and hold to set the auto-focus and exposure. 4 Press the Shutter button the rest of the way down to take the pictures. The camera takes 3 pictures. To evaluate them, press the Review button. Exposure bracketing turns off after the pictures are taken. NOTE: Exposure bracketing is not available in: ■ Night Portrait, Night Landscape, and Fireworks scene modes ■ Shutter and Manual priority modes when the shutter speed is greater than 0.7 seconds Using exposure compensation with exposure bracketing In P, A, and S modes, you can use exposure compensation in conjunction with exposure bracketing. If exposure compensation is set to 0.0 +1.0 -1.0 And if the exposure Then the exposures bracketing interval taken are is set to the default +/-0.3 -0.7, 0.0, +0.3 +0.7, +1.0, +1.3 -1.3, -1.0, -0.7 18 www.kodak.com/go/support
-
 1
1 -
2
-
3
-
4
-
5
-
6
-
7
-
8
-
9
-
10
-
11
-
12
-
13
-
14
-
15
-
16
-
17
-
18
-
 19
19 -
 20
20 -
 21
21 -
 22
22 -
 23
23 -
 24
24 -
 25
25 -
 26
26 -
 27
27 -
 28
28 -
 29
29 -
30
-
31
-
32
-
33
-
34
-
35
-
36
-
37
-
38
-
39
-
40
-
41
-
42
-
43
-
44
-
45
-
46
-
47
-
48
-
49
-
50
-
51
-
52
-
53
-
54
-
55
-
56
-
57
-
58
-
59
-
60
-
61
-
62
-
63
-
64
-
65
-
66
-
67
 |
 |