Kodak ESP 5 User Manual
Kodak ESP 5 - ESP 5 All-in-One Printer Manual
 |
UPC - 041778648858
View all Kodak ESP 5 manuals
Add to My Manuals
Save this manual to your list of manuals |
Kodak ESP 5 manual content summary:
- Kodak ESP 5 | User Manual - Page 1
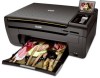
KODAK ESP 5200 Series All-in-One Printer Rotate Back Home MS SD/HC MMC Includes Information for the: ESP 5250 All-in-One Printer ESP 5260 All-in-One Printer Extended User Guide - Kodak ESP 5 | User Manual - Page 2
Eastman Kodak Company Rochester, NY 14650 © Eastman Kodak Company, 2009 Kodak, EasyShare, and Perfect Touch are trademarks of Eastman Kodak Company. Specifications subject to change without notice. P/N 1K5831 September 2009 - Kodak ESP 5 | User Manual - Page 3
a wireless network connection ...5 Setting up an IP address...9 Verifying the network configuration...9 Printing the network configuration ...10 Installing your printer on additional computers on the network 10 Connecting to another KODAK All-in-One Printer 10 Adding a network connection to - Kodak ESP 5 | User Manual - Page 4
software and firmware on a MACINTOSH Computer 39 Monitoring and adjusting printer performance ...40 Checking ink levels...40 Resetting factory defaults ...40 8 Troubleshooting Basic troubleshooting ...41 Status lights...43 Power features...46 Ink cartridges ...46 iv www.kodak.com/go/aiosupport - Kodak ESP 5 | User Manual - Page 5
KODAK ESP 5200 Series All-in-One Printer Connectivity ...46 Software support ...46 Physical specifications ...47 Warranty...47 System requirements...47 Safety information ...49 Regulatory compliance...51 FCC statement ...51 Canadian statements ...51 German compliance statement ...52 - Kodak ESP 5 | User Manual - Page 6
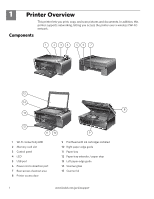
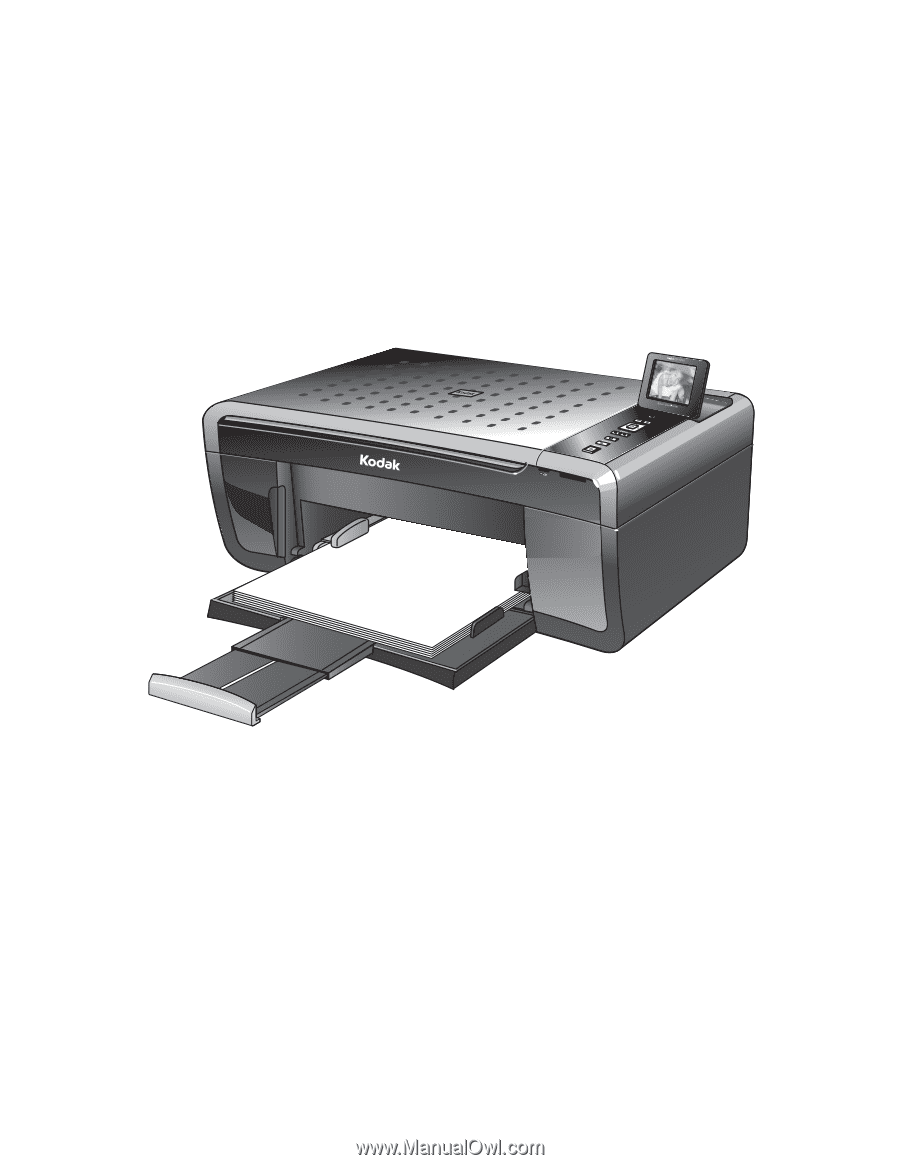
5 USB port 6 Power cord connection port 7 Rear-access cleanout area 8 Printer access door 9 Printhead with ink cartridges installed 10 Right paper-edge guide 11 Paper tray 12 Paper tray extender / paper stop 13 Left paper-edge guide 14 Scanner glass 15 Scanner lid 1 www.kodak.com/go/aiosupport - Kodak ESP 5 | User Manual - Page 7
Control panel KODAK ESP 5200 Series All-in-One Printer ESP 5250 1 All-in-One-Printer 2 Back Home 10 3 9 OK 4 Rotate Back Home MS SD/ Displays pictures, messages, and menus; lifts for easy viewing Turns the printer on or off Displays the main menu, and toggles between screens Used to - Kodak ESP 5 | User Manual - Page 8
, scan, order supplies, access the Extended User Guide, and configure your all-in-one printer from your computer. You can also access the KODAK Tips and Projects Center Web site or upgrade your printer with a newer version of software and/or firmware. Clicking one of the three icons located in the - Kodak ESP 5 | User Manual - Page 9
not have installed the printer software. This chapter tells you how to configure or change your printer settings and your network settings. Configuring printer settings Configuring basic NOTE: When you first power on the printer, the printer automatically steps you printer settings through the - Kodak ESP 5 | User Manual - Page 10
(The name of the printer plus a number indicates a wireless connection; for example, KodakESP5200+1133.) For all computers and operating systems: If you haven't yet installed the printer software, insert the software CD that came with your printer and follow the on-screen instructions to install the - Kodak ESP 5 | User Manual - Page 11
above, contact your Internet service provider or your network administrator. Connecting to a wireless network using the WiFi Setup Wizard You can use the WiFi Setup Wizard on the printer to connect to your wireless network. Read the following procedures and use the one that is appropriate for - Kodak ESP 5 | User Manual - Page 12
CD that came with your printer and follow the on-screen instructions to install the software. To connect to an unlisted network using the Wi-Fi Setup Wizard: 1. Press Home. 2. Press to select Network Settings, then press OK. 3. With WiFi Setup Wizard selected, press OK. NOTE: The Wi-Fi radio - Kodak ESP 5 | User Manual - Page 13
KODAK ESP 5200 Series All-in-One Printer Using WPS to connect to a Wi-Fi network 8. When the confirmation message appears, press OK. 9. If you haven't yet installed the printer software, insert the CD that came with your printer, and install the software. If your router supports Wi-Fi Protected - Kodak ESP 5 | User Manual - Page 14
continue. 5. Select one of the following, then press OK: • Dynamic (DHCP) • Automatic (Private) • Manual (Static) 6. If you selected Manual (Static), you The wireless network settings appear on the LCD. If the printer is connected to your network, you will see the network name and the word CONNECTED. - Kodak ESP 5 | User Manual - Page 15
Follow the on-screen instructions. computers on the network Connecting to If you are connecting to a newer model printer (for example, you already have an another KODAK ESP 7 printer and now you are adding an ESP 5250 printer), you must install the All-in-One Printer software for the newer model - Kodak ESP 5 | User Manual - Page 16
select your printer (ESP5200 Series (5250/5260). c. Select Network - Wireless/WiFi, then click Next. When your printer is detected, driver installation begins. 8. If your wireless all-in-one printer (example: KodakESP5200+1133) is listed: a. Highlight the all-in-one printer that is connected to your - Kodak ESP 5 | User Manual - Page 17
Photo Papers, which are optimized to work with KODAK All-in-One Printers. For the best document printing results, use KODAK Document Papers or a paper with the COLORLOK Technology logo on the package. Use only paper that is designed for inkjet printers. When handling paper: • Hold the paper by the - Kodak ESP 5 | User Manual - Page 18
Handling Paper Envelope sizes The printer accepts the following envelope sizes: • C5 (6.38 x 9 in. / 162 x 229 mm) • C6 (4.5 x 6. Lift the paper stop. 4. Make sure the left paper-edge guide is to the far left. left paper-edge guide Rotate Back Home MS SD/HC MMC paper stop paper tray extender - Kodak ESP 5 | User Manual - Page 19
KODAK ESP 5200 Series All-in-One Printer 7. Move the left paper-edge guide until it touches the paper. left paper-edge guide Rotate Back Home MS SD/HC MMC Loading photo paper The paper tray capacity is 20 sheets of photo paper. To load photo paper: 1. Remove - Kodak ESP 5 | User Manual - Page 20
the tray. 2. Insert the envelope(s) into the tray with the flap up and against the right side of the tray. 3. Move the left paper-edge guide until it touches the envelope(s). left paper-edge guide 15 www.kodak.com/go/aiosupport - Kodak ESP 5 | User Manual - Page 21
Software, select Print Pictures, then follow the on-screen instructions. If you have a MACINTOSH Computer, print your pictures using KODAK EASYSHARE Software card to your computer, press OK then Start. (Your printer and computer must be connected with a USB cable.) The number of copies that print. - Kodak ESP 5 | User Manual - Page 22
and the memory card as a unit; do not remove the memory card while leaving the adapter in the printer. Printing a picture If you use the default settings, one 4 x 6 in. /101 x 152 mm picture is printed. using the default To print a picture: settings 1. Load photo paper with the logo side facing - Kodak ESP 5 | User Manual - Page 23
KODAK ESP 5200 Series All-in-One Printer 2. Insert the memory card into the memory card slot. left paper-edge guide Rotate Back Home MS SD/HC MMC memory card slot 3. Press or to display the picture you want to print. 4. Press Start to begin printing. - Kodak ESP 5 | User Manual - Page 24
pictures, they will be printed according to the default settings on your printer (unless otherwise specified by the tag from the camera). NOTE: Refer to your camera user guide to determine whether your camera supports tagged (also "marked" or "DPOF") functionality. To print tagged pictures: 1. Load - Kodak ESP 5 | User Manual - Page 25
KODAK ESP 5200 Series All-in-One Printer 2. Insert the memory card into the memory card slot. left paper-edge guide Rotate Back Home MS SD/HC MMC memory card slot 3. When the "Print tagged images?" message appears, press Start. Printing panoramic pictures To print a panoramic - Kodak ESP 5 | User Manual - Page 26
connected to a wireless network and with a USB cable, select the USB-connected printer (no number after the printer name). 8. Follow the on-screen instructions computer is connected to a wireless network and with a USB cable, select the USB-connected printer (no number after the printer name). 8. - Kodak ESP 5 | User Manual - Page 27
5 Copying You can copy documents and pictures with your all-in-one printer. The printer produces high-quality color or black-and-white copies on a variety of paper types (see Paper options 1. Press Home. 2. If necessary, press to select Copy Document. 3. Press OK. www.kodak.com/go/aiosupport 22 - Kodak ESP 5 | User Manual - Page 28
No / Yes Description The number of copies that print. The copy is the same size as the original. The printer detects the size of the original on the scanner glass and the size of the paper in the paper tray, as the new default: press OK, select Yes, then press OK. 23 www.kodak.com/go/aiosupport - Kodak ESP 5 | User Manual - Page 29
KODAK ESP 5200 Series All-in-One Printer Changing copy photo options To change the copy photo options: 1. print. If the selected copy size is smaller than the paper in the paper tray, the printer automatically arranges the pictures to best fit the paper size. Good quality output; prints faster - Kodak ESP 5 | User Manual - Page 30
Press or to select the enlargement or reduction you want. NOTE: If you select Fit to Page, the printer detects the size of the original on the scanner glass and the size of the paper in the paper tray, select the photo size you want. 8. Press Start to begin copying. 25 www.kodak.com/go/aiosupport - Kodak ESP 5 | User Manual - Page 31
KODAK ESP 5200 Series All-in-One Printer Darkening or If the original document or picture is too light or too dark, you can make the copy below zero for a darker copy, or press to select a number above zero for a lighter copy. 8. Press Start to begin copying. www.kodak.com/go/aiosupport 26 - Kodak ESP 5 | User Manual - Page 32
computer. To scan with your all-in-one printer, it must be connected to a computer with a USB cable or a wireless network. You save the scanned file(s) to it in Home Center Software, and crop the output as desired. See the Home Center Software Help (? icon) for instructions. Simple scanning To scan - Kodak ESP 5 | User Manual - Page 33
KODAK ESP 5200 Series All-in-One Printer Scanning multiple pictures simultaneously Using Home Center Software, you can scan multiple pictures simultaneously and save them as separate files. NOTE: For Home Center Software screen instructions. NOTE: Click the Help icon for additional instructions. - Kodak ESP 5 | User Manual - Page 34
plugged in with AC power turned on. If you use a power strip, don't turn off the power strip. Keep the printhead and ink cartridges in the printer at all times. This helps prevent damage to the printhead. Service agreements are available in some countries. Contact dealers of KODAK Products for more - Kodak ESP 5 | User Manual - Page 35
Cleaning the scanner glass KODAK ESP 5200 Series All-in-One Printer For good quality copies and scans, ensure the printer's scanner glass and lid backing are clean; dust the exterior as needed. CAUTION: Do not use abrasives, acetone, benzene, or carbon tetrachloride on the glass, - Kodak ESP 5 | User Manual - Page 36
isopropyl (rubbing) alcohol on a soft cloth, then wipe thoroughly with a cloth damped with water to remove any residual alcohol. 5. When finished cleaning, plug in the printer. 31 www.kodak.com/go/aiosupport - Kodak ESP 5 | User Manual - Page 37
KODAK ESP 5200 Series All-in-One Printer Replacing ink cartridges Your printer uses both black and color ink cartridges. You can check the approximate ink levels on the LCD (see Checking ink levels, page 40) or in Home Center Software. When an ink cartridge is out of ink, the printer LCD displays a - Kodak ESP 5 | User Manual - Page 38
Printer 3. Pinch the latch on the ink cartridge and lift it out of the printhead. 4. Remove the ink cartridge from its bag. IMPORTANT: Insert the ink cartridge into the printhead immediately to prevent the printhead from drying out. 5. Remove the protective cap from the cartridge. 10 33 www.kodak - Kodak ESP 5 | User Manual - Page 39
KODAK ESP 5200 Series All-in-One Printer 6. Insert the ink cartridge into the printhead. 7. Press down on the tab until you hear a click. 8. Close the printer access door. www.kodak.com/go/aiosupport 34 - Kodak ESP 5 | User Manual - Page 40
you receive a new printhead from Kodak. To replace the printhead: 1. Make sure your printer is on. 2. Lift the printer access door, and wait for the carriage to move to the access position. 3. Remove any paper that may be loaded in the printer. 4. Remove both ink cartridges and set them aside. 35 - Kodak ESP 5 | User Manual - Page 41
KODAK ESP 5200 Series All-in-One Printer 5. Unlatch the used printhead by lifting the button in the center of the carriage. 6. Lift the used printhead out of the carriage. 7. Remove the new - Kodak ESP 5 | User Manual - Page 42
Maintaining Your Printer 8. Remove the two plastic protective shields. 9. Place the new printhead into the carriage. Insert it at the angle shown. 37 www.kodak.com/go/aiosupport - Kodak ESP 5 | User Manual - Page 43
KODAK ESP 5200 Series All-in-One Printer 10. Push firmly against the target label of the printhead until you hear a loud snap. 11. Insert the black ink cartridge into the printhead. 12. Press down on the ink cartridge until you hear it click into position. Cartouche d'encre noire 10 10 13. - Kodak ESP 5 | User Manual - Page 44
software. To upgrade the firmware: 1. Go to www.kodak.com/go/esp5250downloads. 2. Connect the printer to the computer with a USB cable (if not currently connected). 3. Select your operating system from the drop-down list. 4. Click Select in the Firmware box. 5. Read the instructions, click Download - Kodak ESP 5 | User Manual - Page 45
KODAK ESP 5200 Series All-in-One Printer Monitoring and adjusting printer performance From the control panel, you can perform many tasks to help you keep the printer functioning well. Checking ink levels To check the ink levels: 1. Press Home. 2. Press to select Maintenance. 3. With Check Ink - Kodak ESP 5 | User Manual - Page 46
download the latest software and firmware files. • www.kodak.com/go/esp5250specs for the recommended system requirements. Problem Possible Solutions Printer does not power on • Make sure you are using the power cord that came with your printer. • Make sure the power cord is connected to the AC - Kodak ESP 5 | User Manual - Page 47
KODAK ESP 5200 Series All-in-One Printer Problem Image quality problems Ink cartridge problems Paper jam Error messages or other problems you cannot resolve Possible Solutions • For best results, use KODAK Paper or a paper with the COLORLOK Technology logo on the package. • Make sure the paper is - Kodak ESP 5 | User Manual - Page 48
connect to an available wireless network within range, press OK, turn the Wi-Fi radio off, and run the WiFi Setup Wizard (see Configuring a wireless network connection, page 5). The Wi-Fi radio is turned on and there is a working connection between the printer and a wireless network. 43 www.kodak - Kodak ESP 5 | User Manual - Page 49
Specifications Specifications for this KODAK ESP 5200 Series All-in-One Printer are described in the paper, photo paper, and transparency Optimize image quality for KODAK Photo Papers with barcode KODAK PERFECT TOUCH Technology with Home Center Software Yes, No Color, Black-and-white On, Off www - Kodak ESP 5 | User Manual - Page 50
Normal, Draft - 3 to + 3 Copy Photo Features Black-and-white or color 1 to 99 copies (may vary for different models of the 5200 series printers) 2 x 3 in. (5 x 7.6 cm) 3.5 x 5 in. (9 x 12.7 cm) 4 x 6 in. (10 x 15 cm) 4 cm) Segmentation scanning Auto-destination OCR 45 www.kodak.com/go/aiosupport - Kodak ESP 5 | User Manual - Page 51
KODAK ESP 5200 Series All-in-One Printer Paper tray features Paper Capacity Tray Size Paper Tray Features 100 sheets of 20 lb plain paper 20 sheets of photo paper, up to 12 mil (290 gsm) 20 envelopes 4 x 6 in. to 8.5 x 14 in. (10 x 15 cm to 21.6 x 36 cm) Ink cartridges Ink Handling Ink Life Ink - Kodak ESP 5 | User Manual - Page 52
Power Dimensions Weight Operating Range Full image Quality Environmental Range Physical Specifications US: 110-120 V AC, 50-60 Hz at 2 A WW: 110-240 V AC, Warranty Product Printhead Warranty One year from purchase (with proof of purchase) One year from purchase (with kodak.com/go/aiosupport - Kodak ESP 5 | User Manual - Page 53
KODAK ESP 5200 Series All-in-One Printer MACINTOSH Computers MACINTOSH Computers Operating System CPU Clock Speed Memory Available Disk Space Interface Removable Drive Other Minimum Recommended MACINTOSH OS X 10.4.8 PowerPC G4, G5, or Intel Based Mac 1.2 GHz 512 MB RAM 200 MB available USB 2.0 - Kodak ESP 5 | User Manual - Page 54
Supported instructions marked on the product. • Use only the power source indicated on the product regulatory label. • Use only the power cord that comes with the product. Using another power cord may cause fire and/or shock. Do not use the included power cord with any other equipment. 49 www.kodak - Kodak ESP 5 | User Manual - Page 55
KODAK ESP 5200 Series All-in-One Printer • If you do not use this product for a long period of time, unplug it from the electrical outlet. • Always turn this product off by using the On/Off button. Wait until the On/Off button stops flashing before removing the power plug from the outlet. • Do not - Kodak ESP 5 | User Manual - Page 56
, if not installed and used in accordance with the instructions, may cause harmful interference to radio communications. However, by one or more of the following measures: • Reorient or relocate the receiving antenna. • Increase the separation between the equipment and receiver • Connect the - Kodak ESP 5 | User Manual - Page 57
KODAK ESP 5200 Series All-in-One Printer Industry Canada (IC) Radiation Exposure Statement This equipment Qualified ENERGY STAR and the ENERGY STAR mark are registered U.S. service marks. As an ENERGY STAR partner, KODAK has determined that this product meets ENERGY STAR Guidelines for energy - Kodak ESP 5 | User Manual - Page 58
service, misuse, abuse, use with incompatible accessories or attachments (such as third party ink or ink tanks), failure to follow Kodak's operation, maintenance or repacking instructions, failure to use items supplied by Kodak (such as adapters warranty will be one year from the purchase date or - Kodak ESP 5 | User Manual - Page 59
16275 Technology Drive San Diego, CA 92127, USA Declares our sole responsibility that the product Product Name: Power adapters: Radio Module Number: KODAK ESP 5250 All-in-One Printer HP-A0601R3, VP-09500084-000 US101 conforms to the following Product Specifications: Safety: EMC: Radio: IEC - Kodak ESP 5 | User Manual - Page 60
button, 2 Changing ink cartridges. See Replacing ink cartridges Cleaning the printer, 29 Components, printer, 1 Configuring your printer, 4 basic printer settings, 4 setting printer as the default printer, 5 wireless network settings, 5 Connecting to another KODAK All-in-One Printer, 10 Control - Kodak ESP 5 | User Manual - Page 61
, 36 Replacing ink cartridges, 32 Right paper-edge guide, 1 Rotate button, 2, 21 S Scanner glass, 1 lid, 1 Scanning, 27 changing settings in Home Center Software, 27 multiple pictures simultaneously, 28 Service agreements, 29 Settings basic printer, 4 wireless network, 5 www.kodak.com/go/aiosupport - Kodak ESP 5 | User Manual - Page 62
, troubleshooting, 29 Web support www.kodak.com/go/esp5250downloads, 41 www.kodak.com/go/esp5250specs, 41 www.kodak.com/go/esp5250support, 41 www.kodak.com/go/inkjetnetworking, 41 www.kodak.com/go/itg, 41 www.kodak.com/go/recycle, 29 WEP key, 6 Wi-Fi connectivity LED, 1 WiFi Setup Wizard, on printer
-
 1
1 -
 2
2 -
 3
3 -
 4
4 -
 5
5 -
 6
6 -
 7
7 -
8
-
9
-
10
-
11
-
12
-
13
-
14
-
15
-
16
-
17
-
18
-
19
-
20
-
21
-
22
-
23
-
24
-
25
-
26
-
27
-
28
-
29
-
30
-
31
-
32
-
33
-
34
-
35
-
36
-
37
-
38
-
39
-
40
-
41
-
42
-
43
-
44
-
45
-
46
-
47
-
48
-
49
-
50
-
51
-
52
-
53
-
54
-
55
-
56
-
57
-
58
-
59
-
60
-
61
-
62
 |
 |
KODAK ESP 5200 Series
All-in-One Printer
Includes Information for the:
ESP 5250 All-in-One Printer
ESP 5260 All-in-One Printer
Extended User Guide
MS
SD/HC
MMC
Rotate
Back Home