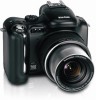
Kodak P712 User Manual
Kodak P712 - Easyshare 7.1MP Digital Camera Manual
 |
UPC - 041771385187
View all Kodak P712 manuals
Add to My Manuals
Save this manual to your list of manuals |
Kodak P712 manual content summary:
- Kodak P712 | User Manual - Page 1
Kodak EasyShare P712 zoom digital camera User's guide www.kodak.com For interactive tutorials, www.kodak.com/go/howto For help with your camera, www.kodak.com/go/p712support - Kodak P712 | User Manual - Page 2
Eastman Kodak Company Rochester, New York 14650 © Eastman Kodak Company, 2006 All screen images are simulated. Kodak and EasyShare are trademarks of Eastman Kodak Company. Schneider-Kreuznach and Xenar are trademarks of Jos. Schneider Optische Werke GmbH used under license by Eastman Kodak Company. - Kodak P712 | User Manual - Page 3
Front View 7 8 6 9 10 5 4 3 2 1 1 Lens 2 Grip 3 Self-timer/Video light 4 LED indicator 5 Shutter button 6 Mode /Power switch 7 Exposure metering button 8 Program button 9 Drive button 10 Mode dial www.kodak.com/go/support Product features 11 12 13 14 15 16 17 18 19 11 Hot shoe 12 Flash 13 - Kodak P712 | User Manual - Page 4
4 LCD screen 13 Review button 5 EVF/LCD toggle button 14 Joystick ( ); OK button (press in) 6 Diopter dial 15 Slot for optional SD or MMC card 7 EVF (Electronic Viewfinder) 16 Share button 8 Zoom lever 17 Menu button 9 Command dial 18 Battery compartment ii www.kodak.com/go/support - Kodak P712 | User Manual - Page 5
5 Using optical zoom 10 Using the flip-up flash 11 Using an external flash unit 11 Reviewing pictures and videos 12 Protecting pictures and videos from deletion 16 3 Transferring and printing pictures 18 Installing the software 18 Transferring pictures 19 Printing from a Kodak EasyShare - Kodak P712 | User Manual - Page 6
and videos 58 Running a slide show 59 Pre-tagging for album names 60 Sharing your pictures 63 5 Troubleshooting 69 Camera problems 69 Computer/connectivity problems 71 Picture quality problems 72 Direct printing (PictBridge) problems 74 6 Getting help 75 iv www.kodak.com/go/support - Kodak P712 | User Manual - Page 7
77 Camera specifications 77 Storage capacities 81 Power-saving features 84 Accessories 85 Important safety instructions 86 Battery information 88 Upgrading your software and firmware 89 Additional care and maintenance 89 Warranty...90 Regulatory compliance 92 www.kodak.com/go/support v - Kodak P712 | User Manual - Page 8
1 Setting up your camera Attaching the lens cap and strap 1 www.kodak.com/go/support - Kodak P712 | User Manual - Page 9
EasyShare printer dock or camera dock. Purchase these and other accessories at a dealer of Kodak products or visit www.kodak.com/go/p712accessories. Loading the battery CAUTION: We recommend that you use a Kodak Li-Ion rechargeable digital camera battery (KLIC-5001). For information on replacing - Kodak P712 | User Manual - Page 10
Setting up your camera Turning on the camera I Capture: Take pictures and videos. I Favorites: View your Favorites, see page 66. Setting the language and date/time, , then press OK. Date & Time: 1 Press OK. to change. for previous/next field. 2 Press OK to accept. 3 www.kodak.com/go/support - Kodak P712 | User Manual - Page 11
card to conveniently store more pictures and videos. For best results, purchase a Kodak card. NOTE: When using the card for the first time, format it in this camera before taking pictures (see page 49). 2 Notched corner 1 Turn off the camera SD or MMC card (optional) CAUTION: A card can only be - Kodak P712 | User Manual - Page 12
the AE/AF indicator turns green, press the Shutter button completely down. AE/AF indicator: green-successful red-failed failed focus failed exposure 4 Press the Shutter button completely down and release. To stop recording, press and release the Shutter button again. 5 www.kodak.com/go/support - Kodak P712 | User Manual - Page 13
Taking pictures and videos Reviewing a quickview of the picture or video just taken After you take a picture or video, the EVF/LCD screen displays a Quickview for email or as a favorite, or tag a picture for print. To view pictures and videos anytime, see page 12. www.kodak.com/go/support 6 - Kodak P712 | User Manual - Page 14
) When using the EVF/LCD screen as a viewfinder, framing marks indicate where the camera is focusing. For the best pictures, the camera attempts to focus on foreground subjects, even if the subjects are not centered in the scene. 1 Press the Shutter button halfway. When the framing marks turn green - Kodak P712 | User Manual - Page 15
icons, histogram, and camera settings I Highlight/Shadow clipping I No icons I Status icons I No icons Review I Status icons I Picture information I Histogram, highlight/shadow clipping, and camera settings I No icons I Status icons I No icons I Video information www.kodak.com/go/support 8 - Kodak P712 | User Manual - Page 16
icons in liveview (default screen) Flash mode Focus mode Drive mode Date stamp Camera mode Album name Image stabilizer Accessory lens Framing marks Picture size Zoom indicator File type Pictures/time remaining Storage location Battery indicator (flashing=exhausted) AF mode White balance Exposure - Kodak P712 | User Manual - Page 17
. NOTE: You cannot use digital zoom for video recording. You may notice decreased image quality when using digital zoom. The blue slider on the zoom indicator pauses and turns red when the picture quality reaches the limit for an acceptable 4 x 6 in. (10 x 15 cm) print. www.kodak.com/go/support 10 - Kodak P712 | User Manual - Page 18
off the Hot-shoe cover. 2 Mount the flash unit to the Hot shoe. 3 Turn on the external flash unit. The external flash unit is live when connected to the camera. The flash synchronizes at any shutter speed. Refer to your external flash unit user's guide for details. 11 www.kodak.com/go/support - Kodak P712 | User Manual - Page 19
and work with your pictures and videos. Pictures 1 Press Review. (Press again to exit.) 2 View previous/next. View . To save battery power, use the optional Kodak EasyShare camera or printer dock, or Kodak 5-volt AC adapter. (See www.kodak.com/go/p712accessories.) www.kodak.com/go/support 12 - Kodak P712 | User Manual - Page 20
review Use the Set button to create a set of pictures to review and to perform various functions, for example Delete (page 17), Protect (page 16), and Copy (page 58). Single-up 1 Press Review set, press review or turn off the camera. Multi-up 1 Press Review. (Press again kodak.com/go/support - Kodak P712 | User Manual - Page 21
Taking pictures and videos Magnifying a picture during review Use the Zoom lever to magnify your pictures. W/T Magnify 1X-10X. View other parts of the picture. OK Return to 1X. www.kodak.com/go/support 14 - Kodak P712 | User Manual - Page 22
: Your camera screen changes when you press the Status button (see page 8). Video Favorite tag Email tag Selected/ Total number Review mode Album name Video length Protect Video number Image storage location Battery indicator Play/Pause Multi-up 15 Video date display www.kodak.com/go/support - Kodak P712 | User Manual - Page 23
Taking pictures and videos Protecting pictures and videos from deletion 1 Press Review. (Press again to exit.) 2 view previous/next. 3 Press Menu. to highlight , also deletes email addresses, album names, and favorites. To restore them, see EasyShare software Help.) www.kodak.com/go/support 16 - Kodak P712 | User Manual - Page 24
Taking pictures and videos Deleting pictures and videos 1 Press Review. (Press again to exit.) 2 view previous/next. 3 Press Delete. 4 Follow the screen prompts. PICTURE location. NOTE: To delete protected pictures and videos, remove protection before deleting. 17 www.kodak.com/go/support - Kodak P712 | User Manual - Page 25
restart the computer. If you turned off anti-virus software, turn it back on. See the anti-virus software manual for details. For information on the software applications included on the Kodak EasyShare software CD, click the Help button in the Kodak EasyShare software. www.kodak.com/go/support 18 - Kodak P712 | User Manual - Page 26
these and other accessories at a dealer of Kodak products or www.kodak.com/go/p712accessories. Transferring pictures with a USB cable, model U-8 If your package does not include an EasyShare dock, use the USB cable (model U-8) that came with your camera. 1 Turn off the camera. 2 Plug the labeled - Kodak P712 | User Manual - Page 27
directly with or without a computer. For dock compatibility for your camera, see page 22. Purchase this and other accessories at a dealer of Kodak products or www.kodak.com/go/p712accessories. Computer-Click the Help button in the Kodak EasyShare software. Printing from an optional SD or MMC card - Kodak P712 | User Manual - Page 28
the camera to the printer 1 Turn off the camera and printer. 2 Optional: If you have a Kodak 5-volt AC adapter (optional accessory), plug it into the camera and into an electrical outlet. 3 Using a USB cable for your camera, connect the camera to the printer. (See your printer user's guide for - Kodak P712 | User Manual - Page 29
. Dock compatibility for your camera To see which EasyShare camera and printer docks are compatible, visit www.kodak.com/go/dockcompatibility. Purchase camera docks, printer docks, and other accessories at a dealer of Kodak products or www.kodak.com/go/p712accessories. www.kodak.com/go/support 22 - Kodak P712 | User Manual - Page 30
your camera Picture-taking modes Choose the mode that best suits your subjects and surroundings. Use Auto mode for general picture-taking. Use this mode For Mode Switch-Capture and Favorites. Capture Taking pictures and videos. Favorites Viewing your favorites (see page 66). 23 www.kodak.com - Kodak P712 | User Manual - Page 31
priority mode is primarily used to prevent blur when your subject is moving. To prevent camera shake, use a tripod for slow shutter speeds. Use the Command dial and Set button to select and adjust settings (see page 38). Press the Menu button to change other settings. www.kodak.com/go/support 24 - Kodak P712 | User Manual - Page 32
camera Use this mode For Manual Custom Enjoying the highest level of creative control. You can set the aperture, shutter speed, flash Custom Transferring settings you created in another mode to any of the C modes using Copy to Custom (see page 52). Custom Scene Video Point-and-shoot - Kodak P712 | User Manual - Page 33
is fast. Landscape Distant subjects. Flash does not fire unless you turn it on. Auto-focus framing marks (page 7) are not available in Landscape. Night Distant scenery at night. Flash does not fire. Place the camera on a flat, Landscape steady surface or use a tripod. Night Portrait Reduces - Kodak P712 | User Manual - Page 34
Museum Party Quiet occasions, like a wedding or lecture. Flash and sound are disabled. People indoors. Minimizes red eye. Snow Bright snow scenes. Beach Bright beach scenes. Fireworks Flash does not fire. Place the camera on a flat, steady surface or use a tripod. 27 www.kodak.com/go/support - Kodak P712 | User Manual - Page 35
stitch them together. After you take 3 pictures, the pictures are automatically stitched together. 1 2 3 Take 2 or 3 pictures. Get 1 panoramic picture. NOTE: For printing options, visit the Kodak EasyShare Gallery at www.kodakgallery.com. www.kodak.com/go/support 28 - Kodak P712 | User Manual - Page 36
general picture-taking. (default) Macro AF Landscape Sharpness and detail in pictures at close range. Use available light instead of flash, if possible. The camera automatically sets the focus distance depending on the zoom position. The close-up distances are: Wide angle: 3.9-35.4 in. (10-90 cm - Kodak P712 | User Manual - Page 37
camera Using the drive mode for self-timer, burst, exposure bracketing Some settings may be unavailable in some modes. 1 Press Drive Drive mode Description Single Camera takes one picture yourself into the picture. Place camera on a tripod or flat First Burst Flash forced off. Camera takes a - Kodak P712 | User Manual - Page 38
camera Drive mode Last Burst Flash forced off. Exposure Bracketing 3 Flash forced off. Exposure Bracketing 5 Flash forced off. Time Lapse Description Camera For using exposure compensation with exposure bracketing, see page 38 Camera takes Review (see page 17). 31 www.kodak.com/go/support - Kodak P712 | User Manual - Page 39
Doing more with your camera Determining the burst capacity The quantity of burst depends on the quality mode and the rate of compression. For 2048 x 1536 TIFF 0 Fine 18 Standard 31 Basic 48 1.2 MP 1280 x 960 TIFF 0 Fine 45 Standard 75 Basic 111 www.kodak.com/go/support 32 - Kodak P712 | User Manual - Page 40
Doing more with your camera Using the AE/AF button the settings and prevents someone from accidentally changing them. Use focus lock to obtain exact focus of subject and background and main subject is in shadow. / Use when you want to control both exposure and focus independent of pressing the - Kodak P712 | User Manual - Page 41
Doing more with your camera Taking pictures using the AF lock For special release the Shutter button to recompose the picture. Using the program button You can program this button in Capture and Review. The button is a shortcut to your favorite Program button 3 seconds. www.kodak.com/go/support 34 - Kodak P712 | User Manual - Page 42
Program button in Review, after program setup, allows for direct access to these review functions without navigating the menu. Shortcut menu selections View Album Protect Edit Red-eye reduction Slide show Copy Video date display Multi-up (can also be set at main menu) 35 www.kodak.com/go/support - Kodak P712 | User Manual - Page 43
conditions require flash but do not require Red-eye reduction, the flash may fire only once.) Regardless of the shutter speed and right after the shutter fully opens. Only useful when slower shutter speeds are used. For other slow-flash settings, see page 52. Never. www.kodak.com/go/support 36 - Kodak P712 | User Manual - Page 44
. Unavailable if flash setting is Off. ISO-controls sensitivity of the camera sensor. Higher settings are more sensitive to light, but may produce unwanted "noise" in a picture. You can use ISO 800 only when you are in the 1.2 MP Picture Size setting (see page 43). 37 www.kodak.com/go/support - Kodak P712 | User Manual - Page 45
Doing more with your camera Changing PASM or C1, C2, C3 mode settings PASM and C modes control the f-number (aperture), shutter speed, exposure compensation, and flash compensation. 1 Turn the Mode dial to P, A, S, M, or C1, C2, C3. 2 Use the Command dial and Set button: I Turn the Command dial - Kodak P712 | User Manual - Page 46
Doing more with your camera Using exposure metering Choose a metering system in PASM or C modes for the of 25 selected screen locations. If used with Selectable Focus Zone (see page 51) they track together. Use to move the cross-hair graphic to the desired zone. 39 www.kodak.com/go/support - Kodak P712 | User Manual - Page 47
the menu. You can also use the Command dial to adjust manual settings in PASM modes, see page 38. Function buttons that provide rapid setting changes: • Flash button (page 36) • Drive button (page 30) • Focus button (page 29) • Exposure metering button (page 39) www.kodak.com/go/support 40 - Kodak P712 | User Manual - Page 48
your camera Using the histogram In Capture or Review, the the Status button to turn the histogram on/off. shadows shaded bar mid-tones highlights Using highlight/shadow clipping In Review, you can view the Status button to turn the Highlight/ Shadow clipping on/off. Shadows appear in blue - Kodak P712 | User Manual - Page 49
customizing your camera settings. I Capture + for advanced picture-taking settings. (Only available in PASM and C settings.) 3 Move the Joystick the OK button. to highlight the setting you wish to change, then press 4 Choose an option, then press the OK button. www.kodak.com/go/support 42 - Kodak P712 | User Manual - Page 50
Doing more with your camera Still menu options Capture Some settings are unavailable in Auto and SCN modes. Setting Icon Picture Size Choose a picture . 1.2 MP-for printing 4 x 6 in. (10 x 15 cm) prints, emailing, Internet, screen display, or for conserving space. 43 www.kodak.com/go/support - Kodak P712 | User Manual - Page 51
your camera Setting file for printing, see page 55. TIFF- Uncompressed format used for saving highly detailed image data. Ideal for software programs High Color Natural Color (default) Low Color Black & White Sepia NOTE: EasyShare software lets you change a color picture to black & white or sepia. - Kodak P712 | User Manual - Page 52
Length Choose a video duration. This setting remains until you turn off the camera. AF Control Choose an auto-focus setting. This setting 15, or 30 seconds Continuous AF (default)-uses external AF sensor and TTL-AF (Through-The-Lens). Because the camera is always focusing, there is no need to - Kodak P712 | User Manual - Page 53
4, or 5 On Off (default) Auto (default)-the camera uses the card if one is in the camera. If not, the camera uses internal memory. Internal Memory -the camera always uses internal memory, even if a card is installed. Pre- is off. AE lock (default) AF lock AE/AF lock www.kodak.com/go/support 46 - Kodak P712 | User Manual - Page 54
Quickview Change Quickview default to on or off. (For more information, see page 6.) Advanced Digital Zoom Choose how digital zoom is deployed. Camera Sounds Choose an overall theme or individual sounds. Sound Volume Turn off all sounds, or choose a volume level. Options See page 34. See page 35 - Kodak P712 | User Manual - Page 55
descriptions remain active.) Accessory Lens Ensure proper AF accessory lens use. Date & Time Set the date and time. Video Out Choose the regional setting that lets you connect the camera to a television or other external device. External Flash Choose an external flash setting. EVF/LCD Stand - Kodak P712 | User Manual - Page 56
Doing more with your camera Setting Icon Options Format CAUTION: Formatting deletes all pictures and videos, including those that imager pixel so that when a picture is taken, variations are corrected. About View camera information. Camera name and firmware version. 49 www.kodak.com/go/support - Kodak P712 | User Manual - Page 57
Doing more with your camera PASM and C1, C2, C3 cast of fluorescent lighting. Ideal for indoor pictures under fluorescent lighting without flash. Click WB - captures a representative white surface for a more balance icons. Registration-saves white balance settings. www.kodak.com/go/support 50 - Kodak P712 | User Manual - Page 58
camera (default)-uses external AF sensor and TTL-AF (Through-The-Lens). Because the camera is always focusing, there is no need to press the Shutter button halfway down to focus. Single AF -uses the picture is needed. Selectable Zone-use to move to any of 25 focus - Kodak P712 | User Manual - Page 59
to enhance the detail and a flash for the subject. Front Sync Redeye -Front-curtain sync and Red-eye are camera on a flat surface or tripod. Custom modes on the Mode dial: Program (default) Aperture Priority Shutter Priority Manual Available only in C1, C2, and C3 modes. www.kodak.com/go/support - Kodak P712 | User Manual - Page 60
Editing functions for Still and Video This camera has editing capabilities for both still and video. 1 Press Review. (Press again to exit.) 2 to locate a picture or video. 3 Press Menu. 4 to I Merge-put two compatible videos together (the reverse of split). 53 www.kodak.com/go/support - Kodak P712 | User Manual - Page 61
. Press Menu button to exit menu The picture is copied, then cropped. The original picture is saved. A cropped picture cannot be cropped again on the camera. Cropped pictures take up space in the internal memory or on a card. www.kodak.com/go/support 54 - Kodak P712 | User Manual - Page 62
taken with your camera. The original file is not affected. RAW files provide 3 advantages: I A digital negative for file authenticity I Ability to correct exposure after capture I Ability to adjust tonal qualities after capture 1 Press Review kodak.com/go/support - Kodak P712 | User Manual - Page 63
repeatedly to view picture/video information. Using the review menu In Review, press the Menu button to access review functions. View Album Protect Edit Redeye Reduction (only JPEG) Slide Show Copy Raw File Develop (only RAW) Video Date Display (only Video) Multi-up www.kodak.com/go/support 56 - Kodak P712 | User Manual - Page 64
camera Making a video action print or picture Video action picture From a video, you can make a 4-, 9-, or 16-up picture. 4-up 9-up 16-up 1 Press the Review 2, 7, or 14 equally spaced frames). Manual You choose the first and last frames. Full Manual You choose all frames. 4 Follow the - Kodak P712 | User Manual - Page 65
. I The camera's picture storage location is set to the location from which you are copying. See Image Storage, page 46. Copy pictures or videos: 1 Press the Review button, then press the Menu button. 2 Move to . To apply protection to a picture or video, see page 16. www.kodak.com/go/support 58 - Kodak P712 | User Manual - Page 66
a slide show on a television or on any external device, see page 60. To save battery power, use an optional Kodak 5-volt AC adapter. (Visit www.kodak.com/go/p712accessories.) Starting the slide show 1 Press the Review button, then press the Menu button. 2 Move to highlight Slide Show , then press - Kodak P712 | User Manual - Page 67
or until battery power is camera USB, A/V Out port to the television video-in port (yellow) and audio-in port (white). See your television user's guide for details. 2 Review pictures and videos on the television. Pre-tagging for album names Use Use Kodak EasyShare software that came with your camera - Kodak P712 | User Manual - Page 68
software Help for details. Tagging pictures/videos for albums Use the Album feature in Review mode to tag the pictures and videos in your camera with album names. First-on your computer Use Kodak EasyShare software that came with your camera to create album names on your computer, then copy - Kodak P712 | User Manual - Page 69
Doing more with your camera Second-on your camera 1 Press the Review button, then locate the picture or video. 2 Press Kodak EasyShare software opens and categorizes your pictures and videos in the appropriate album folder. See Kodak EasyShare software Help for details. www.kodak.com/go/support - Kodak P712 | User Manual - Page 70
Doing more with your camera Sharing your pictures When your pictures/videos are after you take a picture/video, during Quickview (see page 6). I After pressing the Review button (see page 12). Tagging pictures for printing NOTE: RAW and TIFF files are not the menu. 63 www.kodak.com/go/support - Kodak P712 | User Manual - Page 71
(10 x 15 cm) prints, set the camera to the 6.3 MP (3:2) print quality setting. See page 43. Tagging pictures and videos for emailing First-on your computer Use Kodak EasyShare software to create an email address book on your Selected addresses are checked when you exit. www.kodak.com/go/support 64 - Kodak P712 | User Manual - Page 72
them to the addresses you specified. For details, click the Help button in the Kodak EasyShare software. Tagging pictures as favorites You can preserve your favorite pictures in the Favorites section of your camera's internal memory, then share them with friends and family. NOTE: When you transfer - Kodak P712 | User Manual - Page 73
. Use Camera Favorites in the EasyShare software to customize the size of your camera Favorites section. Videos tagged as favorites remain in the Favorites folder in the EasyShare software. For more information, click the Help button in the Kodak EasyShare software. www.kodak.com/go/support 66 - Kodak P712 | User Manual - Page 74
the Camera Favorites Album for your camera. 4 Click Remove Album. The next time you transfer pictures from your camera to the computer, use the Camera Favorites Wizard/Assistant to either recreate your Camera Favorites Album or to turn off the Camera Favorites feature. 67 www.kodak.com/go/support - Kodak P712 | User Manual - Page 75
Doing more with your camera Printing and emailing favorites 1 Turn the Mode switch to Favorites 2 Press the Share button. . Move button. NOTE: Favorites that were taken on this camera (not imported from another source) are good for prints up to 4 x 6 in. (10 x 15 cm). www.kodak.com/go/support 68 - Kodak P712 | User Manual - Page 76
5 Troubleshooting Camera problems For step-by-step product support, visit www.kodak.com/go/p712support and select Interactive Troubleshooting and Repairs. If... Try one or more of the following Camera does not turn on Camera does not turn off and the lens does not retract Camera buttons and - Kodak P712 | User Manual - Page 77
; then turn the camera off then back on. I If all else fails, get customer support help (see page 76). Memory card not recognized or camera freezes with card. I Card may be corrupted. Format card in camera (see page 49). Data will be erased if formatted. I Use another memory card. www.kodak.com - Kodak P712 | User Manual - Page 78
Troubleshooting Computer/connectivity problems If... Try one or more of the following Computer does not I Insert a charged battery (page 2). communicate with I Turn on the camera. the camera I Make sure proper USB cable is securely connected on camera and computer port (page 19). (If using - Kodak P712 | User Manual - Page 79
Troubleshooting Picture quality problems If... Try one or more of the following Picture is too dark I Reposition camera for more available light. or underexposed I Use Fill flash (page 36) or change your position so light is not behind the subject. I Move so that the distance between you and the - Kodak P712 | User Manual - Page 80
if you are outside of the close-up focus specification. I Make sure camera is not in Telephoto mode if you are closer than the telephoto focus specification. I Place the camera on a flat, steady surface or use a tripod, especially in high-zoom settings or in low light. 73 www.kodak.com/go/support - Kodak P712 | User Manual - Page 81
camera have power (page 21). Camera or printer display an I Follow the prompts to resolve the issue. error message. Still having problems? Visit www.kodak.com/go/p712support, or see Helpful links, page 75. For Direct printing issues, contact the printer manufacturer. www.kodak.com/go/support - Kodak P712 | User Manual - Page 82
/go/contact Get support for your product (FAQs, www.kodak.com/go/p712support troubleshooting information, arrange for repairs, etc.) Purchase camera accessories (camera www.kodak.com/go/p712accessories docks, printer docks, lenses, cards, etc.) Download the latest camera firmware www.kodak.com/go - Kodak P712 | User Manual - Page 83
you have questions concerning this product, you may speak with Kodak customer support. Australia 1800 147 701 Hong Kong 800 901 514 Spain 91 749 76 53 Austria 0179 567 357 069 5007 0035 Russia 007 (095) 929 9166 Greece 00800 441 40775 Singapore 800 6363 036 www.kodak.com/go/support 76 - Kodak P712 | User Manual - Page 84
specifications For more specifications, visit www.kodak.com/go/p712support. Kodak EasyShare P712 zoom digital camera CCD (charge-coupled device) CCD 1/2.5 in. CCD, 7.4 MP, 4:3 aspect ratio Camera effective pixels 7.1 MP Output image size 7.1 MP: 3072 x 2304 pixels 6.3 MP (3:2): 3072 x 2048 - Kodak P712 | User Manual - Page 85
Kodak EasyShare P712 zoom digital camera Combined zoom mode Lens protection Lens cap and tether Lens thread Yes (inside lens ring Flash Electronic flash (auto flip-up) Guide no. 11 (@ ISO 100) Working range: 2.9-17.4 ft (0.9-5.3 m) @ Wide 6.6-15.4 ft (2.0-4.7 m) @ Tele www.kodak.com/go/support - Kodak P712 | User Manual - Page 86
Appendix Kodak EasyShare P712 zoom digital camera Flash modes Auto, Fill, Red-eye, Slow sync (front, front red-eye, rear curtain), Off External flash Extended flash range with Kodak external flash unit: Guide no. 37 (working range 43 ft (13 m) @ ISO 100, f/2.8, Wide) Guide no. 100 (working - Kodak P712 | User Manual - Page 87
Appendix Kodak EasyShare P712 zoom digital camera Power Kodak Li-Ion rechargeable digital camera battery KLIC-5001 (or equivalent); 5V AC adapter, optional Communication with computer/TV USB 2.0 (PIMA 15740 protocol), via USB, 8-pin cable (Model U-8), EasyShare camera dock or printer dock, AV - Kodak P712 | User Manual - Page 88
25 31 49 117 46 51 64 100 237 89 100 125 195 462 512 MB SD/MMC 184 206 257 403 952 81 www.kodak.com/go/support - Kodak P712 | User Manual - Page 89
/MMC 128 MB SD/MMC 256 MB SD/MMC 512 MB SD/MMC Number of RAW pictures 7.1 MP (3072 x 2304 resolution) 2 2 5 10 19 40 www.kodak.com/go/support 82 - Kodak P712 | User Manual - Page 90
. 7 sec. 1 min. 52 sec. 2 min. 17 sec. 3 min. 47 sec. 4 min. 28 sec. 7 min. 23 sec. 9 min. 12 sec. 15 min. 14 sec. 83 www.kodak.com/go/support - Kodak P712 | User Manual - Page 91
no action for The camera To turn it back on 15, 30 seconds; 1, 2 minutes EVF/LCD screen turns off. Press any button. 3, 5, 10, 15 or 30 minutes Enters auto power off. Turn camera Off/On. NOTE: See EVF/LCD Stand By and Auto Power Off in Setup on page 48. Appendix www.kodak.com/go/support 84 - Kodak P712 | User Manual - Page 92
P20 zoom flash Provides specialized lighting. It mounts to the camera hot shoe. Check our Web site for the entire listing (batteries & chargers, memory cards, tripods, camera bags, travel kits, cartridge & photo paper kit, camera docks, printer docks, lenses, etc.) 85 www.kodak.com/go/support - Kodak P712 | User Manual - Page 93
observe all instructions of the airline. CAUTION: Do not disassemble this product; there are no user-serviceable parts inside. Refer servicing to qualified service personnel. Do not expose this product to liquid, moisture, or extreme temperatures. Kodak AC adapters and battery chargers are intended - Kodak P712 | User Manual - Page 94
health-related information, contact your local Kodak Customer Service representative. I Dispose of batteries according to local and national regulations. I Do not charge non-rechargeable batteries. For more information on batteries, see www.kodak.com/go/batterytypes. 87 www.kodak.com/go/support - Kodak P712 | User Manual - Page 95
' 3.7V Li-Ion rechargeable batteries are compatible with the camera. Damage caused by unauthorized accessories is not covered under warranty. Optional battery: You can use a Kodak Li-Ion rechargeable digital camera battery, KLIC-5000, but it is a lower power battery. Expect approximately 30% fewer - Kodak P712 | User Manual - Page 96
pictures, and charges the included Kodak Li-Ion rechargeable battery. Kodak 5-volt AC adapter-powers your camera. IMPORTANT: Do not use the AC adapter included with the Kodak EasyShare printer dock to power your camera. Upgrading your software and firmware Download the latest versions of the - Kodak P712 | User Manual - Page 97
does not apply to the battery(s) used in digital cameras or accessories. This warranty does not cover circumstances beyond Kodak's control, nor problems caused by failure to follow the operating instructions in the Kodak digital cameras and accessories User's Guides. THIS WARRANTY DOES NOT APPLY - Kodak P712 | User Manual - Page 98
Appendix ACCIDENT, ALTERATION, MODIFICATION, UNAUTHORIZED SERVICE, MISUSE, ABUSE, USE WITH INCOMPATIBLE ACCESSORIES OR ATTACHMENTS, FAILURE TO FOLLOW KODAK'S OPERATION, MAINTENANCE OR REPACKING INSTRUCTIONS, FAILURE TO USE ITEMS SUPPLIED BY KODAK (SUCH AS ADAPTERS AND CABLES), OR CLAIMS MADE AFTER - Kodak P712 | User Manual - Page 99
Appendix Regulatory compliance FCC compliance and advisory Kodak EasyShare P712 zoom digital camera This equipment has been tested and found to comply with the limits for a Class B digital device, pursuant to Part 15 of the FCC Rules. These limits are designed to provide reasonable protection - Kodak P712 | User Manual - Page 100
N137 Canadian DOC statement DOC Class B Compliance-This Class B digital apparatus complies with Canadian ICES-003. Observation des normes-Classe as unsorted municipal waste. Contact your local authorities or go to www.kodak.com/go/recycle for recycling program information. Korean Class B ITE English - Kodak P712 | User Manual - Page 101
radio interference. Install and use the equipment according to the instruction manual. MPEG-4 Use of this product in any manner that complies with the MPEG-4 visual standard is prohibited, except for use by a consumer engaging in personal and non-commercial activities. www.kodak.com/go/support 94 - Kodak P712 | User Manual - Page 102
black & white, 44 burst capacity, 32 burst mode, 30, 31, 79 button AE/AF, ii delete, 6 drive, i exposure metering, i flash, i focus, i menu, ii program, i review, ii, 12 set, ii share, ii shutter, i status, ii C C1, C2, C3, 37, 38 cable audio/video, 60 camera accessories, 85 www.kodak.com/go/support - Kodak P712 | User Manual - Page 103
mode, 44 combined zoom, 78 command dial, for rapid setting changes, ii, 40 computer connecting camera, 18 transfer to, 18 connector dock, ii continuous AF, 45, 51 continuous shooting, 30, 31 contrast, 51 copy pictures card to memory, 58 memory to card, 58 www.kodak.com/go/support Index to computer - Kodak P712 | User Manual - Page 104
, 36 fill flash, 36 off flash, 36 slow sync, 36 flash settings, 36 flash-to-subject distance, 11 flip-up flash, 11 flower, 27 fluorescent white balance, 50 focus button, i focus framing marks, 7 focus mode close-up, 29 landscape, 29 manual, 29 normal AF, 29 focus modes, 29 www.kodak.com/go/support - Kodak P712 | User Manual - Page 105
44 K Kodak EasyShare software installing, 18 upgrading, 89 Kodak web sites, 75 Korean Class B ITE, 93 L landscape scene mode, 26 language, 4, 48 LCD brightness, 46 LCD screen, ii LCD/EVF, rate & field-of-view, 77 LED indicator, i lens, i, 77 cleaning lens, 89 lens aperture, 37 light battery charger - Kodak P712 | User Manual - Page 106
Index battery, 2 SD/MMC card, 4 software, 18 locking AE/AF, 33 low color, 44 M Macintosh, installing software on, 18 magnifying a picture, 14 maintenance, camera, 89 manner, 27 manual, 25 memory inserting card, 4 storage capacities, 81 menu button, ii microphone, i mode description, 47 mode dial, i, - Kodak P712 | User Manual - Page 107
, 26 power, i auto off, 84 camera, 3 power, battery, 80 preset album, 46 printer dock, 20, 89 printing from a card, 20 optimizing printer, 75 order online, 20 PictBridge, 21 tagged pictures, 20 with EasyShare printer dock, 20 program button, i, 24 program button capture, 47 program button review, 47 - Kodak P712 | User Manual - Page 108
setup mode, using, 46 share button, ii sharpness, 51 shutoff, auto, 84 shutter button, i shutter speed, 37, 78 shutter, problems, 70 single AF, 45, 51 size, camera, 80 sleep mode, 84 slide show continuous loop, 60 problems, 71 running, 59 slow sync, 52 snow, 27 software installing, 18 upgrading, 89 - Kodak P712 | User Manual - Page 109
battery guidelines, 88 care & maintenance, 89 transfer, via USB cable, 18 trash can, deleting, 6 tripod socket, ii troubleshooting, 69 tungsten white balance, 50 turning camera on and off, 3 U upgrading software, firmware, 89 URLs, Kodak web sites, 75 www.kodak.com/go/support , 16 reviewing, 12 - Kodak P712 | User Manual - Page 110
Index Z zoom combined, 78 digital, 10 optical, 10 zoom lever, ii, 10 103 www.kodak.com/go/support
-
 1
1 -
 2
2 -
 3
3 -
 4
4 -
 5
5 -
 6
6 -
 7
7 -
8
-
9
-
10
-
11
-
12
-
13
-
14
-
15
-
16
-
17
-
18
-
19
-
20
-
21
-
22
-
23
-
24
-
25
-
26
-
27
-
28
-
29
-
30
-
31
-
32
-
33
-
34
-
35
-
36
-
37
-
38
-
39
-
40
-
41
-
42
-
43
-
44
-
45
-
46
-
47
-
48
-
49
-
50
-
51
-
52
-
53
-
54
-
55
-
56
-
57
-
58
-
59
-
60
-
61
-
62
-
63
-
64
-
65
-
66
-
67
-
68
-
69
-
70
-
71
-
72
-
73
-
74
-
75
-
76
-
77
-
78
-
79
-
80
-
81
-
82
-
83
-
84
-
85
-
86
-
87
-
88
-
89
-
90
-
91
-
92
-
93
-
94
-
95
-
96
-
97
-
98
-
99
-
100
-
101
-
102
-
103
-
104
-
105
-
106
-
107
-
108
-
109
-
110
 |
 |

Kodak EasyShare P712
zoom digital camera
User’s guide
www.kodak.com
For interactive tutorials,
www.kodak.com/go/howto
For help with your camera,
www.kodak.com/go/p712support