Kodak Z915 User Manual
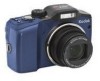
Kodak Z915 - EASYSHARE Digital Camera Manual
 |
UPC - 041771699765
View all Kodak Z915 manuals
Add to My Manuals
Save this manual to your list of manuals |
Kodak Z915 manual content summary:
- Kodak Z915 | User Manual - Page 1
KODAK EASYSHARE Z915 Digital Camera Extended user guide www.kodak.com For interactive tutorials, visit www.kodak.com/go/howto For help with your camera, visit www.kodak.com/go/z915support - Kodak Z915 | User Manual - Page 2
Eastman Kodak Company Rochester, NY 14650 © Kodak, 2009 All screen images are simulated. Kodak, EasyShare, and Perfect Touch are trademarks of Eastman Kodak Company. P/N 4H5245_en - Kodak Z915 | User Manual - Page 3
10 Strap post 11 Share button 12 , OK 13 Delete/Menu/Info/Review buttons For batteries, see page 1. For SD/SDHC cards, see page 3. www.kodak.com/go/support i - Kodak Z915 | User Manual - Page 4
Product features Front view 4 1 2 3 1 Flash 2 Self-timer/Video/AF Assist light 3 Lens/Cover 4 Microphone ii www.kodak.com/go/support - Kodak Z915 | User Manual - Page 5
Using the self-timer 11 Using burst 11 Taking panoramic pictures 12 Getting help from your camera 13 P, A, S, and M modes 14 Using exposure compensation to adjust brightness 16 Using sound tags 22 Cropping pictures 23 Using KODAK PERFECT TOUCH Technology 24 www.kodak.com/go/support iii - Kodak Z915 | User Manual - Page 6
46 7 Getting help 51 Helpful links 51 8 Appendix 53 Camera specifications 53 Storage capacities 55 Important safety instructions 56 Upgrading your software and firmware 57 Battery life 57 Care and maintenance 58 Limited warranty 58 Regulatory compliance 60 iv www.kodak.com/go/support - Kodak Z915 | User Manual - Page 7
1 Setting up your camera Attaching the strap Loading the batteries Other battery types see page 57 Purchase accessories, such as batteries, www.kodak.com/go/z915accessories battery chargers, SDHC cards, etc. www.kodak.com/go/support 1 - Kodak Z915 | User Manual - Page 8
the camera Setting the language, date/time Language: to change. OK to accept. Date/Time: At the prompt, press OK. to change current field. for previous/next field. OK to accept. NOTE: To change language or date/time in the future, use the Setup menu (see page 37). 2 www.kodak.com/go/support - Kodak Z915 | User Manual - Page 9
; forcing it may cause damage. Inserting or removing a card when the camera is on may damage the pictures, the card, or the camera. 1 Turn off the camera. 2 Insert or remove the optional card. 3 Turn on the camera. Purchase accessories www.kodak.com/go/z915accessories www.kodak.com/go/support 3 - Kodak Z915 | User Manual - Page 10
camera is not focusing on the desired subject, release the Shutter button and recompose the scene. 2 Press the Shutter button completely down to take the picture. NOTE: Framing marks do not appear in all modes. Multiple framing marks may appear when faces are detected. 4 www.kodak.com/go/support - Kodak Z915 | User Manual - Page 11
button halfway.) The picture/video is saved unless you press the Delete button. Delete Play a video To review pictures/videos anytime, see page 18. www.kodak.com/go/support 5 - Kodak Z915 | User Manual - Page 12
are detected. ■ The scene is analyzed for other content and for lighting. ■ KODAK PERFECT TOUCH Technology is applied, for better pictures. You can choose the best picture size control. (See page 14). A Aperture S Shutter M Manual Video Video with sound. (See page 5.) 6 www.kodak.com/go/support - Kodak Z915 | User Manual - Page 13
Portrait Reducing red eye of people in night scenes or low-light conditions. Place the camera on a flat, steady surface or use a tripod. Candle light Capturing the ambiance light displays. Flash does not fire. Place the camera on a flat, steady surface or use a tripod. www.kodak.com/go/support 7 - Kodak Z915 | User Manual - Page 14
see Camera specifications, Digital zoom is not available in Smart Capture mode. NOTE: You may notice decreased image quality when using digital zoom. The slider on the LCD turns red when the picture quality reaches the limit for an acceptable 4 x 6-in. (10 x 15 cm) print. 8 www.kodak.com/go/support - Kodak Z915 | User Manual - Page 15
mode.) Red-eye Reduction Preflash Choose Preflash or Digital Correction using the Setup menu (see page 35). Digital Correction A preflash fires, shrinking the eye pupil, before the picture is taken. A preflash does not fire; the camera corrects red eye. Off Never. www.kodak.com/go/support 9 - Kodak Z915 | User Manual - Page 16
cm (4.7-23.6 in.) from the lens. 2 Press the Shutter button halfway to focus and set exposure, then completely down to take the picture. 10 www.kodak.com/go/support - Kodak Z915 | User Manual - Page 17
or to ensure a steady Shutter button press. Place the camera on a tripod or flat surface. 1 Repeatedly press the Shutter button halfway, then completely down. The camera takes the picture/pictures after the delay. Use and hold it to take pictures. The camera takes up to 3 pictures while the Shutter - Kodak Z915 | User Manual - Page 18
2 pictures, press OK to stitch them together. After you take 3 pictures, the pictures are automatically stitched together. Take 2 or 3 pictures. Get 1 panoramic picture. 12 www.kodak.com/go/support - Kodak Z915 | User Manual - Page 19
nothing else about your camera, learn how to use on-camera Help. Because the more you know your camera, the more confident you become! Turning on camera Help 1 Press the Menu button, then highlight a menu choice. 2 Press the Info button. Scroll through a Help topic www.kodak.com/go/support 13 - Kodak Z915 | User Manual - Page 20
The camera automatically sets the compensation aperture for proper exposure. (To prevent blur, use a tripod for slow shutter speeds.) Manual mode offers modes or turn off the camera. Use Reset Camera (see page 37) to reset P, A, S, or M mode to its default setting. 14 www.kodak.com/go/support - Kodak Z915 | User Manual - Page 21
take the picture.) ISO Flash compensation Exposure compensation Shutter speed Aperture ISO-adjust the camera's sensitivity to light. Higher ISO indicates greater sensitivity. NOTE: A higher ISO keeps the main subject sharp; good for landscapes and well-lit conditions. www.kodak.com/go/support 15 - Kodak Z915 | User Manual - Page 22
compensation is set to: interval is set to 0.3 steps: taken are: 0.0 Set the Exposure Bracketing Interval -0.3, 0.0, +0.3 +1.0 in the Capture+ menu (see page 35). +0.7, +1.0, +1.3 -1.0 -1.3, -1.0, -0.7 16 www.kodak.com/go/support - Kodak Z915 | User Manual - Page 23
Understanding the picture-taking icons Focus mode Self timer Flash mode Capture mode Pictures/time remaining Zoom slider Tag name Battery level Date stamp www.kodak.com/go/support 17 - Kodak Z915 | User Manual - Page 24
30. Magnifying a picture during review 1 Press + to magnify 1X-8X. 2 Press to view other parts of a picture. ■ Press OK to return to 1X. 18 www.kodak.com/go/support - Kodak Z915 | User Manual - Page 25
use Undo Delete to retrieve it. This feature is only available immediately after you delete a single picture/video while in Review (not during a Quickview). www.kodak.com/go/support 19 - Kodak Z915 | User Manual - Page 26
or an SD or SDHC Card deletes all (including protected) pictures/videos. (Formatting internal memory also deletes email addresses, tag names, and favorites.) IMPORTANT: Your camera offers a built-in Help system. See page 13. 20 www.kodak.com/go/support - Kodak Z915 | User Manual - Page 27
Review button, then the Menu button. 2 Press to choose a tab: ■ Review to view pictures/videos ■ Edit to edit pictures/videos ■ Setup for other camera settings NOTE: You may need to scroll up to highlight the current tab before you can choose another tab. 3 Press to highlight a setting, then - Kodak Z915 | User Manual - Page 28
press OK. 4 Follow the screen prompts. The sound tag is applied to your picture. ■ Press the Menu button to exit the menu. IMPORTANT: Your camera offers a built-in Help system. See page 13. Playing a sound tag 1 Press the Review button, then to find a picture with a "Play Sound Tag" prompt - Kodak Z915 | User Manual - Page 29
screen prompts. The picture is cropped, the original saved. (Cropped pictures cannot be cropped again.) ■ Press the Menu button to exit the menu. IMPORTANT: Your camera offers a built-in Help system. See page 13. www.kodak.com/go/support 23 - Kodak Z915 | User Manual - Page 30
Working with pictures/videos Using KODAK PERFECT TOUCH Technology KODAK PERFECT TOUCH Technology helps ensure better, brighter pictures. PERFECT TOUCH . ■ Press the Menu button to exit the menu. IMPORTANT: Your camera offers a built-in Help system. See page 13. 24 www.kodak.com/go/support - Kodak Z915 | User Manual - Page 31
is created. (The original video is saved.) ■ Press the Menu button to exit the menu. IMPORTANT: Your camera offers a built-in Help system. See page 13. Trimming a video You can delete an unwanted portion from the original.) ■ Press the Menu button to exit the menu. www.kodak.com/go/support 25 - Kodak Z915 | User Manual - Page 32
finished adding up to 9 bookmarks, press . ■ Press the Menu button to exit the menu. IMPORTANT: Your camera offers a built-in Help system. See page 13. Using bookmarks 1 Press the Review video. button, then to To return to normal view, press the Telephoto (T) button. 26 www.kodak.com/go/support - Kodak Z915 | User Manual - Page 33
Auto options: The camera includes the first and last frames, then 2, 7, or 14 equally spaced frames. ■ Manual: You choose the first and last frames; the camera chooses 2, 7, or button to exit the menu. IMPORTANT: Your camera offers a built-in Help system. See page 13. www.kodak.com/go/support 27 - Kodak Z915 | User Manual - Page 34
the slide show, press OK. After the slide show plays, you may save or modify it. IMPORTANT: Your camera offers a built-in Help system. See page 13. To show selected pictures/videos 1 Press the Review button. After the slide show plays, you may save or modify it. 28 www.kodak.com/go/support - Kodak Z915 | User Manual - Page 35
pictures/videos on a television You can display pictures/videos on a television, computer monitor, or any device equipped with a video input. To connect the camera to a television, use an A/V cable (may be sold separately). NOTE: Ensure that the Video Out setting (NTSC or PAL) is correct (see page - Kodak Z915 | User Manual - Page 36
appears on the picture. You can now print or delete the selected pictures. You can press OK a second time to remove a check mark. 30 www.kodak.com/go/support - Kodak Z915 | User Manual - Page 37
or from internal memory to a card. NOTE: Before you copy, make sure that a card is inserted in the camera. Copy pictures/videos: 1 Press the Review button, then the Menu button. 2 Press to highlight Copy, then press tag Text tag name Battery level Date stamp www.kodak.com/go/support 31 - Kodak Z915 | User Manual - Page 38
Size See Camera specifications, page 53. Choose a picture resolution. Video Size Available only in Video mode. VGA (640 x 480)-medium quality and file size. (4 GB maximum video size.) QVGA (320 x 240)-lower quality; smallest file size. (4 GB maximum video size.) 32 www.kodak.com/go/support - Kodak Z915 | User Manual - Page 39
Sepia NOTE: EASYSHARE Software also lets you change a color picture to black-and-white or sepia. Unavailable in Video mode. AF Control Choose an auto-focus setting. Available only in SCN, P, A, S, M, and Video modes. Continuous AF-because the camera kodak.com/go/support 33 - Kodak Z915 | User Manual - Page 40
See page 16. Sharpness High Control picture sharpness. Normal Available only in P, A, S, M and Low Panorama modes. Histogram On Turn histogram on/off. Off 34 www.kodak.com/go/support - Kodak Z915 | User Manual - Page 41
EASYSHARE network. Software to choose a preferred online service. LCD Brightness 1, 2, 3, 4, 5-dimmest to brightest. (Use a dimmer setting to save battery power.) Image Storage Choose a storage location for pictures/videos. Auto-the camera Tag Name 2 See page 42. www.kodak.com/go/support 35 - Kodak Z915 | User Manual - Page 42
press the Telephoto (T) zoom lever. None-digital zoom is off. Orientation Sensor For pictures-On, On Transfer, Off Orient pictures so that they are For videos-On, Off displayed with the correct side up. Camera Sounds Turn sounds on/off for individual functions. 36 www.kodak.com/go/support - Kodak Z915 | User Manual - Page 43
The format chosen is used for all date/time features. Auto Power Off Choose inactivity time until camera turns off. 10 minutes 5 minutes 3 minutes 1 minute Video Out Check settings used in your that are protected. the internal memory. About View camera information. www.kodak.com/go/support 37 - Kodak Z915 | User Manual - Page 44
your camera and software. To register later, see www.kodak.com/go/register. 5 If prompted, restart the computer. If you turned off anti-virus software, turn it back on. See the anti-virus software manual for details. For software help, click the Help button in EASYSHARE Software. 38 www.kodak.com - Kodak Z915 | User Manual - Page 45
off the camera. 2 Connect the KODAK USB Cable, Model U-8. 3 Turn on the camera. KODAK EASYSHARE Software opens on KODAK Card Reader to transfer your pictures/videos. Purchase accessories www.kodak.com/go/z915accessories Learn more about connecting www.kodak.com/go/howto www.kodak.com/go/support - Kodak Z915 | User Manual - Page 46
KODAK All-in-One Printer Your camera is compatible with PICTBRIDGE Technology, so you can print directly to PICTBRIDGE enabled Printers. You need a camera with fully charged battery, a PICTBRIDGE enabled Printer one or more sheets of paper.) If the printer is capable, choose a print size. All - Kodak Z915 | User Manual - Page 47
transfer pictures from the camera to your computer, you can print them from EASYSHARE Software. For details, see Help in EASYSHARE Software. Ordering prints online KODAK Gallery (www.kodakgallery.com) is one of the many online print services offered in EASYSHARE Software. You can easily: ■ Upload - Kodak Z915 | User Manual - Page 48
to Capture mode. IMPORTANT: Your camera offers a built-in Help system. See page 13. Printing marked pictures When you transfer the marked pictures to your computer, the EASYSHARE Software print screen opens. For details on printing, see Help in EASYSHARE Software. 42 www.kodak.com/go/support - Kodak Z915 | User Manual - Page 49
to mark pictures so that they're ready to email using KODAK EASYSHARE Software. First, create a new email address. (See "Add a camera keyboard, then press OK. The email address or name is now available. IMPORTANT: Your camera offers a built-in Help system. See page 13. www.kodak.com/go/support - Kodak Z915 | User Manual - Page 50
tag selections, highlight Clear All, then press OK. When you transfer the tagged pictures/videos to your computer, EASYSHARE Software opens and categorizes your pictures/videos with the appropriate tag. IMPORTANT: Your camera offers a built-in Help system. See page 13. 44 www.kodak.com/go/support - Kodak Z915 | User Manual - Page 51
the LCD. The tag is applied to new pictures/videos. When you transfer the tagged pictures/videos to your computer, EASYSHARE Software opens and categorizes your pictures/videos with the appropriate tag. IMPORTANT: Your camera offers a built-in Help system. See page 13. www.kodak.com/go/support 45 - Kodak Z915 | User Manual - Page 52
For step-by-step product support, visit www.kodak.com/go/z915support and select Interactive Troubleshooting & Repairs. Camera problems If Try one or more of the following Camera does not ■ Install new batteries (page 1). turn on. ■ Charge rechargeable batteries. Camera does not ■ Remove the - Kodak Z915 | User Manual - Page 53
Troubleshooting guide. video device. Picture is too light. ■ Move so there is at least 2 ft (0.6 m) between the camera camera is not in Close-up mode. ■ Move so there is at least 2 ft (0.6 m) between the camera ■ Place the camera on a flat, steady m) in telephoto between the camera and the subject. ■ Use - Kodak Z915 | User Manual - Page 54
PERFECT camera, do not apply it again when the picture is on the computer (or TOUCH on a KODAK Picture Kiosk). Technology NOTE: PERFECT TOUCH Technology is automatically applied to pictures taken applied (twice) are in Smart Capture mode. of lower image quality. 48 www.kodak.com/go/support - Kodak Z915 | User Manual - Page 55
Troubleshooting Camera/computer communications If Try one or more of the following Cannot transfer pictures. ■ Disconnect the USB cable. Close all open applications. (The Add New Hardware Wizard Re-install the software (page 38). cannot locate drivers EASYSHARE Software to EASYSHARE Software - Kodak Z915 | User Manual - Page 56
format ■ Transfer the picture to the computer (page 39), or delete it (page 19). Camera error #XXXX. ■ Turn camera off, then back on. If the message reappears, visit See user's guide. www.kodak.com/go/z915support and select Interactive Troubleshooting & Repairs. 50 www.kodak.com/go/support - Kodak Z915 | User Manual - Page 57
on EASYSHARE Software www.kodak.com/go/easysharesw (or click the Help button in EASYSHARE Software) Get help with the WINDOWS Operating System www.kodak.com/go/pcbasics and working with digital pictures Other Get support for other cameras, software, accessories www.kodak.com/go/support Get - Kodak Z915 | User Manual - Page 58
Getting help NOTE: If you have questions concerning this product, you may speak with Kodak customer support. Australia 1800 267 588 Austria 0179 567 357 Belgium 02 713 14 45 Brazil 0800 891 Toll Line +44 131 458 6714 International Toll Fax +44 131 458 6962 52 www.kodak.com/go/support - Kodak Z915 | User Manual - Page 59
built-in Digital zoom-5.0X continuous Combined zoom-50X Shutter speed- Smart Capture mode: 1/8-1/1250 sec. (speed is automatically set by the camera) Shutter Priority and Manual modes: +/- 0.3 EV steps White balance-Auto, Daylight, Tungsten, Fluorescent, Open Shade www.kodak.com/go/support 53 - Kodak Z915 | User Manual - Page 60
m (2-4.3 ft) @ telephoto macro Electronic flash-Auto flash; Guide no. 9.5 @ ISO 100; working range in Smart Capture Program, Aperture Priority, Shutter Priority, Manual, Panorama, Video Drive modes-Single shot -KODAK AA Alkaline, Ni-MH, or Lithium Batteries; KODAK 3-Volt AC Adapter (Visit www.kodak. - Kodak Z915 | User Manual - Page 61
with computer-USB 2.0 high speed (PIMA 15740 protocol) via USB cable model U-8 PICTBRIDGE compatibility-Yes Auto power off-Selectable 1, 3, 5, 10 minutes of video) remaining. For average SD Card capacities, visit www.kodak.com/go/SDcapacities. Actual storage capacity varies depending on subject - Kodak Z915 | User Manual - Page 62
instructions CAUTION: Do not disassemble this product; there are no user-serviceable parts inside. Refer servicing to qualified service personnel. KODAK unlikely event that battery fluid leaks inside the product, contact Kodak customer support. ■ In the unlikely event that battery fluid leaks onto - Kodak Z915 | User Manual - Page 63
software included on the KODAK EASYSHARE Software CD and the camera firmware (the software that runs on the camera). See www.kodak.com/go/z915downloads. Battery life ■ KODAK MAX Alkaline Batteries, AA: < 150 pictures ■ KODAK Ni-MH Rechargeable Digital Camera . When using your camera in cold weather, - Kodak Z915 | User Manual - Page 64
surfaces. ■ Service agreements may be available in your country. Contact a dealer of KODAK Products for more information. ■ For digital camera disposal or eiae.org or the Kodak Web site at www.kodak.com/go/z915support. Limited warranty Kodak warrants its digital cameras and accessories (excluding - Kodak Z915 | User Manual - Page 65
service, misuse, abuse, use with incompatible accessories or attachments (such as third party ink or ink tanks), failure to follow Kodak's operation, maintenance or repacking instructions, failure to use items supplied by Kodak from state to state or by jurisdiction. www.kodak.com/go/support 59 - Kodak Z915 | User Manual - Page 66
tested and found to comply with the limits for a Class B digital device, pursuant to Part 15 of the FCC Rules. These limits and, if not installed or used in accordance with the instructions, may cause harmful interference to radio communications. However, there . 60 www.kodak.com/go/support - Kodak Z915 | User Manual - Page 67
DOC statement DOC Class B Compliance-This Class B digital apparatus complies with Canadian ICES-003. Observation des normes , contact your retailer, collection facility, or appropriate local authorities; or visit www.kodak.com/go/recycle. Product weight: 220 g (7.8 oz) Australian C-Tick N137 Korean - Kodak Z915 | User Manual - Page 68
Appendix China RoHS Russian GOST-R Eastman Kodak Company Rochester, NY 14650 AIO-40 62 www.kodak.com/go/support - Kodak Z915 | User Manual - Page 69
.kodak.com/go/support 1 zoom, 5 C cable audio/video, 11 USB, 2 camera sounds, 5 candle light, 4 capture frame grid, 4 caring for your camera, support, 1, 2 D date setting, 2 date stamp, 4 DC-in, 1 delete button, 1 deleting during quickview, 2 pictures/video, 2 protecting pictures, videos, 3 digital - Kodak Z915 | User Manual - Page 70
Index doing more with your camera, 1 download pictures, 1 E EASYSHARE Software, installing, 1 emailing pictures, videos, 6 error messages, card, 3 software, 1 internal memory, storage capacity, 4 K KODAK EASYSHARE Software installing, 1 upgrading, 4 Kodak Perfect Touch technology, 6 Kodak web sites, - Kodak Z915 | User Manual - Page 71
software on, 1 magnify a picture, 1 maintenance, camera, 6 make picture from video, 7 manner/museum, 4 manual, 11 memory inserting card, 3 storage capacity, 4 mode dial, 3 modes aperture priority, 11 manual 11 www.kodak.com/go/support Index Perfect Touch technology, 6 PICTBRIDGE enabled printer, 3 - Kodak Z915 | User Manual - Page 72
portrait, 5 self-timer, 9 service and support telephone numbers, 2 setting about this camera, 6 advanced digital zoom, 5 AF control, 2 camera sounds, 5 capture frame grid brightness, 4 orientation sensor, 5 picture size, 1 picture taking modes, 3 quickview, 5 reset camera, 6 www.kodak.com/go/support - Kodak Z915 | User Manual - Page 73
loop, 10 problems, 2 running, 9 smart capture, 3 snow, 4 software installing, 1 upgrading, 4 sound volume, 5 sounds, camera, 5 specifications, camera, 1 stage, 5 status, camera ready light, 4 storage capacity, 4 strap, 1 sunset, 4 support, technical, 1, 2 www.kodak.com/go/support Index T tag - Kodak Z915 | User Manual - Page 74
, 8 viewing by multi-up, 12 viewing picture/video after taking, 2, 1 volume, adjusting, 5 W warranty, 6 WEEE, 10 white balance, 2 wide angle button, 1 WINDOWS OS-based computers installing software, 1 Z zoom digital, 5 optical, 5 68 www.kodak.com/go/support
-
 1
1 -
 2
2 -
 3
3 -
 4
4 -
 5
5 -
 6
6 -
 7
7 -
8
-
9
-
10
-
11
-
12
-
13
-
14
-
15
-
16
-
17
-
18
-
19
-
20
-
21
-
22
-
23
-
24
-
25
-
26
-
27
-
28
-
29
-
30
-
31
-
32
-
33
-
34
-
35
-
36
-
37
-
38
-
39
-
40
-
41
-
42
-
43
-
44
-
45
-
46
-
47
-
48
-
49
-
50
-
51
-
52
-
53
-
54
-
55
-
56
-
57
-
58
-
59
-
60
-
61
-
62
-
63
-
64
-
65
-
66
-
67
-
68
-
69
-
70
-
71
-
72
-
73
-
74
 |
 |

KODAK EASYSHARE Z915
Digital Camera
Extended user guide
www.kodak.com
For interactive tutorials, visit
www.kodak.com/go/howto
For help with your camera, visit
www.kodak.com/go/z915support