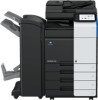
Konica Minolta 300i bizhub 360i/300i Quick Guide
Konica Minolta 300i Manual
 |
View all Konica Minolta 300i manuals
Add to My Manuals
Save this manual to your list of manuals |
Konica Minolta 300i manual content summary:
- Konica Minolta 300i | bizhub 360i/300i Quick Guide - Page 1
Quick Guide Safety Information 1 Before Using this Machine 9 How to Use the HTML User's Guide 11 About This Machine 12 About Panels 18 Loading the Original and Paper 22 Available Operations in this Machine 27 Registering a Destination 31 Read this if You Have a Problem 33 - Konica Minolta 300i | bizhub 360i/300i Quick Guide - Page 2
equipment problems. Make sure that you observe all of the precautions that appear in different sections of this manual. Be sure to observe the safety precautions. This manual contains the instructions that should be strictly observed at all times service representative. bizhub 360i/300i 1 - Konica Minolta 300i | bizhub 360i/300i Quick Guide - Page 3
then call your Technical Representative or your authorized service representative. Make sure that the power cord in a fire or electric shock. 2 When the product has at the locations specified in the User's Guide or other documents. If the unit is bizhub 360i/300i - Konica Minolta 300i | bizhub 360i/300i Quick Guide - Page 4
to follow these instructions could result in a burn. bizhub 360i/300i 1 1.4 Regulation notices About certified model name This product is certified by the following model name in U.S.A., Canada, Mexico, Brazil and Europe: KONICA MINOLTA branded model 302304 (bizhub 360i and bizhub 300i). For other - Konica Minolta 300i | bizhub 360i/300i Quick Guide - Page 5
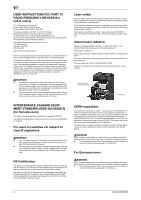
INSTRUCTIONS FCC PART 15 RADIO FREQUENCY DEVICES (for U.S.A. users) FCC: Declaration of Conformity Product Type Multi Function Printer Product Name bizhub 360i, bizhub , including interference that may cause undesired operation. Konica Minolta Business Solutions U.S.A., Inc. 100 Williams Drive Ramsey - Konica Minolta 300i | bizhub 360i/300i Quick Guide - Page 6
of this product will help to conserve natural resources and prevent potential negative consequences for the environment and human health caused by inappropriate waste handling. bizhub 360i/300i 5 - Konica Minolta 300i | bizhub 360i/300i Quick Guide - Page 7
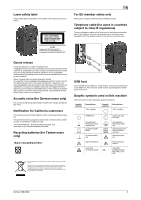
See installation instructions for service. If trouble is experienced with this equipment FK-514 or FK-515, for repair or warranty information, please contact the Konica Minolta Quick Guide. to support pulse problems occur, the user should not contact the Telecom Fault Service bizhub 360i/300i - Konica Minolta 300i | bizhub 360i/300i Quick Guide - Page 8
returning of the leased machine. For details of the overwrite all data function, refer to the User's Guide. Contact your service representative before deleting data. bizhub 360i/300i 1 It is recommended to backup storage periodically as the measures for storage defect. For the detail information - Konica Minolta 300i | bizhub 360i/300i Quick Guide - Page 9
is soiled, please clean to make legible. If you cannot make them legible, or if the caution label or notation is damaged, please contact your service representative. 8 bizhub 360i/300i - Konica Minolta 300i | bizhub 360i/300i Quick Guide - Page 10
; send scanned documents to network scan destinations such as FTP, WebDAV and Email. The intended use also requires that: - The system is used within the limits of device spec- ifications and specifications of optional components, - All safety instructions in the related user's guides are observed - Konica Minolta 300i | bizhub 360i/300i Quick Guide - Page 11
Guide This User's Guide is included in the User's Guide CD. The User's Guide provides basic and detailed information on the functions of this product and also explanations of other various setting functions. 2.5 Symbols and notations used in this manual a procedural instruction. This bizhub 360i/300i - Konica Minolta 300i | bizhub 360i/300i Quick Guide - Page 12
page (Home) allows you to view detailed methods for using the HTML User's Guide. Operating environment Supported operating systems - Microsoft Windows 7 (SP1)/Windows 8.1/Windows 10 Apple Mac OS . The HTML User's Guide uses JavaScript for the page display and search functions. bizhub 360i/300i 11 - Konica Minolta 300i | bizhub 360i/300i Quick Guide - Page 13
small particles (UFP) generated in this machine to prevent them from escaping this machine. 7 Authentication Unit Performs user authentication by scanning vein patterns in the finger. AU-102 The Working Table WT-506 is required to install the Authentication Unit AU-102. 12 bizhub 360i/300i - Konica Minolta 300i | bizhub 360i/300i Quick Guide - Page 14
by scanning information external keyboards, contact your service representa- tive. 12 Security Kit SC-509 Supports the copy guard and supports the punching function. 29 Job Separator JS-506 Install this unit onto the output tray of this machine. This unit sorts printed sheets. bizhub 360i - Konica Minolta 300i | bizhub 360i/300i Quick Guide - Page 15
105. For details on the addable functions, refer to the HTML User's Guide. 12 i-Option LK-111 Allows you to add the ThinPrint function. 13 . 15 i-Option LK-116 Allows you to add the virus scan function. 16 i-Option LK-117 Allows you to add the IP service representative. 14 bizhub 360i/300i - Konica Minolta 300i | bizhub 360i/300i Quick Guide - Page 16
Reverse Automatic Automatically feeds and scans originals by page. This unit scans a 2- Document Feeder sided manual. 2 Left Cover Release Used to open the Left Cover. Lever 3 Left Cover Open the Left Cover when clearing a paper jam. 4 Lateral Guide Adjust this guide bizhub 360i/300i 15 - Konica Minolta 300i | bizhub 360i/300i Quick Guide - Page 17
-connected printer. Tips - The network port of this product is following No.11 and No.12. A port is activated when a network port inserts a cable. 16 bizhub 360i/300i - Konica Minolta 300i | bizhub 360i/300i Quick Guide - Page 18
and has a greater power saving effect. For details on how to use the Power key, refer to HTML User's Guide. NOTICE While printing, do not turn the Main Power Switch off or press the Power key. Otherwise, it may have passed. Not doing so may result in an operation failure. bizhub 360i/300i 17 - Konica Minolta 300i | bizhub 360i/300i Quick Guide - Page 19
mode. For details on how to use the Power key, refer to HTML User's Guide. Indicates the power supply state by the lamp color. • Light-up (blue): Normal state • Flash (blue): Low Power mode or Sleep mode • Light-up (orange): Sub Power OFF • Flash (orange): ErP Auto Power OFF 18 bizhub 360i/300i - Konica Minolta 300i | bizhub 360i/300i Quick Guide - Page 20
is displayed when [Temporarily Change Language] is set to ON. 11 [Utility] Configure settings of this machine or check the use status of this machine. bizhub 360i/300i 19 - Konica Minolta 300i | bizhub 360i/300i Quick Guide - Page 21
machine is left for a certain period of time during login (default: [1] min.), you are logged out automatically. 7 Tap [Yes] on the logout confirmation screen. 20 bizhub 360i/300i - Konica Minolta 300i | bizhub 360i/300i Quick Guide - Page 22
this machine is left for a certain period of time during login (default: [1] min.), you are logged out automatically. 4 Tap [Yes] on the logout confirmation screen. bizhub 360i/300i 21 - Konica Minolta 300i | bizhub 360i/300i Quick Guide - Page 23
function is useful when you want to scan a small original such as a book, magazine, or business card. - Place the original with the scanning side facing down. - Align the original with the mark at the left back of the Original Glass. NOTICE Be careful not to touch the Film. 22 bizhub 360i/300i - Konica Minolta 300i | bizhub 360i/300i Quick Guide - Page 24
Paper Feed Rollers with your hand. 2 Load paper with the print side facing down, then align the Lateral Guide to the paper. % Insert paper into the tray until their edges are pressed against the back. 4 When size setting method and the above, refer to the HTML User's Guide. bizhub 360i/300i 23 - Konica Minolta 300i | bizhub 360i/300i Quick Guide - Page 25
envelopes with the flap part facing up. - Align the Lateral Guide with the envelope size. - Select the desired envelope size from Guide. - Align the Lateral Guide with the envelope size. - Select the desired envelope size from [Envelop/4 e 6] ([Envelop/A6 Card]) of [Paper Size]. 24 bizhub 360i - Konica Minolta 300i | bizhub 360i/300i Quick Guide - Page 26
the tray. - Load postcards with the print side facing down. - Align the Lateral Guide with the postcard size. - Select the desired postcard size from [Envelop/4 e 6] Guide. - Align the Lateral Guide with the postcard size. - Select [4 e 6] ([A6 Card]) from [Paper Size options]. bizhub 360i/300i 25 - Konica Minolta 300i | bizhub 360i/300i Quick Guide - Page 27
print side facing down, load label sheets as shown in the figure. - Align the Lateral Guide with the label sheet size. - Select [Thick 1+] from [Paper Type]. (Not required below. - Align the Lateral Guide with the index sheet size. - Select [Index Paper] from [Paper Type]. 26 bizhub 360i/300i - Konica Minolta 300i | bizhub 360i/300i Quick Guide - Page 28
scan/fax function as major functions. This section describes the basic operations for each function. If you want to learn about more detailed descriptions or operation methods, refer to the HTML User's Guide included in the User's Guide copying. 3 Tap [Copy] on the home screen. bizhub 360i/300i 27 - Konica Minolta 300i | bizhub 360i/300i Quick Guide - Page 29
the number of copies to print. 4 Click [Properties] (or [Preferences]) to change the print settings of the printer driver as necessary. 5 Click [Print]. 3 Tap the scan function key on the home screen. 4 Specify the destination. 28 bizhub 360i/300i - Konica Minolta 300i | bizhub 360i/300i Quick Guide - Page 30
screen appears. Enter the required items, and tap [Login]. 6 Use the Start key to start transmission. 2 Load the original. 3 Tap [Fax] on the home screen. bizhub 360i/300i 29 - Konica Minolta 300i | bizhub 360i/300i Quick Guide - Page 31
7 4 Specify the destination. 5 Specify transmission options as needed. 6 Use the Start key to start transmission. 30 bizhub 360i/300i - Konica Minolta 300i | bizhub 360i/300i Quick Guide - Page 32
]: The fax number specified for fax is checked against the destination fax number (CSI) and the fax is sent only when they match. 4 Tap [OK]. bizhub 360i/300i 31 - Konica Minolta 300i | bizhub 360i/300i Quick Guide - Page 33
screen, enabling the user to easily select a destination. Enter the E-mail address of the destination (using up to 320 characters, excluding spaces). 4 Tap [OK]. 32 bizhub 360i/300i - Konica Minolta 300i | bizhub 360i/300i Quick Guide - Page 34
9 9 Read this if You Have a Problem 9.1 Main messages and remedies 9.1.1 Checking a notification message on the Touch Panel The notification icon is displayed on . 1 Tap the notification icon on the home screen. 2 Tap [ATTENTION List], and check the notification list. bizhub 360i/300i 33 - Konica Minolta 300i | bizhub 360i/300i Quick Guide - Page 35
warning message is not reset. For details on how to take an action when a paper jam message is not reset, refer to the HTML User's Guide. When a paper jam is cleared, a screen showing how to correctly load paper or the original is displayed. 34 bizhub 360i/300i - Konica Minolta 300i | bizhub 360i/300i Quick Guide - Page 36
system restarts scanning or [Trouble Code], and contact your service problem has been detected, [Continue] or [Recover Data] is displayed. To continue operations, select any key. However, the problem has not been resolved, so contact your service representative immediately. bizhub 360i - Konica Minolta 300i | bizhub 360i/300i Quick Guide - Page 37
Auto Power off mode, press the Power key to display the Touch Panel. To use it outside the preset operating hours, follow the on-screen instructions. - Check to see that the Main Power Switch is turned ON. 36 bizhub 360i/300i - Konica Minolta 300i | bizhub 360i/300i Quick Guide - Page 38
Slit Scan Glass 0 Perform this procedure when the Reverse Automatic Document Feeder DF-632 or Reverse Automatic Document Feeder DF-714 is installed on the machine. 1 Open the ADF. 2 Wipe stains off the Slit Scan Glass using a dry, clean cloth. NOTICE Do not touch the Slit Scan Glass. bizhub 360i - Konica Minolta 300i | bizhub 360i/300i Quick Guide - Page 39
. 1 Open the ADF. 2 Open the Opening and Closing Guide. % Release the lock lever of the Opening and Closing Guide, and open the Opening and Closing Guide. 3 Wipe stains off the Slit Scan Glass (back) using a dry, clean cloth. NOTICE Do not touch the Slit Scan Glass (back). 38 bizhub 360i/300i - Konica Minolta 300i | bizhub 360i/300i Quick Guide - Page 40
and Closing Guide is locked securely. Cleaning the Print Head Glass Printing quality deteriorates if the Print Head Glass is dirty. If this occurs, clean the Print Head Glass according to the following procedure. 1 Open the Front Door of the machine. 2 Remove the Waste Toner Box. bizhub 360i/300i - Konica Minolta 300i | bizhub 360i/300i Quick Guide - Page 41
times. 5 Mount the Printhead Cleaner onto the Front Door of this machine. 6 Mount the Waste Toner Box. 7 Close the Front Door of the machine. 40 bizhub 360i/300i - Konica Minolta 300i | bizhub 360i/300i Quick Guide - Page 42
a message appears when the Slit Scan Glass is dirty. Replace consumables or clean the Slit Scan Glass as instructed in the displayed message. Contact your service representative if the messages continue to . You can display the replacement procedure on the screen and check it. bizhub 360i/300i 41 - Konica Minolta 300i | bizhub 360i/300i Quick Guide - Page 43
medical advice if irritation persists. - If you swallow toner, rinse out your mouth and drink a few glasses of water. Seek medical advice if necessary. 42 bizhub 360i/300i - Konica Minolta 300i | bizhub 360i/300i Quick Guide - Page 44
Follow the displayed guidance to take an action. Replacing a Waste Toner Box 1 2 5 3 4 Tips - Your service representative will collect your used Waste Toner Box. Put it in a plastic bag, and store it in a box drink a few glasses of water. Seek medical advice if necessary. bizhub 360i/300i 43 - Konica Minolta 300i | bizhub 360i/300i Quick Guide - Page 45
(for Finisher FS-539 / Finisher FS-539 SD) 1 Open the Front Door of the Finisher. 2 Unlock the Staple Cartridge. 3 Pull out the Staple Cartridge. 44 bizhub 360i/300i - Konica Minolta 300i | bizhub 360i/300i Quick Guide - Page 46
replace the Staple Cartridge after the relevant message has appeared. If a Staple Cartridge is removed before the relevant message appears, it may result in a failure. bizhub 360i/300i 45 - Konica Minolta 300i | bizhub 360i/300i Quick Guide - Page 47
9 Replacing a Staple Cartridge (for Finisher FS-533) 1 Pinch the Lock Release Lever, and slide the Finisher. 2 Pull the Punch Kit Release Lever [FS2] in the arrow direction, and open the Punch Kit. FS2 1 2 3 Unlock the Staple Cartridge. 4 Pull out the Staple Cartridge. 46 bizhub 360i/300i - Konica Minolta 300i | bizhub 360i/300i Quick Guide - Page 48
replace the Staple Cartridge after the relevant message has appeared. If a Staple Cartridge is removed before the relevant message appears, it may result in a failure. bizhub 360i/300i 47 - Konica Minolta 300i | bizhub 360i/300i Quick Guide - Page 49
9 Replacing a Saddle Staple Cartridge (for Finisher FS-539 SD) 1 Open the Front Door of the Finisher. 2 Pull out the Saddle Stitcher. 3 Tilt the blue knob of the Saddle Staple Cartridge toward you. 48 bizhub 360i/300i - Konica Minolta 300i | bizhub 360i/300i Quick Guide - Page 50
9 4 Pull out the Saddle Staple Cartridge. 5 Open the Saddle Staple Cartridge cover. 2 1 1 6 Remove any empty staple cases from the Saddle Staple Cartridge. 1 2 1 7 Attach a new staple case to the Saddle Staple Cartridge. 1 2 8 Close the Saddle Staple Cartridge cover. bizhub 360i/300i 49 - Konica Minolta 300i | bizhub 360i/300i Quick Guide - Page 51
Staple Cartridge after the relevant message has appeared. If a Saddle Staple Cartridge is removed before the relevant message appears, it may result in a failure. 50 bizhub 360i/300i - Konica Minolta 300i | bizhub 360i/300i Quick Guide - Page 52
-539 / Finisher FS-539 SD) 1 2 3 Tips - The figure shows the Finisher FS-539 SD equipped with Punch Kit PK-524 and Relay Unit RU-513. bizhub 360i/300i 51 - Konica Minolta 300i | bizhub 360i/300i Quick Guide - Page 53
9 Punch scrap processing (for Finisher FS-533) 1 2 FS2 1 2 3 4 5 6 1 2 Tips - The figure shows the Finisher FS-533 equipped with Punch Kit PK-519. 52 bizhub 360i/300i - Konica Minolta 300i | bizhub 360i/300i Quick Guide - Page 54
http://konicaminolta.com AC77-9562-00 © 2020 Printed in China 2020. 2
-
 1
1 -
 2
2 -
 3
3 -
 4
4 -
 5
5 -
 6
6 -
 7
7 -
8
-
9
-
10
-
11
-
12
-
13
-
14
-
15
-
16
-
17
-
18
-
19
-
20
-
21
-
22
-
23
-
24
-
25
-
26
-
27
-
28
-
29
-
30
-
31
-
32
-
33
-
34
-
35
-
36
-
37
-
38
-
39
-
40
-
41
-
42
-
43
-
44
-
45
-
46
-
47
-
48
-
49
-
50
-
51
-
52
-
53
-
54
 |
 |

Quick Guide
About Panels
Loading the Original and Paper
Available Operations in this Machine
Registering a Destination
Safety Information
1
9
11
12
18
22
27
31
33
Before Using this Machine
How to Use the HTML User's Guide
About This Machine
Read this if You Have a Problem