Konica Minolta Fujitsu fi-4860C2 Operating Guide
Konica Minolta Fujitsu fi-4860C2 Manual
 |
View all Konica Minolta Fujitsu fi-4860C2 manuals
Add to My Manuals
Save this manual to your list of manuals |
Konica Minolta Fujitsu fi-4860C2 manual content summary:
- Konica Minolta Fujitsu fi-4860C2 | Operating Guide - Page 1
P3PC-1692-01ENZ0 fi-4860C2 Image Scanner Operator's Guide - Konica Minolta Fujitsu fi-4860C2 | Operating Guide - Page 2
- Konica Minolta Fujitsu fi-4860C2 | Operating Guide - Page 3
is no exceptions. The fi-4860C2 is designed to give you the best results for your production scanning needs. The fi-4860C2 has the following Duplex capability is available as standard feature. About this manual The manual provides the following information. 1. BASIC OPERATIONS This chapter describes - Konica Minolta Fujitsu fi-4860C2 | Operating Guide - Page 4
5. SOLVING COMMON PROBLEMS This chapter describes how to remedy document jams, scanner troubleshooting, and items to check before Guide" is attached to this Scanner. This guide contains necessary information for the scanner and the driver installation, please also read the Installation Guide - Konica Minolta Fujitsu fi-4860C2 | Operating Guide - Page 5
. This equipment generates, uses, and can radiate radio frequency energy and, if not installed and used in accordance with the instruction manual, may cause harmful interference to radio communications. However, there is no guarantee that interference will not occur in a particular installation - Konica Minolta Fujitsu fi-4860C2 | Operating Guide - Page 6
. Cet appareil numérique de la classe B est conforme à la norme NMB-003 du Canada. Bescheinigung des Herstellers / Importeurs Für den fi-4860C2 wid folgendes bescheinigt: •In Übereinsstimmung mit den Bestimmungen der EN45014(CE) funkentstört •Maschinenlärminformationsverordnung 3.GPSGV: Der höchste - Konica Minolta Fujitsu fi-4860C2 | Operating Guide - Page 7
International ENERGY STAR® Program As an ENERGY STAR® Partner, PFU LIMITED has determined that this product meets the ENERGY STAR® guidelines for energy efficiency. The International ENERGY STAR® Office Equipment Program is an international program that promotes energy saving through the penetration - Konica Minolta Fujitsu fi-4860C2 | Operating Guide - Page 8
About the use of mercury Hg Lamp(s) inside this product contain mercury and must be recycled or disposed of according to local, state, or federal laws. To avoid unexpected injuries; •Do not put the substance contained in the lamp in your mouth as it has mercury. •Do not breathe the chemical - Konica Minolta Fujitsu fi-4860C2 | Operating Guide - Page 9
other countries. Other product names are the trademarks or registered trademarks of the respective companies. How Trademarks Are Indicated In This Manual References to operating systems (OS) are indicated as follows: Windows 95: Microsoft® Windows® 95 operating system. Windows 98: Microsoft® Windows - Konica Minolta Fujitsu fi-4860C2 | Operating Guide - Page 10
, UNEXPECTED INJURY MAY BE CAUSED TO USERS OR BYSTANDERS. Also, store this manual in a convenient and safe place so that it can be easily referred to by errors or omissions or by statements of any kind in this manual, its updates or supplements, whether such errors are omissions or statements - Konica Minolta Fujitsu fi-4860C2 | Operating Guide - Page 11
this product. In particular, be sure to read and fully understand the Safety Precautions described in this manual before you use this product. Warning Indications Used In This Manual This manual uses the following indications to ensure safe and correct use of this product, and to prevent possible - Konica Minolta Fujitsu fi-4860C2 | Operating Guide - Page 12
Symbols Used In This Manual This manual uses the following symbols in explanations in addition to warning indications. specific action that is not allowed. Outline characters on a colored background show instructions R users should follow. It may also include the drawing that shows the specific - Konica Minolta Fujitsu fi-4860C2 | Operating Guide - Page 13
of the scanner application you are using. Furthermore, the screenshots in this manual are for the FUJITSU TWAIN32 scanner driver, ScandAll 21 Image Capturing Utility Software, FUJITSU ISIS scanner driver, QuickScanTM image capturing software and Adobe® Acrobat®. About Maintenance The user must - Konica Minolta Fujitsu fi-4860C2 | Operating Guide - Page 14
■ Safety Precautions WARNING The following describes important warnings described in this manual. Do not touch the Power cable with wet hands. Do not touch the power plug with wet hands. Doing so might cause electric shock. Do - Konica Minolta Fujitsu fi-4860C2 | Operating Guide - Page 15
. Do not use the scanner if you smell a strange odor coming from the scanner. If you detect heat coming from the device or detect other problems such as smoke, strange smells or noises, immediately turn off the scanner and disconnect its power plug. Make sure that the smoking has stopped, and - Konica Minolta Fujitsu fi-4860C2 | Operating Guide - Page 16
turn off the scanner and disconnect the power plug from the power outlet, contact the store where you purchased the scanner or the Maintenance Service Center. Pay particular attention to this warning in households where there are small children. Do not touch the inside of the scanner. Do not - Konica Minolta Fujitsu fi-4860C2 | Operating Guide - Page 17
The following describes important cautions described in this manual. Do not install the scanner on unstable of vibration to prevent it from tilting. Install the scanner on a strong surface that will support the weight of the scanner and any other devices on that surface. Firmly insert the power - Konica Minolta Fujitsu fi-4860C2 | Operating Guide - Page 18
Before moving the scanner, disconnect the power plug from the power outlet. Do not move the scanner with the power and interface cables connected as this might damage the cables, causing fire, electric shock or injuries. Before moving the scanner, be sure to disconnect the power plug from the power - Konica Minolta Fujitsu fi-4860C2 | Operating Guide - Page 19
scanner in the direct sunlight or near heating apparatus. Doing so might cause excessive heat to build up inside the scanner, causing fire or scanner trouble. Install the scanner in a well-ventilated location. Do not try to lift or move the scanner alone. This scanner is heavy (99lbs/45kg). When you - Konica Minolta Fujitsu fi-4860C2 | Operating Guide - Page 20
on this manual or on (39-02)26294.201 Website: http://www.fis.fujitsu.com/ E-mail: [email protected] FUJITSU AUSTRALIA LTD. Fujitsu House 2 ://www.fdg.fujitsu.com/ E-mail: [email protected] FUJITSU ESPAÑA Services, S.A.U. Camino Cerro de los Gamos, 1 28224, Pozuelo de Alarcon, - Konica Minolta Fujitsu fi-4860C2 | Operating Guide - Page 21
FUJITSU TAIWAN LTD. 19th Fl., No39, Sec.1,Chung-hwa Rd., Taipei, Taiwan Phone: (886-2)2311-2255 Fax: (886-2)2311-2277 Website: http://tw.fujitsu.com/ FUJITSU HONG KONG LTD. 10/F., Lincoln House, 979 King's Road, Taikoo Place, Island East, Hong Kong Phone: (852)2827-5780 Fax: (852)2827-4724 Website: - Konica Minolta Fujitsu fi-4860C2 | Operating Guide - Page 22
●xx - Konica Minolta Fujitsu fi-4860C2 | Operating Guide - Page 23
Stacker 1-15 Setting the Stacker Extension 1-17 Loading Documents on the Hopper 1-18 Inserting Documents Manually 1-21 Scanning Documents 1-23 How to use the Scanner Driver 1-27 2 SCANNING VARIOUS TYPES OF DOCUMENTS 2-1 Scanning Documents with different widths 2-2 Saving Scanned Images in - Konica Minolta Fujitsu fi-4860C2 | Operating Guide - Page 24
Lamp 4-20 5 SOLVING COMMON PROBLEMS 5-1 Clearing Document Jams 5-2 Troubleshooting 5-8 Before Contacting a Service Provider 5-29 Labels on Test Mode Details 7-72 8 OPTIONS 8-1 Options 8-2 fi-486PRFR (Pre-imprinter 8-3 fi-486PRRE (Post-imprinter 8-4 fi-486TRK (Thinner paper Roller Kit 8-5 - Konica Minolta Fujitsu fi-4860C2 | Operating Guide - Page 25
9 SCANNER SPECIFICATIONS 9-1 Basic Product Specifications 9-2 Installation Specifications 9-3 Dimensions 9-5 APPENDIX 1 DROP-OUT COLOR AP-1 APPENDIX 2 DOUBLE-FEED (MULTI-FEED) DETECTION CONDITIONS AP-2 APPENDIX 3 MESSAGES ON THE OPERATOR PANEL ......AP-5 INDEX IN-1 ●xxiii - Konica Minolta Fujitsu fi-4860C2 | Operating Guide - Page 26
●xxiv - Konica Minolta Fujitsu fi-4860C2 | Operating Guide - Page 27
this manual. Please be aware that when the FUJITSU TWAIN 32 scanner driver, or the FUJITSU ISIS scanner driver is updated , the screens and operations noted in this chapter may be changed slightly. In this case, please refer to the User's Guide - Konica Minolta Fujitsu fi-4860C2 | Operating Guide - Page 28
1.1 Turning the Scanner ON ■ Turning the power on 1. Press "I" side of the main line switch located on the back of the scanner. Power On Main line switch (Rear View) 1-2 1.1 Turning the Scanner ON - Konica Minolta Fujitsu fi-4860C2 | Operating Guide - Page 29
2. Press the power button on the Operator panel. The power turns on and the green Power LED at the Operator panel lights. Operator panel LCD shows "Ready" to indicate the scanner is in the READY state. Power Button 1 BASIC SCANNER OPERATIONS 1.1 Turning the Scanner ON 1-3 - Konica Minolta Fujitsu fi-4860C2 | Operating Guide - Page 30
■ Turning the Power off 1. On the Operator panel, press and hold down the Power button for two seconds or longer. 2. Press "O" side of the main line switch located on the back of the scanner. Power Off Main line switch (Rear View) 1-4 1.1 Turning the Scanner ON - Konica Minolta Fujitsu fi-4860C2 | Operating Guide - Page 31
BASIC SCANNER OPERATIONS 1.2 Waking the Scanner from the Power Save Mode The Power Save Mode keeps the scanner in a low powered state to save energy. If no operation is performed on the scanner for a preset time (15 minutes to 60 minutes depending on the timer setup), the scanner automatically - Konica Minolta Fujitsu fi-4860C2 | Operating Guide - Page 32
1.3 Basic Operations of the Operator Panel This basic operation include how to enter setup mode and test mode. ■ Clearing error messages When an user recoverable error occurs, The "Check" LED blinks to warn you and the error message is displayed on the LCD. Here is an example of an error message. - Konica Minolta Fujitsu fi-4860C2 | Operating Guide - Page 33
■ Lifting or lowering the hopper When the scanner has no errors (Check LED is not lit), the Hopper height position can be changed. CAUTION During hopper height adjustment, do not put your hands or anything on or under the hopper to prevent your fingers from getting caught and injured. If something - Konica Minolta Fujitsu fi-4860C2 | Operating Guide - Page 34
(2) In test mode ([Single feed] or [Multi-feed], the Hopper height changes as follows by pressing (Next button): 1. When the Hopper is at the bottom position, it moves up to 250 sheet position. 2. When the Hopper is at 250 sheet position, it moves down to the bottom position. 3. When the Hopper is - Konica Minolta Fujitsu fi-4860C2 | Operating Guide - Page 35
message This scanner has Abrasion counters to estimate service life of the consumables. When a counter (for or the Back-side lamp) reaches the pre-set value, the LCD shows a message that the consumable's service life has expired. Here is an example of the error messages. Ab r a s i o n al - Konica Minolta Fujitsu fi-4860C2 | Operating Guide - Page 36
functions are different depending on the mode. For the details, refer to "7 OPERATOR PANEL MENUS" on page 7-1. To enter these modes, follow the instructions below: - Online setup mode When the LCD indicates Ready status, press appears. (Next button). The following message Pressing Mo d e Se - Konica Minolta Fujitsu fi-4860C2 | Operating Guide - Page 37
Turning on the power J JJFF FF Ej ec t i ng paper Wa r m i n g - u p No w! ! Ch e c k i n g sensor Wa r mi n g - u p No w! ! Re s e t t i n g hopper Wa r m i n g - u p No w! ! Wa i t i n g IF Re a d y Re a d y Press (Next button) xxxxx xxxxxx Press (Previous button) Mo d e Se l e - Konica Minolta Fujitsu fi-4860C2 | Operating Guide - Page 38
- Offline setup mode and test mode Keep pressing (Start button) and turn on the power. Turn on the power while pressing the Start button JJJFFFF TEST Ej e c t pap er now Wa r m i n g - u p No w: T Ch e c k s ens or now Wa r m i n g - u p No w: T set hop pe r now Wa r m i n g - u p - Konica Minolta Fujitsu fi-4860C2 | Operating Guide - Page 39
- To enter the test mode, from the [] screen, press (Left arrow button) or (Right arrow button) , select [Test] and press Please see the Operator panel transition chart below. (Enter button). < MOD E SEL ECT> SET UP TEST < < TEST MODE > > 1 Press (Start button) or Test mode ( - Konica Minolta Fujitsu fi-4860C2 | Operating Guide - Page 40
1.4 Setting up the Hopper 1. Gently flip down the Hopper table by pulling the blue handle. Blue Handle 1-14 1.4 Setting up the Hopper - Konica Minolta Fujitsu fi-4860C2 | Operating Guide - Page 41
BASIC SCANNER OPERATIONS 1.5 Setting up the Stacker 1. Flip open the stacker. Stacker 1 1.5 Setting up the Stacker 1-15 - Konica Minolta Fujitsu fi-4860C2 | Operating Guide - Page 42
2. Push the opened stacker table lock into the scanner to lock it in place. When closing the stacker, pull out the stacker a little then fold it HINT closed. 1-16 1.5 Setting up the Stacker - Konica Minolta Fujitsu fi-4860C2 | Operating Guide - Page 43
1.6 Setting the Stacker Extension 1. Hold the center of the blue part of the stacker extension to pull it out. Stopper 1 ATTENTION Stacker extension Do not use the stopper to pull out the stacker extension. Stopper may be damaged if you pull it. BASIC SCANNER OPERATIONS 1.6 Setting the Stacker - Konica Minolta Fujitsu fi-4860C2 | Operating Guide - Page 44
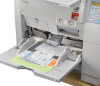
1.7 Loading Documents on the Hopper 1. Straighten the edges of the documents 1) Straighten both sides of the document stack. 2. Fan the documents 1) Take a stack of documents with thickness of 15mm to 20mm (1/2 to 3/4 inch). 2) Hold both ends and bend the documents into an arch. 15 to 20mm 3) Firmly - Konica Minolta Fujitsu fi-4860C2 | Operating Guide - Page 45
OPERATIONS 3. Load the documents on the hopper. Place the documents face-up on the hopper table. 1 Hopper 4. Adjust the Side guides to the document width. Pressing the lock lever, slide the Side guides so that they contact the document sides. If there is space between the document edges and the - Konica Minolta Fujitsu fi-4860C2 | Operating Guide - Page 46
stack is below the maximum height mark on the inside of the Side guides. • For loading long documents, extend the hopper extension. Hopper Extension • A batch which consists of different sizes may cause feeding problems. 5. Start up the scanner application and scan the documents. For the details on - Konica Minolta Fujitsu fi-4860C2 | Operating Guide - Page 47
To setup the scanner for Manual Feed Mode: 1. Lift the Pick roller until it is held by the magnet catch. The hopper table moves up to the feeding position. Be careful not to get your fingers or anything caught in the mechanism when the hopper table moves up. 1.8 Inserting Documents Manually 1-21 - Konica Minolta Fujitsu fi-4860C2 | Operating Guide - Page 48
2. Place documents face-up at the center of the hopper table. For information on setting Manual feed timeout, refer to "7 OPERATOR HINT PANEL MENUS" on page 7-1. 3. Adjust the Side guides to the width of the documents. Load the documents so that the top edge of the documents contacts the hopper - Konica Minolta Fujitsu fi-4860C2 | Operating Guide - Page 49
1.9 Scanning Documents For scanning with the VRS, a software provided with the scanner, refer to the VRS user's manuals available in the VRS installation CD. The following shows the procedure for scanning documents using the "ScandAll 21" application (simply called "ScandAll 21" from now - Konica Minolta Fujitsu fi-4860C2 | Operating Guide - Page 50
The [Select source] dialog box appears. Select [FUJITSU fi-4860CEAdij] (for TWAIN32 V8, [FUJITSU TWAIN 32]). Then click [Select]. 5. Click the [Display in scan preview screen] on the tool bar. The [TWAINDriver] dialog box (screen for setting scanning conditions) appears. 1-24 1.9 Scanning Documents - Konica Minolta Fujitsu fi-4860C2 | Operating Guide - Page 51
OPERATIONS 6. Set the scan resolution, document size and other scan conditions, and click the [Scan] button. For the details on settings in the [TWAIN Driver] dialog box, refer to the "Scanner Utility for Microsoft® Windows® User's Guide" on the scanner driver CD-ROM. 1 1.9 Scanning Documents 1-25 - Konica Minolta Fujitsu fi-4860C2 | Operating Guide - Page 52
The image of the scanned document appears on the ScandAll 21 screen. For details on scanning various types of documents, refer to "2 SCANNING VARIOUS TYPES OF DOCUMENTS" on page 2-1. For details on ScandAll 21 function and operations, refer to ScandAll 21 Help. 1-26 1.9 Scanning Documents - Konica Minolta Fujitsu fi-4860C2 | Operating Guide - Page 53
1.10 How to use the Scanner Driver ■ FUJITSU TWAIN32 Scanner Driver FUJITSU TWAIN32 Scanner Driver is designed for scanning documents with FUJITSU image scanner fi series by using application software that complies with the TWAIN standard. The following describes the procedure with examples of - Konica Minolta Fujitsu fi-4860C2 | Operating Guide - Page 54
to use, then click the [Select] button. Select • [FUJITSU fi-4860CEAdij] for FUJITSU TWAIN32 V9 or • [FUJITSU TWAIN32] for FUJITSU refer to "1.7 Loading Documents on the Hopper" on page 1-18. 5. Open the TWAIN Driver window. Select [Scan To View] from the [Scan] menu. •ScandAll 21 provides scanning - Konica Minolta Fujitsu fi-4860C2 | Operating Guide - Page 55
BASIC SCANNER OPERATIONS 6. Configure settings for scanning and click the [Scan] button. 1 For details about the settings on this window, refer to "Setting Window for FUJITSU TWAIN32 Scanner Driver." on page 1-31. 1.10 How to use the Scanner Driver 1-29 - Konica Minolta Fujitsu fi-4860C2 | Operating Guide - Page 56
you wish to start another scanning, return to procedure 4. 8. End the application. Select [Exit] from the [File] menu. 1-30 1.10 How to use the Scanner Driver - Konica Minolta Fujitsu fi-4860C2 | Operating Guide - Page 57
on this window. The following describes the main setting items. • For details on each functions, refer to "FUJITSU TWAIN32 Scanner Driver Help" (appears by pressing [Help] or [F1] button). • Depending on the type of your scanner, available setting items or range of setting values vary. Resolution - Konica Minolta Fujitsu fi-4860C2 | Operating Guide - Page 58
Saves the current settings and closes this window. [Reset] button Used to undo changes of settings. [Help] button Opens the "FUJITSU TWAIN32 Scanner Driver Help" window. The window also opens by pushing the [F1] key. [About...] button Opens an information window about the FUJITSU TWAIN32 Scanner - Konica Minolta Fujitsu fi-4860C2 | Operating Guide - Page 59
, blank page skipping, etc. [Generic] tab Select this tab to change the unit displayed on the Setting Window for the FUJITSU TWAIN32 Scanner Driver. (Millimeters, Inches, and Pixels are available) [Filter] tab Select this tab for setting the image processing filter(s). Page Edge Filler: Fills up the - Konica Minolta Fujitsu fi-4860C2 | Operating Guide - Page 60
the procedure with examples of QuickScanTM for ordinary scanning by using this driver software. The procedure may vary depending on your application. If you use an application other than QuickScanTM, please refer to its Guide or Help for further information. ● Procedure for Basic Scanning Operation - Konica Minolta Fujitsu fi-4860C2 | Operating Guide - Page 61
] button. ⇒The selected profile will be deleted. When you added, edited or deleted a profile, go to the procedure 10. 1.10 How to use the Scanner Driver 1-35 - Konica Minolta Fujitsu fi-4860C2 | Operating Guide - Page 62
Settings] on the [Profile Editor] window. ⇒The configuration window of ISIS driver appears. 7. Configure settings for scanning and click the [OK] button. For details on this dialog box, refer to "Configuration Window of FUJITSU ISIS Scanner Driver" on page 1-38. 1-36 1.10 How to use the Scanner - Konica Minolta Fujitsu fi-4860C2 | Operating Guide - Page 63
information on functions and operations of QuickScan. After the installation of QuickScan, it is registered in the [Start] menu. 1.10 How to use the Scanner Driver 1-37 - Konica Minolta Fujitsu fi-4860C2 | Operating Guide - Page 64
● Configuration Window of FUJITSU ISIS Scanner Driver Image Mode Select a color mode suitable for the purpose from the menu. Black and White Scans data in binary (black both text and photographs. This setting is suitable for scanning light photographs. 1-38 1.10 How to use the Scanner Driver - Konica Minolta Fujitsu fi-4860C2 | Operating Guide - Page 65
side (Both, Front, Back). [More...] button Opens the [More Settings] window. Used for setting advanced features. BASIC SCANNER OPERATIONS 1 1.10 How to use the Scanner Driver 1-39 - Konica Minolta Fujitsu fi-4860C2 | Operating Guide - Page 66
when Endorser Option (separately sold) is installed. Refer to the documentation provided with the Endorser Option. [JPEG...] button 1-40 1.10 How to use the Scanner Driver - Konica Minolta Fujitsu fi-4860C2 | Operating Guide - Page 67
set the binary image processing. These options are available only when "Black and White" is selected in the "Mode". 1.10 How to use the Scanner Driver 1-41 - Konica Minolta Fujitsu fi-4860C2 | Operating Guide - Page 68
Control Performs simple binary processing on the images. When this option is selected, you can manually adjust the threshold (Brightness) with the slider control on the Configuration Window. Standard Performs simple (Both, Front, Back). White Level Follow 1-42 1.10 How to use the Scanner Driver - Konica Minolta Fujitsu fi-4860C2 | Operating Guide - Page 69
when the red color is selected, the scanner reads only the text and eliminates (drop out) the red frame. 1.10 How to use the Scanner Driver 1-43 - Konica Minolta Fujitsu fi-4860C2 | Operating Guide - Page 70
margins. [Side] The settings of this configuration window are applied to the selected document side (Both, Front, Back). 1-44 1.10 How to use the Scanner Driver - Konica Minolta Fujitsu fi-4860C2 | Operating Guide - Page 71
or the FUJITSU ISIS scanner driver is updated, the screens and operations noted in this chapter may change. In that case, please refer to the User's Guide provided with the update. For scanning with the VRS, a software provided with the scanner, refer to the VRS user's manuals available in the VRS - Konica Minolta Fujitsu fi-4860C2 | Operating Guide - Page 72
shows the procedure to scan batches of mixed size documents. 1. Sort the batch into the stacks of the same width documents. 2. Adjust the side guide to the width of each document stack to scan. For the explanation on how to scan the documents, please refer to the section "1.9 Scanning Documents - Konica Minolta Fujitsu fi-4860C2 | Operating Guide - Page 73
, unexpected images may be output when: 1. Setting "Edge Shadow Removal" in Acrobat, and setting "Digital Endorser" or "Black Background" options in the TWAIN driver at the same time. Letter strings embedded in the image or the background may be missed. Solution 1: Set "Edge shadow removal" to "OFF - Konica Minolta Fujitsu fi-4860C2 | Operating Guide - Page 74
[Start] menu. This will start up the application. 3. From the menu bar select [Scan] and then [To Adobe PDF] from the pull down menu. [TWAIN Driver] dialog is displayed. 2-4 2.2 Saving Scanned Images in PDF Format - Konica Minolta Fujitsu fi-4860C2 | Operating Guide - Page 75
SCANNING VARIOUS TYPES OF DOCUMENTS 4. Select the scan resolution, document size and other scanning conditions, and then click the [Scan] botton. 2 5. To end scanning, click the [Close] button. The window for saving the image appears. 2.2 Saving Scanned Images in PDF Format 2-5 - Konica Minolta Fujitsu fi-4860C2 | Operating Guide - Page 76
6. Save the scanned image by selecting file name and path. For details, refer to ScandAll 21 Help. Using Adobe Acrobat Following shows the procedure for saving scanned images in PDF format. 1. Load the documents on the hopper. 2. Start up Adobe Acrobat. Select [Programs] - [Adobe Acrobat] from the [ - Konica Minolta Fujitsu fi-4860C2 | Operating Guide - Page 77
SCANNING VARIOUS TYPES OF DOCUMENTS 4. Select [FUJITSU fi-4860CEAdij] at [Scanner] and click [Scan] button. 2 [TWAIN driver] dialog box is displayed. ATTENTION Scanning with default settings may yield unexpected results. If that is the case, change the settings as follows: • Uncheck " - Konica Minolta Fujitsu fi-4860C2 | Operating Guide - Page 78
6. When scanning is finished, click the [Done] button. The scanned image is displayed. 7. Select [Save as] or [Save] from [File] menu to save the scanned image. For the details on Adobe Acrobat operations, refer to the Adobe Acrobat manual and Help. 2-8 2.2 Saving Scanned Images in PDF Format - Konica Minolta Fujitsu fi-4860C2 | Operating Guide - Page 79
, you can set the scanner to get only the text and eliminate the green frames. To drop out a color, change the setting in the driver setting dialog box. The following shows examples for changing the setting of [TWAIN Driver ] dialog box to drop out a color. 2 1. Click [Advance] button in the [TWAIN - Konica Minolta Fujitsu fi-4860C2 | Operating Guide - Page 80
contains black text in green frames, you can set the scanner to get only the text and eliminate the green frames. 3. Click [OK] button. [TWAIN Driver] dialog box will be redisplayed. Start scanning from this dialog box and you can drop out the color specified above. 2-10 2.3 Selecting a Color to - Konica Minolta Fujitsu fi-4860C2 | Operating Guide - Page 81
2.4 Skipping blank Pages The following shows examples for changing settings in the [TWAIN Driver] dialogbox to skip blank pages at scanning documents. 1. Click the [Option ...] button in the [TWAIN Driver] dialogbox. 2 ⇒The [Option] dialogbox appears. 2. Click the [Job/Cache] tab 2.4 Skipping blank - Konica Minolta Fujitsu fi-4860C2 | Operating Guide - Page 82
] (ratio of black or white parts on the documents) for judging if the scanned document is recognized as a blank page by the scanner. The [TWAIN Driver] dialogbox will be redisplayed. Then, perform the scanning operation on the dialogbox. 2-12 2.4 Skipping blank Pages - Konica Minolta Fujitsu fi-4860C2 | Operating Guide - Page 83
dialog box. The following shows the procedure for changing the settings in the dialogbox. 2 1. Click the [Option...] button in the [TWAIN Driver] dialogbox. SCANNING VARIOUS TYPES OF DOCUMENTS ⇒The [Option] dialogbox appears. 2. Click the [Job/Cache] tab. 2.5 Detecting Double-Feeds (Multi-Feeds - Konica Minolta Fujitsu fi-4860C2 | Operating Guide - Page 84
) DETECTION CONDITIONS" on page AP-2 for detailed information about the document for double-feed detection. 4. Click the [OK] button. The display returns to the [TWAIN Driver] dialogbox. Then, perform the scanning operation on the dialogbox. 2-14 2.5 Detecting Double-Feeds (Multi-Feeds) - Konica Minolta Fujitsu fi-4860C2 | Operating Guide - Page 85
and corrected automatically when skewed documents are fed into the ADF. The following shows examples for chaning the setting in the [TWAIN Driver] dialogbox to enable this function. The following shows the procedure for changing the setting in the dialogbox. 2 1. Click the [Option...] button in - Konica Minolta Fujitsu fi-4860C2 | Operating Guide - Page 86
Detection] from the [Automatic Size and Skew Detection] menu. 4. Click the [OK] button. The display returns to the scanninig operation [TWAIN Driver] dialogbox. Then, perform the scanning operation on the dialogbox. ATTENTION When using either of the following documents, the automatic page size - Konica Minolta Fujitsu fi-4860C2 | Operating Guide - Page 87
3 DAILY CARE This chapter describes how to clean the scanner. WARNING When you clean the scanner, turn off the power, and unplug the power cable from the outlet. 3.1 Cleaning Materials and Areas Requiring Cleaning .........3-2 3.2 Cleaning the Pad 3-5 3.3 Cleaning the Rollers 3-8 3.4 Cleaning - Konica Minolta Fujitsu fi-4860C2 | Operating Guide - Page 88
3.1 Cleaning Materials and Areas Requiring Cleaning ■ Cleaning materials Cleaning materials Part No. Cleaning sheet CA99501-0016 Remarks 20 sheets/pack (* 1) Cleaner F2 CA99501-0014 1 bottle, 100ml/bottle (* 1) Isopropyl alcohol or CA99501-0013 Cleaner F1 1 bottle, 100ml/bottle Moisten - Konica Minolta Fujitsu fi-4860C2 | Operating Guide - Page 89
cleaning. Part to clean Pad Pick roller Brake roller Separation roller Feed roller Pinch roller Transport path Discharge brush Removable sheet guide Glass sheet guide Document width detection sensor Ultrasonic sensor SF0 SF1 SF1.5 SF2 Front-side Lamp Back-side lamp Standard Cleaning Cycle Clean - Konica Minolta Fujitsu fi-4860C2 | Operating Guide - Page 90
. You must clean the following area more frequently when you use fi486PRFR or fi-486PRRE imprinters. The imprinter ink tend to stick to the document transport path. • Removable sheet guide • Glass sheet guide • Feed rollers • Pinch rollers 3-4 3.1 Cleaning Materials and Areas Requiring Cleaning - Konica Minolta Fujitsu fi-4860C2 | Operating Guide - Page 91
before you put your hands inside of the scanner. 3 DAILY CARE 2. Pull the ADF release lever toward you and lift up the ADF upper sheet guide. ADF upper sheet guide ADF release lever 3.2 Cleaning the Pad 3-5 - Konica Minolta Fujitsu fi-4860C2 | Operating Guide - Page 92
3. Press down on the upper part of the Guide plate with your fingers at the two positions shown and then rotate the plate toward you to remove it. Pad ASSY Guide plate 3-6 3.2 Cleaning the Pad - Konica Minolta Fujitsu fi-4860C2 | Operating Guide - Page 93
4. Wipe the translucent rubber part of the Pad ASSY using a lint free cloth moistened with cleaner F1. Pad (cleaning area) Pad ASSY 3 Guide plate DAILY CARE 5. Install the guide plate in the reverse order of the removal.You should push it down then rotate back, so the installation can be done - Konica Minolta Fujitsu fi-4860C2 | Operating Guide - Page 94
■ Cleaning the rollers with the cleaning sheet 1. Set the Side guide for B4 size width. 2. Set the scanner in Test mode: the cleaning sheet on the hopper table, align the left side with the hopper guide and with the adhesive side up. Press then the cleaning sheet is fed. (Start button), 3-8 - Konica Minolta Fujitsu fi-4860C2 | Operating Guide - Page 95
from a new cleaning sheet and place it with the adhesive side face down on the hopper table, aligning the left side with the hopper guide. Press is fed. (Start button), then the cleaning sheet Repeat steps 6 through 8. When the cleaning is completed turn off the power. 3.3 Cleaning the Rollers - Konica Minolta Fujitsu fi-4860C2 | Operating Guide - Page 96
■ Cleaning the Pick Rollers and the Separation Roller 1. Remove documents from the stacker. Pull up the lever on the right front of the Upper transport and then raise it. CAUTION Raise the Upper transport unit fully, then lower it to engage lock before you put your hands inside of the scanner. 3- - Konica Minolta Fujitsu fi-4860C2 | Operating Guide - Page 97
2. While pulling the ADF lever toward you, lift up the ADF upper sheet guide. ADF upper sheet guide 3 ADF release lever DAILY CARE 3. Slide the Pick roller unit to the left to disengage the clutch ring from the shaft. Ring Pick roller unit Shaft 3.3 Cleaning the Rollers 3-11 - Konica Minolta Fujitsu fi-4860C2 | Operating Guide - Page 98
4. Wipe both Pick rollers (2 positions) and the Separation roller using a clean lint free cloth moistened with cleaner F1. Ring Pick roller unit Separation roller 3-12 3.3 Cleaning the Rollers - Konica Minolta Fujitsu fi-4860C2 | Operating Guide - Page 99
and align the clutch ring with the shaft and move right to engage. 3 Incorrect installation Correct installation DAILY CARE 6. Lower the ADF upper sheet guide carefully. 7. Lift the Upper transport unit to release the safety lock, then lower the unit carefully and push the unit to close it - Konica Minolta Fujitsu fi-4860C2 | Operating Guide - Page 100
■ Cleaning the Brake roller unit 1. Remove documents from the stacker. Pull up the lever on the right front of the Upper transport and then raise it. CAUTION Raise the Upper transport unit fully, then lower it to engage lock before you put your hands inside of the scanner. 3-14 3.3 Cleaning the - Konica Minolta Fujitsu fi-4860C2 | Operating Guide - Page 101
toward you and lift up the ADF sheet guide. ADF upper sheet guide 3 ADF release lever 3. Pressing down on the upper part of the Guide plate with your fingers at the two positions shown and then pull the plate toward you to remove it. Pad ASSY DAILY CARE Guide plate 3.3 Cleaning the Rollers 3-15 - Konica Minolta Fujitsu fi-4860C2 | Operating Guide - Page 102
4. Turn the bail of the Brake roller upward and release the lock. Brake roller Bail 5. Pull the Brake roller toward you to remove it. 3-16 3.3 Cleaning the Rollers - Konica Minolta Fujitsu fi-4860C2 | Operating Guide - Page 103
bracket and rotate down until it locks in. 8. Install the Guide plate in the reverse order of the removal. By pressing the Guide plate down, and pushing the Guide plate back, you can install it smoothly. 9. Lower the ADF upper sheet guide carefully. 10. Lift the Upper transport unit to release the - Konica Minolta Fujitsu fi-4860C2 | Operating Guide - Page 104
■ Cleaning the Feed rollers 1. Remove documents from the stacker. Pull up the lever on the right front of the Upper transport and then raise it. CAUTION Raise the Upper transport unit fully, then lower it to engage lock before you put your hands inside of the scanner. 3-18 3.3 Cleaning the - Konica Minolta Fujitsu fi-4860C2 | Operating Guide - Page 105
2. Wipe the metal feed rollers using a lint free cloth moistened with cleaner F2. Wipe the rollers thoroughly. If the rollers have black build-up, the feed reliability is affected. Feed rollers (in 12 locations) 3 DAILY CARE CAUTION Use cleaner F2 only on metal rollers (only the Feed rollers). - Konica Minolta Fujitsu fi-4860C2 | Operating Guide - Page 106
■ Cleaning the Pinch rollers 1. Remove documents from the stacker. Pull up the lever on the right front of the Upper transport and then raise it. CAUTION Raise the Upper transport unit fully, then lower it to engage lock before you put your hands inside of the scanner. 3-20 3.3 Cleaning the - Konica Minolta Fujitsu fi-4860C2 | Operating Guide - Page 107
DAILY CARE 2. Wipe the pinch rollers using a cloth moistened with cleaner F1. Pinch roller (in 12 locations) 3 3. Lift the Upper transport unit to release the safety lock, then lower the unit carefully and push the unit to close it completely. 3.3 Cleaning the Rollers 3-21 - Konica Minolta Fujitsu fi-4860C2 | Operating Guide - Page 108
3.4 Cleaning the Transport Path ■ Cleaning the Transport path 1. Remove documents from the stacker first. Pull up the lever on the right front of the Upper transport and then raise it. CAUTION Raise the Upper transport unit fully, then lower it to engage lock before you put your hands inside of - Konica Minolta Fujitsu fi-4860C2 | Operating Guide - Page 109
2. Wipe and clean the whole transport path using a cloth moistened with cleaner F1. Vacuum the transport path if there are paper dust in the path. HINT Do not use aerosol sprays to clean the path. 3 CAUTION Do not use HIgh Pressure Air to blow dust out of the scanner. This will contaminate the - Konica Minolta Fujitsu fi-4860C2 | Operating Guide - Page 110
3.5 Cleaning the Discharge Brush 1. Remove documents from the stacker. Pull up the lever on the right front of the Upper transport and then raise it. CAUTION Raise the Upper transport unit fully, then lower it to engage lock before you put your hands inside of the scanner. 3-24 3.5 Cleaning the - Konica Minolta Fujitsu fi-4860C2 | Operating Guide - Page 111
2. Pull the ADF release lever toward you and lift up the ADF sheet guide. ADF upper sheet guide 3 ADF release lever DAILY CARE 3. Slide the Pick roller unit to the left to disengage the clutch ring from the shaft. Ring Pick roller unit Shaft 3.5 Cleaning the Discharge Brush 3-25 - Konica Minolta Fujitsu fi-4860C2 | Operating Guide - Page 112
4. Pressing down on the upper part of the Guide plate with your fingers at the two positions shown and then rotate the plate toward you to remove it. Pad ASSY Guide plate 5. Release the lock and then hold and rotate the bail of the Pick roller unit upward to release the lock. Brake - Konica Minolta Fujitsu fi-4860C2 | Operating Guide - Page 113
DAILY CARE 6. Pull the Brake roller unit toward you to remove it. 3 7. Using a dry cloth, wipe off the dust from the two discharge brushes: one at the Pick roller side, the other at the Brake roller side. Discharge brush(for Pick roller unit) Discharge brush(for brakeroller) 8. Re-install the Brake - Konica Minolta Fujitsu fi-4860C2 | Operating Guide - Page 114
order of the removal. You should push it down and rotate back then the installation can be done smoothly. 10. Lower the ADF upper sheet guide slowly. 11. Lift the Upper transport unit to release the safety lock, then lower the unit carefully and push the unit to close it completely - Konica Minolta Fujitsu fi-4860C2 | Operating Guide - Page 115
3.6 Cleaning the Glass Surface ■ Cleaning of the removable sheet guide The Lamps get very hot during use. Wait until the Lamps are cooled down CAUTION before touching. Do not allow F1 cleaner to contact hot - Konica Minolta Fujitsu fi-4860C2 | Operating Guide - Page 116
2. Use your index fingers to lift both ends of the removable sheet guide. 3. Lift the right side first. 4. Shift the sheet guide leftward while lifting it up to remove. Removable sheet guide 3-30 3.6 Cleaning the Glass Surface - Konica Minolta Fujitsu fi-4860C2 | Operating Guide - Page 117
DAILY CARE 5. Wipe the both sides of the glass surface using a clean lint free cloth moistened with cleaner F1. 3 6. Attach the removable sheet guide in the reverse order of its removal. 7. Lift the Upper transport unit to release the safety lock, then lower the unit carefully and push the - Konica Minolta Fujitsu fi-4860C2 | Operating Guide - Page 118
■ Cleaning the Glass Sheet Guide CAUTION The Lamps get very hot during use. Wait until the Lamps are cooled down before touching. Do not allow F1 cleaner to contact hot - Konica Minolta Fujitsu fi-4860C2 | Operating Guide - Page 119
DAILY CARE 2. Push down on the Glass sheet guide tab to open the Glass sheet guide. 3 This picture is side View. Glass sheet guide 3.6 Cleaning the Glass Surface 3-33 - Konica Minolta Fujitsu fi-4860C2 | Operating Guide - Page 120
using a clean lint free cloth moistened with cleaner F1. Glass sheet guide Tab 4. Lift the tabs until the Guide locks in. Close the Glass sheet guide. Make sure that the metal part locks. 5. Lift the Upper transport unit to release the safety lock, then lower the unit carefully and push the - Konica Minolta Fujitsu fi-4860C2 | Operating Guide - Page 121
3.7 Cleaning the Sensors ■ Cleaning the document width detection sensors (6 positions) 1. Remove documents from the stacker. Pull up the lever on the right front of the Upper transport and then raise it. 3 Raise the Upper transport unit fully, then lower it to engage lock before you CAUTION put - Konica Minolta Fujitsu fi-4860C2 | Operating Guide - Page 122
4. Wipe the six sensor surfaces with a clean lint free cloth moistened with cleaner F1. Document width sensor(in 6 locations) 5. Lower the ADF upper sheet guide gently. 6. Lift the Upper transport unit to release the safety lock, then lower the unit carefully and push the unit to close it completely - Konica Minolta Fujitsu fi-4860C2 | Operating Guide - Page 123
■ Cleaning the SF0 sensor and SF1 sensor. 1. Remove documents from the stacker. Pull up the lever on the right front of the Upper transport and then raise it. CAUTION Raise the Upper transport unit fully, then lower it to engage lock before you put your hands inside of the scanner. 3 DAILY CARE - Konica Minolta Fujitsu fi-4860C2 | Operating Guide - Page 124
. 4. Wipe SF0 and SF1 sensor surfaces with a clean lint free cloth moistened with cleaner F1. SF1 Sensor SF0 Sensor 5. Lower the ADF upper sheet guide gently. 6. Lift the Upper transport unit to release the safety lock, then lower the unit carefully and push the unit to close it completely. 3-38 - Konica Minolta Fujitsu fi-4860C2 | Operating Guide - Page 125
■ Cleaning the SF1.5 sensor and SF2 sensor 1. Remove documents from the stacker. Pull up the lever on the right front of the Upper transport and then raise it. CAUTION Raise the Upper transport unit fully, then lower it to engage lock before you put your hands inside of the scanner. 3 DAILY - Konica Minolta Fujitsu fi-4860C2 | Operating Guide - Page 126
2. Wipe SF1.5 and SF2 sensor surfaces with a clean lint free cloth moistened with cleaner F1. SF2 Sensor SF1.5 Sensor 3. Lift the Upper transport unit to release the safety lock, then lower the unit carefully and push the unit to close it completely. 3-40 3.7 Cleaning the Sensors - Konica Minolta Fujitsu fi-4860C2 | Operating Guide - Page 127
3.8 Cleaning the Lamps CAUTION The Lamps get very hot during use. Wait until the Lamps are cooled down before touching. Never replace the Lamp without turning off the power. 3 Do not allow F1 cleaner to contact hot lamps. DAILY CARE ■ Front-side lamp 1. Remove documents from the stacker. - Konica Minolta Fujitsu fi-4860C2 | Operating Guide - Page 128
2. Push down on the Glass sheet guide tab to open the Glass sheet guide. This picture is side View. Glass sheet guide 3-42 3.8 Cleaning the Lamps - Konica Minolta Fujitsu fi-4860C2 | Operating Guide - Page 129
3. Pull down on the tab to release the Lamp socket covers attached to the both ends of the Lamp to remove them. Tab 3 DAILY CARE 4. Rotate the Lamp a half turn so that the terminals on each end align with the slot on the Lamp socket. Then remove the Lamp from the socket. Lamp socket 3.8 - Konica Minolta Fujitsu fi-4860C2 | Operating Guide - Page 130
5. Clean the clear portion of the Lamp with a clean lint free dry cloth. Clear portion 6. Attach the front-side Lamp in the reverse order of its removal. Make sure that the clear portion of the Lamp faces down. ATTENTION If the Lamp is installed with the clear portion facing incorrect direction, - Konica Minolta Fujitsu fi-4860C2 | Operating Guide - Page 131
cover hook to the Lamp frame then rotate forward as shown below, to attach the covers. Lamp socket cover 3 8. Close the Glass sheet guide. Make sure that the guide is fixed firmly. 9. Lift the Upper transport unit to release the safety lock, then lower the unit carefully and push the unit to - Konica Minolta Fujitsu fi-4860C2 | Operating Guide - Page 132
■ Back-side lamp 1. Push back blue latch to release the side cover, then open. Side cover 2. Hold the handle (blue part) and pull the Back-side lamp unit out of the scanner. 3-46 3.8 Cleaning the Lamps - Konica Minolta Fujitsu fi-4860C2 | Operating Guide - Page 133
DAILY CARE 3. Rotate the Lamp a half turn so that the terminals on each end align with the slot on the Lamp socket and remove the Lamp from the unit. Lamp socket 3 Backside lamp unit 4. Clean the clear portion of the Lamp with a dry cloth. Clear portion 3.8 Cleaning the Lamps 3-47 - Konica Minolta Fujitsu fi-4860C2 | Operating Guide - Page 134
5. Install the Back-lamp unit in the reverse order of its removal. Make sure that the clear portion of the Lamp faces up. ATTENTION If the Lamp is installed with the clear portion facing incorrect direction, an error due to insufficient light occurs. 6. Install the Back-lamp in the reverse order - Konica Minolta Fujitsu fi-4860C2 | Operating Guide - Page 135
4 REPLACEMENT OF CONSUMABLES This chapter describes how to replace consumables. 4.1 Consumables and Replacement Cycle 4-2 4.2 How to check the Abrasion Counter 4-3 4.3 Replacing the Pad ASSY 4-4 4.4 Replacing the Pick Roller Unit 4-9 4.5 Replacing the Brake Roller Unit 4-12 4.6 Replacing the - Konica Minolta Fujitsu fi-4860C2 | Operating Guide - Page 136
standard replacement cycle of the consumables. It is recommended that you stock extra consumables before the ones in the scanner reach the end of Their service life. The consumables must be replaced periodically. You can check the number of scanned pages for the Pad ASSY, the Pick roller unit, the - Konica Minolta Fujitsu fi-4860C2 | Operating Guide - Page 137
4.2 How to check the Abrasion Counter ■ Checking the counter from the Operator panel The number displayed on the right bottom of LCD in the "Ready" status shows the consumables count. The Abrasion counter, shown below indicates the highest cumulative number of sheets scanned by the PAD ASSY, the - Konica Minolta Fujitsu fi-4860C2 | Operating Guide - Page 138
4.3 Replacing the Pad ASSY 1. Remove documents from the stacker. Pull up the lever on the right front of the Upper transport and then raise it. CAUTION Raise the Upper transport unit fully, then lower it to engage lock before you put your hands inside of the scanner. 4-4 4.3 Replacing the Pad - Konica Minolta Fujitsu fi-4860C2 | Operating Guide - Page 139
2. Pull the ADF release lever toward you and lift up the ADF sheet guide. ADF upper sheet guide 4 ADF release lever 3. Press down on the upper part of the Guide plate with your fingers at the two positions shown and then rotate the plate toward you to remove it. Pad ASSY REPLACEMENT OF CONSUMABLES - Konica Minolta Fujitsu fi-4860C2 | Operating Guide - Page 140
Pad (cleaning area) Guide plate Pad ASSY 4-6 4.3 Replacing the Pad ASSY - Konica Minolta Fujitsu fi-4860C2 | Operating Guide - Page 141
REPLACEMENT OF CONSUMABLES 4. Remove the Pad ASSY from the Guide plate by pushing the removal metal scroll down and then release hooks. 4 4.3 Replacing the Pad ASSY 4-7 - Konica Minolta Fujitsu fi-4860C2 | Operating Guide - Page 142
Pad ASSY by engaging the hooks then pressing scroll into the slot of the Guide plate. Hooks ATTENTION Confirm that the pad is firmly attached to the guide. Make sure that the two tabs are engaged with the Guide plate. If not attached firmly, paper feed errors such as document jams may occur - Konica Minolta Fujitsu fi-4860C2 | Operating Guide - Page 143
4.4 Replacing the Pick Roller Unit 1. Remove documents from the stacker. Pull up the lever on the right front of the Upper transport and then raise it. CAUTION Raise the Upper transport unit fully, then lower it to engage lock before you put your hands inside of the scanner. 4 REPLACEMENT OF - Konica Minolta Fujitsu fi-4860C2 | Operating Guide - Page 144
2. While pulling the ADF lever toward you, lift up the ADF upper sheet guide. ADF upper sheet guide ADF release lever 3. Lift up the Pick roller unit a little. Slide the Pick roller unit to the left to disengage the clutch ring from the - Konica Minolta Fujitsu fi-4860C2 | Operating Guide - Page 145
clutch ring with the shaft and move right to engage. 4 Incorrect installation Correct installation REPLACEMENT OF CONSUMABLES 5. Lower the ADF upper sheet guide carefully. 6. Lift the Upper transport unit to release the safety lock, then lower the unit carefully and push the unit to close it - Konica Minolta Fujitsu fi-4860C2 | Operating Guide - Page 146
to engage lock before you put your hands inside of the scanner. 2. Pull the ADF release lever toward you and lift up the ADF sheet guide. ADF upper sheet guide ADF release lever 4-12 4.5 Replacing the Brake Roller Unit - Konica Minolta Fujitsu fi-4860C2 | Operating Guide - Page 147
REPLACEMENT OF CONSUMABLES 3. Press down on the upper part of the Guide plate with your fingers at the two positions shown and rotate the plate toward you to remove it. Pad ASSY 4 Guide plate 4. Turn the bail of the Brake roller upward and release the lock. Brake roller Bail 4.5 Replacing the Brake - Konica Minolta Fujitsu fi-4860C2 | Operating Guide - Page 148
removal. By holding the bail toward you, put the Brake roller into bracket and rotate down until it locks in. 7. Install the Guide plate in the reverse order of the removal. By pressing the Guide plate down and pushing the Guide plate back, you can install it smoothly. 8. Lower the ADF upper sheet - Konica Minolta Fujitsu fi-4860C2 | Operating Guide - Page 149
4.6 Replacing the Front-side Lamp CAUTION Never replace the Lamp without turning off the power. Wait 5 minutes after turning off the power before touching the Lamp. 4 1. Remove documents from the stacker. Pull up the lever on the right front of the Upper transport and then raise it. CAUTION - Konica Minolta Fujitsu fi-4860C2 | Operating Guide - Page 150
2. Pull down the Glass sheet guide tab and open the Glass sheet guide. This picture is side View. Glass sheet guide 4-16 4.6 Replacing the Front-side Lamp - Konica Minolta Fujitsu fi-4860C2 | Operating Guide - Page 151
REPLACEMENT OF CONSUMABLES 3. Pulling down the Lamp socket covers attached to the both end of the Lamp sockets and remove them. Tab 4 4. Rotate the Lamp a half turn so that the terminals on each end align with the slot on the Lamp socket and remove the Lamp from the unit. Lamp socket 4.6 Replacing - Konica Minolta Fujitsu fi-4860C2 | Operating Guide - Page 152
5. Install a new Lamp in the reverse order of the removal. Make sure that the clear portion of the Lamp faces down. ATTENTION If the Lamp is installed with the clear portion facing incorrect direction, an error due to insufficient light occurs. 4-18 4.6 Replacing the Front-side Lamp - Konica Minolta Fujitsu fi-4860C2 | Operating Guide - Page 153
of its removal. Make sure that the metal part is fixed firmly. Lamp socket cover 4 REPLACEMENT OF CONSUMABLES 7. Close the glass sheet guide. Make sure that the guide is fixed firmly. 8. Lift the Upper transport unit a little to release the safety lock and then lower the unit slowly, then push - Konica Minolta Fujitsu fi-4860C2 | Operating Guide - Page 154
4.7 Replacing the Back-side Lamp CAUTION Never replace the Lamp without turning off the power. Wait 5 minutes after turning off the power before touching the Lamp. 1. Pull and open the side cover. Side cover 4-20 4.7 Replacing the Back-side Lamp - Konica Minolta Fujitsu fi-4860C2 | Operating Guide - Page 155
REPLACEMENT OF CONSUMABLES 2. Hold the handle (blue part) and pull out the Back-side lamp unit. 4 3. Rotate the Lamp a half turn so that the terminals on each end align with the slot on the Lamp socket and remove the Lamp from the unit. Lamp socket Backside lamp unit 4.7 Replacing the Back-side - Konica Minolta Fujitsu fi-4860C2 | Operating Guide - Page 156
4. Attach a new Lamp following the reverse order of old lamp removal. Make sure that the clear portion of the Lamp faces up. ATTENTION If the Lamp is installed with the clear portion facing incorrect direction, an error due to insufficient light occurs. 4-22 4.7 Replacing the Back-side Lamp - Konica Minolta Fujitsu fi-4860C2 | Operating Guide - Page 157
5. Install the Back-lamp unit in the reverse order of its removal. Make sure the connectors meet properly. 4 REPLACEMENT OF CONSUMABLES 6. Close the side cover. Confirm that the cover is closed securely. 7. Clear the Rear-side lamp counter. Please refer to the section "7.3 Setup Mode Details", " - Konica Minolta Fujitsu fi-4860C2 | Operating Guide - Page 158
4-24 4.7 Replacing the Back-side Lamp - Konica Minolta Fujitsu fi-4860C2 | Operating Guide - Page 159
to clear document jams, how to remedy other problems, items to be checked before contacting an authorized service provider and how to check labels on the scanner. 5.1 Clearing Document Jams 5-2 5.2 Troubleshooting 5-8 5.3 Before Contacting a Service Provider 5-29 5.4 Labels on the Scanner 5-31 - Konica Minolta Fujitsu fi-4860C2 | Operating Guide - Page 160
5.1 Clearing Document Jams If a document jam occurs during feeding, follow the procedure below to remove the jammed documents. CAUTION • Be careful not to get injured during jam removal. • When removing jammed documents, be careful not to get your neckties or necklaces entangled inside the - Konica Minolta Fujitsu fi-4860C2 | Operating Guide - Page 161
toward you, lift up the ADF upper sheet guide. ADF upper sheet guide 5 SOLVING COMMON PROBLEMS ADF release lever 3. Remove the jammed document. the documents before you start scanning. 4. Lower the ADF upper sheet guide carefully. 5. Lift the Upper transport unit to release the safety lock, - Konica Minolta Fujitsu fi-4860C2 | Operating Guide - Page 162
. 1. Remove the documents on the stacker. Pull up the lever on the right front of the Upper transport and then raise it. ADF upper sheet guide ADF release lever 2. Pull out the jammed document to the stacker. 3. Lift the Upper transport unit to release the safety lock, then lower the unit - Konica Minolta Fujitsu fi-4860C2 | Operating Guide - Page 163
error occurs frequently, adjust the brake force of the Brake roller using setup mode. - Double-feed - Mis-pick - Paper jam1 5 SOLVING COMMON PROBLEMS 1. Enter into the setup mode. Please refer to the section "1 Basic Operations of the Operator Panel", "Using the setup and the test modes - Konica Minolta Fujitsu fi-4860C2 | Operating Guide - Page 164
Document separation force setup items are as follows. Setting Document thickness Thick Medium Thick Medium Thick Medium Thick Medium Medium Thin Thin Medium Thin Thin Document separation force Strong Medium strong Medium (Factory default setting) Medium Weak Weak "Double-feed" occurs - Konica Minolta Fujitsu fi-4860C2 | Operating Guide - Page 165
Pick speed Fast (Factory default) Mid Slow Mis-pick occurs frequently Decrease pick speed ATTENTION When you set pick speed at "Mid" or "Slow", scanning speed is reduced. 5 SOLVING COMMON PROBLEMS 5.1 Clearing Document Jams 5-7 - Konica Minolta Fujitsu fi-4860C2 | Operating Guide - Page 166
5.2 Troubleshooting This section describes common troubles during usage and how to remedy the troubles. Before you ask for repair service, check the following flowchart to determine the trouble. If you can not resolve the trouble after following the flowcharts, please check the items in section - Konica Minolta Fujitsu fi-4860C2 | Operating Guide - Page 167
SOLVING COMMON PROBLEMS Symptom2 The operator panel LCD goes out. Has it been a while operator panel to wake it up. The scanner operation is normal. YES Contact an authorized FUJITSU Scanner service provider. 5 (* ) Press any button except Power button. The Power button will not work to wake - Konica Minolta Fujitsu fi-4860C2 | Operating Guide - Page 168
Is the SCSI ID set correctly? YES NO Set the SCSI ID correctly from the operator panel of the scanner. (* 1) Continued on next page 5-10 5.2 Troubleshooting - Konica Minolta Fujitsu fi-4860C2 | Operating Guide - Page 169
SOLVING COMMON PROBLEMS Continued from the previous page Has the scanner been selected by multiple applications ? NO Is the Check LED blinking? of user recoverable errors. Is the LED still blinking? YES NO The scanner operation is normal. Continued on next page 5 5.2 Troubleshooting 5-11 - Konica Minolta Fujitsu fi-4860C2 | Operating Guide - Page 170
on again. Is the Check LED lit? YES NO The scanner operation is normal. NO The scanner operation is normal. Contact an authorized FUJITSU Scanner service provider. (* 1) For the details on how to set SCSI ID, refer to the section "7.3 Setup Mode Details", "19. Setting SCSI ID" on page 7-48. 5-12 - Konica Minolta Fujitsu fi-4860C2 | Operating Guide - Page 171
the document path, the Removable NO sheet guide, the Glass sheet guide and/or the Lamp(s) clean? YES Clean the scanner completely. (* 2) Are the Lamps installed correctly? NO Re-install the lamps correctly. (* 3) YES Continued on next page SOLVING COMMON PROBLEMS 5 5.2 Troubleshooting 5-13 - Konica Minolta Fujitsu fi-4860C2 | Operating Guide - Page 172
previous page Contact an authorized FUJITSU Scanner service provider. (* 1) If Binary mode can be different. If the application allows you to change the setting from scanner driver setting dialog, specify [Halftone], [Gray scale] or [24bit Color] for Image " on page 4-1. 5-14 5.2 Troubleshooting - Konica Minolta Fujitsu fi-4860C2 | Operating Guide - Page 173
? YES NO Is the document path, the Removable sheet guide, the Glass sheet guide and/or the Lamp(s) clean? YES Select "Line Art" mode from your PC. (* 1) Clean the scanner completely. (* 2) Contact an authorized FUJITSU Scanner service provider. 5 (* 1) If halftone mode is used, the scanned image - Konica Minolta Fujitsu fi-4860C2 | Operating Guide - Page 174
and/or not sharp. Is the document path, the Removable sheet guide, the Glass sheet guide and/or the Lamp(s) clean? YES NO Is the scanner Contact an authorized FUJITSU Scanner service provider. (* ) For the details of cleaning, refer to "3 DAILY CARE" on page 3-1. 5-16 5.2 Troubleshooting - Konica Minolta Fujitsu fi-4860C2 | Operating Guide - Page 175
. (* 3) Contact an authorized FUJITSU Scanner service provider. SOLVING COMMON PROBLEMS 5 (* 1) For the cleaning of the removable sheet guide, and the glass sheet guide, please refer to "3 DAILY CARE" on on how to replace Lamps, refer to "4 REPLACEMENT OF CONSUMABLES". 5.2 Troubleshooting 5-17 - Konica Minolta Fujitsu fi-4860C2 | Operating Guide - Page 176
user recover- NO able error. (* ) Is the Check LED blinking still? YES The scanner operation is normal. Contact an authorized FUJITSU Scanner service provider. (* ) For the message display contents and the error recovery method, refer to "APPENDIX 3 MESSAGES ON THE OPERATOR PANEL", "Error message - Konica Minolta Fujitsu fi-4860C2 | Operating Guide - Page 177
Symptom9 The Check LED lights right after power on. Turn off the power and on again. Is the check LED lit again? YES NO The scanner operation is normal. Contact an authorized FUJITSU Scanner service provider. 5 SOLVING COMMON PROBLEMS 5.2 Troubleshooting 5-19 - Konica Minolta Fujitsu fi-4860C2 | Operating Guide - Page 178
the documents recently printed on a copier or Laser printer? NO YES Fan the documents a few times to eliminate static electricity. Continued on next page 5-20 5.2 Troubleshooting - Konica Minolta Fujitsu fi-4860C2 | Operating Guide - Page 179
. (* 4) YES Are the Pick roller, the Brake roller or the document path dirty? YES Clean the scanner completely. (* 5) NO Continued on next page SOLVING COMMON PROBLEMS 5 5.2 Troubleshooting 5-21 - Konica Minolta Fujitsu fi-4860C2 | Operating Guide - Page 180
you have not scanned more than 300,000 sheets. (* 7) YES NO Contact an authorized FUJITSU Scanner service provider. Replace the Pick roller unit and the Brake roller unit if necessary. (*6) (* 1) For "7.3 Setup Mode Details", "9. Abrasion counter reset" on page 7-33. 5-22 5.2 Troubleshooting - Konica Minolta Fujitsu fi-4860C2 | Operating Guide - Page 181
remove the foreign objects. (* 3) NO Is the Pad ASSY installed properly? NO Re-install the Pad ASSY properly. (* 4) YES Continued on next page SOLVING COMMON PROBLEMS 5 5.2 Troubleshooting 5-23 - Konica Minolta Fujitsu fi-4860C2 | Operating Guide - Page 182
Pick roller unit and the Brake roller unit if necessary. (*6) NO Contact an authorized FUJITSU Scanner service provider. (* 1) For the details on required conditions, refer to the section "6.2 Document Quality" on Mode Details", "9. Abrasion counter reset" on page 7-33. 5-24 5.2 Troubleshooting - Konica Minolta Fujitsu fi-4860C2 | Operating Guide - Page 183
adjust the offset (position to start scanning the documents)? YES Contact an authorized FUJITSU Scanner service provider. NO Do the offset adjustment. Which OS are you using? Windows 98/ Windows [Options]. Adjust the vertical magnification. SOLVING COMMON PROBLEMS 5 5.2 Troubleshooting 5-25 - Konica Minolta Fujitsu fi-4860C2 | Operating Guide - Page 184
in the past? Re-install the driver. (* 2) YES Is Adaptec EZ-SCSI installed ? YES Uninstall EZ-SCSI first, then install the driver. NO Is the Check LED on the operator panel lit? NO YES Contact an authorized FUJITSU Scanner service provider. Continued on next page 5-26 5.2 Troubleshooting - Konica Minolta Fujitsu fi-4860C2 | Operating Guide - Page 185
cause of the error. (* 3) Contact an authorized FUJITSU Scanner service provider. 5 SOLVING COMMON PROBLEMS (* 1) For the details on how to install the SCSI card driver and updates, refer to section 2.2 in the "fi-4860C2 Installation Guide". (* 2) For the details on how to install FUJITSU TWAIN - Konica Minolta Fujitsu fi-4860C2 | Operating Guide - Page 186
an authorized FUJITSU Scanner service provider. (* ) For the details on how to install FUJITSU TWAIN, refer to "FUJITSU TWAIN32 Scanner Driver (Scanner Utility for Microsoft Windows) User's Guide", "3. Installation." The User's Guide is included in the FUJITSU TWAIN CD-ROM. 5-28 5.2 Troubleshooting - Konica Minolta Fujitsu fi-4860C2 | Operating Guide - Page 187
following items before contacting an authorized FUJITSU Scanner service provider. SOLVING COMMON PROBLEMS ■ General descriptions 5 Items to check Model Serial Number Manufacturing date Date of purchase Symptom Frequency of trouble (example) fi-4860C2 (example) 000001 (example) 2006-05 (May 2006 - Konica Minolta Fujitsu fi-4860C2 | Operating Guide - Page 188
) Filing company documents (example) December 2003 (example) November 15, 2003 (example) Paper Jam2 Imaging quality trouble Items to check Type and version of scanner driver Interface controller OS (Windows) type Application software Findings (example) FUJITSU TWAIN 9.9 (example) Adaptec SCSI Card - Konica Minolta Fujitsu fi-4860C2 | Operating Guide - Page 189
labels are located on the scanner. Manufacturing Label (example): 5 Indicates scanner manufacturing information. Regulatory label (example): Shows the conforming standards of the scanner. SOLVING COMMON PROBLEMS 5.4 Labels on the Scanner 5-31 - Konica Minolta Fujitsu fi-4860C2 | Operating Guide - Page 190
5-32 5.4 Labels on the Scanner - Konica Minolta Fujitsu fi-4860C2 | Operating Guide - Page 191
6 ADF DOCUMENT SPECIFICATIONS This chapter describes the sizes and qualities of documents required for the satisfactory performance of the scanner. 6.1 Document Size 6-2 6.2 Document Quality 6-3 6.3 Hole-punching Prohibited Areas 6-6 6.4 Print Prohibited Area 6-7 6.5 Background Color Areas 6-8 - Konica Minolta Fujitsu fi-4860C2 | Operating Guide - Page 192
6.1 Document Size The following shows the supported document sizes. A Feeding Direction B A 297 mm 11.7 in. Maximum B 432 mm 17 in. A 74 mm 2.9 in. Minimum B 74 mm 2.9 in. 6-2 6.1 Document Size - Konica Minolta Fujitsu fi-4860C2 | Operating Guide - Page 193
6.2 Document Quality This section describes the types and thickness of documents this scanner supports. ■ Document type The recommended document types are as follows. 6 - Woodfree m2 or 14 lb to 34 lb (when fi-486TRK option is not installed) ADF DOCUMENT SPECIFICATIONS 6.2 Document Quality 6-3 - Konica Minolta Fujitsu fi-4860C2 | Operating Guide - Page 194
■ Precautions The following documents may not be scanned successfully. - Document of non-uniform thickness (e.g. envelopes) - Wrinkled or curled documents (Refrer to HINT on the next page ) - Folded or torn documents - Tracing paper - Coated paper - Carbon paper - Carbonless paper - Photosensitive - Konica Minolta Fujitsu fi-4860C2 | Operating Guide - Page 195
the Pick roller. For details on cleaning the Pad ASSY ancd the Pick roller, refer to "Chapter 3 Daily Care" on page 3-1. Replacing parts: The service life of the Pad ASSY and Pick roller may be shortened compared to the case of scanning wood con- 6 taining paper documents. • When scanning wood - Konica Minolta Fujitsu fi-4860C2 | Operating Guide - Page 196
6.3 Hole-punching Prohibited Areas Punched holes in the shaded areas may cause errors. For job separation sheet requirements, please refer to the section "6.6 Job Separation Sheet" on page 6-9. Reading reference position 113 (4.45") 134 (5.28") 79 (3.12") 96 (3.78") 10 10 12 12 10 10 (0.39 - Konica Minolta Fujitsu fi-4860C2 | Operating Guide - Page 197
6.4 Print Prohibited Area If there is printing in area A, the document size may be mis-detected. If there is printing in area B of a document, it may cause double-feed errors. The following figure shows print prohibited areas on a document. If double-feed detection is to be enabled, it is - Konica Minolta Fujitsu fi-4860C2 | Operating Guide - Page 198
6.5 Background Color Areas Paper white detection is performed in the shaded area as shown in the Figure below. The top 3mm on both sides of a document, should have no printing in this area. When using dropout color, the color can be in this area. If this cannot be followed, turn the white level - Konica Minolta Fujitsu fi-4860C2 | Operating Guide - Page 199
6.6 Job Separation Sheet 1. Shape The following shows the typical format of the job separation sheet. 15 (0.59") 6 Feeding direction 15 (0.59") ADF DOCUMENT SPECIFICATIONS Center of document more than 210 (8.27") (Unit : mm) 2. Document Specifications Document width must be Letter (8.5 inch)/A4 - Konica Minolta Fujitsu fi-4860C2 | Operating Guide - Page 200
6.7 Hopper Capacity The number of pages that can be loaded on the Hopper depends on the paper size and the ream weight. This information is shown in the following graph. Capacity of Hopper (sheets) 500 A4/Letter or smaller Legal 300 200 250 A3 or 11x17 in. 150 110 52 80 128 Paper weight - Konica Minolta Fujitsu fi-4860C2 | Operating Guide - Page 201
7 OPERATOR PANEL MENUS This chapter explains the setup mode and the test mode of the scanner. 7.1 Setup Mode 7-2 7.2 Setup mode functions 7-9 7.3 Setup Mode Details 7-16 7.4 Test Mode Overview 7-67 7.5 Test Mode Details 7-72 7-1 - Konica Minolta Fujitsu fi-4860C2 | Operating Guide - Page 202
setup mode from offline status. According to the selected mode, available functions are different. To enter these modes, follow the instructions below: - Online setup mode When LCD indicates Ready status, press The following message appears. (Next button). Mo d e Se l e c t 1 ! Set u p Mo - Konica Minolta Fujitsu fi-4860C2 | Operating Guide - Page 203
■ Online setup mode restrictions In Online setup mode, the scanner setup can be changed without turning off the power. However, the following items cannot be changed from this mode. - Consumables counter reset - SCSI ID change 7 - Product ID change - SCSI bus width change - Interface change - Konica Minolta Fujitsu fi-4860C2 | Operating Guide - Page 204
] Function Displays the next menu item without saving the change. Referred to as Next button in this manual. Displays the previous menu item without saving the change. Referred to as Previous button in this manual. Moves to the right item on the menu Referred to as Right arrow button in this - Konica Minolta Fujitsu fi-4860C2 | Operating Guide - Page 205
(From screen !30) ! 01 Se pa r a t i on = Thi ng g g c c Thi c k ! 02 = Pr e - p i c k On / Of f ! 03 Pi c k Sp e e d = F a s t / Mi d / S l o w ! 04 Do u b l e Feed = No / Ye s g 1 / 2 : St o p ! 05 Lengt h Ch e c k = No / Ye s g 1 / 2 : St o p ! 06 = Sk e w Ch e c k On / Of - Konica Minolta Fujitsu fi-4860C2 | Operating Guide - Page 206
! 09 Abr as i on CNT Pi c k / Br a k e / Pad ! 09- 1 Pi c k CNT =xxxx xx Re s e t / No ! 09- 2 Br a k e CNT =xxxx xx Re s e t / No ! 09- 3 Pa d CNT =xxxx xx Re s e t / No ! 09- 4 Fr ont L a mp =xxxxxx Re s e t / No ! 09- 5 Bac k L a mp =xxxx xx Re s e t / No ! 09- 6 xxxx - Konica Minolta Fujitsu fi-4860C2 | Operating Guide - Page 207
! 17 Feed Ch a n g e ? r et r y No / Ye s ! 18 Ma n u a l Fe e d Ch a n g e ? No / Ye s ! 19 S CSI ID =0/ 1/ 2/ 3/ 4/ 5/ 6/ 7 ! 17- 1 = Re t r y 1 St e p ! 17- 2 = Re t r y 4 T i me ! 18- 1 = Pi c k St a r t 1. 0 Se c ! 18- 2 = T i me - o u t 30 Se c ! 20 Pr oduc t ID - Konica Minolta Fujitsu fi-4860C2 | Operating Guide - Page 208
mode. Screen 22 and screen 23 appear only when any TPS interface board is HINT installed. Screen 24 appears only when both the fi-486PRFR (Pre-imprinter) and the fi-486PRRE (Post-imprinter) are installed. Screen 25, Screen 26 and Screen 29 appear when either or both of the fi486PRFR and the - Konica Minolta Fujitsu fi-4860C2 | Operating Guide - Page 209
7.2 Setup mode functions There are 32 items in setup mode as shown in the following. LCD display Descriptions Selectable parameters Default Mode On- Offline line Remarks Double Feed (Multi-feed) Specifies the double-feed (Multi-feed) detection mode based on: 1: Document overlapping / - Konica Minolta Fujitsu fi-4860C2 | Operating Guide - Page 210
10,000 sheets. Abrasion Counter Clear the consumable counters (Abrasion counter) - Not Avail- - Avail- able able Manual Feed Specifies the pick start time from the time document is manually set. 0.2 to 29.8 sec 1.0 sec Avail- Avail- able able Specifies the waiting time from 1, 5, 10, 20 - Konica Minolta Fujitsu fi-4860C2 | Operating Guide - Page 211
LCD display Descriptions Selectable parameters Skew Check Specifies if skew detection is On/Off enabled. Separation Specifies the Brake roller force Thick appropriate for the document thickness Medium Thick Default Mode Remarks On- Offline line Off Avail- Avail- Settings via the able - Konica Minolta Fujitsu fi-4860C2 | Operating Guide - Page 212
LCD display Descriptions Selectable parameters Pre-pick Enable or disable pre-pick operation, the picking of a document prior to actual feeding. (increases scanner throughput) On / Off Picking speed Specify the Pick roller rotation Fast / speed Mid / Slow Pick retry Specify the Pick motor - Konica Minolta Fujitsu fi-4860C2 | Operating Guide - Page 213
LCD display Descriptions Selectable parameters B.Drop-out Brightness SCSI ID Specifies the back page R dropout color for a G monochrome scan. B Adjust the Front/Back Brightness to compensate for the grayscale level differences between the CCDs. -6 to +6 Specifies SCSI ID of the scanner. - Konica Minolta Fujitsu fi-4860C2 | Operating Guide - Page 214
rate for TPS interface. 19200/ 9600/ 4800/ 2400 When both fi-486PRFR (Preimprinter) and fi-486PRRE (Post-imprinter) are installed, specifies which one to setup. Pre / Post When either fi-486PRFR (Pre- Numbering imprinter) and fi-486PRRE : On / Off (Post-imprinter) is installed, set the numbering - Konica Minolta Fujitsu fi-4860C2 | Operating Guide - Page 215
LCD display Descriptions Selectable parameters Power Save Specifies the time before entering Power save mode. 5 to 60minutes Language Specifies the language to use for Operator panel display. Japanese (Katakana) / English Imprinter Status Shows the installed imprinter type. Lamp control - Konica Minolta Fujitsu fi-4860C2 | Operating Guide - Page 216
7.3 Setup Mode Details 1. Setting the document separation force 1) Press (Next button) or (Previous button) and let the scanner show . ! 01 Se par at i on = T h i n JJJFFT h i c k 2) At , press (Left arrow button) or (Right arrow button) and select the - Konica Minolta Fujitsu fi-4860C2 | Operating Guide - Page 217
OPERATOR PANEL MENUS If the following error occurs frequently, change the setting by HINT referring to the explanation on the table. - Double-feed - Mis-pick - Paper Jam1 7 Setting Document separation force Thick Strong Medium Thick Medium strong Medium Average (Factory default) - Konica Minolta Fujitsu fi-4860C2 | Operating Guide - Page 218
2. Setting Pre-pick 1) Press (Next button) or (Previous button) and let the scanner show . ! 02 = Pr e- p i c k On / Of f 2) At , to enable Pre-pick, press (Left arrow button) and select [On]. To disable Pre-pick, press (Right arrow button) and select [Off]. 3) - Konica Minolta Fujitsu fi-4860C2 | Operating Guide - Page 219
3. Setting Pick Speed 1) Press (Next button) or (Previous button) and let the scanner show . ! 03 Pi c k Spe ed = F a s t / Mi d / S l o w 2) At , press (Left arrow button) or (Right arrow button) and 7 select Pick roller rotation speed. The blinking item is - Konica Minolta Fujitsu fi-4860C2 | Operating Guide - Page 220
4. Setting Double-feed detection (document overlapping/thickness) 1) Press (Next button) or (Previous button) and let the scanner show . ! 04 Do u b l e Feed = N o / Y e s J1 / 2 : S t o p 2) At , by pressing (Left arrow button) or (Right arrow button), Double-feed - Konica Minolta Fujitsu fi-4860C2 | Operating Guide - Page 221
3) At you can enable or disable the Double-feed detection or configure the detection modes by pressing (Right arrow button) or (Left arrow button). ! 04- 1 Ul t r a s o n i c = O f f / O n -> 1 / 2 : F u l l 7 By pressing By pressing (Right arrow button), the - Konica Minolta Fujitsu fi-4860C2 | Operating Guide - Page 222
The available ranges of detection are as follows: Top: 0 (default), 50, 100, 150, 200 (Unit : mm) L: 100 (default), 150, 200 (Unit : mm) 5) Besides the Double-feed detection by checking paper overlapping (the amount of ultrasonic waves), you can enable or disable the detection by checking paper - Konica Minolta Fujitsu fi-4860C2 | Operating Guide - Page 223
! 04- 4 DF Mo d e + T h i c k n e s s &Ro l l e r (1) [Thickness] is blinking: Double-feed is detected by light amount transmitted through paper. (2) [Thickness & Roller] is blinking: Double-feed is detected based on the light amount transmitted through paper and Brake roller rotation amount. - Konica Minolta Fujitsu fi-4860C2 | Operating Guide - Page 224
ATTENTION ATTENTION When a double-feed is detected and the scanning operation is stopped, the last documents in the hopper or the one ahead of it might have been double fed. Depending on the document type, there are cases when double-feed can not be detected by paper thickness. 7-24 7.3 Setup Mode - Konica Minolta Fujitsu fi-4860C2 | Operating Guide - Page 225
5. Setting Double-feed detection (by document length) 1) Press (Next button) or (Previous button) and let the scanner show . ! 05 Lengt h Ch e c k = N o / Y e s J1 / 2 : S t o p 2) At , by pressing (Left arrow button) or (Right arrow button), 7 Double-feed - Konica Minolta Fujitsu fi-4860C2 | Operating Guide - Page 226
3) In case of (2) or (3), by pressing . (Enter button), LCD display changes to ! 05- 1 Lengt h = 10/ 15/ 20 mm 4) At , by pressing (Left arrow button) or (Right arrow button), the document length can be specified. By pressing (Right arrow button), selection - Konica Minolta Fujitsu fi-4860C2 | Operating Guide - Page 227
6. Setting Skew Check 1) Pressing (Next button) or . (Previous button) and let the LCD show ! 06 Sk ew Ch e c k = On / Of f 7 2) If you want to enable Skew check at , press (Left arrow button), and select [On]. To disable Skew-check, press (Right arrow button) - Konica Minolta Fujitsu fi-4860C2 | Operating Guide - Page 228
7. Setting IPC pre-set 1) Pressing (Next button) or . (Previous button) and let the LCD show ! 07 I = No / PC Pr e- s e t 1/ 2/ 3/ 4/ 5 2) At , the preset items can be selected by pressing (Left arrow button) or (Right arrow button). The blinking item is the - Konica Minolta Fujitsu fi-4860C2 | Operating Guide - Page 229
When scanning in Binary mode (Line art), document type and a suitable pre- HINT set pattern relationship is shown as follows: −The horizontal axis shows the darkness/color of the background against the text/lines on the documents. −The vertical axis shows the darkness of the text and lines on - Konica Minolta Fujitsu fi-4860C2 | Operating Guide - Page 230
This setting is invalid in grayscale mode or in color mode. HINT Pre-sets are valid only in binary scan mode. The following table shows validity of each scan parameter when using IPC pre-set in Offline mode. Validity of scan parameter Valid Invalid Scan mode X - Resolu- Line tion art/ - Konica Minolta Fujitsu fi-4860C2 | Operating Guide - Page 231
8. Setting Consumables Replacement Message 1) Pressing (Next button) or . (Previous button) and let the LCD show ! 08 Abr as i on Al a r m Se t ? No / Ye s 7 2) At , to change Consumables replacement message setup (Abrasion Alarm), press (Right arrow button) and - Konica Minolta Fujitsu fi-4860C2 | Operating Guide - Page 232
3) At , press (Left arrow button) or (Right arrow button) to select consumable error process. (1) [Stop] is blinking: When the consumables replacement limit is reached, the Consumables replacement message (Abrasion alarm) is shown on the LCD and scanning stops. (2) [Message] is - Konica Minolta Fujitsu fi-4860C2 | Operating Guide - Page 233
9. Abrasion counter (Abrasion CNT) reset 1) Pressing (Next button) or . (Previous button) and let the LCD show ! 09 Abr as i on CNT Pi c k / Br a k e / Pad 7 2) At , select the Abrasion counter to reset. The blinking item is the one selected. HINT OPERATOR - Konica Minolta Fujitsu fi-4860C2 | Operating Guide - Page 234
3) By pressing (Enter button), LCD display changes to , , , , or depending on the selection at . When [Pick] is selected: ! 09- 1 Pi =xxxx xx ck CNT Re s e t / No When [Brake] is selected: ! 09- 2 - Konica Minolta Fujitsu fi-4860C2 | Operating Guide - Page 235
4) At , , , or , to reset the corresponding counter, press (Left arrow button) and select [Reset]. Press (Enter button) to confirm the selection, then is displayed. If you do not want to reset the counter, select [No] and press ( - Konica Minolta Fujitsu fi-4860C2 | Operating Guide - Page 236
10. Setting Short document scan mode(Paper Length setup) 1) Press (Next button) or . (Previous button) and let the LCD display ! 10 Pa p e r Lengt h = N o r ma l / S h o r t 2) At , press (Left arrow button) or (Right arrow button) and select the proper - Konica Minolta Fujitsu fi-4860C2 | Operating Guide - Page 237
11. Setting Language 1) Press (Next button) or . (Previous button) and let LCD display ! 11 Language =En g l i s h / 7 2) Press (Left arrow button) or (Right arrow button) and select the language for LCD display. 3) Press Press screen. (Enter button) to confirm the - Konica Minolta Fujitsu fi-4860C2 | Operating Guide - Page 238
12. Setting Front-side background color 1) Press (Next button) or . (Previous button) and let LCD display ! 12 F. = Wh i t Ba c k g r e / Bl a c ou nd k 2) At , to set the background color to white, press (Left arrow button) and select [White]. To set the - Konica Minolta Fujitsu fi-4860C2 | Operating Guide - Page 239
13. Setting Back-side background color 1) Press (Next button) or (Previous button) and let LCD display . ! 13 B. Ba c k g r o u n d = Wh i t e / B l a c k 2) At , to set the background color to white, press (Left arrow 7 button) and select [White]. To set - Konica Minolta Fujitsu fi-4860C2 | Operating Guide - Page 240
14. Setting Front-side dropout color 1) Press (Next button) or . (Previous button) and let LCD display ! 14 = R/ F. G/ Dr B op- out 2) At , press (Left arrow button) or (Right arrow button) and select the color to drop out. The blinking item is the one - Konica Minolta Fujitsu fi-4860C2 | Operating Guide - Page 241
15. Setting Back-side dropout color 1) Press (Next button) or . (Previous button) and let LCD display ! 15 B. Dr o p - o u t = R/ G/ B 7 2) At , press (Left arrow button) or (Right arrow button) and select a color to drop out. The blinking item is the one - Konica Minolta Fujitsu fi-4860C2 | Operating Guide - Page 242
16. Setting Pick retry 1) Press (Next button) or . (Previous button) and let LCD display ! 16 Pi c k Ch a n g e ? r et r y No / Ye s 2) At , to change pick motor's pick operation time and the number of retries, press (Right arrow button) and select [Yes]. Press - Konica Minolta Fujitsu fi-4860C2 | Operating Guide - Page 243
4) At , specify the number of pick retries. By pressing (Left arrow button), the number of retries decreases. By pressing (Right arrow button), the number of retries increases. Press (Left arrow button) or (Right arrow button), and select the setting. The number of the pick retries can - Konica Minolta Fujitsu fi-4860C2 | Operating Guide - Page 244
17. Setting Feed retry 1) Press (Next button) or . (Previous button) and let LCD display ! 17 Feed Ch a n g e ? r et r y No / Ye s 2) At , to change Feed motor operation time and the number of retries, press (Right arrow button) and select [Yes]. Press (Enter - Konica Minolta Fujitsu fi-4860C2 | Operating Guide - Page 245
4) In , specify the number of retries. By pressing (Left arrow button), the number of retry decreases. By pressing (Right arrow button), the number of retries increases. The number of the feed retries can be set between 1 to 7 times. Press (Left arrow button) or (Right arrow button), and - Konica Minolta Fujitsu fi-4860C2 | Operating Guide - Page 246
select [No] and press (Enter button). ! 18- 1 = Pi c k St a r t 1. 0 Se c 3) At , specify the time to start pick from the manual setting of the document (Start time). By pressing (Left arrow button), the pick start time decreases. By pressing (Right arrow button), the - Konica Minolta Fujitsu fi-4860C2 | Operating Guide - Page 247
18- 2 = T i me - o u t 30 Se c 4) At , specify the wait time (i.e. the time from the PC issues scan command to time out) for manual setting of document. 7 By pressing (Left arrow button), the wait time becomes shorter. By pressing (Right arrow button), the wait time becomes longer - Konica Minolta Fujitsu fi-4860C2 | Operating Guide - Page 248
19. Setting of SCSI ID 1) Press (Next button) or . (Previous button) and let LCD display ! 19 S CSI ID =0/ 1/ 2/ 3/ 4/ 5/ 6/ 7 2) At , press (Left arrow button) or press (Right arrow button) to select SCSI ID number. The blinking item is the one selected. HINT - Konica Minolta Fujitsu fi-4860C2 | Operating Guide - Page 249
20. Setting of Product ID (Scanner model number) 1) Press (Next button) or . (Previous button) and let LCD display ! 20 Pr oduc t ID f i 4860C / f i 4990C 7 2) At , press (Left arrow button) or (right arrow button) and select Product ID. The blinking item is - Konica Minolta Fujitsu fi-4860C2 | Operating Guide - Page 250
21. Setting SCSI bus width 1) Press (Next button) or . (Previous button) and let LCD display ! 21 = Wi S CS I dt h Bu s 8/ 16 bi t 2) At . If Wide SCSI (68pin) interface is used, press (Right arrow button) and select [16]. If SCSI-2 (50pin) interface is used, - Konica Minolta Fujitsu fi-4860C2 | Operating Guide - Page 251
22. Setting Interface 1) Press (Next button) or . (Previous button) and let LCD display ! 22 I nt er f ace = Au t o / SCSI / T PS 7 2) At , press (Left arrow button) or (Right arrow button), and select the type of interface. The blinking item is the one - Konica Minolta Fujitsu fi-4860C2 | Operating Guide - Page 252
23. Setting Baud rate of TPS interface 1) Press (Next button) or . (Previous button) and let LCD display ! 23 Ba u d Ra t e =19200/ 9600/ 4800 2) At , press (Left arrow button) or (right arrow button) and select Baud rate. The blinking item is the one selected - Konica Minolta Fujitsu fi-4860C2 | Operating Guide - Page 253
button) and The blinking item is the one selected. HINT When "Pre" is blinking: the Pre-imprinter (fi-486PRFR) is selected When "Post" is blinking: the Post-imprinter (fi-486PRRE) is selected. OPERATOR PANEL MENUS 3) Press (Enter button) to confirm the setting. Then configure the priority - Konica Minolta Fujitsu fi-4860C2 | Operating Guide - Page 254
button) to confirm the setting. (Exit button) and the LCD display goes back to the [Ready] ATTENTION This screen is displayed only when both imprinters (fi-486PRFR and fi-486PRRE) are installed. 7-54 7.3 Setup Mode Details - Konica Minolta Fujitsu fi-4860C2 | Operating Guide - Page 255
25. Setting Imprinter numbering 1) Press (Next button) or (Previous button) and let LCD display . ! 25 = N u mb e r i n g On / Of f ( x x x x ) 7 To show your selection of imprinter or the imprinter to setup, [Pre] or [Post] HINT is displayed. OPERATOR PANEL MENUS 2) - Konica Minolta Fujitsu fi-4860C2 | Operating Guide - Page 256
3) At , press (Left arrow button) or let your choice of number of digits blink. Selectable number of digits is listed as below. (Right arrow button) and (1) [5] is blinking: 5 digit (2) [8] is blinking: 8 digit Press (Enter button), then is displayed. ! 25 - Konica Minolta Fujitsu fi-4860C2 | Operating Guide - Page 257
OPERATOR PANEL MENUS 5) At , you can specify if the numbering should be initialized to the specified initial value in 4) at hopper empty. To specify to initialize the numbering counter at hopper empty, press (Left arrow button) and select [On]. Press (Enter button) to confirm the - Konica Minolta Fujitsu fi-4860C2 | Operating Guide - Page 258
26. Reset the Ink remain counter of imprinter. If the following message comes up, prepare the new Print cartridge. If no further printing is not possible, replace the Print cartridge and reset the ink counter. If the Print cartridge is replaced before Print cartridge error occurs, be sure to reset - Konica Minolta Fujitsu fi-4860C2 | Operating Guide - Page 259
2) At , to choose to reset the ink counter, press button) and select [Reset]. Press (Enter button). is displayed. Not to reset, select [No] and press (Enter button). (Left arrow ! 26- 1 Re s e t No w 7 No / Ye s OPERATOR PANEL MENUS 3) At , - Konica Minolta Fujitsu fi-4860C2 | Operating Guide - Page 260
27. Setting Power save mode 1) Press (Next button) or . (Previous button) and let LCD display ! 27 = Po we r Sa v e 2) At , press (Left arrow button) or (Right arrow button)and select [On] to use power save mode. Next, press (Enter button). Then the LCD display - Konica Minolta Fujitsu fi-4860C2 | Operating Guide - Page 261
28. Setting Brightness 1) Press (Next button) or . (Previous button) and let LCD display ! 28 Br i gh t n e s s Ch a n g e ? No / Ye s 7 2) At , to adjust the Brightness, press (Right arrow button) and select [Yes]. Press (Enter button) to confirm the - Konica Minolta Fujitsu fi-4860C2 | Operating Guide - Page 262
St at u s Pos t / Pr e [XXXX/XXXX], imprinter installation status is displayed as follows. (1) Only fi-486PRFR is installed: (2) Only fi-486PRRE is installed: (3) Both fi-486PRFR and fi-486PRRE are installed: [Pre] [Post] [Post/Pre] 2) By pressing (Exit button), LCD display goes back to "Ready - Konica Minolta Fujitsu fi-4860C2 | Operating Guide - Page 263
OPERATOR PANEL MENUS 30. Setting Lamp Control 1) Press (Next button) or . (Previous button) and let LCD display ! 30 L a mp c ont r ol N o r ma l / A l wa y s On 7 2) At , press (Left arrow button) to select [Normal] or press (Right arrow button) to select [ - Konica Minolta Fujitsu fi-4860C2 | Operating Guide - Page 264
31. Setting Auto crop width When the scanner is set to scan in the Black & White mode and to detect a paper size automatically, the width of the detected paper may not be the integer number. You can round the number including fractions up or down. 1) Press (Next button) or . (Previous - Konica Minolta Fujitsu fi-4860C2 | Operating Guide - Page 265
32. Setting the offset (starting position) for automatic size detection of the back side image 1) Press (Next button) or . (Previous button) and let LCD display ! 32 C r o p p i n g (B ) Ch a n g e ? No / Ye s 7 2) At , to adjust the offset (starting position) - Konica Minolta Fujitsu fi-4860C2 | Operating Guide - Page 266
4)At , press (Left arrow button) or (Right arrow button) to adjust the vertical starting position. Pressing (Right arrow button): The setting value increases from -4 to +4 (x 0.5mm). Pressing (Left arrow button): The setting value decreases from +4 to -4 (x 0.5mm). 5) Press (Enter button - Konica Minolta Fujitsu fi-4860C2 | Operating Guide - Page 267
7.4 Test Mode Overview ■ Outline Scanner operation can be checked in the offline test mode. To enter the test mode, follow the procedures below. - Test mode Keep pressing (Start button) and turn on the power. 7 Then the Operator panel LCD displays the following message. < MOD E SEL ECT> SET - Konica Minolta Fujitsu fi-4860C2 | Operating Guide - Page 268
] Function Displays the next menu item without saving the change. Referred to as Next button in this manual. Displays the previous menu item without saving the change. Referred to as Previous button in this manual. Moves to the right item on the menu. Referred to as Right arrow button in this - Konica Minolta Fujitsu fi-4860C2 | Operating Guide - Page 269
■ Transition of screens in test mode Refer to the next page. The LCD screen transition chart in the following pages show the concept. The flow charts in the following pages show the transition of the LCD screen. For the details, please refer to the descriptions in " Contents of test mode setting - Konica Minolta Fujitsu fi-4860C2 | Operating Guide - Page 270
dt e COL OR P AP ER A4 S Ie Zt E P S I MP L E X /e Dt U P L E X S I MP L E X T03 De v i c e Li f e L A MP FO :f xf sx ex xt x x x x B: x x x x x x x x T04 Op t i o n s Pos t pO rf fi ns et et r : - Pr e pr i nt er : g 7-70 7.4 Test Mode Overview - Konica Minolta Fujitsu fi-4860C2 | Operating Guide - Page 271
■ Contents of test mode setting LCD display Single feed Multi-feed Device Life Options Descriptions Scans a sheet of document without connecting to a PC. Scans documents continuously without connecting to a PC. Shows the cumulative lamp-on time. Shows the options installation status. 7 OPERATOR - Konica Minolta Fujitsu fi-4860C2 | Operating Guide - Page 272
7.5 Test Mode Details 1. Single feed test mode Without connecting to a PC, the scanner's whole mechanism's operation can be checked. Only one sheet is fed with this test. Scan parameters can be changed for scan test. Imprinter test print can be performed at the same time. 1) Place the documents to - Konica Minolta Fujitsu fi-4860C2 | Operating Guide - Page 273
At this screen, press (Left arrow button) or (Right arrow button) and select simplex or duplex. Press (Enter button) and confirm the setting. Then the display goes back to . (2) At , select the second item from left, [A4P] in the sample screen, and press . ( - Konica Minolta Fujitsu fi-4860C2 | Operating Guide - Page 274
Press (Enter button). Then the display goes back to . At , select [START], and press (Start button). If fi-486PRFR and/or fi-486PRREis installed, is displayed for setting imprinter test conditions. If an imprinter(s) is not installed, the scanner starts scanning - Konica Minolta Fujitsu fi-4860C2 | Operating Guide - Page 275
) and: Select [On] to do imprinter test while scanning. Then select the imprinter to use. 7 If the printer to use is fi-486PRFR, select [Pre]. If fi-486PRRE, select [Post]. If imprinter test is not required, select [Off]. 7) Press (Start button). Scanning operation starts with or without - Konica Minolta Fujitsu fi-4860C2 | Operating Guide - Page 276
2. Multi feed test mode Without connecting to a PC, the scanner's whole mechanism's operation can be checked. In this test documents are scanned continuously. Scan parameters can be changed for scanning test. Imprinter test print can be performed at the same time. 1) Place the documents to scan on - Konica Minolta Fujitsu fi-4860C2 | Operating Guide - Page 277
5) Specify the scanning conditions. (1)At , select the left most item, [S] in the sample screen, and press 2.1>. (Enter button). Then the LCD display shows - Konica Minolta Fujitsu fi-4860C2 | Operating Guide - Page 278
A4 portrait B4 portrait Legal portrait 11 x 17 inch portrait A3 portrait A5 landscape B5 landscape Letter landscape A4 landscape A5 portrait B5 portrait Letter portrait A4P B4P LGP DLP A3P A5L B5L LTL A4L A5P B5P LTP Press (Enter button) and confirm the setting.Then is redisplayed. - Konica Minolta Fujitsu fi-4860C2 | Operating Guide - Page 279
, press (Left arrow button) or Select [On] to do imprinter test while scanning. Then, select the imprinter to use. If the printer to use is fi-486PRFR, select [Pre]. If fi-486PRRE, select [Post]. (Right arrow button) and: If imprinter test is not required, select [Off]. 7.5 Test Mode Details 7-79 - Konica Minolta Fujitsu fi-4860C2 | Operating Guide - Page 280
7) Press (Start button). Scanning operation starts with or without imprinter test. To quit the test, press (Stop button). HINT The LCD goes back to . 7-80 7.5 Test Mode Details - Konica Minolta Fujitsu fi-4860C2 | Operating Guide - Page 281
3. Display the cumulative lamp-on time You can check the cumulative number of lamp-on time. 1) Press (Next button) or (Previous button) and let LCD display . T03 De v i c e Li f e 7 OPERATOR PANEL MENUS 2) At , press (Start button) or is - Konica Minolta Fujitsu fi-4860C2 | Operating Guide - Page 282
pO fr if ns et et r : - Pr e pr i nt er : J If fi-486PRFR is installed, LCD display shows [Pre Printer: ]. [ ] indicates that the printer is installed. If not installed, it shows [Pre Printer:-]. If fi-486PRRE is installed, LCD display shows [Post Printer: ]. [ ] indicates that - Konica Minolta Fujitsu fi-4860C2 | Operating Guide - Page 283
8 OPTIONS This chapter describes options for fi-4860C2. 8.1 Options 8-2 8.2 fi-486PRFR (Pre-imprinter 8-3 8.3 fi-486PRRE (Post-imprinter 8-4 8.4 fi-486TRK (Thinner paper Roller Kit 8-5 8-1 - Konica Minolta Fujitsu fi-4860C2 | Operating Guide - Page 284
8.1 Options The following lists options available for the scanner. Name fi-486PRFR fi-486PRRE fi-486TRK Part No. PA03296-D207 PA03296-D201 PA03296-D780 Description Prints information on the front of a document prior to scan. Installed before the scanner optics. - Konica Minolta Fujitsu fi-4860C2 | Operating Guide - Page 285
of the scanner. It prints prior to scanning. The fi-486PRFR (Pre-imprinter) Specifications are described below. Item B A As for the operations and functions of fi-486PRFR (Pre-imprinter), refer to the fi-486PRFR Operator's Guide attached to fi-486PRFR. 8.2 fi-486PRFR (Pre-imprinter) 8-3 - Konica Minolta Fujitsu fi-4860C2 | Operating Guide - Page 286
path, inside of the scanner. It prints after the scanning. The fi-486PRRE (Post-imprinter) Specifications are described below. Item Descriptions Printing Method and functions of fi-486PRRE (Post-imprinter), refer to the fi-486PRRE Operator's Guide attached to fi-486PRRE. 8-4 8.3 fi-486PRRE (Post - Konica Minolta Fujitsu fi-4860C2 | Operating Guide - Page 287
Rubber foam) 300,000 sheets or 1 year Brake Roller(Rubber 300,000 sheets or 1 year foam) Pad ASSY 300,000 sheets or 1 year When using fi-486TRK, documents of coated paper (e.g. photos, maga- HINT zines, etc.) may not be fed into the ADF successfully. For scanning such documents, the standard - Konica Minolta Fujitsu fi-4860C2 | Operating Guide - Page 288
8-6 8.4 fi-486TRK (Thinner paper Roller Kit) - Konica Minolta Fujitsu fi-4860C2 | Operating Guide - Page 289
9 SCANNER SPECIFICATIONS This chapter describes the Scanner Specifications. 9.1 Basic Product Specifications 9-2 9.2 Installation Specifications 9-3 9.3 Dimensions 9-5 9-1 - Konica Minolta Fujitsu fi-4860C2 | Operating Guide - Page 290
9.1 Basic Product Specifications 1 Scanner Type ADF(Automatic Document Feeder) and Manual feed 2 Image sensor Color CCD x 2 Front/Back 3 Light source " on page 6-1. (* 5) A3 and 11 x17in document sizes are not supported at color 400dpi. (* 6) Avoid connecting other SCSI devices to the same - Konica Minolta Fujitsu fi-4860C2 | Operating Guide - Page 291
9.2 Installation Specifications Item Dimensions (With hopper and stacker retracted) Space requirements Depth 431 mm, 17 in. 500 mm 19.7 in. Specification Width 520 mm, 20.5 in. Height 523 mm, 20.6 in. 100 mm 4 in. Scanner 100 mm 4 in. 600 mm 23.6 in. Weight (kg) Input power Voltage Phase - Konica Minolta Fujitsu fi-4860C2 | Operating Guide - Page 292
Item Ambient condition Device status Temperature Humidity Heat capacity Shipping Weight (kg) Specification Operating Not operating 15 -- 35 degrees Celsius 59 -- 95 degrees Fahrenheit -20 -- +60 degrees Celsius -4 -- +140 degrees Fahrenheit 20 - 80 % 8 - 95 % 172 kcal or less 50 kg, 110 lb - Konica Minolta Fujitsu fi-4860C2 | Operating Guide - Page 293
9.3 Dimensions 523 (20.6 in.) (17in) (20.5 in.) 9 (20.6 in.) SCANNER SPECIFICATIONS 520 (20.5 in.) unit: mm 9.3 Dimensions 9-5 - Konica Minolta Fujitsu fi-4860C2 | Operating Guide - Page 294
9-6 9.3 Dimensions - Konica Minolta Fujitsu fi-4860C2 | Operating Guide - Page 295
APPENDIX 1 DROP-OUT COLOR A drop-out color is a color that can be eliminated from what the scanner sees. To check the background color of document for drop-out, use the method and follow the standards given below. Print density measurement The measurement must be made in one of the following ways: - Konica Minolta Fujitsu fi-4860C2 | Operating Guide - Page 296
: document thickness, document length, and both document thickness and length. The following conditions must be satisfied in each of these detection modes. (When fi-486TRK is not installed.) Detection by Document Overlapping - Paper weight: 52 g/m2 - 127 g/m2 or 14 lbs to 34 lbs - Punched holes are - Konica Minolta Fujitsu fi-4860C2 | Operating Guide - Page 297
- Punched holes are not allowed within 35mm (1.4 inch) of the vertical center line of the document. - The deviation in the amount of the light transmitted through background areas must not be less than 10%. Detection by Document Overlapping and Length Sheets of the same thickness and length shall be - Konica Minolta Fujitsu fi-4860C2 | Operating Guide - Page 298
- The deviation in the amount of the light transmitted through background areas must not be less than 10%. The type and the conditions of document and the conditions sometimes HINT cause the double-feed detection rate to drop. When the overlapping check is specified, the paper sheets which - Konica Minolta Fujitsu fi-4860C2 | Operating Guide - Page 299
APPENDIX 3 MESSAGES ON THE OPERATOR PANEL ■ Massages of Scaner Operation Status changes to with progress of time, and when all become , it (Initializing) move to the following check states. J JJFF FF (Ejecting document) (Checking sensor) - Konica Minolta Fujitsu fi-4860C2 | Operating Guide - Page 300
HINT Pr e pa r e new I nk No w Re a d i n g ! x x x x "xxxx" shows the Batch counter value. HINT No w Re a d i n g ! x x x x "xxxx" shows the Batch counter value. When the messages of LCD on the Operation panel disappears and the Power LED lamp - Konica Minolta Fujitsu fi-4860C2 | Operating Guide - Page 301
(Scanning) The following message is displayed while the scanner is scanning continuously in the state where double-feed (multi feed) has been detected (by overlapping check). If a double-feed detection state is canceled on "Ready" screen after scanning, the upper row of this - Konica Minolta Fujitsu fi-4860C2 | Operating Guide - Page 302
"xxxx" shows the number of Batch counter value. HINT (Waiting) HINT The following message is displayed while the scanner is waiting in the state when double-feed (multi feed) has been detected (by thickness check). Press the [Stop] button, and the double-feed detection state is canceled. The upper - Konica Minolta Fujitsu fi-4860C2 | Operating Guide - Page 303
■ Error mesage (Temporary error :Check LED blinking) Check LED blinks when the following errors occur except and . The following messages are displayed if no documents are on the hopper during the scanning opperation. Please place documents on the hopper. - Konica Minolta Fujitsu fi-4860C2 | Operating Guide - Page 304
The following message is displayed if the ADF cover is not closed completely. Close the ADF cover completely, to enable scanning. ADF- Co v e r Op e n The following message is displayed, when the double-feed is (by thickness check) detected by thickness check - Konica Minolta Fujitsu fi-4860C2 | Operating Guide - Page 305
The following message is displayed, When skewed document is fed from the hopper to the ADF. I r r egul ar paper not set correctly or when there are too many documents. (When the - Konica Minolta Fujitsu fi-4860C2 | Operating Guide - Page 306
replacement message. Ab r a s i o n al ar m not set to fi-486PRFR (Pre-imprinter) or to fi-486PRRE (Post- imprinter). Pr e No I nk Ca r t r i d g e Pos t No I nk Ca r t r i d g e ●AP-12 - Konica Minolta Fujitsu fi-4860C2 | Operating Guide - Page 307
supply once again after disconnecting the power supply. If the same message is displayed again, please contact a distributor or an nearest imaging service and support center for help. (Front side) The following message is displayed, when an error occurs to the front side optical - Konica Minolta Fujitsu fi-4860C2 | Operating Guide - Page 308
(Front side) The following message is displayed, when the fuse for the lamp for front side blows out. Fus e al ar m Fr o nt si de l a mp The following message is displayed, when the fuse for the lamp (Back side) for back side blows out. Fus e al ar m - Konica Minolta Fujitsu fi-4860C2 | Operating Guide - Page 309
The following message is displayed, when the hopper moves over the normal position. Ho p p e r over r un The following message is displayed, when an error occurs in the sensor control. Se n s o r Co n t r o l Al a r m - Konica Minolta Fujitsu fi-4860C2 | Operating Guide - Page 310
The following message is displayed, when an error occurs in the Power supply. P o we r suppl y er r or The following message is displayed, when an error occurs in the EEPROM. A DDR ES S xxH E E P ROM Al a r m The EEPROM address where the error occurs is - Konica Minolta Fujitsu fi-4860C2 | Operating Guide - Page 311
. MD C d o wn l o ad Er r o r The following message is displayed, when an error occurs in the fi-486PRFR (Pre-imprinter) or the fi-486PRRE (Post-imprinter). Pr e I mp r i n t e r Al a r m Pos t I mp r i n t e r Al a r m The following message is displayed - Konica Minolta Fujitsu fi-4860C2 | Operating Guide - Page 312
●AP-18 - Konica Minolta Fujitsu fi-4860C2 | Operating Guide - Page 313
3-8 Discharge brush 3-24 Document width sensor........3-35 Feed roller 3-18 Glass sheet guide 3-32 Glass surface 3-29 Lamps 3-41 Pad 3-5, 3-7 Pick Roller 3-10 sheet 3-2, 3-8 Configuration Window of FUJITSU ISIS Scanner Driver 1-38 Consumables 4-2 Abrasion counters........... 1-9, 4-3 Part - Konica Minolta Fujitsu fi-4860C2 | Operating Guide - Page 314
fi-486PRFR 8-2, 8-3 fi-486PRRE 8-2, 8-4, 8-5 Front-side lamp............3-3, 3-41, 4-15 FUJITSU ISIS Scanner Driver..... 1-34 FUJITSU TWAIN32 Scanner Driver 1-27 G Glass sheet guide 3-3, 3-32 Glass surface 3-29 Guide 1-7 ●IN-2 M Magnet catch 1-21 Manual Feed Mode 1-21 O Offline setup mode - Konica Minolta Fujitsu fi-4860C2 | Operating Guide - Page 315
Service provider 5-29 Setting Window for FUJITSU TWAIN32 Scanner Driver 1-31 Setup mode 1-10, 7-2 Details 7-16 Function of buttons 7-4 Outline 7-2 Transitions, screens 7-4 SF0 sensor 3-3, 3-37 SF1 sensor 3-3, 3-37 SF1.5 sensor 3-3, 3-39 SF2 sensor 3-3, 3-39 Side cover 3-46 Side guides - Konica Minolta Fujitsu fi-4860C2 | Operating Guide - Page 316
fi-4860C2 Image Scanner Operator's Guide P3PC-1692-01ENZ0 Date published: May, 2006 PFU LIMITED •Copying of the contents of this manual in whole or in part and copying of the scanner application is forbidden under the copyright law. •The contents of this manual are subject to change without notice.
-
 1
1 -
 2
2 -
 3
3 -
 4
4 -
 5
5 -
 6
6 -
 7
7 -
8
-
9
-
10
-
11
-
12
-
13
-
14
-
15
-
16
-
17
-
18
-
19
-
20
-
21
-
22
-
23
-
24
-
25
-
26
-
27
-
28
-
29
-
30
-
31
-
32
-
33
-
34
-
35
-
36
-
37
-
38
-
39
-
40
-
41
-
42
-
43
-
44
-
45
-
46
-
47
-
48
-
49
-
50
-
51
-
52
-
53
-
54
-
55
-
56
-
57
-
58
-
59
-
60
-
61
-
62
-
63
-
64
-
65
-
66
-
67
-
68
-
69
-
70
-
71
-
72
-
73
-
74
-
75
-
76
-
77
-
78
-
79
-
80
-
81
-
82
-
83
-
84
-
85
-
86
-
87
-
88
-
89
-
90
-
91
-
92
-
93
-
94
-
95
-
96
-
97
-
98
-
99
-
100
-
101
-
102
-
103
-
104
-
105
-
106
-
107
-
108
-
109
-
110
-
111
-
112
-
113
-
114
-
115
-
116
-
117
-
118
-
119
-
120
-
121
-
122
-
123
-
124
-
125
-
126
-
127
-
128
-
129
-
130
-
131
-
132
-
133
-
134
-
135
-
136
-
137
-
138
-
139
-
140
-
141
-
142
-
143
-
144
-
145
-
146
-
147
-
148
-
149
-
150
-
151
-
152
-
153
-
154
-
155
-
156
-
157
-
158
-
159
-
160
-
161
-
162
-
163
-
164
-
165
-
166
-
167
-
168
-
169
-
170
-
171
-
172
-
173
-
174
-
175
-
176
-
177
-
178
-
179
-
180
-
181
-
182
-
183
-
184
-
185
-
186
-
187
-
188
-
189
-
190
-
191
-
192
-
193
-
194
-
195
-
196
-
197
-
198
-
199
-
200
-
201
-
202
-
203
-
204
-
205
-
206
-
207
-
208
-
209
-
210
-
211
-
212
-
213
-
214
-
215
-
216
-
217
-
218
-
219
-
220
-
221
-
222
-
223
-
224
-
225
-
226
-
227
-
228
-
229
-
230
-
231
-
232
-
233
-
234
-
235
-
236
-
237
-
238
-
239
-
240
-
241
-
242
-
243
-
244
-
245
-
246
-
247
-
248
-
249
-
250
-
251
-
252
-
253
-
254
-
255
-
256
-
257
-
258
-
259
-
260
-
261
-
262
-
263
-
264
-
265
-
266
-
267
-
268
-
269
-
270
-
271
-
272
-
273
-
274
-
275
-
276
-
277
-
278
-
279
-
280
-
281
-
282
-
283
-
284
-
285
-
286
-
287
-
288
-
289
-
290
-
291
-
292
-
293
-
294
-
295
-
296
-
297
-
298
-
299
-
300
-
301
-
302
-
303
-
304
-
305
-
306
-
307
-
308
-
309
-
310
-
311
-
312
-
313
-
314
-
315
-
316
 |
 |

Operator's Guide
fi-4860C2 Image Scanner
P3PC-1692-01ENZ0