Konica Minolta ScanDIVA ImageDIVA Touch User Guide
Konica Minolta ScanDIVA Manual
 |
View all Konica Minolta ScanDIVA manuals
Add to My Manuals
Save this manual to your list of manuals |
Konica Minolta ScanDIVA manual content summary:
- Konica Minolta ScanDIVA | ImageDIVA Touch User Guide - Page 1
ImageDIVA Touch User's Guide - Konica Minolta ScanDIVA | ImageDIVA Touch User Guide - Page 2
Contents User's Guide 1-1 Contents ii 1 Getting 3-10 Output Buttons 3-7 3-11 E-Mail 3-8 E-Mail ...3-8 Address Book 3-9 Edit ...3-10 3-12 Batch Scan Mode 3-11 Start of Keyboard Shortcuts 4-1 4-2 Input Serial Number 4-2 4-3 Select Scanner 4-2 4-4 Open the TWAIN Driver screen 4-3 4-5 Display - Konica Minolta ScanDIVA | ImageDIVA Touch User Guide - Page 3
4-6 Preferences 4-5 Scan Settings 4-5 Output Settings 4-6 File Settings 4-6 Printer Settings 4-7 Other Settings 4-7 4-7 E-Mail Settings 4-8 E-Mail TX (SMTP) settings 4-8 E-Mail RX (POP 4-9 Other Settings 4-9 ImageDIVA Touch iii - Konica Minolta ScanDIVA | ImageDIVA Touch User Guide - Page 4
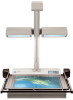
1 Getting Ready 1 Getting Ready 1-1 Overview Thank you for purchasing ImageDIVA Touch. This version of the Application supports the following scanners: ScanDIVA PS7000C MKII PS5000C MKII PS5000C 1-2 Trademark Acknowledgments IBM and IBM PC/AT are registered trademarks of International - Konica Minolta ScanDIVA | ImageDIVA Touch User Guide - Page 5
Windows 7 32 bit, 64 bit Windows Vista 32 bit, 64 bit SP2 or later NOTE ! PS5000C is not supported by 64-bit operating systems. CPU Memory Hard disk drive Optical Disc Drive Display Scanner INTEL Core i7 or greater 4 GB or greater 2 GB of available hard disk space CD-ROM drive Display - Konica Minolta ScanDIVA | ImageDIVA Touch User Guide - Page 6
for installing the Application Software. NOTE ! When installing the Scanner Driver, follow the procedure in the Operator's Manual or User's Guide of the scanner. Perform the Setup Adjustment after completing the Scanner Driver's Installation. 2-1 Installing the Application Software The following - Konica Minolta ScanDIVA | ImageDIVA Touch User Guide - Page 7
Application Software Installation 2 2. When the installation screen appears, click Install ImageDIVA Touch to begin application installation. 3. If the User Account Control dialog box appears, click Yes. 4. When the installation screen of "Microsoft .NET Framework 4.0 Client" and "Microsoft SQL - Konica Minolta ScanDIVA | ImageDIVA Touch User Guide - Page 8
2 Application Software Installation 5. When the Welcome to the InstallShield Wizard for ImageDIVA Touch screen appears click Next. NOTE ! Uninstall "ImageDIVA (ver.1.x)", and then install the latest version if the following screen is displayed. 6. When the License Agreement screen appears, - Konica Minolta ScanDIVA | ImageDIVA Touch User Guide - Page 9
Application Software Installation 2 7. When the Software Setup is executed, input the serial number, and click the Next. NOTE ! The serial number is shown in the upper right of the "End User Software License Agreement" bundled with the CD-ROM. If the serial number input is skipped, the software - Konica Minolta ScanDIVA | ImageDIVA Touch User Guide - Page 10
2 Application Software Installation 9. When the InstallShield Wizard Complete screen appears, click Finish, and remove the CD-ROM from the computer. 2-6 ImageDIVA Touch - Konica Minolta ScanDIVA | ImageDIVA Touch User Guide - Page 11
procedure to remove it. 1. From the start menu, choose Control Panel. Click Uninstall a Program. Select 1. Confirm the Power Switch of the Scanner is turned OFF. 2. From the start menu, choose Control Panel. Click Uninstall a Program. Select ImageDIVA Touch, and click Uninstall. 3. When the - Konica Minolta ScanDIVA | ImageDIVA Touch User Guide - Page 12
2 Application Software Installation 5. Restart the Personal Computer. 6. The application was uninstalled successfully. 2-8 ImageDIVA Touch - Konica Minolta ScanDIVA | ImageDIVA Touch User Guide - Page 13
the Personal Computer with a USB cable, and turn ON the Power Switch of the Scanner. 2. Turn ON the Power Switch of the Personal Computer, and start Windows. 3. Click the "Start" button "All programs" "ImageDIVA Touch" "ImageDIVA Touch" 4. The application starts - Konica Minolta ScanDIVA | ImageDIVA Touch User Guide - Page 14
3 Image Adjustment 4 File Format 5 Scan 6 Preview Area 7 Cropping Area 8 Output Buttons 9 Help Button Select the desired settings for Scan Size, Resolution, Book Correction, and Auto Cropping. See Section 3.4 Scan Mode Select the image type to be scanned. See Section 3.5 Image Mode Adjust the - Konica Minolta ScanDIVA | ImageDIVA Touch User Guide - Page 15
until the time out interval has been reached. The available Scan Size settings depend on the scanner model. ScanDIVA, PS7000C MKII PS5000C MKII, PS5000C 1 Scan Size 2 High Resolution 3 Book Correction 4 Auto Cropping 5 Rotate 180° Selects the scanning size. Scans the image in high resolution - Konica Minolta ScanDIVA | ImageDIVA Touch User Guide - Page 16
3 Operation of Application 3-5 Image Mode Pressing the Image Mode button toggles through the available image modes. NOTE ! The Image Mode can still be changed after scanning. Displays the document in color regardless of the color of the document. Displays the document in grayscale regardless of - Konica Minolta ScanDIVA | ImageDIVA Touch User Guide - Page 17
Operation of Application 3 4 Image Mode: B/W 1. Preview Window 2. Brightness 3. Contrast 4. Threshold 5. Reset 6. OK 7. Cancel The scanned image is displayed. The brightness of the image is adjusted. The contrast of the image is adjusted. The threshold is adjusted (only available in B/W mode). - Konica Minolta ScanDIVA | ImageDIVA Touch User Guide - Page 18
the Preview Image. Scanning can also be started by using the Manual Switch (optional). 3-9 Preview Area The scanned image is displayed the image will not become smaller than the scan window size. "Pinching" is supported for the zoom in and zoom out functions when a touch screen monitor is used. - Konica Minolta ScanDIVA | ImageDIVA Touch User Guide - Page 19
Operation of Application 3 3-10 Output Buttons The scanned image is printed, saved, or e-mailed. Outputs the image to the printer. Saves the image to favorite folder. Saves the image to USB memory. Removal of USB Memory is enabled. Sends the image via E-mail. ImageDIVA Touch 3-7 - Konica Minolta ScanDIVA | ImageDIVA Touch User Guide - Page 20
11 E-Mail E-Mail Transmission by E-mail is executed. 2 3 4 5 Operation of Application 1 1 Address Book 2 To: 3 Subject: 4 File: 5 Message 6 Send 7 Cancel 6 7 Opens the Address Book window. NOTE ! The Address Book button is only displayed when it is enabled in E-Mail Options. Input the E-mail - Konica Minolta ScanDIVA | ImageDIVA Touch User Guide - Page 21
. 1 2 3 4 5 6 1 Name, Address 2 Add 3 Edit 4 Delete: 5 Select 6 Cancel The names and addresses registered in the Address Book are displayed. Adds a new E-mail address. Edit E-mail addresses that have been registered. Delete E-mail addresses that have been registered. Select an E-mail address - Konica Minolta ScanDIVA | ImageDIVA Touch User Guide - Page 22
3 Edit E-mail Address is registered and edited. 1 2 Operation of Application 3 1 Name 2 Address 3 OK 4 Cancel 4 Inputs the address name. Inputs the E-mail address. Registers the edited name and address. Cancels the selection and closes the window. 3-10 ImageDIVA Touch - Konica Minolta ScanDIVA | ImageDIVA Touch User Guide - Page 23
Operation of Application 3 3-12 Batch Scan Mode The Batch Scan mode automatically saves the image into the specified folder as each page is scanned. Only the "Start" button is displayed at the bottom of the screen when ImageDIVA is in the Batch Scan Mode and "Batch Scan Mode" is displayed at the - Konica Minolta ScanDIVA | ImageDIVA Touch User Guide - Page 24
3 Operation of Application Start of Batch Scan 1. The "Scan" button is pressed after "Scan Mode" is set, and the original is read. NOTE ! The image in the Preview Window is not saved until the "Start" button is pressed. 2. Sets the "Image Mode", "Image Adjustment", "File Format", and ""Cropping - Konica Minolta ScanDIVA | ImageDIVA Touch User Guide - Page 25
Application Settings 4 4 Application Settings 4-1 Keyboard Shortcuts Shortcuts Ctrl + a Ctrl + s Functions Input the Serial Number. Select a Scanner. Ctrl + o Open the TWAIN Driver screen. Ctrl + i Ctrl + k Open the scanned image with the application related to Windows. Open the Preference - Konica Minolta ScanDIVA | ImageDIVA Touch User Guide - Page 26
! If the Serial Number has been registered previously it is displayed. 4-3 Select Scanner When Ctrl-s is pressed the active scanner view is displayed. Selects the active scanner when two or more scanners are connected. Display is active It is connected. It is connected. 4-2 ImageDIVA Touch - Konica Minolta ScanDIVA | ImageDIVA Touch User Guide - Page 27
not valid when scanning using the TWAIN driver: Mode (ScanDIVA) Image Mode (Excluding ScanDIVA), Page Rotate Cropping Area in Preview The Size and is not supported by the TWAIN driver. For detailed information, please refer to the Operators Manual or Users Guide of the scanner. ImageDIVA Touch - Konica Minolta ScanDIVA | ImageDIVA Touch User Guide - Page 28
4 Application Settings 4-5 Display of the Scanned Image When Ctrl - i is pressed, the last file that was saved to File or USB is opened by the related application in Windows. NOTE ! Neither Print nor E-Mail output files are displayed. 4-4 ImageDIVA Touch - Konica Minolta ScanDIVA | ImageDIVA Touch User Guide - Page 29
can be made, as shown below. 1 12 2 13 3 4 14 15 5 6 7 8 9 10 16 11 19 17 20 18 21 Scan Settings 1 Scan Size 2 High Resolution 3 Book Correction 4 Auto Cropping 5 Diffusion Dither (B/W) Sets the default Scan Size. Sets the default High Resolution setting. Sets the default - Konica Minolta ScanDIVA | ImageDIVA Touch User Guide - Page 30
4 Application Settings Output Settings NOTE ! It is necessary to select one or more Output Settings in the Preferences screen. 6 Printer 7 File 8 USB 9 E-Mail 10 E-Mail Option 11 Batch Scan Mode Displays the "Printer" button. Displays the "File" button. Displays the "USB" button. Displays the - Konica Minolta ScanDIVA | ImageDIVA Touch User Guide - Page 31
Application Settings 4 15 Compression Sets the appropriate type of compression for each file format, as follows: Format PDF TIFF JPEG PNG Compression LZW JPEG (Fine) JPEG (Standard) JPEG (Economy) LZW JPEG Fine Standard Economy n/a Quality File Size High Large Low High Low High Small Large - Konica Minolta ScanDIVA | ImageDIVA Touch User Guide - Page 32
4 4-7 E-Mail Settings Application Settings E-Mail TX (SMTP) settings 1 SMTP server Sets the SMTP server address. 2 Port Number Sets the port number for E-mail transmission. 3 SSL Sets SSL (enable/disable) for E-mail transmission. 4 Mail Address Sets the sender's mail address. 5 SMTP - Konica Minolta ScanDIVA | ImageDIVA Touch User Guide - Page 33
mail reception. Sets the POP server Login Name. Sets the POP server Password. Other Settings 14 Server Capacity 15 Server Timeouts 16 Use Address Book Sets the maximum E-mail file size. A warning message is displayed when the size of the image data exceeds the maximum value and E-mail transmission - Konica Minolta ScanDIVA | ImageDIVA Touch User Guide - Page 34
Copyright 2012 KYOKKO SEIKO CO., LTD. The information contained in this manual is subject to change without notice to incorporate improvements made on the product or products the manual covers. 2012. 08 7177-7502-01
-
 1
1 -
 2
2 -
 3
3 -
 4
4 -
 5
5 -
 6
6 -
 7
7 -
8
-
9
-
10
-
11
-
12
-
13
-
14
-
15
-
16
-
17
-
18
-
19
-
20
-
21
-
22
-
23
-
24
-
25
-
26
-
27
-
28
-
29
-
30
-
31
-
32
-
33
-
34
 |
 |

ImageDIVA Touch
User’s Guide